
Yes, it's that time again! The time when the days become too long and the nights too short; when sleep deprivation seems to be the status quo for some; and when so many photographers voluntarily leave the comforts of home to hang out in the middle of nowhere in the dark for a few hours. The Milky Way is back, baby! Find a dark sky location, charge up those batteries, strap on the headlamp, and let's head out into the night for some Milky Way photography.
This article will dive headfirst into the what's, where's, and how's of photographing the night sky. What camera and lens do you need to take pictures of the Milky Way? Where is the Milky Way and how do you find it? How do you focus at night and get sharp photos of the stars? We'll answer these questions, and more, so grab a cup of coffee (or your beverage of choice) and a comfortable seat as we explore the wonderful world of night.
Capturing stunning Milky Way images doesn't require the most expensive gear. With some careful planning, a good understanding of how to manipulate camera settings, and a few other tricks, an entry-level camera and kit lens are capable of bringing home images to be proud of.
The Gear
When talking about gear for Milky Way photography, the general consensus is that better gear will make capturing amazing images easier. That is true in pretty much all photography genres, and is true about capturing Milky Way photos. However, that doesn't mean that you can't get good results with lower-end gear. Don't let the naysayers, or your gear, hold you back. Work with what you have and become familiar with its limitations. After reaching the point where the limitations of the gear is hindering your improvement as a photographer, then it is time to upgrade.
Camera
An obvious place to start, the best options for cameras will be those capable of changing lenses and manual control. There are many great options in DSLRs and mirrorless models. Since Milky Way photography usually requires using high ISOs, the better the camera is at handling noise, the cleaner (or, less grainy) the images will be. It is not uncommon to push the ISO up to 3200 or 6400, or even higher to capture the faint detail in the Milky Way. Full-frame sensor cameras will typically perform better at higher ISOs than their APS-C (crop) sensor counterparts. That doesn't mean you have to have a full frame camera. Most modern cameras are capable of a native high ISO setting of 6400 or more. Might the images at these higher ISOs be noisy? Probably. Does it matter? Probably not as much as you think.
The ability to manually control all pieces of the exposure puzzle is important. Most interchangeable lens cameras, and even some compact cameras, have a manual control mode. You will need to set aperture, shutter speed, and ISO to suit the shooting conditions and to get a good exposure. If you're not comfortable using manual mode, this tutorial will help. It's really not as scary as it seems, and night photography is a great way to learn it very quickly.
Lenses
The most important lens spec to look at for Milky Way photography is the maximum aperture setting. The maximum aperture refers to the widest opening a lens can achieve. It is expressed as an f/number, with a lower number being most desirable for low-light situations. An aperture of f/2.8 is good, but f/2.0, f/1.8, or f/1.4 would be even better. A wider aperture will let more light into the sensor and will enable you to use a lower ISO setting.
A lot of ‘kit' lenses have an aperture range of f/3.5 to f/5.6. This means that at the widest angle (commonly 18mm), the maximum aperture setting is f/3.5. That may not be ideal, but is still possible to use to capture Milky Way images. Just be sure to keep the lens at the widest zoom setting. Zooming in will change the maximum aperture to f/5.6, which will not work well for capturing the Milky Way.
Using a wider angle – in the 14mm to 24mm range – is common for Milky Way photography. The wider angle has a wider field of view, which means that more of the Milky Way will be captured in a single image. It is also quite possible, however, to use a longer focal length. A 50mm lens (aka, the “nifty fifty”) is a very common, and relatively inexpensive, lens across most camera brands. The least expensive of these lenses will usually have a maximum aperture of f/1.8. The field of view is much narrower, but works well for more detailed shots or for a series of images to stitch together to make a panorama.
Finally, one of my favorite lenses to use for Milky Way photography is the Rokinon 14mm f/2.8. It is an all manual lens, meaning the focus and aperture will need to be set on the lens itself. However, the lens is relatively inexpensive and has served me quite well. Rokinon also has some other very compelling offerings that are generally much less expensive than the name brands.
Tripod
It goes without saying (but I'll say it anyway) that a tripod is a necessity for Milky Way photography. Shutter speeds will be measured in seconds, so a stable support for your camera is a must. There have been plenty of articles – many on this website – reviewing different levels of tripods. Check out this article by Jim Harmer. There are also recommendations in the “Recommended Gear” section of the Improve Photography website.
Recommending what tripod someone should buy is about as easy as making a car buying recommendation. There are just so many different models and price points. It's a touchy subject that spawns debates – kind of like the Ford vs. Chevy vs. Toyota vs. your favorite brand – about which brand is best. (Besides, we all know that Toyota is the best, right?:-)
So what do you really need in a tripod? Stability is of utmost importance. Lightweight and durability are good to have as well. You will need to find a good balance between these criteria – and throw price in there – that works best for you.
Remote shutter release
A remote shutter release is not an absolute necessity, but it is nice to have. It allows you to trigger the shutter of your camera without touching it. Touching the camera when doing long exposures can introduce camera shake. Plus, there is just more of a chance of bumping the tripod. As an alternative, you could use the timed shutter release, but cable releases are relatively inexpensive and worth the purchase in my opinion. Remote shutter release can be wired or wireless; just make sure to get one compatible with your camera.
Headlamp
When heading out into the night for Milky Way photography, it is good to have a light to see where you are going and to set up your camera. The best option is a headlamp. A headlamp keeps both hands free to do other things and the light is also pointed where you are looking. I've been using the Black Diamond Spot for the past year and it has performed great. The white LED is powerful enough to guide you through the night and it also has a red light option to help preserve night vision.
Planning and Scouting
Careful and thoughtful planning is important for any Milky Way shoot. There many variables, such as weather, the moon phase, and light pollution. And where is the Milky Way anyway and how do you find it? If that weren't enough, you also need to figure out how to compose the shot to include something of interest in the foreground. Capturing stunning Milky Way photos can be tricky, but there are lots of great tools and tricks to help out. There are tons of mobile and desktop applications for this, but these are the ones that have become my favorites.
PhotoPills
PhotoPills is my go-to app for planning any night photography shoot. It can also be used to plan sunrises, sunsets, and everything in between. This app is $9.99 and is available for both iOS and Android devices. The number of features packed into the is app is just incredible, and there is no way to cover them all in this article. Fellow writer Julian Baird published a great hands-on review article last August. There are also two Photo Taco podcast episodes about this app – “Take Your PhotoPills” and “PhotoPills Tour“. The PhotoPills guys also have a Youtube channel, which is a great place to learn how to use the app.
PhotoPills can help you plan just about every aspect of your Milky Way shoot. Using the Planner Pill, you can find out when the sun sets, when the sky becomes truly dark, what time the moon rises and sets or if it's a New Moon, where the Milky Way will be in relation to your location, and what time the Galactic Core rises above the horizon. Using the Night Augmented Reality feature, you can see where the Milky Way will be at a specific time and how to line up a shot with the surface features where you are. It's really an amazing app and well worth the money.
Sky Guide
Sky Guide is another of my favorite apps to use to located celestial objects. This app is available for iOS and Android, and costs $2.99. It uses augmented reality technology to provide a virtual view of the night sky from wherever you are. Just start the app, hold the phone up to the sky, and stars, planets, constellations, and other objects become visible. It's easy to use as quick confirmation that you are aiming your camera in the right direction for Milky Way shots. Plus, it's just really a lot of fun to use.
MyRadar
A few clouds can work out great for sunrise, sunset, or general daytime landscapes. For Milky Way photography, however, clouds can totally ruin a shoot. Know before you go. It's easy to look outside and see if it is clear or cloudy now, but what will it be like at the time and place you are ready to shoot? MyRadar can help, and it is a free app. It provides a real-time view of what the clouds are doing so you can plan the best time and place for a Milky Way shoot. Even if it is cloudy now, this app will help you determine if those clouds will move out of your area in time to get the shot. Unfortunately, it is only available for iOS devices. If you're on Android, try the app Storm. I haven't used it, but it gets good reviews from photographers as well.
Dark Sky Finder
Finding a place to shoot with minimal light pollution is vital to get good Milky Way photos. This means getting as far away as possible from big city lights. Dark Sky Finder is an app to help you navigate to a dark sky location. It does cost $2.99, and it is only for iOS devices (sorry – I use an iPhone). This app shows light pollution maps of the entire world and highlights particularly good locations. It is color coded, with yellow, orange, red, and white the most light polluted areas (in that order) and darker colors like blue, gray, to black being the darkest. Keep in mind that you don't necessarily need to be right in one of those dark areas. As long as the direction you look to see the Milky Way is toward a darker area, you may be all set.
For Example
As I write this article on February 16, 2018, we are only one night beyond the New Moon phase. It's a bit early in the season, but still possible to get some Milky Way images if conditions are right, and if one is willing to stay up very late (or get up very early). I've been waiting for Milky Way season to return, and it has. Let's take a look to see where the Milky Way is, what time would be best for photos, and see if it will work for me tonight.
Within the PhotoPills app, I click on the Planner pill and scroll the top bar to the right to the Visibility GC screen. GC stands for Galactic Core. That's what to shoot for with Milky Way photos, since that is the brightest part of the galaxy that we can see. According to the Planner, the GC will be visible at my location from 4:00 AM, when it rises above the horizon, to 5:38 AM, when Astronomical Twilight begins and the Milky Way becomes washed out by the coming dawn. A look at the map shows that the direction to shoot is toward the southeast – with an azimuth between about 128 degrees and 145 degrees. This time of year, the GC will only be visible near the horizon, only reaching an altitude of about 12.4 degrees. To give you an idea of how high that is, if you make a fist and hold it at arm's length, your fist covers approximately 10 degrees.
I know from experience that this isn't a great location in terms of light pollution. I live in a green zone on the map, which isn't bad, but toward the southeast (where the Milky Way GC will be) is a lot of yellow, orange, and red. Not good. I need to drive at least a couple of hours to the north or west to get some much darker skies.
Finally, the weather. The major wild card for me in the Midwest. Looking outside, I see no stars. It is completely overcast here, but I'll check MyRadar to see what conditions are like regionally. It's not looking very promising. There is a band of cloud cover stretching from eastern Colorado into Illinois, and basically covering the entire area where I could feasibly go to shoot the Milky Way tonight. Looks like I'm out of luck for tonight. There could be some breaks in the clouds, but probably not worth driving 2-3 hours in the middle of the night to find out.
Looking Ahead
It's tough to get good Milky Shots early in the season. Not only is the weather a big factor, but due to the core of the galaxy rising so early in the morning, it's difficult to get out and capture it. As we move into the spring and summer here in the Northern Hemisphere, the core of the Milky Way will become visible earlier each night and give you more time to shoot before it fades away. Its position will also change, as it becomes more vertical and much higher in the sky. For most of us, we will have many opportunities through the month of October before it disappears for winter again.
Looking ahead at the nights of the New Moon each month is a good place to start planning. That's easy to do within PhotoPills. Mark those days on the calendar, as well as 3 to 4 days on either side of the New Moon. Those are the times that will provide the best opportunities to capture stunning Milky Way photos.
Time to Shoot
Figuring out when and where to go shoot is the hardest part. As long as the weather cooperates, the rest is pretty easy – and a lot of fun! One of the best pieces of advice is to get to the shooting location while it's still daytime. That way you can figure out where you want to set up the shot. Finding a good composition in the dark is quite difficult, so use a little early scouting to figure things out. Try some test shots during the day to find a composition you like and get familiar with the area so you can easily return in the dark without getting lost or possibly injured.
As indicated from the beginning of the article, you don't need the most expensive gear for this. Use what you have and learn its limitations. You'll have many “Aha!” moments while out shooting the Milky Way. The first time you capture it, you'll be amazed. You'll also be hooked and will want to keep trying to get better shots.
Camera settings
Camera settings are actually fairly simple. Use the widest aperture of your lens, even if that is f/3.5. Then set a shutter speed that will allow you to capture the stars without noticeable trailing. A good place to start is to use the “500 rule”. This is where you divide 500 by the focal length of your lens. Note that crop factor needs to be included in this calculation. So for example, if you are shooting an 18mm focal length using a Canon T6i, first convert the focal length to its full frame equivalent by multiplying 18 by 1.6 (the crop factor for Canon DSLRs). Divide 500 by that result (rounded to 29mm) to get a shutter speed of about 17 seconds. In theory, that is the slowest your shutter speed should be with that camera and lens to keep the stars sharp. I usually err on the side of caution and decrease that amount by at least a couple of seconds.
With aperture and shutter speed set, the only thing left is ISO. That will take some experimentation to get the proper exposure. Start at about 3200, but expect to go higher to get good results. By the way, you will be shooting in manual mode to give you full control of all these settings. Take a test shot, then check the histogram. Most of the data will be pushed to the left side, with one large peak for the core. Make sure that peak is not touching the far left side of the histogram. If it is, try raising the ISO to get it more to the right.
Focus
Finding focus at night seems to be one of the things most photographers have problems with when doing night photography. I actually wrote a complete article about this topic last September, so won't rehash of lot of that detail here. Once you have done it a few times, it becomes much simpler and sharp focus can be achieved every time.
Composition
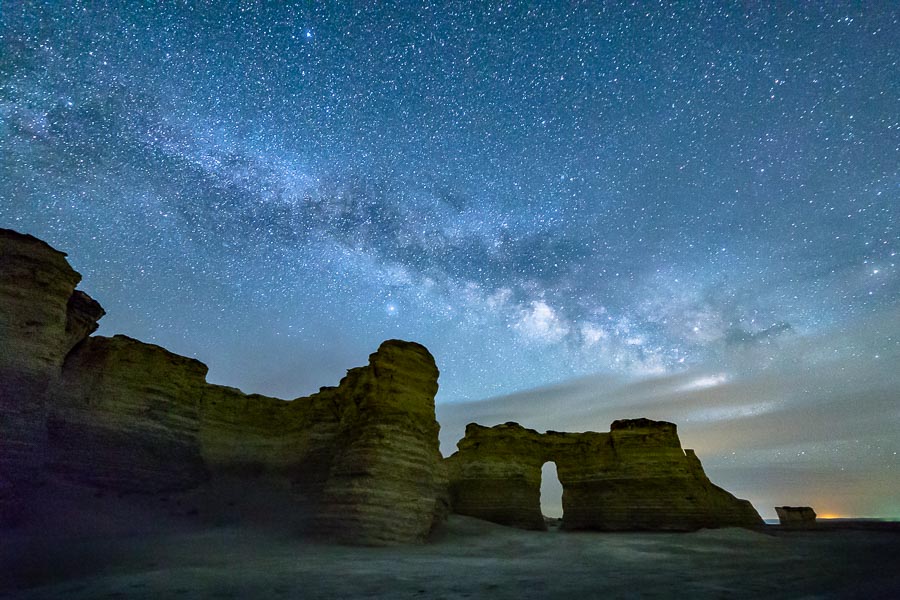
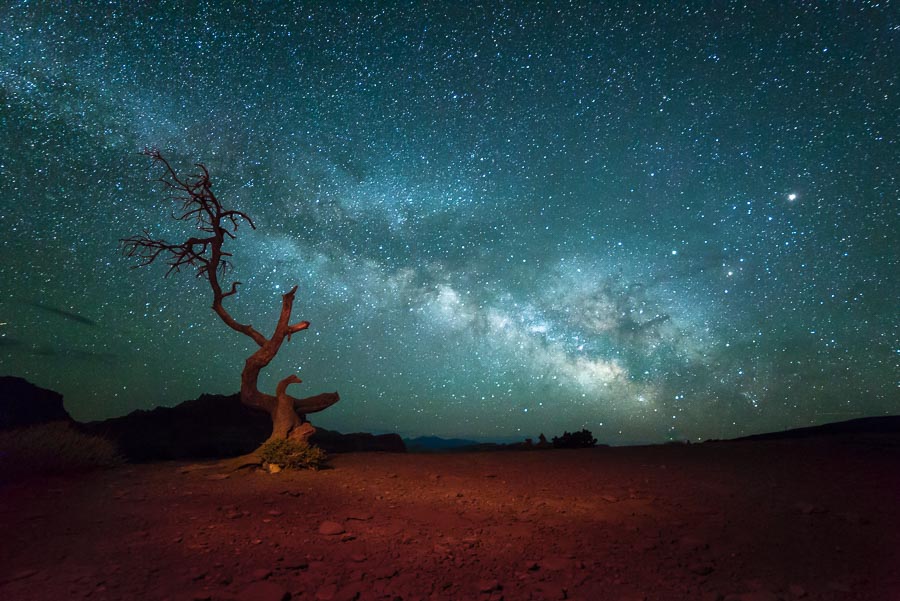
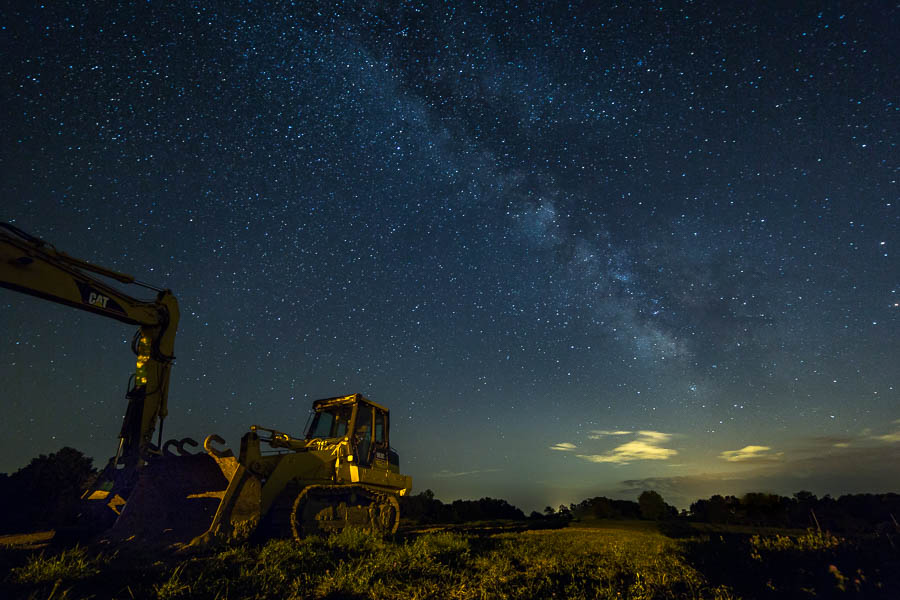
The Milky Way itself is a pretty interesting subject, but it's good to have some kind of foreground. That could be just about anything from mountains, trees, water, etc. You could even put yourself in the picture, if you can be still long enough. Including terrestrial objects grounds the photo and gives it more of a sense of place. Don't just set up the tripod and never move, though. Try different things and change perspectives.
Experimentation
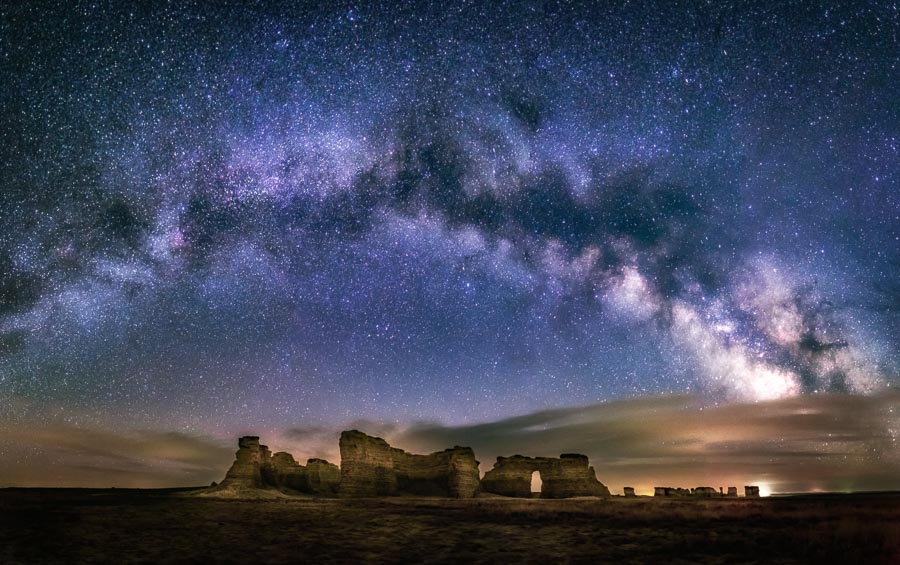
There are many different things you can experiment with when shooting the Milky Way. Try light painting to show more of the foreground. It shouldn't dominate the scene, but if added subtly can really increase interest and drama. Try shooting at different focal lengths, as long as you can maintain a relatively fast aperture. You may even want to zoom in and shoot a number of images that can be stitched together into a panorama. Another option is to shoot a sequence of images over a couple of hours that can be converted into a time lapse video.
Great article Rusty, we still have a few months to wait for the Milky Way to appear strongly in the Southern Hemisphere, which can only mean I have a bit more time to find some good locations.
True here in the north as well. Although it is visible now, it will be much better in a couple of months. You have the advantage of much longer nights during the peak season than we do, so I’m jealous about that!
Thanks for reading, Craig!
Hi Rusty,
I am a student at the U, I really appreciate your and Jim’s articles in this website. I have learned so much in last few months by following this website and Youtube. I tried to capture the Milky Way at the Bonneville Salt Flats during the January 31st lunar eclipse and got decent results, I mean decent enough for a beginner like me :-p
Thanks a lot. It feels great to follow and learn from photographers from Utah.
my 500px: https://500px.com/asib_jibon
Glad you enjoyed the article, Asib. Thanks for reading!
Very nicely done AGAIN Rusty! “Maybe” I’ll stay awake long enough on our trip to try this with you…:)
Bring along lots of coffee and let’s do it! Thanks for reading, Phil!
Great article, Rusty. I can use your links to the PhotoPills app. I have a general understanding of it but can get a lot more out of it. As you may have seen, I did the Milky Way a few nights ago at Death Valley but in another month it will be a lot higher. Having a good horizon and a dark sky really helps! Keep up the good work!
PhotoPills is extremely powerful and full of features, but not exactly the most intuitive to use. I think it takes a lot of ‘fiddling’ with it to find everything you need and how to use it.
DV would be awesome for Milky Way! Thanks for reading, John!
Does PhotoPills have advantages/disadvantages vs Photographers Ephemeris app?
I have actually not used the Photographer’s Ephemeris app much, mostly because I got Photo Pills first. My understanding is that they both work well for planning shots, but that Photo Pills has a few additional features. My thought is that if you are familiar with one, it’s probably not worth it to switch.
Maybe someone who has more experience with both can chime in here?
Thanks for reading, Brian!
Great article, Rusty. Concise and clear!
Thanks for reading and for the comment, Gary!
Another fantastic article. I’ve shot the Milky Way a lot but some of this advice should help me even more, especially those tools you use for planning a shoot!
Thank you for reading and for the comment! There’s always more to learn!
I am bound and determined to get a Milky Way shot this year, an acceptable one anyway.
On the East Coast of Canada I’ve a while to wait just yet (too damn cold too, lol)…any tips for focusing over water. There are potential great shots but nothing to focus on…would I then use the infinity focus technique? I’d be using a Sigma Art 18-35mm 1.8 on a Nikon D7100 (crop 1.5). I have my photopills, ready an waiting. 😛
Thanks…love the shots!
Thanks, Jason, and good luck with the shooting (when it warms up!).
First thing to try would be to use the Live View on you camera (assuming you have that function) and find the brightest star you can. Then zoom in on the star on the LCD (not the lens) and use manual focus to get the star as sharp as possible. The best way to tell is that the star will appear its smallest on the screen when it is in focus.
Another way would be to find some kind of light source on the horizon (toward land) that is very far away. Auto-focus on that light and you should be focused to infinity at that point. Then carefully switch to manual focus so the camera doesn’t try to re-focus when you shoot (unless you use back button focus, but that’s another topic).
Hope this helps. Feel free to ask more ??s and share your images on the Improve Photography Podcast Facebook page if you’d like.