
Twilight photography is my favorite part of shooting real estate. When a client says, “Yes, I want twilight photos” my heart skips a beat. Twilights are one of the few opportunities you'll have to create art instead of just take a picture. Some will argue that you can create art with every shot you take but I've never seen someone want to hang a photograph of an empty bedroom on their wall. But I have had clients request the full size version of a twilight photo so they can print it and hang it on their wall. Twilight photos can turn out that good if you do them right.
The reason why you want to be good at taking twilight photos is because you can charge extra for them. I've been successful in charging 10 times my usual per-photo rate because the work that goes into each image is more than 10 times the amount of work that goes into a regular image. I explain this to my clients, so the price is justifiable. Plus, I have an extensive set of twilight images in my Salt Lake City Real Estate Photography portfolio which convinces clients that I know what I'm doing and I'm really good at it.
Really good twilight photos are much more than just taking a picture during sunset. They can include multiple flash exposures, along with a sky replacement (because the sky rarely cooperates), blended together for one final, stunning composite image. In this article, I'll show you how to shoot and edit twilight photos, including flash exposures and doing a sky replacement.
Step 1: Choose your composition
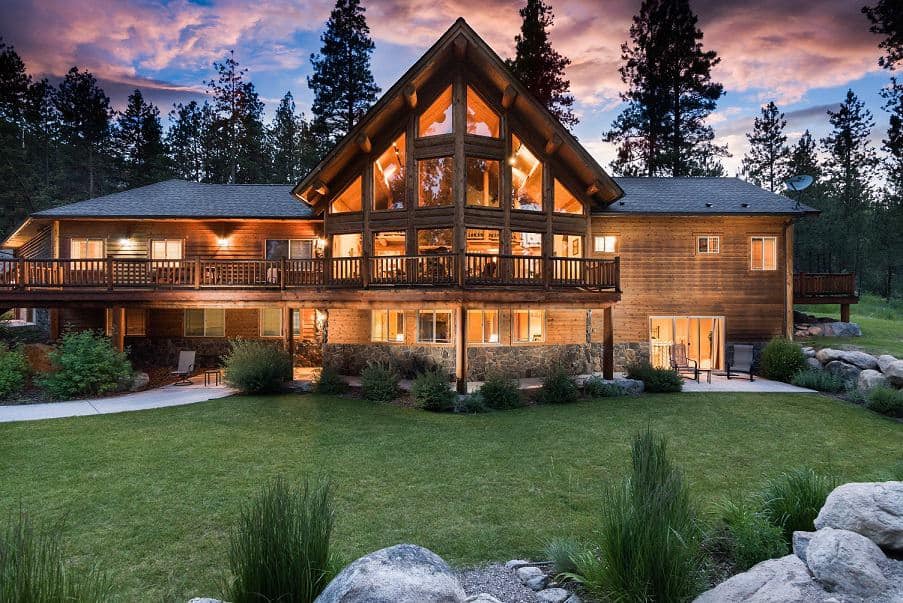
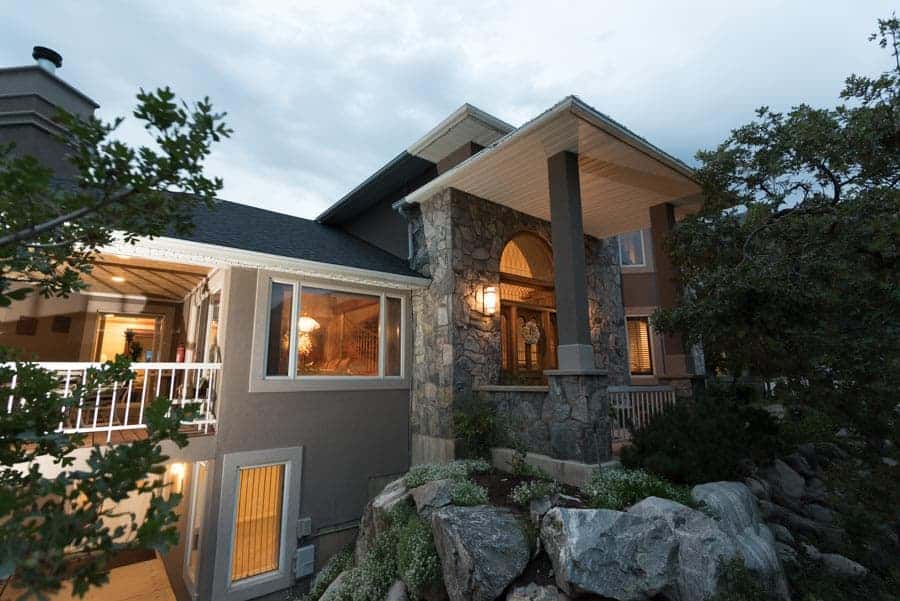
The first step is choosing the best composition. Some homes will look amazing when shot with a 1 point composition (to brush up on your 1, 2, and 3 point compositions, check out this article). Other homes, due to landscaping or architectural design, will look better when shot from an angle. When you are on site, take a few sample photos from different compositions and decide which one you like best. As a guideline, the front door should be clearly visible and is often the subject of the front face of the home. However, larger homes may not feature the front door as prominently as say, a picture window. In this image I took of a lodge in Montana, the floor to ceiling windows serve as the focal point. The front door is just a means to an end (you actually can't even see the front door; it's that unimportant in the design of this lodge).
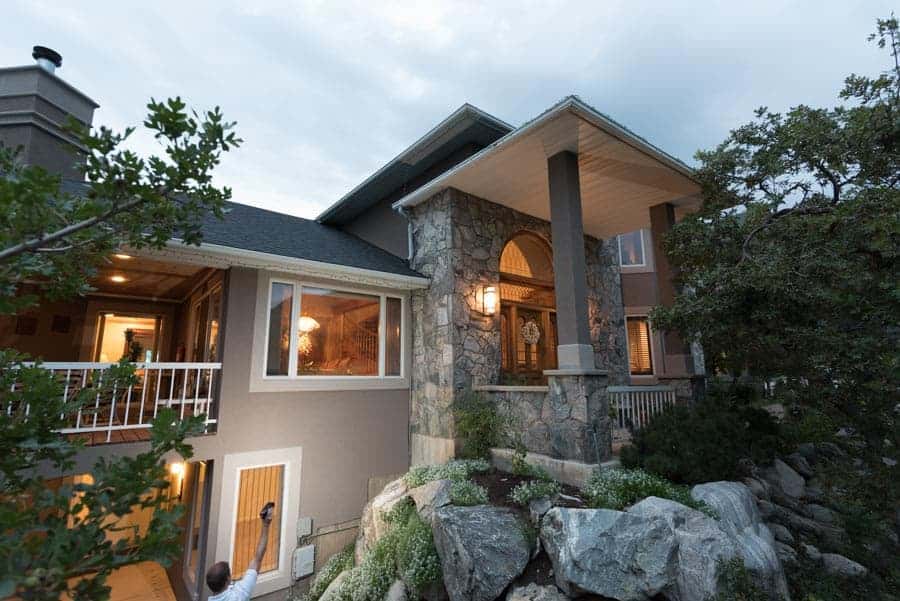
For the sample images we'll be using today, I had to overcome some logistical challenges brought on by the landscaping. The homeowner wanted his house to be hidden from the street to reduce street noise and add privacy. I found a small opening off to the left of the house and was able to set up my camera on a painter's pole.
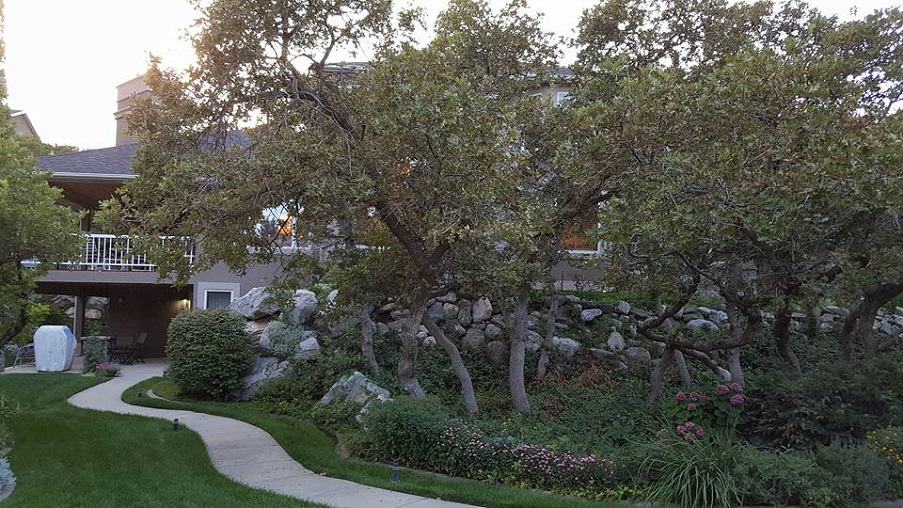
Normally, I recommend shooting straight so your verticals aren't so crazy in the resulting image, but I had no choice here. But it's nothing that can't be fixed in Photoshop. Now that you have your composition selected, wait for the best light to shoot the photo. I've found that about 10 minutes after sunset makes for the best images, when the ambient light matches the interior lights of the house. You want to be able to see the warm glow coming from inside the house. I don't like having any shadows on the home I'm shooting and the soft light of the sinking sun gives me the best exposure.
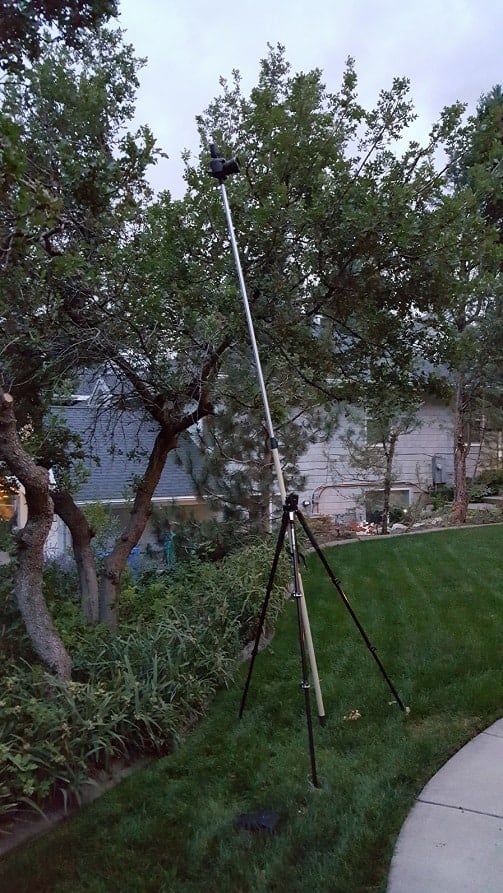
Tip: when using a painter's pole for twilight photography, you'll need to secure the pole to your tripod. I recommend using velcro or bungee straps. I fully extend my tripod legs then apply one strap around my ballhead and a second around the center column. I've done this dozens of times and it has worked great every time.
Step 2: Take a bracketed exposure
Next, take a 3 bracket exposure of the ambient light. You'll use one of these photos as your base image, upon which you'll layer your flash images.
Step 3: Start flashing the scene
You will need some sort of remote trigger to do this effectively. However, it's not necessary if you are just getting started. For the lodge image above, I didn't have a painter's pole and set up my tripod on some large boulders across the lawn. I locked down my ballhead tight and set my timer to 10 seconds and to take 9 photos in succession with 3 seconds between exposures. I pressed shutter button then ran like a fool to light up different parts of the house. I repeated that motion several times until I had enough images to make the twilight composite. This method isn't super professional, so I would really recommend getting some sort of remote trigger if you have clients onsite. Otherwise, for practice, you'll be fine doing it the old fashioned way.
There are 3 effective remote triggers you can use, each with their benefits and downfalls.
- In-camera wifi and/or qDSLR Dashboard. Some cameras come with an app and native in-camera wifi. The Nikon attempt at this is awful, in my opinion, and will only work in a pinch. qDSLR Dashboard is an app that uses your camera's wifi so you can control your camera via smartphone or tablet. This works pretty good but the camera wifi has an extremely limited ranged and doesn't work great when having to run around the house to do flash pops. You simply get too far away from the camera for the range to reach.
- Radio shutter release triggers. This is a great budget option, in my opinion. The benefit of using a radio trigger instead of an IR (infrared) trigger is that you don't need a line of sight with the camera. I use a radio trigger for much of my interior photography because I can be in another room popping flashes and don't need to see the camera. It also has a 300ft range which is more than enough for almost every scenario. The downside to this is you can't see the images after you take them. You can set your base exposure then take a picture with the flash to test the flash power, make adjustments, then finish your setup. Remember, you can't move the camera once you've started taking photos, so raising and lowering the pole to see your shots isn't going to work. If you aren't using a pole, this is a great option.
- Camranger. This is the most helpful but hardest to get set up. The Camranger offers full functionality of your camera via phone or tablet and has an incredible range because it is basically a TP-Link wifi broadcaster with different firmware. It has a 300 foot range and you can change your exposure on the fly. The downside is that getting the thing powered on and paired to your phone can sometimes take up to 15 minutes. And sometimes it won't make a connection at all, despite rebooting the phone or the device. I've gotten the most success with my Camranger by pairing it with a tablet instead of a phone. I think the incoming cell signal with a phone interferes with its wifi connection somehow. I have a 7 inch Samsung tablet that I use with mine. The bigger screen makes it easier to see my photos better as well.
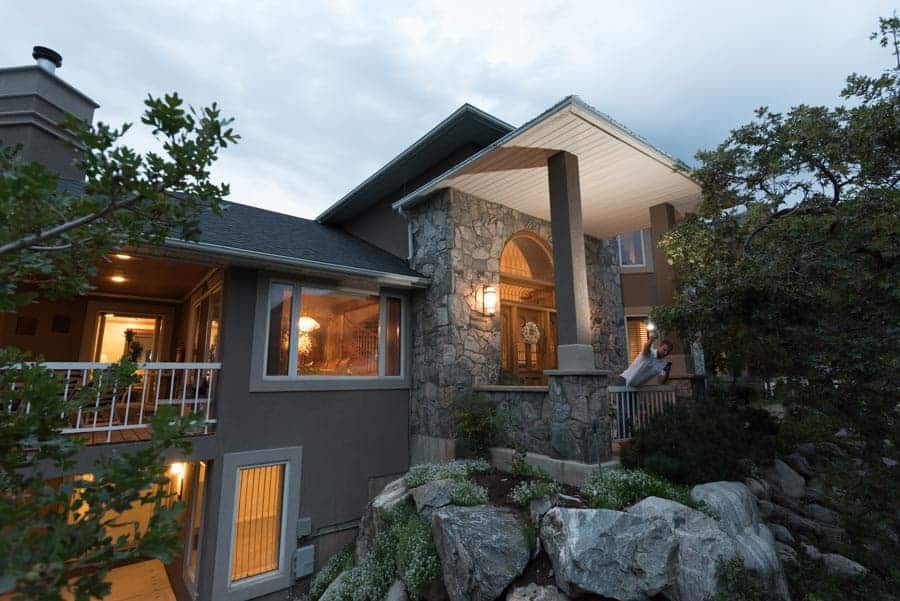
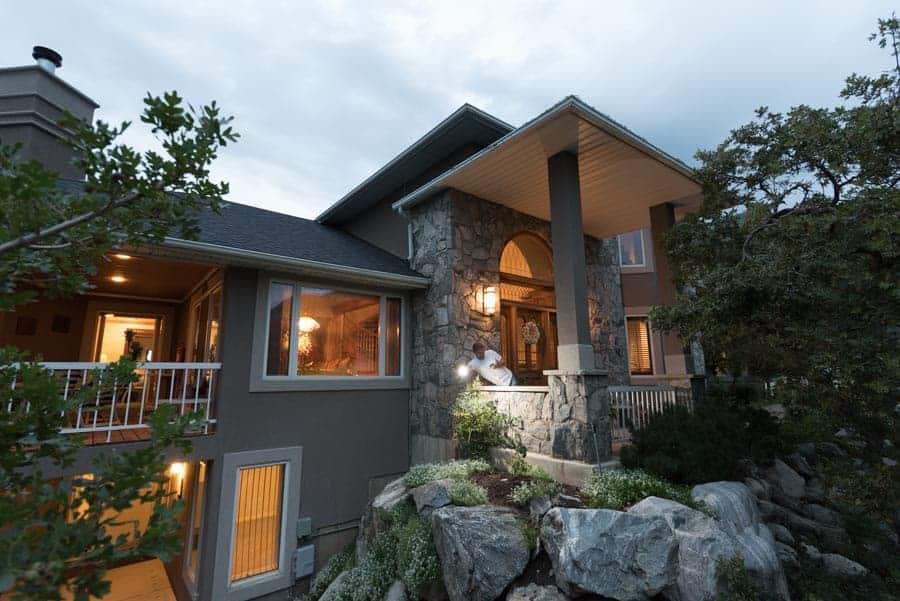
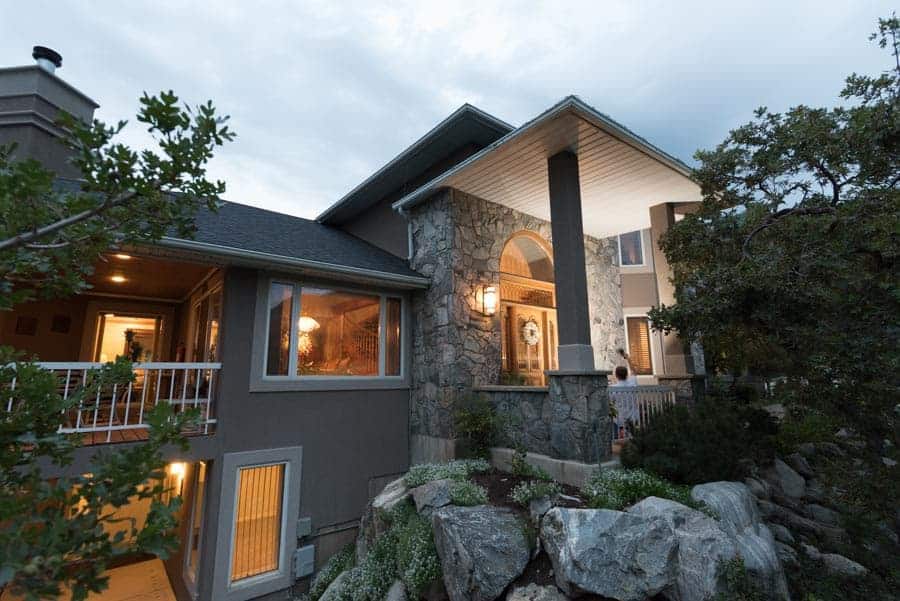
Alright, now that we've got everything set up, let's start popping flashes. Leave your camera on your base exposure settings and test out your flash pops to make sure they aren't too bright or too dark. You want to see crisp detail without blowing everything out. Now, walk the scene and start flashing the surrounding landscape, trees, rocks, shrubs, flowers, walkways, and all parts of the house. You want to cover everything with nice, clean light. You'll have about 15 or 20 exposures. Don't go crazy and try to get every square inch though. You don't want to end up with 50+ exposures to blend in Photoshop. Flash an area, holding the flash high above your head to get good coverage, then walk 4 or 5 feet and do it again.
Here are some the samples we'll be working with. You can see how I got good coverage of the home in only a handful of exposures.


Step 4: Import into Lightroom then as layers in Photoshop
I import all the photos into Lightroom, make lens correction adjustments, then cull the images for the ones I want. Out of 20 or so images, I selected 13 to use in my composite. Adding all the photos is time consuming from a processing standpoint and uncessary because some of the flash pops covered the same area.
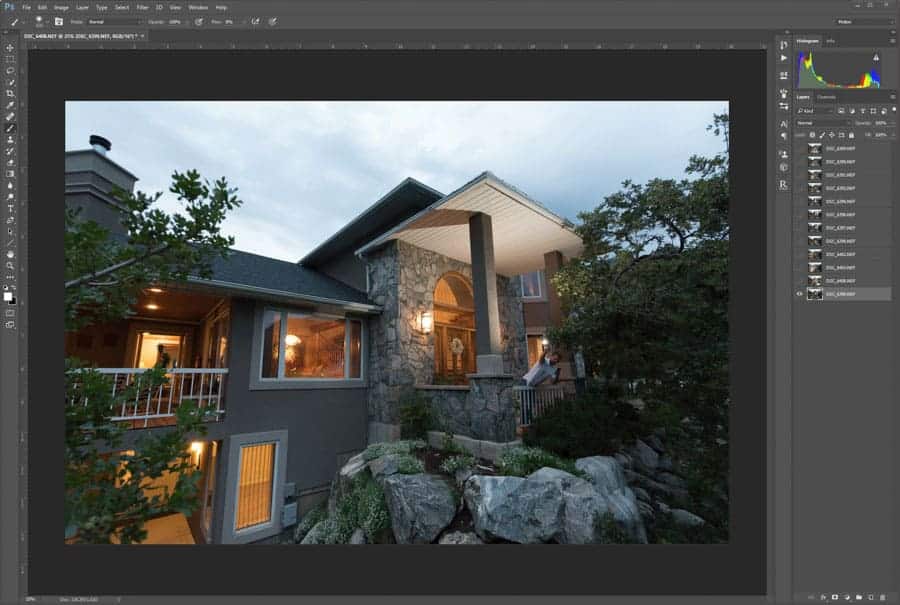
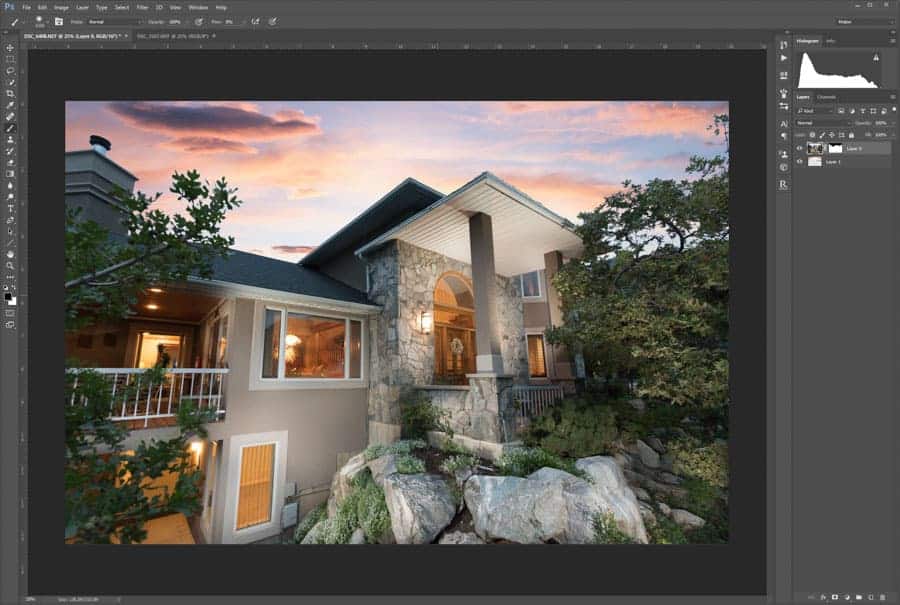
Once I have all the images into Photoshop, I set my ambient image as my bottom layer. I didn't take an ambient image on this shoot so I just used a flash image that didn't cast light or shadows on the main part of the house and blended out the part where you can see me holding the flash.
Next, turn off visibility on all layers except your base layer. You can quickly do this by clicking and holding the mouse button on the eye of the top layer and then dragging down over the eyes on all the subsequent layers. This is MUCH easier and faster than click, click, click, 20 times.
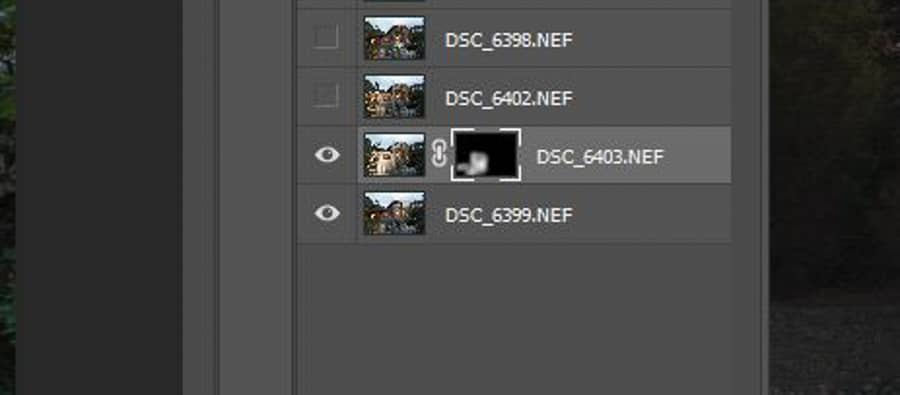
Next, turn on your second layer and add a black mask. You can do this in one motion by holding Alt or Option and clicking on the “add layer mask” button (the rectangle with the circle inside of it at the bottom of the layers panel). This will mask out the entire layer, revealing your base layer.
Next, change your blend mode to “Lighten.” Above the layers panel you'll see a dropdown box that says “Normal.” Select that, and choose “Lighten.” This will only reveal the lighter pixels from the top layer when you start painting them in.

Now, take your brush, change your color to white, set your flow to about 8% and hardness to between 0-20%, and start brushing in the areas where you light painted with your flash. The trick here is to only give a kiss of light to the scene. You aren't replacing the base exposure, only enhancing it with crisp, clean light.
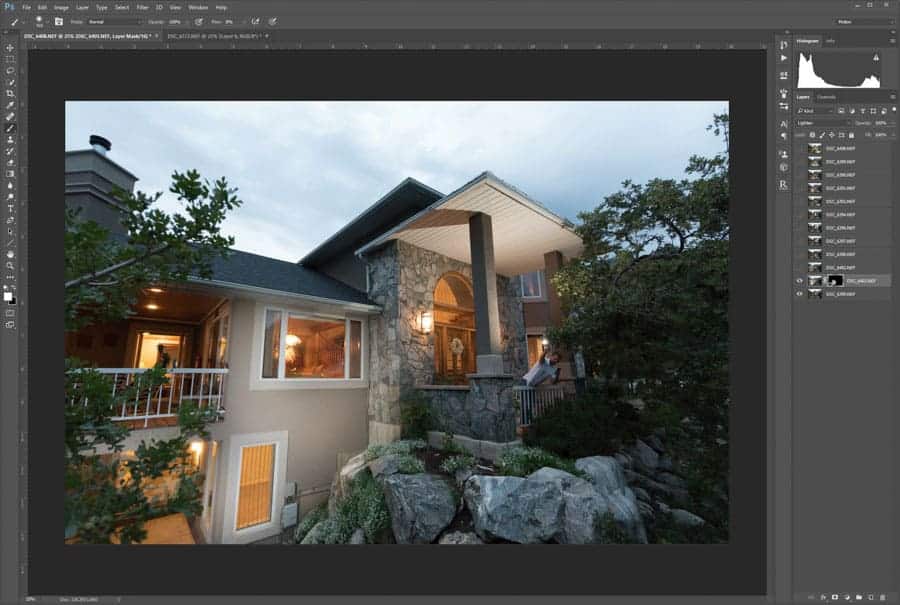
Here you can see on the layer mask how I brushed on the flash layer to the base exposure. No heavy handed brushing and a very soft edge to the brush to avoid harsh transitions from the flash layer to the ambient layer.
Now, do this for all your layers, carefully brushing on the flash parts of each layer.
- Turn each layer on after you finished the previous layer
- Add a black mask (Alt/option + “Add new layer”)
- Change the blend mode to Lighten
- Use your brush to reveal the flash layer onto the base exposure
- Brush opacity: 100%
- Flow: 8%
- Hardness: 0-20%
- Color: white

Step 5: Flatten the image
Now we're looking pretty good! We have to now flatten the image in order to get a clean selection for our sky replacement. Highlight all the layers, right click, and select “flatten image.”

Step 6: Add your new sky
Now we need to add a new sky. You can find skies all over the Internet if you need to build a library. I have my own library of skies that I've photographed throughout the year. Don't go too wild with your sky. The sky is not the important part of the image and you don't want it to detract from the house.
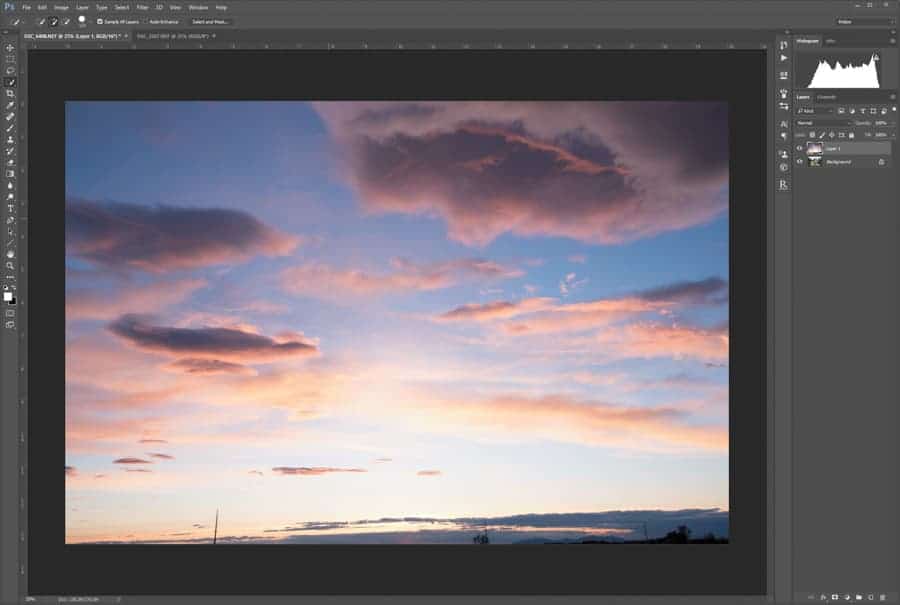
Copy your sky layer onto your layer pallet then uncheck the padlock on your base layer and drag your sky layer below it.

Step 7: Select and mask your sky
Now, select the “Quick Selection” tool (shortcut “w”; make sure you don't choose the magic wand tool) and select your sky. It's ok to do a rough selection because we will refine it in the next step. You can kind of see the marching ants in this screenshot of the sky. Hit the “Select and Mask” button on the toolbar at the top to find the “Refine Edge” tool.
Below you can see the rough selection we did. The trees aren't fully selected and the sky through the trees needs to be cleaned up.
There are a number of sliders we can use and each serves a specific and valuable purpose. I won't go over all that in this tutorial though, you can read up more about them elsewhere. Here are my settings that I've found work best for sky replacements:
- Radius: 3px
- Smart Radius unchecked
- Smooth: 2
- Feather: 2.1px
- Contrast: 25%
- Shift Edge: -5%
- Output to: Layer mask
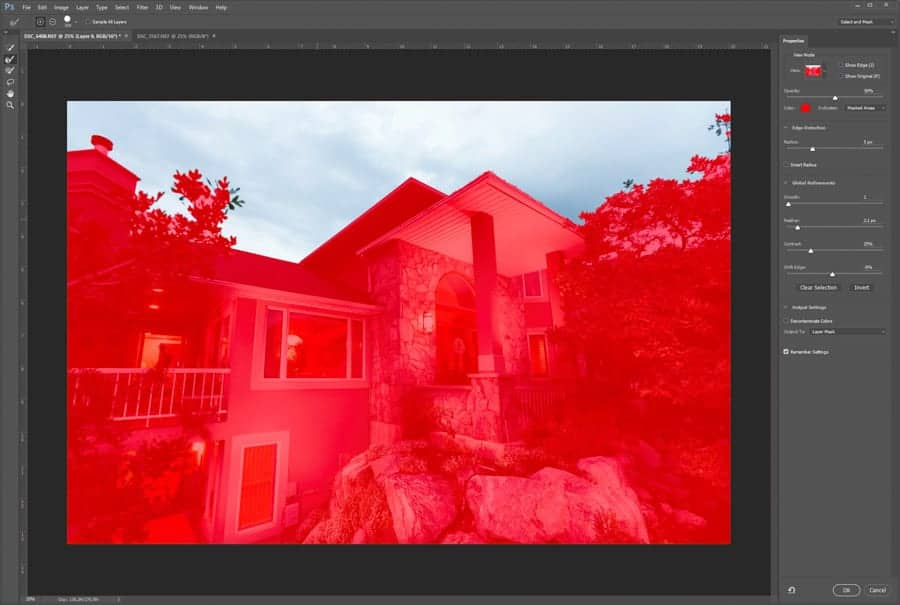
Using the “refine edge brush” (second from the top on the left side of the window) you will then start to refine the mask edge. Place the brush on the body of the image (not the sky) and brush toward the sky to select everything but the sky. This is an easy example because there isn't much in the way of the tree detail. Once you are finished brushing everything out, your selection will look like this:

Now click on “Ok” and have the mask applied to a new layer mask.
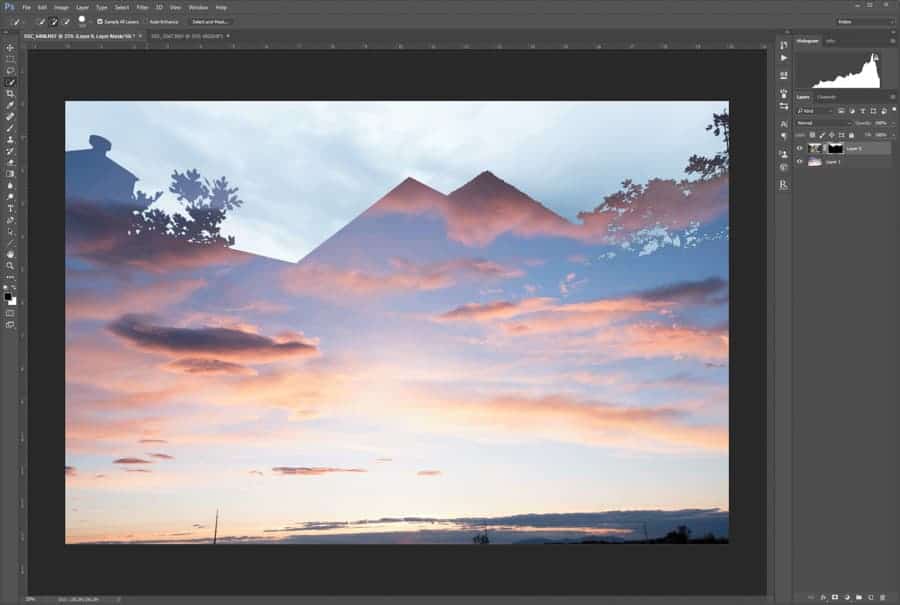
It will be inverted at this point and all you need to do is reverse the selection by hitting Ctrl/Cmd + i.
Ok, that looks pretty terrible, so we'll clean it up.
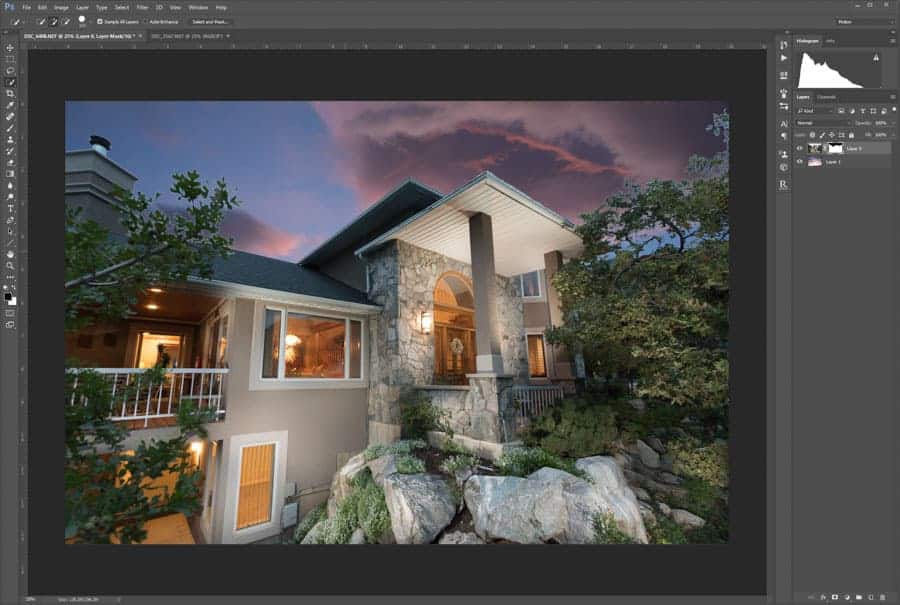
Next, you can move your sky layer around to get the best part of the sky on your scene. Click on your sky layer then select the move tool (shortcut ‘v'). Now move your sky around to get the best part of the sky showing.
Once you are happy, flatten the image once again and hit Ctrl/Cmd + S to save the image and import it back into Lightroom.
Step 8: Make final Lightroom Adjustments
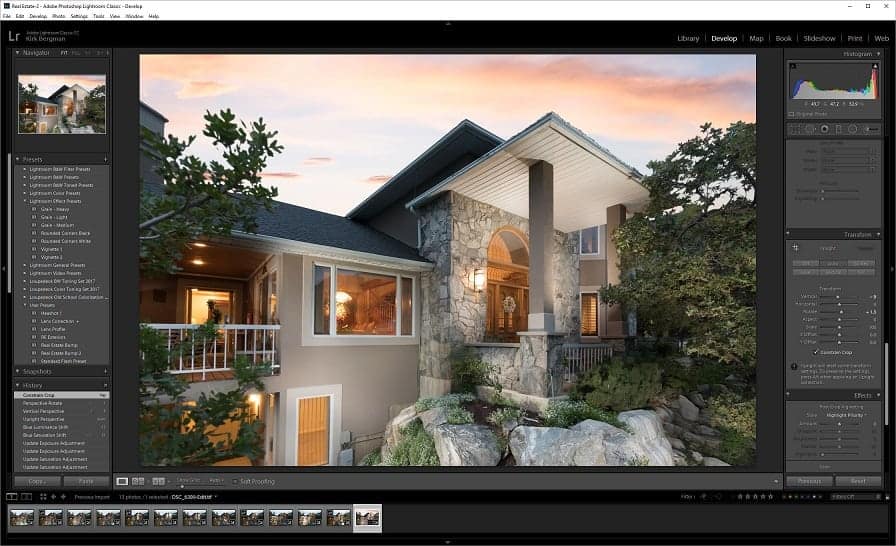
Now that you have your composite back into Lightroom, make final adjustments to the verticals, exposure, contrast, and saturation.
Because I had to shoot this at an angle, I needed to make some dramatic vertical corrections. I used the “auto” upright button along with adjustments to the vertical and rotate sliders. For this image, I adjust the verticals to -9 and rotate to +1.3. Use the automatic ruler guides that pop up on the image when you adjust these sliders to get a pretty good alignment.
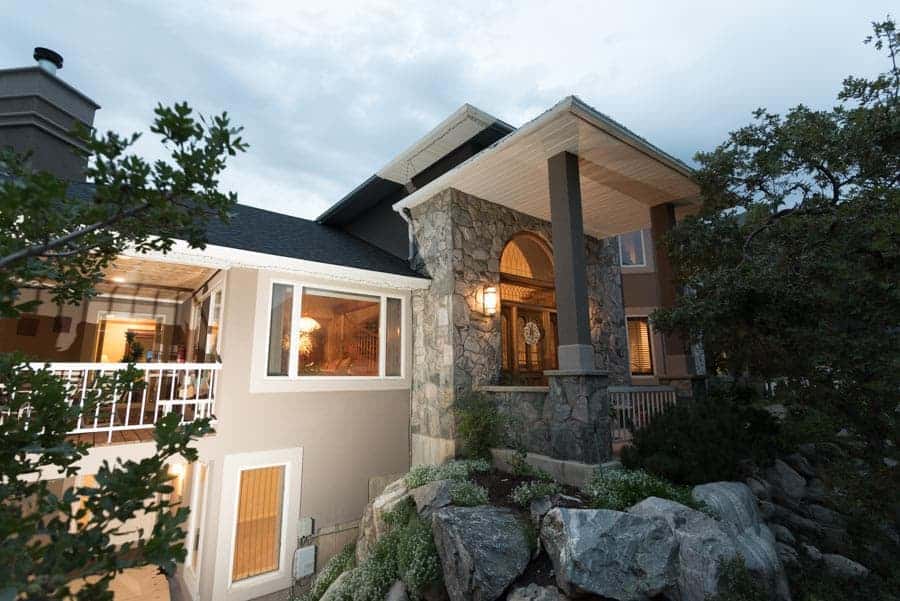
Now, make your exposure, contrast, saturation, and clarity adjustments.
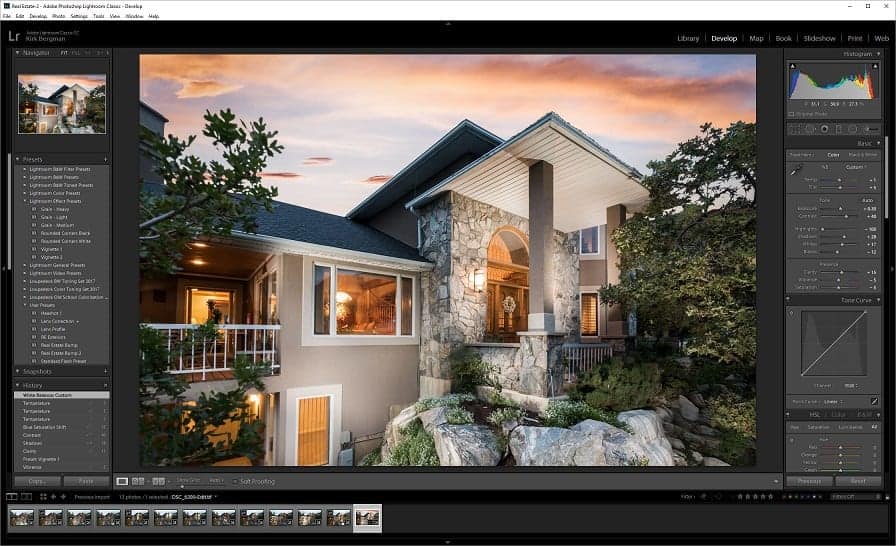
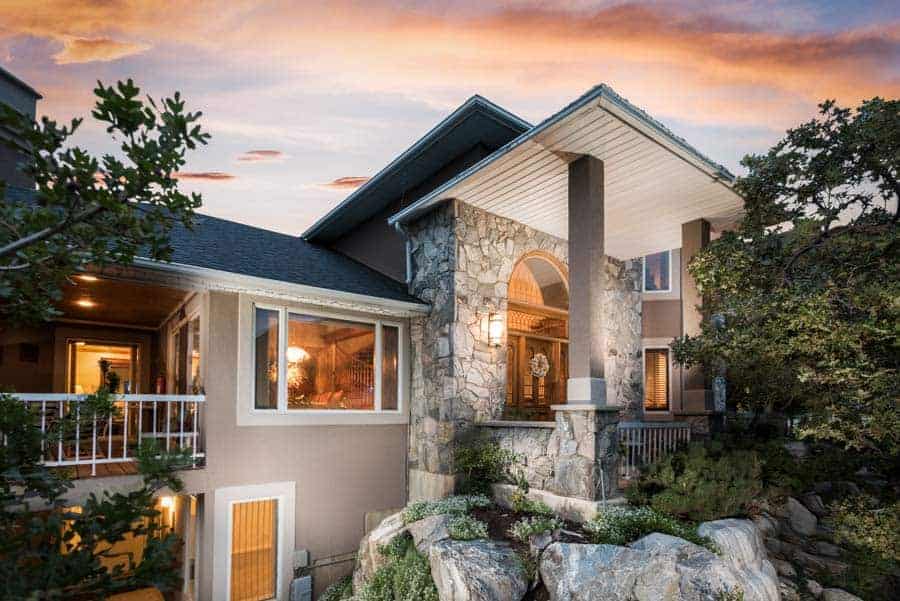
Now that looks pretty great! Any agent or homeowner would be happy to have this image.
Conclusion and final tips
A few tips before you try this out:
The first time you do this it will be frustrating and take forever. That's ok. Take your time and do it right so that it looks good.
When you start to get pretty good at this, don't spend hours upon hours on every twilight image. Remember, these are just going on the MLS for a couple weeks or a couple months. They aren't getting published in Architecture Digest magazine.
However, if you are doing twilight images for commercial projects (like that Montana lodge photo at the beginning of the article) then you should charge more so you can spend more time getting everything perfect. I breezed through this tutorial as an example of what to do and how to do it. There are several things that could be improved if I spent more time on it. But only work as hard as you feel justifies the pay you are getting. I've spent over 2 hours per image on some twilights, and others have only taken me 20 minutes.
Don't be harsh with your flash pops or blending. Remember, you are going for a kiss of light, not a blinding supernova. Knowing how to apply delicate detail is what will make for a better image and will make you stand out. Use a scalpel, not a sledge hammer.
Lastly, in Photoshop there are a hundred ways to do something. What I've shown you is how I do it. I understand there are many different ways to accomplish any step, some superior, some inferior. If you find a better way to do something, by all means, do it.
You might be asking, “Why go to all this bother? Why not just use the exposure brush in LR to “add a kiss of light” here and there?” I asked the same question myself when I first started doing these. I suggest you try it. Using the exposure brush, you'll be able to get to 75% of the quality of the real thing. For some houses and some clients, it will be enough. But for most of what I do and the portfolio I am trying to build, I want to have 100% quality. The crispness and color you get from a flash pop can't be cleanly replicated with the exposure brush or the dodge tool in PS. In some trouble areas, you can use them to “enhance” what you have, but they won't be replacements for the real thing.
Mastering twilight photography will help you upsell your clients on real estate photography services and give you one more tool in your belt. It will help you stand out from the less quality oriented competition in your area. As I mentioned before, the reason I like it so much because I can actually create a photograph instead of just take a picture. This is my way of fulfilling my desire to make art with photography. And they are just super fun to shoot and process.
Hi Kirk
Very interesting. What made you go down this route rather than just bracketing the exposure and doing HDR Merge in Lightroom?
Regards
Rick
Great question Rick. I touched on this a little at the very end of the article. Adjusting the image via exposure brush in LR only goes so far. It can’t replace the crisp and clean look you get from adding flash pops to the scene. For many people, it won’t matter either way, but I feel this is a way to go one step above your competition and produce better images.