

Two weeks ago, I came in the front door of my house feeling lower than I had in a long time. I had just come home from the hospital where my brother had just suddenly died. As I walked in the door, I saw a box from Loupedeck on my front porch that they had sent me for review.
Loupedeck is a keyboard accessory to Lightroom that gives you physical dials and buttons for making the most common edits in Lightroom. It's an AWESOME toy, but I was skeptical that it could find a permanent place on my desk for working in Lightroom.
I spent about 20 hours with Loupedeck (Available on Amazon.com) over the next 3 days as I looked through the 17,023 photos that were taken of my brother during his life so I could put them together for a slideshow. It was cool to simply type his name in Lightroom's search and immediately see every picture ever taken of him. But the task was daunting to cull through that many photos. Loupedeck dramatically improved the entire experience. I was able to fly through photos and apply very quick edits much faster than I could have otherwise. That's my Loupedeck story, and how I fell in love with it.
Here's the tl;dr version of my review: Loupedeck has become a must-have accessory for editing in Lightroom. Nothing has sped up my Lightroom workflow more than adding Loupedeck to the mix. It's intuitive, reliable, and beautiful. Highly recommended for any photographer who spends a significant amount of time in Lightroom. While it does have some limitations and imperfections which I'll discuss in the review, it gets 5 stars from me.
Let's get to the review.
Build Quality and Design
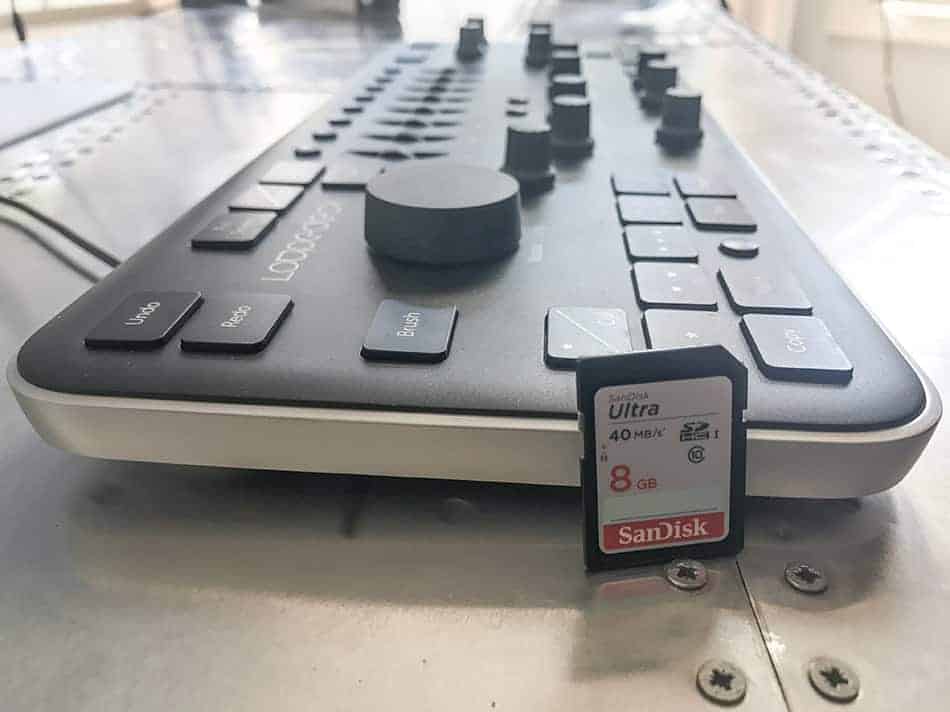
When you first take Loupedeck out of the box, you'll be impressed. It's pretty. It's something that you won't mind keeping on your desk. I like the two-toned sides with a gray bottom and satin black top. The packaging was nice, but not overly lavish.
The build quality of all the dials is quite good. The dials don't click to each setting, so you can smoothly make adjustments with just the right balance of fine-tuned setting and quickness. The dials give a slight vibration of feedback as you turn them that is pleasing to use.
The buttons on the keyboard don't feel quite as polished. They feel more like the type of touch you'd feel on an old-school PC keyboard with a somewhat long key travel and substantial click. They feel somewhat uneven when pressing so the button is slightly tilted when you press only on one side of the button–not like on a good keyboard. However, I wouldn't call the feel of the buttons cheap or problematic. They just aren't high end.
One thing I don't love about the design is that the board is raised up quite high. I would estimate that the board is up a full inch from the desk to the top of the buttons. This means your wrist must either hover in the air while using it, or you'll need a thick and tall wrist pad. #firstworldproblems Another imperfection is that the board does not prop up on the back. It lies at almost a perfectly flat angle. If it had pegs on the back to raise it up at more of an angle, I believe it'd be easier to use.
My main point of frustration with the design is the layout of the dials. The sliders in the basic panel in Lightroom are presented from top to bottom in the order that you'd normally want to use them. You set the white balance first because it will impact the color of the entire image and can even impact perceived exposure. Then you go to the exposure dial to make a global adjustment, then change contrast and all the way down. They are in an order for a reason. However, the dials on Loupedeck don't reflect that order at all. They are somewhat grouped as to use: Contrast/clarity/exposure, blacks/whites/highlights/shadows, and whibal/tint/vibrance/saturation. I can see why they chose to group them this way, but if they had been laid out in a way that reflected the Lightroom layout, it would mean I could use them without looking down at the labels for each dial, and I could move left to right in an organized fashion instead of needing to jump around. It's certainly a personal preference issue, though, and I can see why they chose to do it how they did.
The board as whole looks and feels like a quality product and it gives me no concerns at all for the durability of the device. The build quality is imperfect, but quite good. I'm happy with it.
Setup and Install
I'm a typical man's man. I never read directions and will blame it on the product if I can't figure it out 🙂 Fortunately, there was no need at all to look at the directions when installing Loupedeck. I plugged it in, went to their website to download the small piece of software that connected it to my computer and Lightroom, and I was ready to use it. I was actually surprised when the install was done that it didn't need anything else. I love it when software actually works.
That's my kind of install!
What Loupedeck Can Do
Loupedeck only functions when in the develop module of Lightroom. Yet, it can do quite a lot in the develop module. In fact, nearly everything you can do with a slider in Lightroom can be done on Loupedeck. That's quite impressive.
The only time I find myself reaching for a mouse when using Loupedeck is to use the tools (such as adjustment brush tool, gradient tool, spot removal tool, etc), or to set a custom contrast curve.
Main Dials
- Contrast
- Exposure
- Clarity
- Blacks
- Whites
- Highlights
- Vibrance
- Saturation
- White Balance
- Tint
- Custom slider (I set mine to control a vignette)
There is also a set of minor dials for each of the colors in the HSL panel. There are buttons to control whether the dials will change hue, saturation, or luminance and a small light next to those buttons to indicate which is selected. I really like the way the HSL panel has been implemented on the keyboard. It allows for a wide range of tools with few keys and the design is intuitive. Well done.
I really like that it has a row of 8 buttons that can be programmed to use presets. That's awesome! I have my first three set to use my favorite portrait presets, buttons 4-6 for landscape presets, and 7-8 are black and white presets. Really nice!
It also has buttons for und and redo, brush, full screen, color/b&W, and two pill buttons for custom functions (I'm not quite sure what I'll use them on yet…). There are also 5 buttons for star ratings, 4 buttons arrow buttons for navigation, a before/after button, and an export button (very handy).

My Loupedeck Workflow
There is very little I do in Lightroom during the cull and quick-edit process that I can't do on Loupedeck. The way I've incorporated it into my workflow is that I start by reviewing all the photos. It has arrow keys to go between shots, and 5 buttons to either place a star rating (my preference) or a color tag on each photo. I put my right hand on the arrows and the left hand on the star keys and fly through the photos to give them star ratings.
The star ratings system that I use and teach in my Lightroom Medic Video Tutorial is as follows:
- 1 star – completely useless photo that can be deleted to save drive space. This is only for shots where I left the lens cap on, bumped the shutter while walking, dramatically messed up the exposure, etc.
- 2 star – The photo is fine, but just not very good. Not one of the shots that I'll want to take any time editing.
- 3 star – Come back to this shot and edit it. It's one of the better shots from the shoot.
Then, after I give all my photos a rating of 1, 2, or 3 stars, I then sort them to only show the three-star photos from the shoot. At this point, I edit each of the photos 1-by-1 using Loupedeck. After I edit each photo, I decide if it turned out good enough to be promoted to 4 or 5 stars.
- 4 stars – The photo is good enough that I'm willing to publish it and put my name on it. This is a photo that's destined for social media, to be sold as stock, put on my website, etc.
- 5 stars – One of the best photos I've ever taken in my life. I only keep about 30-40 photos as 5-star shots in my portfolio. By reserving 5 star for only the best of the best, I can always sort Lightroom by 5 star photos and INSTANTLY have my portfolio ready to go.
I also like that Loupedeck has an export button at the top right so I can instantly publish my shots. Awesome!
Current Software Limitations of Loupedeck
Loupedeck is a very compelling product right now, but I can see the device becoming even more powerful in the future through software updates. I'd love to be able to use Loupedeck in Photoshop. If I could set one of the custom pill buttons to open the layer in the Camera Raw Filter screen, that would be amazing! Then in Camera Raw, I could see myself using Loupedeck to make even more edits.
I would also love to see Loupedeck be able to use the keyboard when in the Library module to control the “quick edits” Lightroom has available there. Or, better yet, if it had a button on Loupedeck for the develop and library modules. That would be helpful, but I realize that Lightroom could have some limitations that make that impossible–I don't know.
Pricing and Where to Buy
You can buy Loupedeck on Amazon.com (click to see the current price on Amazon). Curiously, the price to purchase Loupedeck from their website is €369.00 or $463; yet, it's significantly less expensive on Amazon. I don't know if this is something expected to last, or if Amazon just has a cheaper price right now, but it seems like it'll make a lot more sense to buy through Amazon.
The IndieGoGo campaign that launched the product raised $435,000 US (€366,361) and made the project a reality.
If Loupedeck came down in price to $149 instead of its current position, I bet they could sell 4x as many. However, at its current price, I think this will remain a product just for the wedding, event, and sports photographers who need to go through thousands of photos quickly. It'll be more of a product for the pros and less for passionate hobbyists. There are just too many other $300 devices we could buy for photography.
Conclusion
Overall, Loupedeck is a very powerful Lightroom accessory. It offers controls for almost everything I do in Lightroom and allows me to make my most common edits far more quickly. All I do with the mouse now is the adjustment brush and the gradient tools.
The build quality of the device is not ultra-lavish, but it is beautiful and appears to be durable. The same is true of the software which was easy to install and bug-free.
Would I cry and freak out if someone took my Loupedeck away? No. That would be my reaction if they tried to take my YN-560s away. But after 3 weeks of using Loupedeck frequently, it's still on my desk. I still use it, and I foresee myself continuing to use it going forward. It's a “buy.”
I’ve got the PaletteGear modules which are similar in function. I loved it at first, but for some reason over time I have gravitated back to mouse and keyboard. I might say the same thing for my Intuos Pro tablet, though that still has some functionality that can’t be replicated with a mouse and kb. I still use the PaletteGear now and then for LR, but not as much as I was anticipating, though I do use two of the buttons daily for switching between desktops 🙂
I am very sorry to hear about your brother. Thank you for the review.
Keyboard accessories to this very beautiful and many lightroom features.