
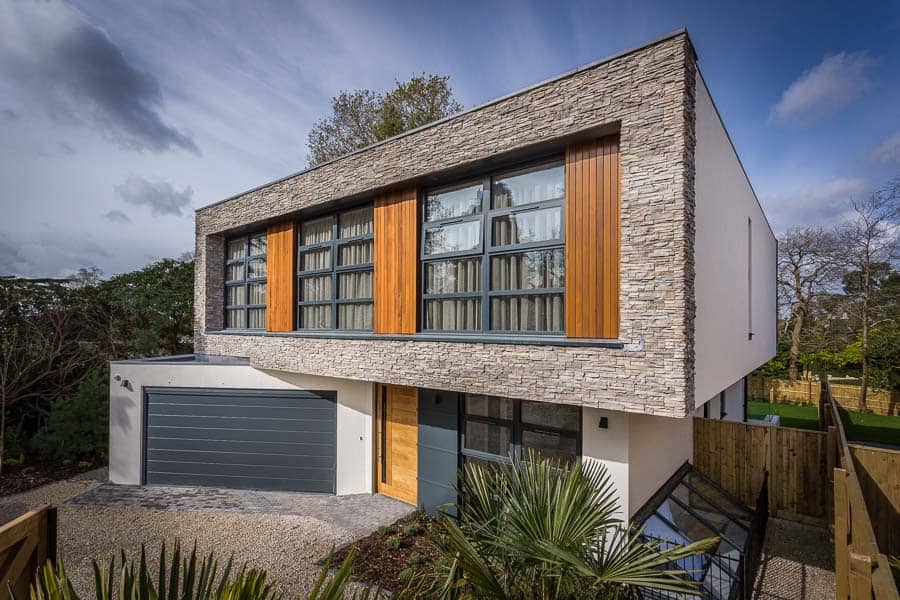
In the next in my series of articles about being an architectural photographer I am going to describe how I take the images on a commercial architectural shoot.
The main point I want to make here is that when I am out on site I concentrate on what I am taking photos of rather than my camera settings and gear.
I have practised and practised with my camera gear, so much so that I can use my Canon 6D in the dark nearly as well as I can in daylight.
I have simplified my image capture process as much as possible to allow me to concentrate on the environment I am working in and the things that I am meant to be photographing.
About those previous articles – if you missed them, here are links to the previous articles
Want to be an architectural photographer? Read my guide here
10 Tips on getting work as an architectural photographer
10 tips for planning an architectural photography shoot
What gear do I use for my architectural photography? Find out here

My image capture workflow
I have a well-refined image capture workflow, which has evolved over the years. I follow a very similar process for most of my photography work to be honest, with variations mainly around time and location.
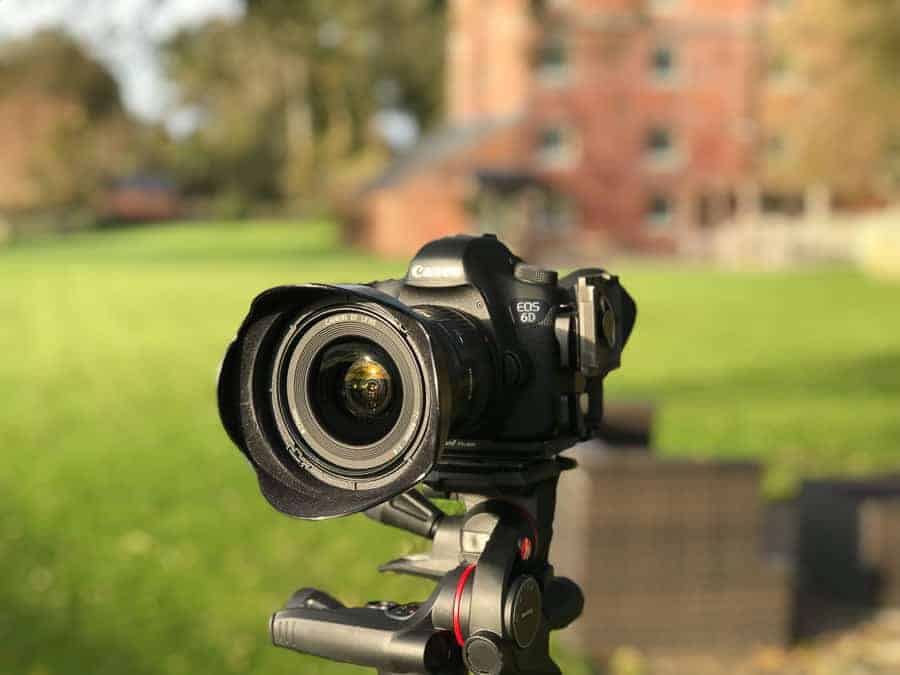
The photography gear I use for my architectural photography
I wrote in detail about the gear I use for my architectural photography work in the previous article.
To recap, I will list here the gear I use most of the time – if you need any more info check out that last post
- Canon 6D
- Canon 17-40mm lens
- Manfrotto 090 tripod
- Manfrotto XPRO Geared Three-way pan/tilt tripod head
- Neewer Loupe viewer
Camera settings
The camera settings I use are as follows
ISO
I use an ISO of 100. This is the lowest ISO on my Canon 6D. As I use a tripod for every shot (unless not physically possible), I can use the lowest ISO to get the best image capture quality. If I have to shoot handheld I will use the lowest ISO that will ensure I get a sharp image.
Aperture
I know that F8 gives me the best image quality with my Canon 17-40mm lens. If however I need more depth of field then I go down to F16 – this leaves me not that many options, F8, F11, F13 and F16.
I like not having too many options – simplicity is the key, which you will realise as you read on.
Shutter speed
I am shooting on a tripod whenever possible. The shutter speed is the shutter speed. The camera works this out for me, and is not a concern.
Not quite.
If I am shooting outside and it is windy the movement of trees/ plants/ grass/ anything not fixed needs to be considered. Sure there is the deghost feature in Lightroom HDR Merge which will deal with this to a degree, but it is better to sort this in camera during image capture.
As my Canon 17-40mm lens does not have image stabilisation I work on the rule of thumb that the shutter speed I use is a higher number than the focal length – so for a focal length of 40mm the minimum shutter speed I will use is 1/60th second.
This gives me a minimum shutter speed to work with, the aperture is the one that the image requires, meaning that I have to increase the ISO to get a fast enough shutter speed to freeze everything in the scene.
AV Mode
I have set the ISO. I decide on an aperture. The camera works out the shutter speed.
That is how AV works and that is exposure done.
RAW
I shoot in RAW. There are many resources on the Improve Photography website that explain the difference between JPEG and RAW – all I will say here is that shooting in RAW gives me the maximum amount of data in each and every image for me to work with.
Bracketing
I set my Canon 6D to take a bracketed set of images.
- The first image is the correct exposure.
- The second image is two stops under exposed – darker
- The second image is two stops over exposed – lighter
I merge these two last images later, which I will talk about in the next article on processing my images using Lightroom and Photoshop.
For now, in terms of image capture, all I need to say is that doing this lets me concentrate on the composition and not worry about the exposure. The combination of using RAW image capture combined with the exposures used for the bracketed image capture give me such latitude that I do not need to think about this during a shoot.
Evaluative metering mode
I have dabbled with other metering modes, but apart from some rare, notable exceptions I have not found a need to use any of the other modes.
Auto Focus on
Not a lot more to say about this. I use auto-focus – my camera is more accurate than me. This is one reason why I do not love tilt-shift lenses.
If you have used manual focus for any length of time I suggest you try manual focus – it will seem like such a backward step!
Which it is.
Back-button focus
Now this is a bit of a change for me. Something a bit more complicated.
I use back button focus.
This is not a default setting on the Canon 6D – it is a custom function change. This takes focus away from the shutter button, separating exposure and focus into two separate operations.
I will talk about how I focus an image later on in this article.
GPS on
I want to know where I took the photos. Of course I know where I am, as I managed to get myself there, but I find this feature incredibly useful, especially for those grabbed images on the way to or from a shoot. And I am one of those people who actually likes the seldom talked about Map Module in Lightroom.
Self-timer
I have bought various remote releases, and used the Canon Connect App on my iPhone, but find that the simplest way of capturing an image and reducing vibration is to just use the self-timer on the camera. I use the 10-second self-timer, and on those rare occasions when this is too long I use the 2-second self-timer.
Another simple, basic but very effective technique. And one less piece of kit to have to carry/ have batteries for/ pack/ maintain.
Drive Mode
As I am bracketing the images I use continuous shooting mode.
AF Mode
I set the auto-focus to one shot, as I am focussing once and image capture is done separately.
Grid view on Live View screen
On my Canon 6D I have the option of a grid, splitting the viewfinder into 9 squares. I find the vertical and horizontal lines invaluable in straightening up my composition.
A bit about my favourite lens
Focal length – 17mm
For internal shots I shoot everything at 17mm. So much so that I tape the lens so the focal length stays at 17mm. This gives me the widest view I can achieve, whilst maintaining natural dimensions and perspectives. And consistency of view, which is vital within a set of images.
For external shots I use the appropriate focal length for the scene I am trying to capture.
I always leave my lens in auto focus – why wouldn’t I?
A quick word about tilt shift lenses
I use a Canon 24mm tilt shift lens from time to time, but to be honest I am not a huge fan – I only use it when I really need to. I find that most of the time I do not need it. One of the things I do not like is that it is manual focus only. That is enough on its own to put me off!
You have to remember that I am getting on a bit and my close vision is not the best, neither my distance vision thinking about it!
How I compose my images
I compose images using Live View, which is magnified and easier to read thanks to my Neewer viewer.
With this excellent and not expensive piece of kit I prefer doing this to using the viewfinder on my camera.
I start with the composition, getting exactly what I want in the scene.
Next I do a very important thing – I check around the edges – if there is an annoyance creeping in that I can remove by recomposing this is when I do this. Of course I can do this in Photoshop but a quick re-compose is much better.
The critical part of composing the shot – verticals and horizontals
Once that is done I straighten the composition using the geared levers on my Manfrotto geared tripod head.
I always ensure that the horizon is level first, then I try to get the verticals, well vertical.
Sometimes I have to include a lot of foreground in the composition to get the verticals correct. This is fine as I can deal with this either by cropping or by adding stuff at the top in Photoshop.
The other option is to shoot wider than I normally would, and not get the verticals completely vertical, but close enough that they can be corrected in Lightroom without having to add stuff around the edges.
This is very much shooting knowing how I am going to edit – this is the result of all that practise I talked about earlier.
Composition done – its time to shoot.
Last thing, after all these adjustments, is focussing and exposure.
Focussing
I move the focus point to a position roughly 1/3rd into the image, and focus on that using back button focus. That is all I do. I am shooting with a wide-angle lens, and my aperture is never less than F8.
And from practising I know that this works for me.
Exposure
Final thing is exposure.
I move the white rectangle, which is what the camera is using to take the meter reading, then press the shutter halfway.
Taking the shot
Last thing is to press the shutter button. The 10-second timer kicks in, then the camera takes the three images I talked about earlier, one after the other, automatically.
Bracketing
I bracket every shot. Why? Simple. When I am processing my images I merge the two stop under and the two stop over exposed images. All my images are produced this way, which in part is my style.
And the other benefit – I do not need to think about exposure 99% of the time, as the bracketed images, RAW capture and the power of Lightroom all combine to take that worry away.
Image capture done
A few other things to consider
Why do I take photos using a tripod?
- I am photographing static subjects.
- I want to use the lowest ISO possible
- I prefer composing an image using a tripod
- Composition and technical correctness are vital to my work.
What do I do when I can’t use my tripod?
If I can’t squeeze into a corner then I shoot handheld. In these situations I use the lowest ISO that allows to me to get tack sharp images. The rule of thumb here is that 1/the shutter speed should be more than the focal length in use. I mentioned this before.
But I did not mention this
Holding the camera
Hold the camera securely and correctly, but do not tense your body. Relax, take a deep breath, and then exhale slowly. While breathing out roll your finger over the shutter gently to minimise movement in the camera and take the three pictures. I do this sometimes with the self-timer set to 2 seconds, or not at all. It depends.
White balance
Sorry – forgot this. I set my camera to auto white balance.
Why this? I am a lazy person.
I use a Lastolite collapsible grey card, which I include in the first shot at each location, or whenever the light source changes.
And then I fix this after in Lightroom.
I know – not a technique for the purist, but for a realist like me working on live construction sites this is just fine.
Painters pole
Yes – I do use a painters’ pole. This gives me a different view. I have used a painters pole to take photos
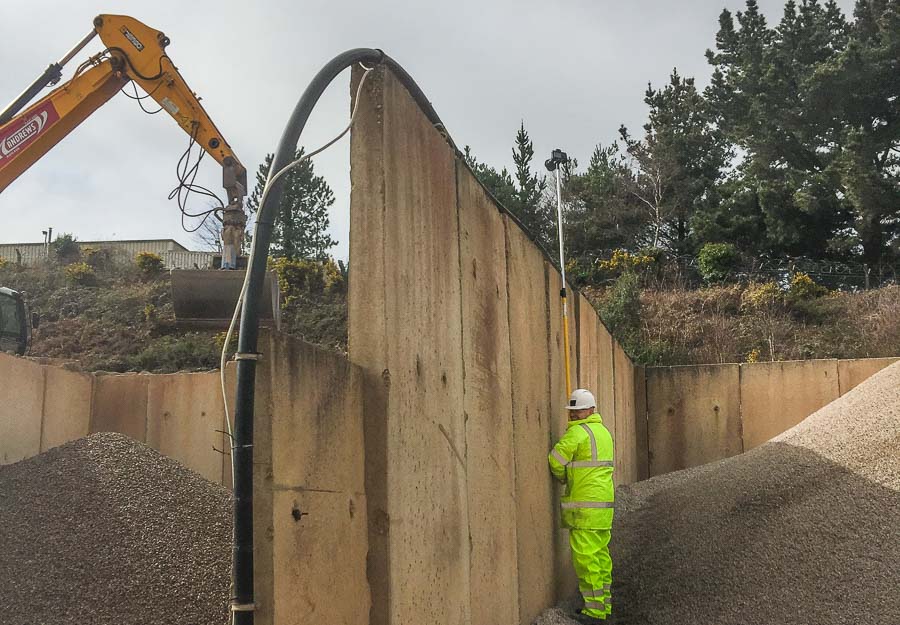
- Level with the first floor, meaning no correction of perspective.
- Getting my camera above distractions
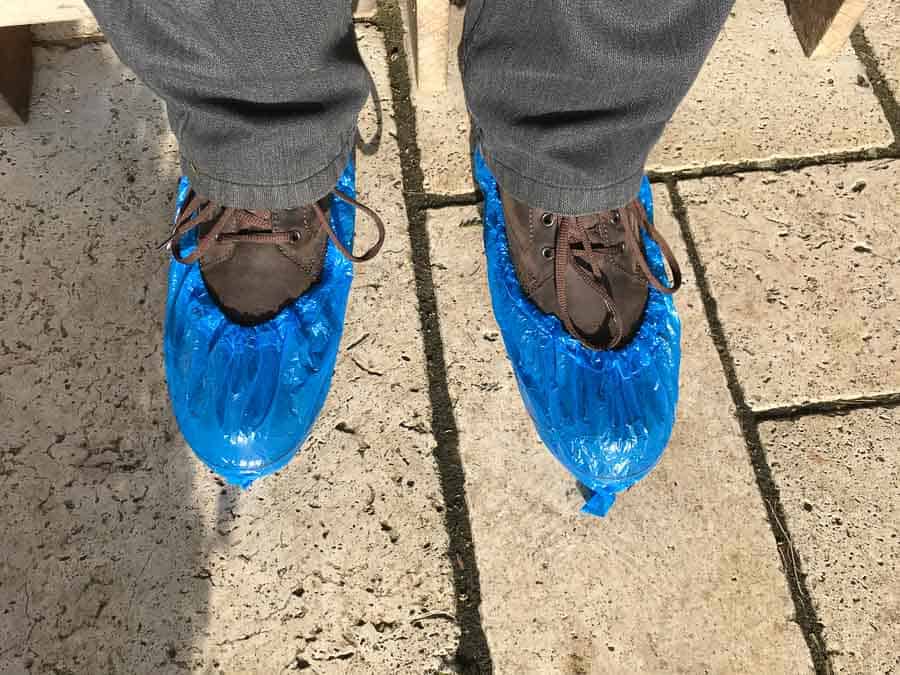
- To deal with sloping ground (see image at the beginning of this article)
Platypod
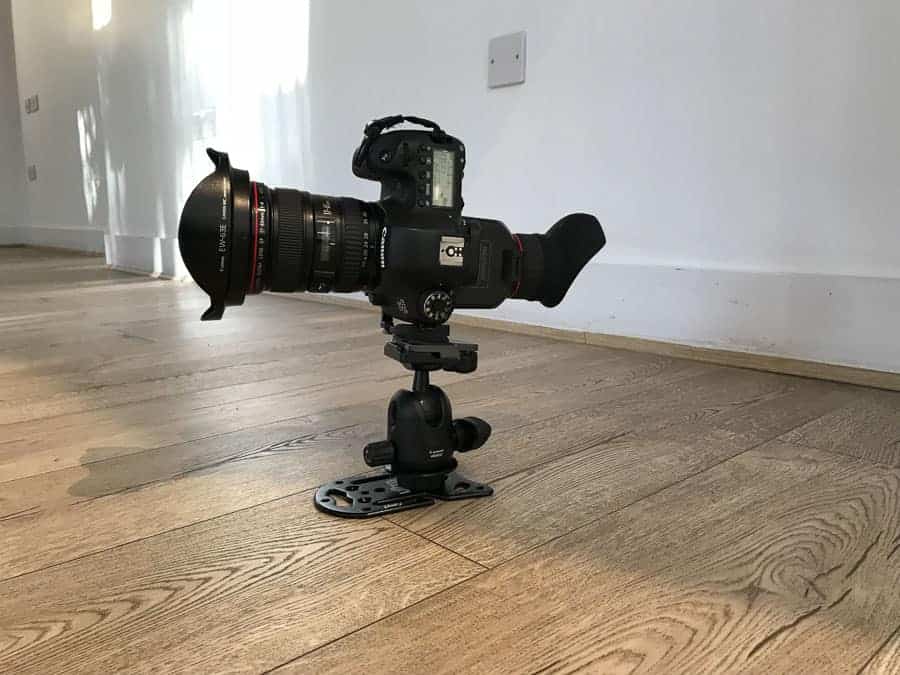
I also use a Platypod to get photos from floor level. These are mainly internal shots, and I have also used the Platypod as a smaller tripod to get shots from places where I cannot physically fit my tripod.
The importance of getting alternative views is this – you are giving your client a variety of views, choices, something different. And not every photographer will do this.
We have to do all we can to stand out from the crowd – shoot high and shoot low.
The importance of the settings
On an architectural shoot I concentrate on the composition. I don’t need to think about what the camera is doing, other than
- Choosing an alternative aperture (if F8 is not appropriate)
- Where I focus
- Where I take the exposure from
That is all I need to think about.
Checking the settings before I shoot
This is a habit I have got into – getting all the cameras settings I have talked about dialled in before I begin each and every shoot.
Forgetting to reset the settings
A few times in the past I have changed something in camera to get a completely different result, or to suit a change in circumstance.
One such time was when I was photographing a dark staircase, and could not get my tripod in the space for the capture I wanted. This is a time for bumping up the ISO, increasing the sensitivity of the sensor and allowing me to use a faster shutter speed.
In this case I used an ISO of 1600.
All fine.
Next shot was outside, back in my tripod. I composed, set the exposure but something was not right.
I had forgotten to change the ISO back to 100, and was trying to shoot outdoors in bright sunlight at ISO 1600!
Another time I turned off my autofocus for a shot, and some time later remembered that I had not turned it on. Believe it or not most of the pictures I had taken in-between were ok – there were only a couple of shots that I had to retake.
Checking the image capture
I rarely do this these days (ignore the last point!). I used to check after taking every shot, but now I rarely do as happily my image capture is such that I do not need to.
I believe the term used is chimping.
Don’t be a chimp!
I review the images when I leave a location to make sure I have what the client wants.
A word on the gear I use
You might have noticed that I have not mentioned other gear at all. I will have a boot full of gear with me of course, but only normally use the stuff I have mentioned, which all fits into my Peak Design Everyday Backpack.
Apart from my blue shoes. Very important these!
I use this backpack as I am able to move around construction sites with both hands free, which is vital for climbing ladders and moving around scaffolding.
My image capture is very mobile, quick and efficient, which suits the environment I am working in.
Summary
I hope that you have found my image capture process interesting. The main points that I want you all to get out of this are the following
- Know your gear.
- Know your workflow
- Practise, practise, practise
- Don’t overcomplicate things
- Concentrate on what you are photographing
I am in the happy position where I am able to concentrate on taking photos, and not constantly fiddling with my camera, changing settings, changing gear.
If you have any questions please get in touch using the comments box – I am always delighted to hear from readers and will answer all questions
In the next article I will write about processing my architectural photography images.
Excellent article, but you have a typo… (see subhead in the “Tilt Shift Lens” section) =)
Matthew
Thank you for the kind words. The very unfortunate typo I have corrected – thank you so much for letting me know.
With regards from a very cold England
Rick
No worries. It happens to the best of us, even those of us in the arctic Michigan tundra.
I’ll admit, I had a few chuckles.
Hi Matthew
Glad it gave you a laugh, and glad you told me about it so quickly!
From the arctic (England).
Rick
I take it you don’t like tilt shift lenses…
Hi Todd
Thanks, but thankfully my typo has already been pointed out to me and corrected!
Regards
Rick
Thanks, very good
http://benhviemgan.net/
Hi and thanks for your comment.
With regards from England
Rick
You don’t mention any lighting equipment so I’m curious to know how you deal balancing the color temperature in mixed lighting situations for interiors? There’s nothing quite like walking into a room that has CFL overhead lighting with tungsten lamps next to a bed and daylight streaming in through the windows…
Anyway, it’d be real nice if you knew a good solution for this that doesn’t involve laboriously measuring color temp and gelling a bunch of lights or carrying around a million bulbs of every possible size and type that are all color matched in the back of my car from job to job.
Hi Michael
Thanks for your question. And I have to say that is a great question, and something I am going to touch on in the next article.
I don’t use any lighting equipment at all. I use a grey card from which I do a custom white balance in Lightroom and take it from there. I aim to get correct overall colours and do local adjustments as and when required.
I am finding mixed lighting less of a problem than it was to be honest.
With a lot of my work I do not have the time or space in the location to set up lights, and I have got used to working this way.
Thanks again and regards
Rick
Hello, Rick, under exposure you mention moving the exposure box. I understand the box you are speaking of, but you don’t mention where you place it. Maybe you are going to elaborate on this in future articles. I shoot homes for agents that are about to list them for sale, and I have noticed, where you place your exposure (I tend to use single point) drastically impacts what the meter reads. If I place it over the windows vs. on a dark chair or something. What do you find to be the correct thing to expose from. I am now thinking you expose for the grey card as your correct exposure? I find my self taking 5 or six shots sometimes to make sure I can balance the view out the window with the shadow areas of the room.
Hi Rick
Thanks for the question. This is a visual thing to be honest, and I go with what appears to be the best average lighting in the scene. I am viewing this in Live View using a loupe viewer so have a good idea of how the image will look.
As I am bracketing two stops under and two stops over this works just fine.
That is it really – avoid the extremes of light and dark, expose for the average and let the bracketing catch either end.
This is quick and works for me.
Thanks again for the question.
Regards
Rick
really really appreciated this walk through. As a someone who did architecture as a degree but never pursued it, I’ve returned to architectural photography in my 40s and am finding a growing customer base here in Bahrain although it’ll not be my day job here I doubt.
Learning a lot from your website too. Thanks so much for taking the time to share this.
Hi John – thank you very much for taking the time to provide your thoughts – I am delighted to hear that you found my article helpful.
With regards from England
Rick
đẹp quá