
This is the fourth in a series of articles where I tell you about my experiences of being an architectural photographer in the UK.
In this article I am going to talk about the photography gear I use. In the next article I will write about how I approach image capture with this gear, but for now I am going to stick to gear, both photography gear and non-photography stuff that I use on my architectural shoots.
If you missed them, the previous articles are
1 – Want to be an architectural photographer?
2 – 10 Tips on getting work as an architectural photographer
3 – 10 tips for planning an architectural photography shoot
The gear I use for my architectural photography work
The equipment I use covers obviously photography equipment, but also non-photography equipment that I use. And my red hat. Yes, I have a thing – red hats.
Back to the gear though,
First and foremost is my camera. I use a full frame Canon DSLR, the Canon 6D.
Canon 6D – my camera of choice
No frills, fancy stuff or bells and whistles. My Canon 6D works faultlessly day after day producing consistently great architectural images. I don’t care about the speed, number of focus points or lack of this, that and the other.
It works and captures great images effortlessly.
Image quality
I will let you into a secret about the Canon 6D. When it was released, the Canon 6D had the same sensor as the Canon 5D Mark 3. I was shooting a Canon 5D Mark 1 at the time, and it was time to upgrade.
As I will bore you by repeating, image quality is my number one priority for a camera. I did my research, and concluded that, if you took the same picture using the same settings with the Canon 6D and Canon 5D Mark 3 you would not be able to tell which camera took which image. They would be virtually identical.
And the Canon 6D was half the price.
And the Canon 6D has Wi-Fi and GPS, which the Canon 5D Mark 3 did not. These two features are very important for me.
Why?
I use the Wi-Fi on the Canon 6D when I am taking photos remotely. I have bought products before as remote releases, which are sat in a cupboard somewhere. They have all been replaced by the Canon Connect app on my iPhone, which connects through Wi-Fi to my Canon 6D. Sure it is not the slickest app, but it works consistently, and allows me to do what I want to do. And using these tools I can view the images I am taking remotely on the screen of my iPhone 7 Plus – bigger and better than the actual screen on my Canon 6D.
The Canon 5D Mark 3 has loads and loads of other features that to be honest I am not that interested in. If Canon asked me if I wanted a Canon 5D Mark 3 or 4 I would love to have one, but the Canon 6D does the thing I need it to do.
It just works
I turn the Canon 6D on and it works. That is it. There isn’t much more to say. I turn it on, it works. And when I am done I turn it off.
Ease of use
I have looked at lots of other cameras, and would love to try another system, but the Canon system suits me. I have been using Canon cameras all my life, from the film days. The Canon 6D is easy to use, once you have spent the time getting to know it that is. I have made a few adjustments to the camera to suit my way of shooting.
I tend not to think about my camera too much on a shoot – I just don’t need to. This is important when working on a live construction site – there is enough else to think about!
Low light performance
Low light performance is great on the Canon 6D. I quite often have to take architectural photos in low light.
- Interiors with very subtle, discreet, atmospheric lighting.
- Product shoots on construction sites – no lighting available
- Night shoots – I often photograph buildings at dusk/ darkness to show off the interior lighting.
GPS
I always turn the GPS on when I take photos. If there is one infuriating thing about the Canon 6D it is the fact that it will drain the battery down if you don’t disable it, even when the camera is turned off.
I use the GPS feature when I am working in Lightroom, as the Map Module shows where photos were taken. Now the Map Module in Lightroom has had a bit of bad press, I think from people who just don’t need it.
I do – I stop all over the place when out and about travelling taking photos, and I don’t have to bother writing down where I took a photo as the Canon 6D does that for me.
Wi-Fi
I used this on the last architectural shoot I did. I needed to get my camera back flat against a wall to capture a flight of stairs – only problem is in doing this I could not see the screen, so I just turned on the wi-fi on the camera, fired up the Canon app and used my phone to as a screen to compose the image.
Without this I would not have been able to take this shot.
Full frame sensor
The Canon 6D has a full frame sensor. This means that 17mm on my Canon 17-40mm lens is just that – 17mm. If I used a camera with an APS-C sensor, which has a crop factor of 1.6, the 17mm focal length I need would actually be 27mm, which is of no use to me. And the larger the crop factor the smaller the sensor.
Last thing about my camera – when will I replace my Canon 6D?
I have no reason to. It just works.
I will replace it
- When it breaks down.
- When it gives up having been dropped one time too many.
- Or when there is something that will genuinely help me take better photos.
- Or when Canon give me something else to use! (chances of that happening?)
Canon 17-40mm F4 L Lens
I can buy a Canon 17-40mm F4 L Lens for £549.99 from Amazon. If you check out the reviews the lens gets typically 4 stars. I would not say that this the best lens available. But this lens provides great image quality whilst being compact and lightweight.
And the 17mm focal length is the thing that makes this my go to lens.
I probably take 75% of my architectural images at 17mm, and probably 95% of my interior images at the 17mm focal length.
Why do I not go wider?
Simple. 17mm is wide enough to show an interior space in a flattering wide view, without making the space look artificially large.
Again, this lens just works for me. I set the focal length to 17mm and compose the shot. I have started taping the zoom ring with gaffers tape to make it in effect a 17mm lens.
To sum up my lens of choice for architectural photography – the Canon 17-40mm lens is
- Sharp
- Small
- Light
- Fast enough
- Simple to use
- Reliable
And great value for what you get. And would you believe this lens first came out in 2003!
I have other Canon lenses, but they stay in my bag until needed.
Need I say more?
Next thing is the all important tripod
I use the Manfrotto 190 Go tripod. Sorry that has been retired now, and replaced by the Manfrotto 055. I will still use the 190 Go for foreign trips, but the Manfrotto 055 is now my tripod of choice. It is bigger than the 190 Go and has some great features.
After all, what do I want from a tripod for architectural photography?
- Strong
- Rigid
- Easy to use
- Not too heavy but heavy enough
A tripod is something that I put my camera on to take photographs of buildings. That is all. Sometimes things are that simple.
The Manfrotto 055 has (as described my Manfrotto) “Quick Power Lock” – basically these are strong yet simple locking levers to the legs, which I can operate with one hand.
I bought this tripod having been to an actual camera shop, and talking to a nice chap from Manfrotto. I tried out this tripod, and other ones, and bought it. And I have to say I really like it and enjoy using it.
I know this is a bit old-fashioned, but let’s not forget how important camera shops are, and that if we only ever buy stuff online there will come a time where all the camera shops are gone.
So, let’s keep our camera shops going by buying stuff from them.
SUPPORT YOUR LOCAL CAMERA SHOP
Tripod Head
There is another thing that goes on top of the tripod, the head. And what tripod head do I use?
The Manfrotto XPRO Geared Thee-way pan/ tilt tripod head.
I bought this at the Photography Show at the NEC in Birmingham when I bought the Manfrotto 190 Go tripod. I took the geared head off the 190 Go and put it on the 055.
This geared head is an essential part of my equipment, allowing me to quickly frame a composition, with the grab handles on the three axes of adjustment, with the geared knobs giving me the fine adjustment I need to get everything level and vertical and looking all nice and correct.
I try to compose every shot so there is no adjustment in Lightroom in the transform panel, which saves me time and also gives me better composition.
In combination with the grid view on my Canon 6D and the spirit level built into the camera I am able to quickly get the correct composition.
I will talk about image capture in the next article, but would like to say here that I use my tripod for every image I take on an architectural shoot – the only exception is when I cannot physically get the shot I want.
Platypod
And that is often when the Platypod comes in. I use this for shots taken on the ground. Two examples are these two images of a specialist door in a hospital, and a product shoot for a paving manufacturer.
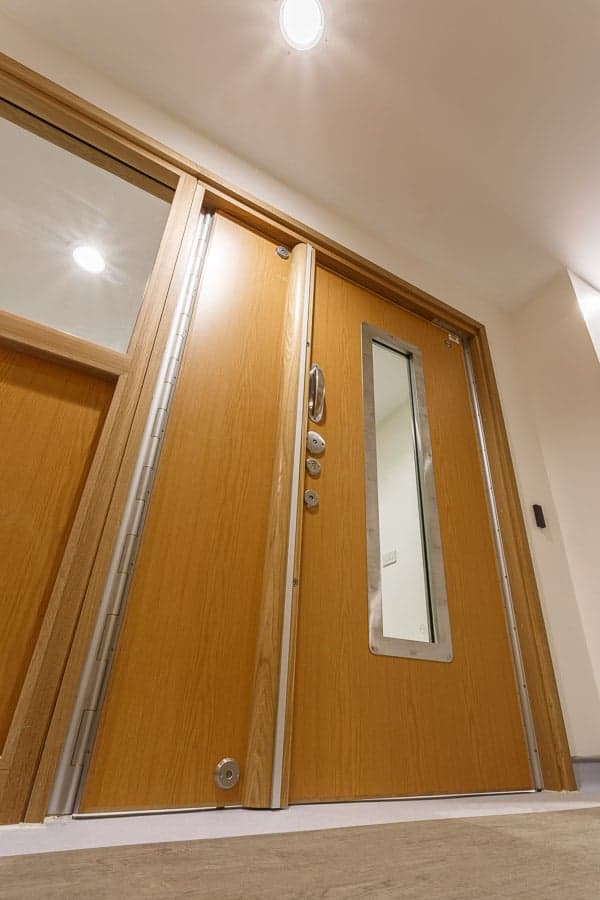
A commercial construction product shoot of specialist anti-ligature doors in the refurbished wing of a hospital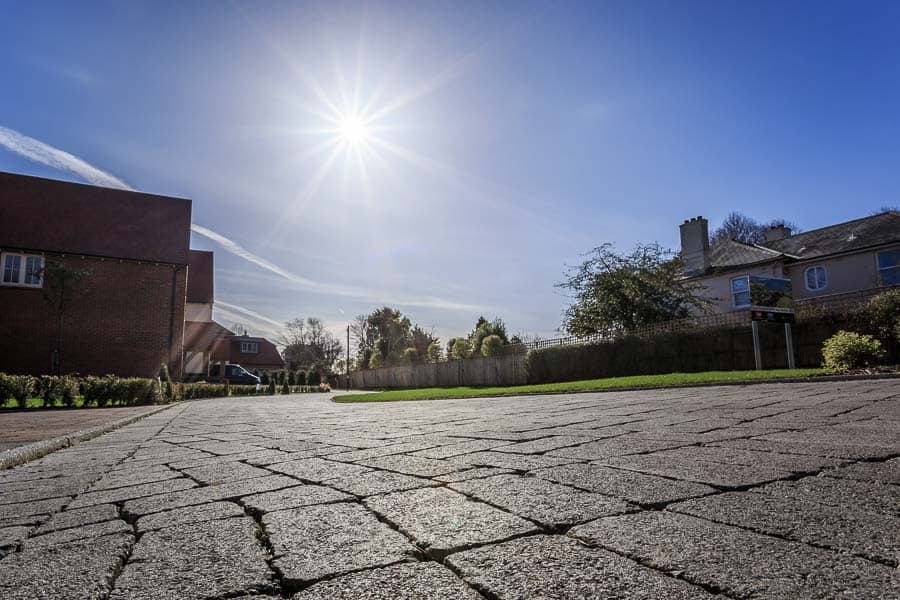
Photographs of the Hydropave Tegula block paving at Salterns Reach, Emsworth, West Sussex
Neewer Loupe Viewer

I use this on every architectural shoot. It has become a major part of how I work. As much as I love the Canon 6D the screen on the back is not great. This viewer gives me a magnified view of the LCD screen, and an eyecup to reduce outside light interference.
I use this in conjunction with my tripod geared head to compose each and every architectural image.
Lastolite collapsible grey card
I use a grey card to help me get the white balance right. Dead easy to use, all I do is include the collapsible grey card in the first shot in a specific location, then put it away and get on with my work. Each time I change location I do this, or each time the lighting changes.
This is a quick and simple solution that works for me, giving me a target white balance in every location I photograph. I will talk about how I get my white balance correct in Lightroom in the article on image processing.
L bracket
I currently use a Sunway Foto L Bracket. I say currently as it is looking a bit battered, and in need of replacing. The L bracket fits into the tripod screw socket on the bottom of my Canon 6D, and to the bracket I fit 2 No Manfrotto 200PL quick release plates. I am able to swap quickly from portrait to landscape orientations without moving my tripod, which means that I get both orientations covered quickly whenever I need to.
Leatherman
This is just a great piece of kit that I always have with me. Just for doing stuff.
iPhone 7 Plus
Yes, my phone. These days they have lots of uses. I use my iPhone on every commercial shoot for things including the following
- Test shots which I can view on a bigger (and much better) screen
- Remote control of my Canon 6D
- Various apps
- Filling time whilst waiting for the sun to appear.
- Or for people to go away
- And lots of other things.
These are the main bits of kit that I use on every shoot. I put them all into my
Peak Design Everyday Backpack
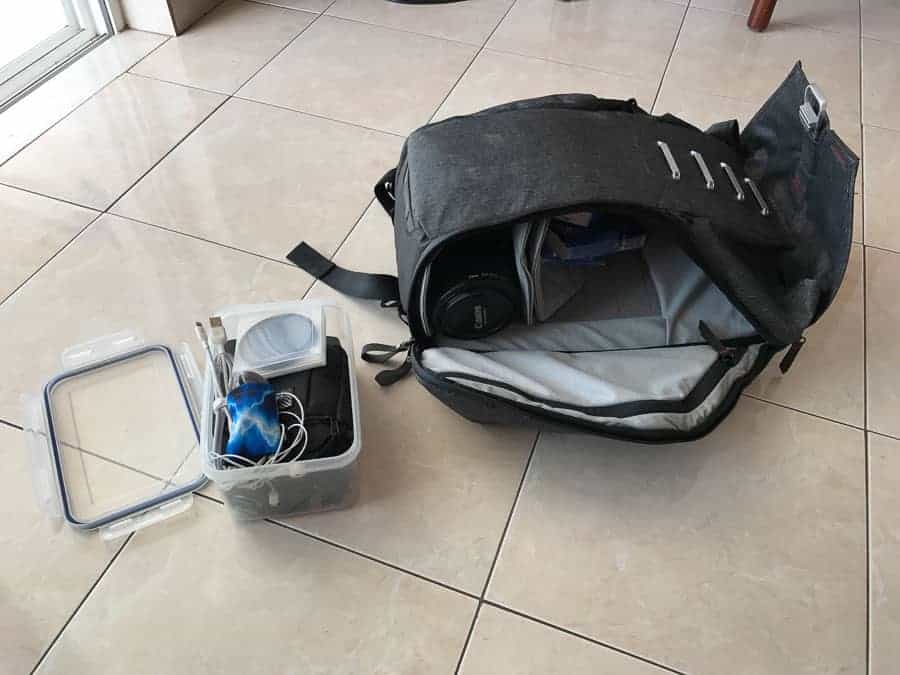
This is the camera bag I use for my day to day gear. This bag goes with me wherever I go. Literally everywhere.
And this extends to an architectural shoot. I pack the gear I use on most shoots, along with the bits that I might need in the side pockets, such as spare batteries, memory cards and the cleaning stuff I will talk about later.
The important thing is this – I have the gear I need for an architectural shoot in my back pack, leaving my hands free and me able to access wherever I need to unhindered. This is essential when working on live construction sites, when you need to be agile, mobile and able to adapt to the demands of working on a construction site with lots of busy people. When I am photographing a site it is normally not quite finished, being in the manic last stages of works.
If I needed to set up lights and demand space and time to take photos this just would not happen.
And this is the other gear that I have in my bag in case needed.
- Canon 70-200mm F4L lens
- Spare batteries
- Spare memory cards
- Circular polarising filter
- Spudz lens cloths
Cleaning stuff
A quick word on cleaning my gear before an architectural shoot.
I have an extensive equipment cleaning regime. OK I don’t. There are two things I do before every shoot, using the following gear.
Hurricane blower
I clean the sensor and the mirror housing, as well as the back of the lens. This takes seconds using quick blasts of air only.
And then
Pec Pads and Eclipse cleaning fluid
I clean my lens before every shoot, both the front and rear elements. Pec Pads are great, inexpensive disposable cleaning pads in packs of 100 which can last me a good few weeks. And the Eclipse cleaning fluid is very effective too – both are available from Amazon. When I have cleaned the front and rear lens elements I use these pads to clean the other bits of my camera, such as the LCD display and the viewfinder window.
And also to clean my glasses, sunglasses, anything really. You can use the fluid to clean your sensor – I did this once and never again!
That is cleaning done.
And some non-photography peripheral bits of kit.
My North Face Red Hat
Whenever it is getting remotely cold I put one of my North Face red hats on. I say one of as I currently have two, and am in the market for a new one. These red hats are going to start featuring in some new work I will be doing – an idea for another time!
Blue overshoes – the disposable ones.
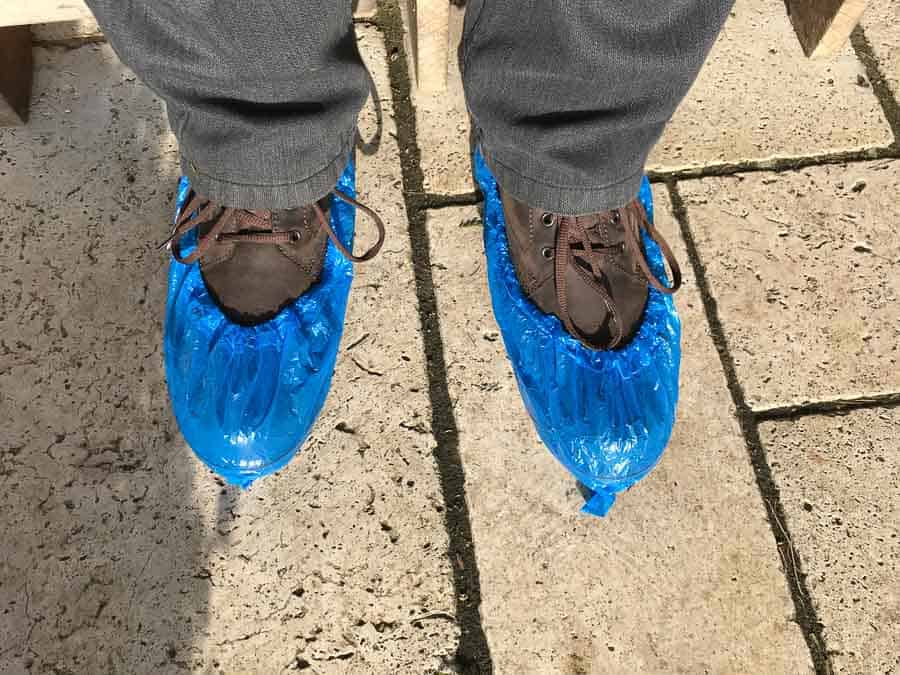
If you are familiar with construction sites (certainly in England) you will have at some point worn a pair of these stylish, disposable covers for your shoes. I used them just the other day having taken external shots of a building from a muddy field, then going into the house to photograph the stairs and the loft conversion!
My flask
I can’t work without coffee.
There is lots more gear that I have just in case, but that is another story! I have three additional bags of gear which I always put in the boot of my car, and I know a shoot has gone well if I don’t use anything out of a bag.
And here are the new additions to my gear, which I am starting to work with as I move slowly into video production.
- DJI Osmo Mobile
- Rode VideoMic Me
That is pretty much it for me and my gear – please ask any questions on the comments box at the bottom of this post, and thanks for reading all the way to the bottom.
Out of curiosity, is there are particular reason that you choose not to use a TS lens?
Hi Michael
Thank you for your question. I have a Canon 24mm tilt shift lens, nut only use it when I have to. It is manual focus, and most of the time I do not need it. I bought the 24mm version to try, and to be honest with you forgot to mention it I use it that little.
Thanks again for your question.
Regards
Rick
May I buy it off you then? Serious here! Laugh out loud Excellent article by the way. Very enlightening. Thanks so much for sharing!
Hi Theo
Sorry – no – I will use it at some point I am sure! THank you very much for your kind words.
With regards from England
Rick
Shame that T/S lenses are not in the bag……
Hi Butch
Thank you very much for your question. I did had another question on this point. My answer was
“I have a Canon 24mm tilt shift lens, nut only use it when I have to. It is manual focus, and most of the time I do not need it. I bought the 24mm version to try, and to be honest with you forgot to mention it I use it that little.”
There is one in my bag, but I find that I can manage without it.
Regards
Rick