
Landscape photographers often prioritize scenes with high saturation, high dynamic range, or contrast. I mean, who doesn’t love a mind-blowing sunset bursting with oranges and purples or an epic mountainscape with dramatic storm clouds overhead and gorgeous flowers in the foreground? I do as much as the next person. But does that mean that a landscape photographer should keep the camera in the bag on dreary, foggy days? I say no.
Fog or mist can be a great way to elevate your landscape photography compositions. In this article, I describe various ways to use fog as a compositional element and also how to deal with some of the challenges involved with photographing fog.
4 Ways to Use Fog in Landscape Compositions
1. Create Mood
Fog (and its more lightweight sibling: mist) can be a great way to add mood to your photos. If you’ve ever gone out to shoot on a cloudy day, you’ve likely learned that the reason cloudy days are generally favored by photographers is that the sky acts like a giant softbox. The light is diffuse, thereby eliminating harsh shadows and creating more of a balance of the dynamic range of a scene.
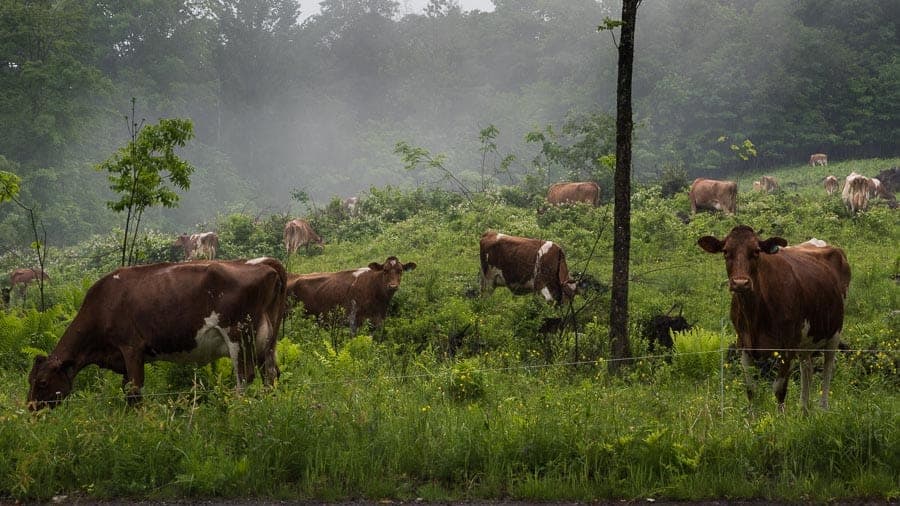
Fog has a similar effect only it is amplified because you are effectively inside of a cloud. As a result, fog creates a very subdued look, with low contrast and low saturation. Fog or mist can create tension in an image by adding an element of the unknown making the viewer feel something as they study the image. It can also make a scene feel peaceful or mysterious or gloomy.
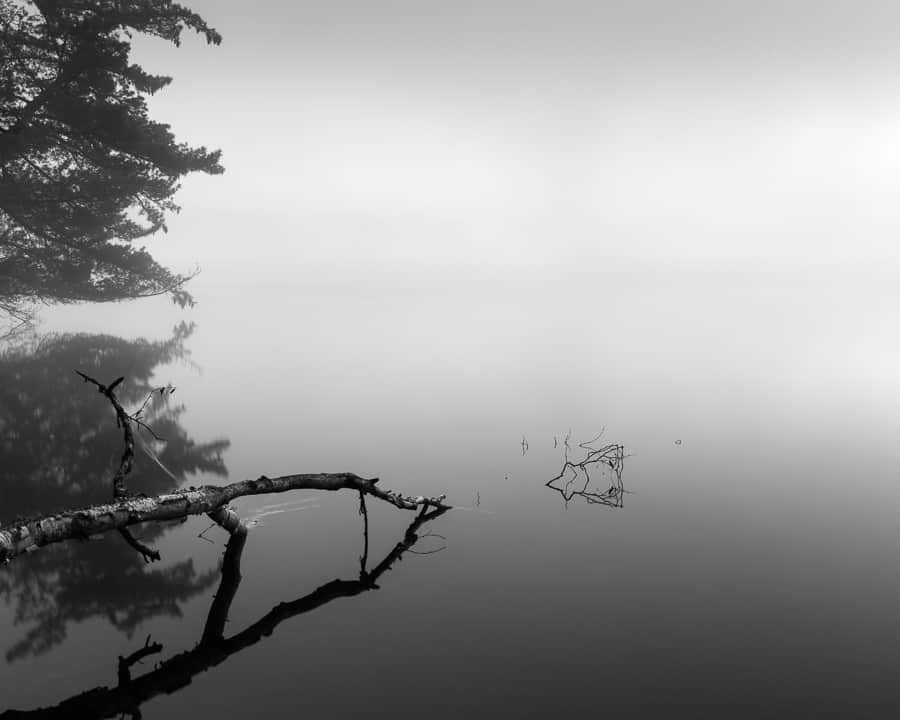
2. Isolate a Subject
Depending on how thick the fog is, you could use it to separate out subjects in your composition; some elements might be fully in view whereas others may be more hidden or muted behind the fog. Just as you would use other natural features – like a tree branch or rock ledge – to frame a subject in a composition, fog can be used to frame a subject by isolating that subject from the rest of the landscape like a solid backdrop of sorts. It can help eliminate distractions that otherwise would be present in the photo.
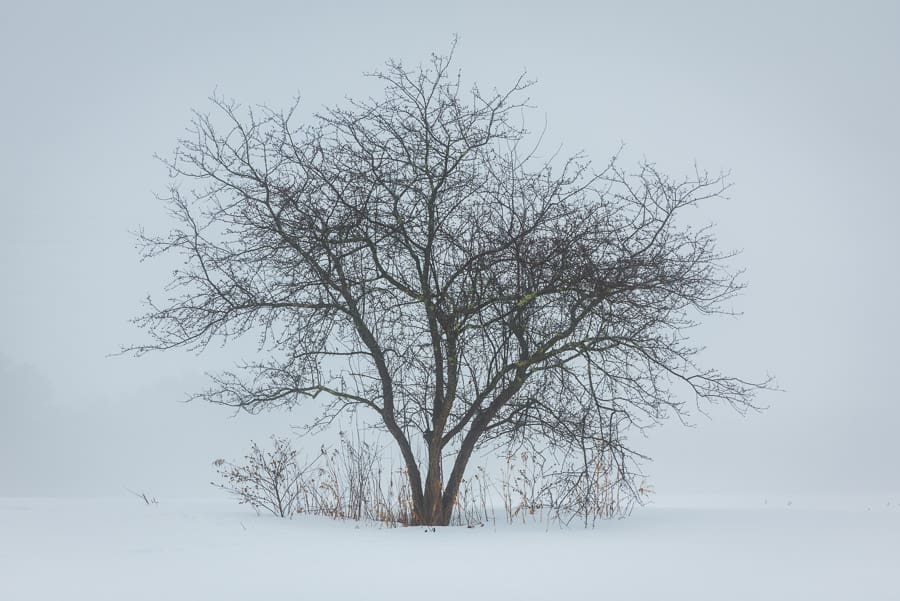
Another way fog can be used to isolate a subject is use it to create a silhouette. This effect can help tell the story of an image or give it that mysterious or calm feel as discussed above. To make a silhouette image, it is best to expose for the fog rather than for the subject. This way, the subject would be darker and silhouetted in the image, and the fog wouldn’t be overexposed.
3. Create Depth or Layers
One of my favorite ways to use fog in landscape photography is to use it to create a sense of depth. Sure, you can use a wide aperture (small f-stop number) to show depth by blurring out the background of a scene.
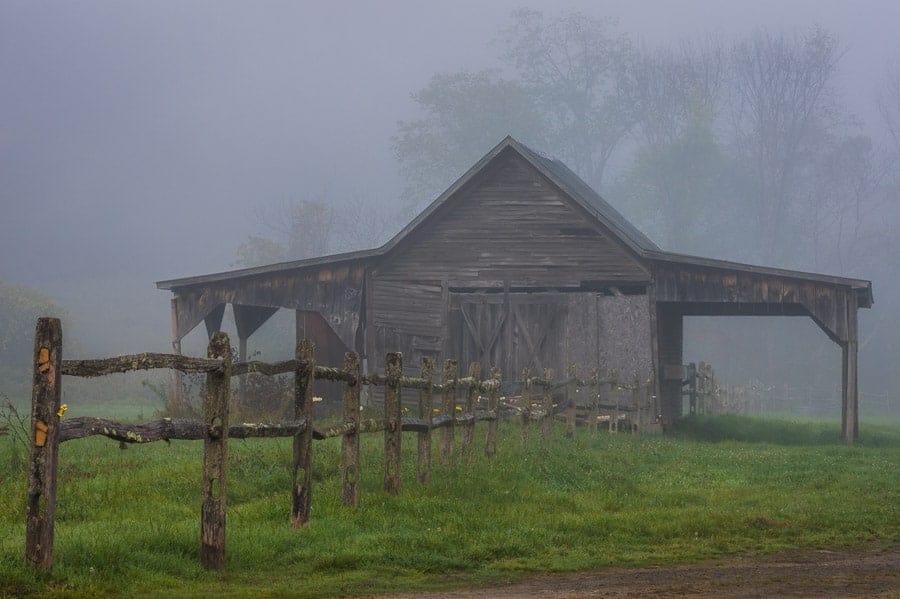
Fog, however, is nature’s way of providing a similar depth of field effect. Think about how a photo of a fence leading off into the distance provides perspective and the feeling of three-dimensional space. Now imagine that same fence on a foggy morning and it disappearing into the fog. The fog gives more of a sense of distance and depth in such a composition.
Fog not only creates depth in an image, but it can also separate out layers that might be otherwise compressed in the composition. A common example of this is using a telephoto lens to shoot trees in a forest at a distance. Using a telephoto would be a way to compress the scene, but fog can provide an atmospheric space between the trees, thereby creating a layering effect and a different type of composition altogether.
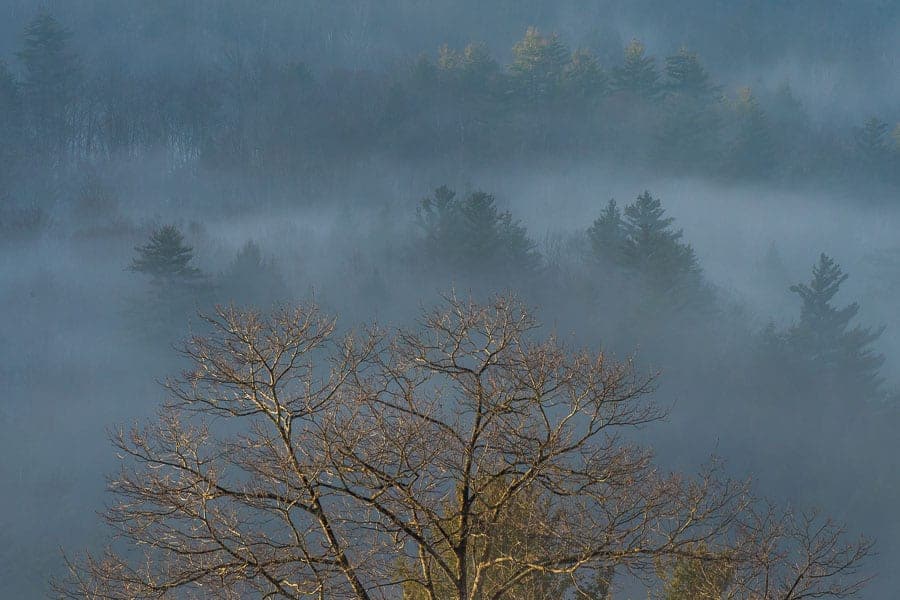
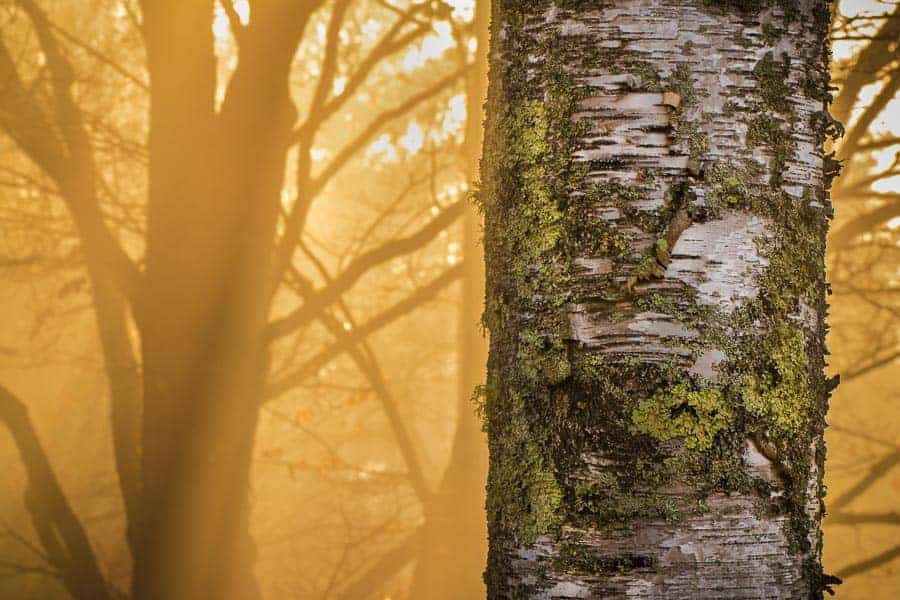
4. Emphasize Light
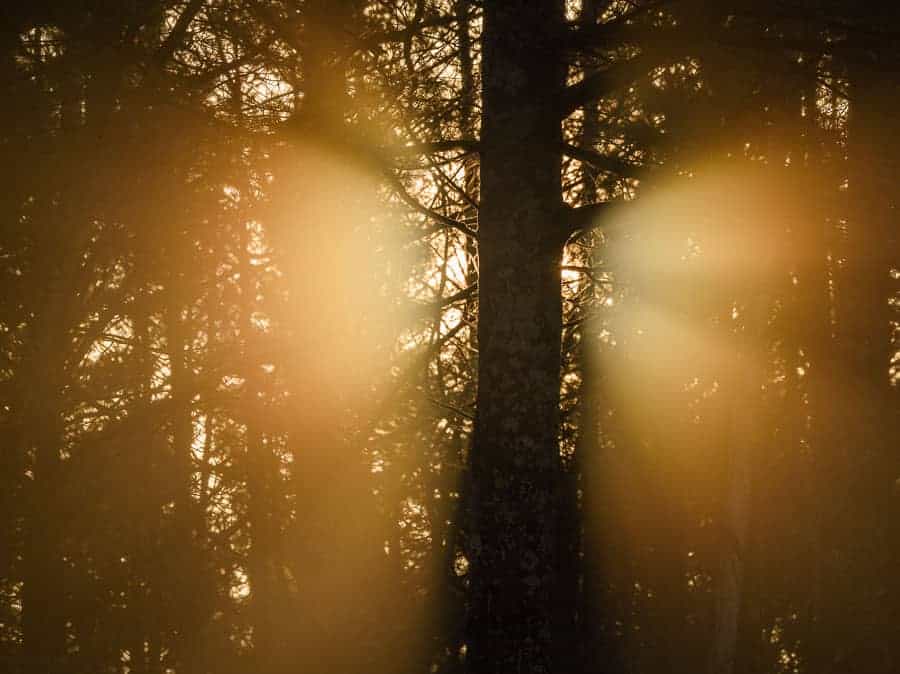
Another way fog can add interest to your photos is to use fog to emphasize light. Fog is basically water droplets suspended in air. These water droplets refract light, which depending on the time of day may result in sunbeams or rays or a really neat glow. Morning is the most probable time of day when you may get this really cool light effect with the fog. It often happens for just a moment, so you need to be watching out for it. As the sun rises and warms the air, the fog will tend to move around more, creating more opportunities for sunbeams and rays. Using fog to emphasize the morning light is also useful in creating silhouetted images.
When to Photograph Fog
It is fairly difficult to predict whether fog will form. Typically fog or mist forms overnight when the ground cools rapidly in a moist air environment. It also forms when cold, dry air moves over warmer bodies of water, and when warm air moves over colder surfaces. Fog is usually found in low-lying areas, like river valleys, and evaporates once the sun rises and warms the air temperatures. It can also be very specific to a location given the terrain, which is why weather apps may not always accurately predict fog. My advice? Pay attention to the weather conditions that may increase the odds of fog forming and be accept the fact that it can be hit or miss.
How to Photograph Fog
If you are new to landscape photography, be sure to check out my article on Landscape Photography for New Photographers. In it, I go into detail on the tips and techniques used in landscape photography. The techniques used in photographing fog are very similar to those that you would use in landscape photography, although fog has some of its own unique challenges, which I discuss more below.
Here is a quick summary of camera setting you should start with when photographing fog and the reasons behind them:
Use a tripod: the lower light and lower contrast in the scene will generally require slower shutter speeds, which is why a tripod is necessary.
Shoot in raw: fog can throw off your camera’s white balance, so it is best to shoot in raw so that you can adjust the white balance appropriately in post-processing. JPEG files are limited in the amount of editing you can do to a file without degradation of the quality of the image.
Use auto white balance: you will likely need to adjust white balance in post-processing, so I find it easiest to use auto white balance when shooting fog. That said you could also try using Kelvin mode to manually adjust the white balance in real time to try to get it to match the scene. While I find using Kelvin mode to be helpful in some conditions, I have found it to be difficult to use it well in the fog, so I end up just using auto white balance and raw file format.
Shoot in manual mode: I am a big proponent of shooting in manual mode in landscape photography. If you haven’t trekked into this territory yet, never fear! Landscape photography is a great way to start learning manual mode. That’s how I learned, and I am so glad I took the time to do so. You can slow down your process, unlike with wildlife photography or sports photography, and can take your time getting comfortable with changing the settings manually.
Start with the base ISO of your camera (usually ISO 100) to get the highest quality image. The aperture setting will depend on what your subject is, but because fog or mist gives depth to an image, I prefer to shoot at narrower apertures, such as f/14, to take advantage of the effect the fog creates. I then choose my shutter speed to correctly expose the image. Because of the low light conditions when shooting in fog, the shutter speeds will be a longer than on a bright sunny day. Keep in mind that the longer the shutter speed, the more likely you will capture any movement of the fog resulting in a more uniform look, which may make the image appear more washed out. To avoid this, you can raise your ISO and use a shorter shutter speed accordingly.
Challenges of Photographing Fog
Fog and mist can be tricky to photograph for two main reasons: autofocus and camera meters. The flat light and low contrast that it creates can make it difficult to use autofocus. Autofocus relies on finding areas of contrast, so your lens might hunt around trying to find focus. I usually use fog as an opportunity to practice using manual focus for this reason. If your camera has live view, I recommend zooming in on your subject to adjust the focus more accurately.
Another reason capturing photos with fog is challenging is because fog can mess with your camera’s internal light meter and underexpose an image. Camera meters measure reflected light rather than ambient light, and foggy conditions can make a camera think it is brighter out than it is. What’s the solution? Check your camera’s histogram and expose a little towards the highlights (aka expose to the right) without clipping them. You may have to increase exposure compensation by a stop or two.
Additional Tips
A few last pieces of advice:
1. Be patient! Fog is dynamic; once you’ve found your composition, wait for the fog to move and swirl to get the effect you desire. You may end up with several different compositions of the same subject simply because of how the fog changes over time.
2. Try a timelapse. Since fog is slow moving, it makes a great subject for timelapse photography.
3. Beware of moisture. Fog is by definition a moist environment. Make sure to bring along a lens cloth and microfiber cloth to keep your lens (and camera body!) clean.
What are your favorite ways of using fog or mist in your landscape photography? Please share below!
What an awesome tutorial. Makes me want to grab my cameras and run for the fog. Too bad there’s none around me right now…
Glad to hear it (that you were inspired)! Hope you get some fog soon so you can practice!
I truly enjoyed your instruction in this lesson! Learned some things too! Will be looking for opportunities to implement the lesson. Thanks!
Terrific! I’m glad to hear it was helpful. 🙂
I tried photographing fog and was not successful all the time – mainly due to white balance issue – will try with auto – very nice tutorial – also getting a confirmation of the composition suggested by you – thank you
Yeah, white balance can be tricky. The image can turn out too blue or too yellow. For some reason, I find adjusting the Kelvin while in the fog to be difficult. I’m not sure if it’s the LCD display or my eyes that are playing tricks on me ;). Best of luck!
Very young and good ????????????????
Thanks!
Fog and mist are without a doubt my favourite conditions to photograph in. I like to simplify the scene as much as possible but leave a small hint of the background visible. I find it enhances the mystery of the image more than just a blanket of white fog.
Absolutely!