

Tripods just might be the most abused gear we photographers own. We take them out in bad weather, stick them in mud and salt water, use them in wind-blown sand and driving rain. We bang them around in our car, sling them over our shoulder while hiking and strap them to the outside of our packs, where they sometimes crash into tree limbs and rocks.
We take our tripods for granted. Good ones are pretty durable and rarely have problems. But, when a problem occurs, can you troubleshoot and fix the issue or will your photoshoot come to a crashing halt?
An ounce of prevention
There are several things you can do to keep your tripod in tiptop shape and prevent some problems from developing.

- Keep it clean. If you’re a landscape photographer, your tripod is going to be exposed to mud, sand, and dust. After your shoot, as soon as you can, clean off your tripod. That may help keep grit from getting into the locking mechanisms of the legs. Keep a rag in the car or in your pack and wipe down the tripod legs in the field before closing them up. If you’re at a beach or in sand dunes, your tripod may need more extensive cleaning. When I was in Iceland, after shooting at black volcanic sand beaches, I set up my tripod in the shower, with the legs fully extended, to wash off the accumulated salt and the grit, and then let it dry overnight. And speaking of dry . . .
- Let it dry out. When you’re out in bad weather, crashing surf or near a misty waterfall, your tripod is going to get wet. To avoid corrosion and other moisture-related problems, dry off your tripod (that rag will be handy) as soon as you’re out of the wet environment. If you’ll be at home or in a hotel that night, fully extend the tripod in your room and let it dry completely. Take off the rubber feet at the bottom of the legs so the inside of the leg tubes will dry completely.
- Perform regular maintenance. Like an automobile, tripods benefit from regular maintenance. You periodically clean your camera’s sensor and wipe down the LCD screen. It’s worth doing a visual inspection of your tripod every now and again and testing the tightness and function of the leg locks.
- Yearly cleaning. There is apparently an old law in Kentucky that requires citizens to bathe at least once a year. The same should be true for your tripod. If you regularly use your tripod, taking it apart and cleaning it yearly is a great idea. Although it may, at first, seem intimidating to start fiddling with all those screws and bolts and washers, it’s really pretty easy. Brent Bergherm has a great video tutorial on Improve Photography Plus showing how to disassemble and clean a tripod.

The How and the Why
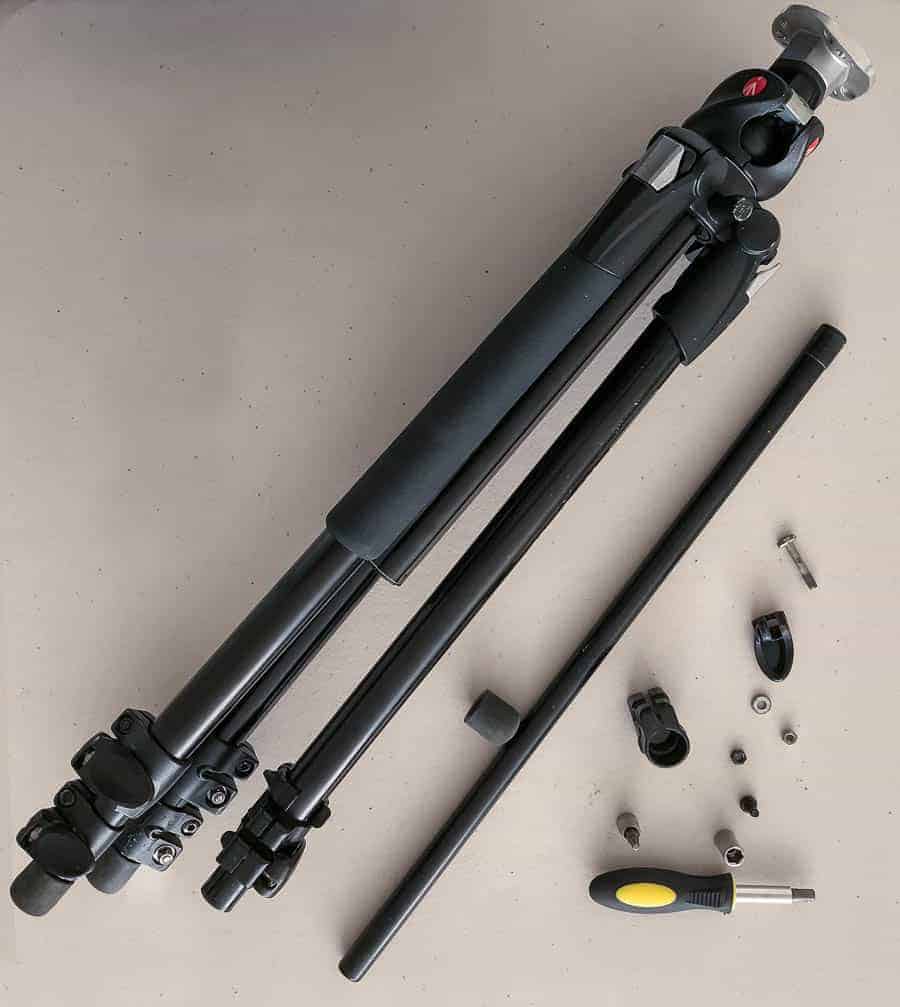
Most big tripod manufacturers have cleaning instructions available online and there are myriad how-to videos on You Tube that cover just about all of the major models of tripod. It’s worth finding out how to clean and maintain your tripod, even if you have no intention of actually doing yearly maintenance. Here’s why: If you run into a problem in the field or even in a studio situation, it will help to have some familiarity with how your tripod functions and to have the necessary tools on hand. Most tripods come with an Allen wrench, which may be all you need. However, some tripods may also require more esoteric tools. You don’t want to be in Iceland, have a leg lock problem and only then realize you need a T25 Torx bit socket (like the Manfrotto 190XPro requires)*. Believe me, the hardware stores outside of Reykjavík are few and far between!
These days, I mostly use a Feisol CT 3442 Tournament tripod (see Improve Photography’s Recommended Gear section for more about this little gem). I’ve printed out the excellent cleaning instructions from the manufacturer and always have them and the two Allen wrenches in my camera bag . . . just in case I need to tighten or take apart something. I previously used and still have the Manfrotto and had to buy the T25 and an 8mm sockets that were needed to disassemble the leg locks. They were in my bag whenever I traveled with that tripod.
Tripods generally have one of two different types of leg locks: twist locks or clip/snap locks. The twist type, like on my Feisol, unscrew. My Manfrotto has the snap locks which, as I mentioned, require other tools.
It’s a good idea to place your tripod on a light-colored surface before you start to take anything apart. This way you can easily see and keep track of the pieces. Do this in a place where a small piece won’t roll off the surface and fall onto the carpet or floor, where it can hide.

For my Feisol twist locks, I simply unscrew each until the lock comes off the upper leg segment, then slide the bottom leg segment out. Pay careful attention to the pieces inside. There are a number of C-shaped compression rings that fit in a particular order (see photo). Slide them off and set them aside in the same order. Once you’ve taken apart the problematic joint or the entire leg, clean each component and let everything dry. Pay special attention to cleaning the threading on both elements of the twist lock, as grit and sand are often attracted to the threads. In Brent’s video, he uses an inexpensive artist’s brush to clean the threads. An old toothbrush will work just as well. Add a small amount of lubricant to the clean threading and reassemble. You should be good to go.
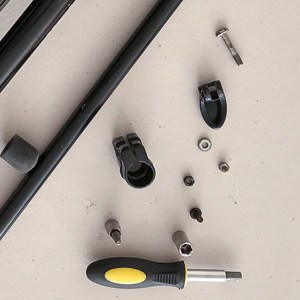
For snap locks, the procedure is different and you may need special tools. For my Manfrotto, I need both that 8mm and the T25 socket and a socket wrench to unscrew the bolts holding the snap lock to the tripod leg. Once the bolts have been removed, the lever and the tubular lock will come off and the lower leg segment can side out (see photo). Clean all parts and reassemble. As you put the legs back together, make sure the snap locks all line up in the same orientation. I like to work on one leg at a time, so I always have at least one fully assembled leg as a model. As you screw the snap locks back together, adjust the tightness of the screws to change the amount of tension on the lock and the amount of force needed to open the lock.
The spot where the tripod leg connects with the spider can get loose. Usually, tightening the joint with the right Allen wrench will tighten it up. If you have to take it apart, that can be easy, as with my Feisol, with just a couple of pieces and an Allen wrench. Or it can get more complicated, as with my Manfrotto, with other tools, a spring, and other parts. Check manufacturer’s directions before you try to take the joint apart.
Most tripod manufacturers will recommend a specific type of lubricant—graphite powder, silicone grease or marine grease, for example—and it pays to have a small amount of that handy. Lubrication only requires a tiny amount, so get the smallest size available. The 8-ounce tube of marine grease I bought will last me about a thousand years!
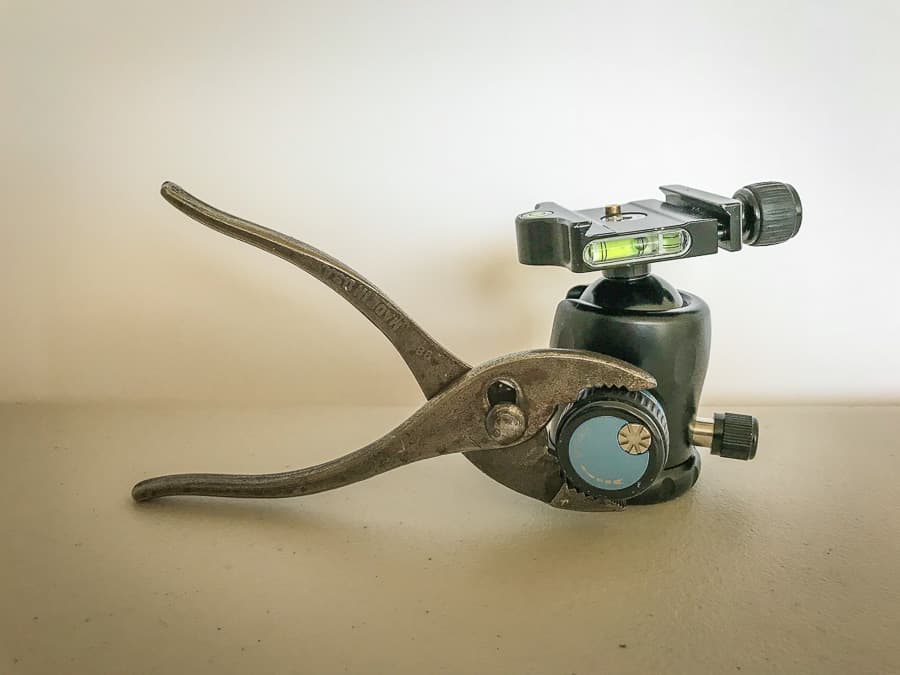
I also keep small, slip-joint pliers in my bag. I have a Sirui K20X ball head (see Improve Photography’s Recommended Gear section for more about this head). If I overtighten the friction control knob that locks down the ball head, the rubber grip around the knob will turn, but the knob won’t. Then I need to use the pliers to free up my ball head . . . until the next time I forget and overtighten it.
Common tripod problems and solutions
Loosey Goosey
Perhaps the single most common, and most annoying, problem with tripods is when something gets loose. Maybe a leg lock isn’t holding like it should. Maybe the connection between the leg and the tripod spider (that piece to which the legs attach and which supports the head) is getting loose and the legs won’t completely lock into place. Maybe there’s a loose connection to the tripod’s center column or center insert that’s making things wobbly.
Those are the easiest problems to fix in the field, assuming you have the right tools. Once you’ve identified where the problem is, a quick twist with the right tool and you’re set to go! I’ve also had leg connections and center columns get a little loose at the spider but could easily tighten them up with the right Allen wrench.

If you can’t tighten the leg lock, or it appears to be broken, you might want to duct tape the leg section in its extended position. It’ll make carrying and setting up your tripod a bit awkward but, with a bit of extra care, you can still use it. Duct tape also works if you’ve broken a leg lock and/or lost some of the parts. The tape will keep the leg reasonably stable until you’re back in a place where you can take it apart (as described above) and really fix it.
If a part gets loose more than once, however, it may be a sign of a more serious problem brewing. Time to do some serious cleaning and maintenance, once you are back home.
In the Lock Up
The opposite problem is when a part of your tripod, most often a leg lock, binds up and won’t move. Sometimes, the slip-joint pliers can fix that. Gently press the jaws of the pliers around the leg lock and twist, pull or push, depending on the type of leg lock. Don’t grab or pull too hard, or you risk breaking the leg lock.
If you think some grit or sand has gotten into the threads or locking mechanism, you might try pouring a little water from a water bottle onto the lock, which might dislodge the particles.
If it’s completely seized up and you can’t get it free, then you may have to live with it until you get back home or to your hotel and can take it apart and clean the individual parts (see above). Having one frozen leg section is an inconvenience but it won’t stop your shoot.
Follow this thread
I once had a store-brand carbon-fiber travel tripod and ball head from one of the big NEW York camera stores. On a trip to Italy, the threads in the bottom of the ball head broke. There was a metal sleeve that contained the threading and it just cracked and fell out. I couldn’t attach the head to the tripod for the rest of the trip. That sucked! I got a replacement part from the store once I got home, but what do you do when the threading fails on a screw or in the hole the screw goes in?
If it’s just a little loose, try wrapping the screw or bolt threads with tape (I once used paper first-aid tape) and then try screwing it in. It may provide just enough tension to hold the piece together.
Follow your inner MacGyver
We’ve covered the most common issues with tripods failing. However, there are no limits to what can go wrong or to the creative fixes that enable you get by. Maybe you forgot to pick up the tripod when loading the car and ran over it. Broke a tripod leg when it fell off a cliff and landed on rocks? Perhaps a hiking pole or small tree branch and some duct tape could act as a splint and hold the leg together long enough for your shoot.
What were your traumatic tripod tragedies? How did you MacGyver your way through the situations?
*The current version of the Manfrotto tripod mentioned in the article is the 190CXPro4. I have an earlier model, which is slightly different.
After wandering a lot here which will let you enjoy free online games as these games you can enjoy online directly without facing any kind of process or downloading in your android phones. Have a visit for once surely you will be loving these games.