
 Nothing catapults the quality of portrait photography quite like off-camera flash – and few lighting setups impress quite like clamshell lighting. If you want your headshot and portrait photography to jump to the next level with minimal gear, minimal cost, and minimal complexity then clamshell lighting might be just the thing you’ve been looking for.
In this article, I’m going to make the case that, while there are hundreds of possible lighting arrangements of varying complexity, clamshell lighting is one of the best lighting setups available to the average photographer. We’ll discuss why photographers should be using flash, why they should be using off-camera flash as opposed to on-camera flash, what kind of gear I recommend for the average flash photographer, and how to understand and implement clamshell lighting.
Let’s get started!
Why use flash at all?
It seems like more and more photographers these days label themselves “ambient-light-only” photographers – a label many wear as a badge of honor. Indeed it is quite a skill to be able to walk into a scene and create solid, professional images with whatever light is naturally available. However, as photographers who want to step up the quality of our work we have to be willing to accept the fact that the ability to create a proper exposure in ambient-light settings is really a minimum requirement in photography; it really is a basic skill which should be developed very early on in a photographer’s career. It takes time to master the process of acquiring proper exposures in ambient light, but those who are ready to take their photography to the next level must move on to the next phase of photographic growth by controlling not only the camera which captures the light in a scene but the very light itself:
Flash Photography
There are several drawbacks present when a photographer is limited to the exclusive use of ambient light. First, ambient light isn’t always available. When we talk about ambient light we almost always are referring to sunlight, moonlight, or constant light sources in street photography. As far as sunlight and moonlight go, the weather is a major deciding factor for the ambient light photographer: Clouds cover the sun and rob photos of their drama. Storms roll in and rob photos of almost all light. Rain ruins photo sessions 9 months out of the year for some photographers in certain parts of the world. The ambient light photographer is held captive by weather.
Secondly, ambient light isn’t always sufficient. Sometimes the ambient light is just too dim (bad weather, bad location, etc…). Sometimes it’s simply facing the wrong direction (client availability/choice of location sometimes puts the sun where the photographer isn’t positioned best for lighting/background options.) Other times ambient light photographers chase the right kind of light but end up in bad locations as a result.
 Thirdly, ambient light doesn’t care about your schedule. They don’t call it “Golden Hour” for nothing. If you want that beautiful, golden sunset light you have almost exactly one hour before the scene starts to get too dark… and fast. That doesn’t leave a lot of room for error. Clients are sometimes late, kids get fidgety, and the light just vanishes. The best ambient light of any given day typically shows up an hour after sunrise and an hour before sunset. The ambient light during most of the rest of the day is hardly usable (unless you’re shooting with window light, which can be absolutely beautiful). That leaves too much white space on a photographer’s calendar, in my opinion.
Incorporating something as cheap and easy as flash to your photography remedies each and every one of these shortcomings faced by ambient-light-only photographers. While ambient light isn’t always available, flash is always available. As long as you’ve got charged or fresh batteries ready to go you can always light a dark scene with flash. While ambient light isn’t always sufficient, flash photography is highly adjustable and controllable. Output power can be adjusted, light positions can be adjusted, and multiple lights can be added to a scene to apply light exactly how and where a photographer wants. The control afforded to flash photographers really can’t be overemphasized – but there’s more: Try taking that flash off the top of your camera.
The case for off-camera flash vs. on-camera flash
 Adding flash to your repertoire is a huge milestone and a great way to step up your game quickly. However, what’s even better than slapping a speedlight onto your hotshoe is slapping a wireless transmitter onto your hotshoe and placing that speedlight off-axis from your camera.
What I mean by off-axis is this: Imagine that you are taking a person’s portrait. Your subject sits in front of you on a short stool and you place your camera lens at eye-level to your subject. If your flash is sitting on top of your camera your subject will be washed in a very flat, featureless light. Essentially, your light source is on the same axis as your lens, as they relate to your subject. This tends to erase the shadows that we typically look for on a person’s face to identify texture, contours, and features. What we’re left with is a very stunned-looking, featureless face with very little contour apparent in the image.
Imagine now, however, that your speedlight is 45 degrees above your subject and 45 degrees to one side of them, pointed directly at their closest cheekbone. Now when you take the image there will be contour, texture, and feature apparent on your subject’s face because there are interchanges of both light and shadow dancing across their visage. This makes for much, much better photography. Some photographers rarely remove their speedlights from the hotshoe atop their cameras but, rather, turn the speedlight to send the light in a different direction to bounce back at their subject from a nearby surface. This is called bounce flash and is a topic for another day. In this article, I will heartily encourage you to get that flash off the top of your camera.
For more information on off-camera flash, read this article.
 Clamshell Lighting as a Concept
 Clamshell Lighting as a Concept
One way I love to get my speedlights off the top of my camera is a method called “Clamshell Lighting”. Clamshell lighting, in essence, arranges two light sources around your subject: One in front and above, one in front and below. This creates a veritable “clamshell” of light in which a subject is lit.
Clamshell lighting is one of the three lighting arrangements I teach to my introductory photography students, the other two being direct lighting and Rembrandt lighting. Direct lighting is exactly what it sounds like: a single light source is placed directly in front of the subject but slightly above their eye level. This highlights the forehead, cheekbones, nose, and chin of a subject – but is typically not flattering. Rembrandt lighting also employs one light source but places it 45 degrees above the subject and 45 degrees to one side. This cast light across the features of one half of the face and shadows across those of the other side, leaving a telltale ‘triangle’ of light on the opposite cheek. This is a very classic lighting arrangement (named after the famous Dutch painter Rembrandt Harmenszoon van Rijn who popularized the style. It is not, however, a very glamorous light on the face and can be a little moody if care is not taken.
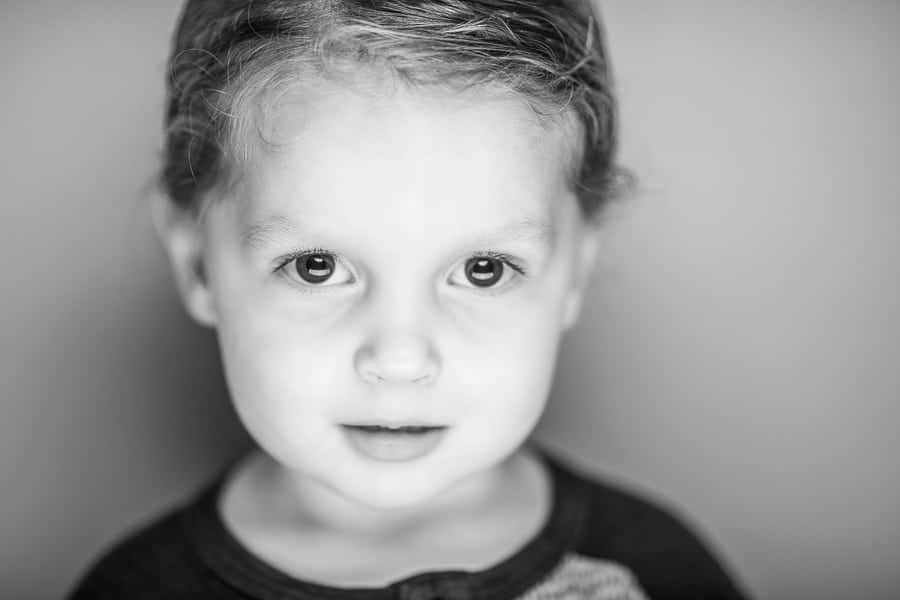
Clamshell lighting, however, utilizes two light sources – arranged as discussed above and following – and is extremely flattering and glamorous (if so desired). It is a very simple and versatile style of lighting which casts the majority of its light on the main features of the face that we’re used to looking for: the eyes, the nose, and the mouth. When combined with a wide aperture such as 1.4, 1.8, or 2.0 a very cool 3D effect can be achieved in clamshell portraits. Typically, clamshell lighting is used for intimate headshots because of the nature of the lighting arrangement. However, it is possible to use this arrangement to photograph more complex, intimate scenes.
Gear Needed
 For this light arrangement you will need two light sources (however, a single light source and a reflector will work in a pinch.) A strong main light above your subject could be bounced back up from below with a pop-up reflector or a piece of white foam core in the subject's lap or on a table in front of them. Tri-fold reflectors do not work very well with this setup, though, as they tend to ‘wrap’ the light around your subject a little too much. The goal of clamshell lighting is to highlight the prominent features of the face while allowing the less prominent features to melt away into the background. For this reason, it really is better to have two individual light sources.
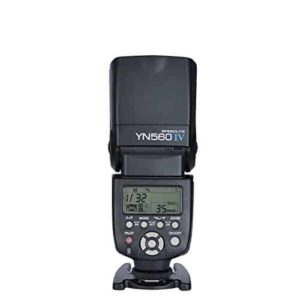
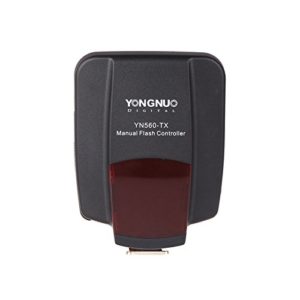 For this type of portrait lighting I strongly, strongly suggest the simple and inexpensive Yongnuo YN560IV speedlight. If you’ve done any serious investigation into the attitude around here at Improve Photography you know that almost all of us are crazy about these little lights. They’re cheap but not cheap, they’re light, and they just work. Plus they have built-in receivers so they pair very nicely with the Yongnuo YN560TX transmitter, which I also recommend. Our very own Brian Pex has written two incredible articles on these two pieces of kit which have been so popular they actually rank higher with Google than the actual online manuals from the manufacturer. Bookmark his articles here and here and come back to them when your speedlights come in the mail.
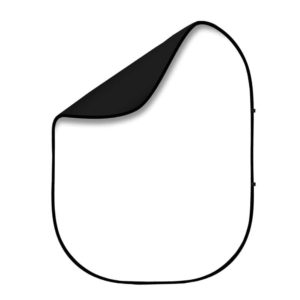 In addition to the lights and transmitter, you’ll also need some sort of background. Realistically, you can use anything you’d like. Blank or textured walls work great, patterned walls such as brick or shiplap give portraits character, or you could even have your subject stand out in the open late in the day for a dark, natural backdrop. I personally like to use a pop-up background I can take on-location with me and set up in seconds. Just keep in mind that the farther your light is from your background the darker your background will be. (We refer to this as the Inverse Square Law. All you need to know when it comes to buying a white background is that a white background in a clamshell lighting setup will often look gray unless it has its own designated light. Keep this in mind.)
 You’ll also need some light stands to hold those shiny new speedlights of yours. I, personally, do not own a C-stand but highly recommend one for anything involving overhead lighting like this. I make do because I have a personal method but life would, in all honesty, be much easier with a C-stand. This one comes highly recommended to me. I also recommend this short stand to support the lower light in the arrangement. It gets very low to the ground which is great for photographing children or subjects sitting low to the ground.
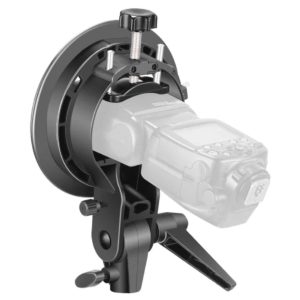
You’ll also need some sort of bracket to mount your speedlights and modifiers to your light stands. These come in many shapes and sizes but, when I can, I like to use these very unique speedlight mounts. They don’t work with every type of modifier but, when they do, they’re sturdy, quick, and I can leave the little “feet” on my speedlights – which I often use for my real estate photography work.

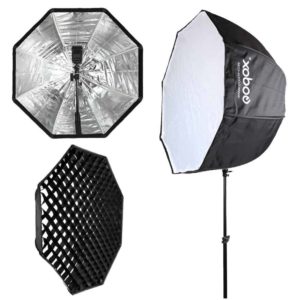 Finally, you’ll need some light modifiers. This is a can of worms, I know. Everybody has their favorite light modifiers – and I’m no different. I cut my teeth on shoot-through umbrellas and they’re great. They’re dirt cheap and they, inexplicably, often last forever. They work very well, so don’t be afraid to only spend twenty bucks on a set of shoot-through umbrellas. Take care of them and they’ll take care of you. You could also use a beauty dish, and octagonal softbox, a square softbox, strip boxes, etc… The list goes on and on. For the purposes of this article, I’ll be using a 32” Octagonal Softbox and an 8.7” x 35.4” Strip Box. These are my go-to modifiers for all things portrait (the strip box being my favorite modifier of all time.)
Different Types of Lights in a Scene
For the purposes of this tutorial, we should discuss three elements of our lighting arrangement. In clamshell lighting, there are actually three types of light. First, the Key Light (or main light.) This is the primary light source for the scene and provides about 70% of the light on your subject. For this tutorial, our 32” octagonal softbox will be our Key Light. We’ll set our Key Light to light the face appropriately but then we’ll need something to fill in the shadows created by our Key Light on the face and neck of our subject. Enter the Fill Light. This is going to be our 8.7” strip box. We’ll angle this up at our subject from below and fill in the shadows created by the Key Light. In essence, these two lights create the two halves of the “clamshell” of light we’re building around our subject’s face and complete the light arrangement… but there’s one more very, very important detail to discuss:
 The Catch Light.
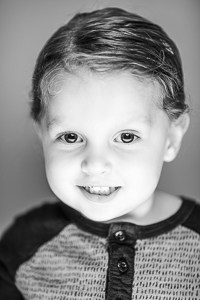
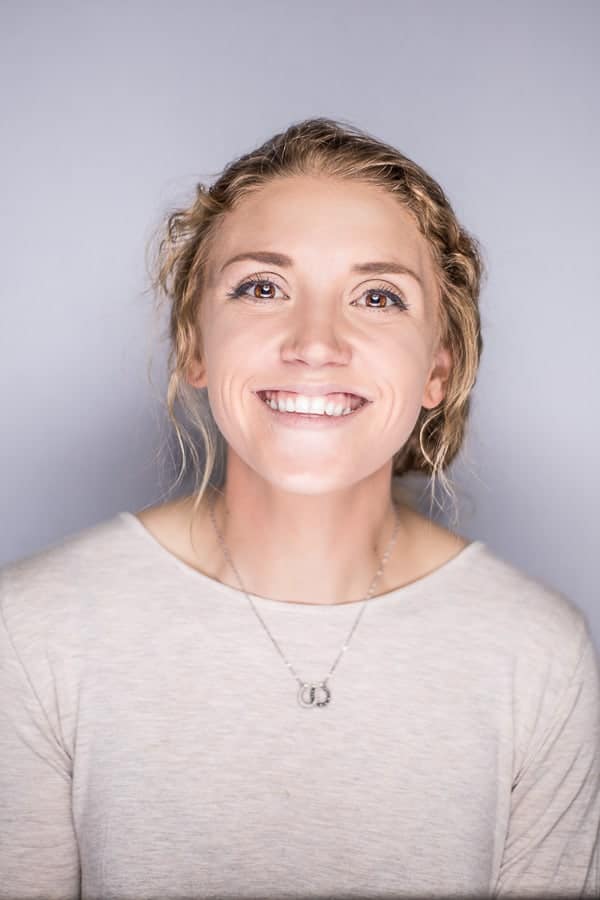
The Catch Light is the key to an amazing portrait or headshot. Essentially, the Catch Light is the reflection of the lighting of a scene in the eye of the subject – the specular highlight which shows up in the iris of the subject’s eye is a reflection of the light sources in a scene and can either make or break a photo. This is why I, personally, love the combination of an octagonal softbox above the subject and a short strip box below them. The reflection in the eye of my subject is, I think, extremely appealing – especially the shape of the strip box, which bends and distorts to follow the curvature of the iris. Your choice of modifier doesn’t matter much, in all honesty, but remember: the only bad catch light is no catch light. Get some reflection in those eyes and the drama in a portrait shoots from 0 to 60 in no time flat.
Setting the Scene
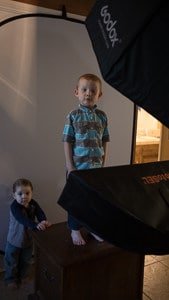 So now that you’ve got all your new goodies unpacked and laid out on the kitchen table, how do we set up this shot? Let’s start by building our light stands. Depending on the modifiers you’ve chosen you might have to set up your brackets and speedlights first. (Pro Tip: After you’ve set this whole thing up once, only tear it down as far as you need to. There’s no sense in breaking down your lighting setup all the way if you don’t have to. If you own a home studio, keep this lighting setup built and towed in a corner. I, personally, hate taking down my strip box because they are almost impossible to put together. I leave mine fully set up in my bedroom closet at all times so I can just grab it and go when I need to.) Once you have your two light stands built, turn on your speedlights and position the light sources in front of your subject. Depending on the mood you’re trying to convey with your images you’ll have to determine for yourself how far away you want to position your lights relative to your subject. Let’s start by placing the Key Light about 3 feet away from the subject’s head with the center of the Key Light pointed directly at your subject’s forehead at a downward 45-degree angle. (Make sure your light stand is stable and supported so that it does not fall over or onto your subject. Orient one of the tripod legs to point in the direction the stand wants to lean and support with some sort of weight like sandbags or your camera bag.)
 Next, arrange your Fill Light opposite your Key Light – about 3 feet away from your subject pointing up at your subject’s upper lip at a 45-degree angle.
Now, turn on your transmitter and start by dialing in your Key Light’s power. To do this, turn off the speedlight in your Fill Light Modifier. Now only your Key Light should be powered on. My personal method for setting my exposure is as follows:
-ISO turned as low as possible (ISO 100 for my 5D Mark IV)
-Aperture set at 1.8 (Using my favorite lens, my Canon 135mm L Series f/1.8 prime.)
-Shutter Speed at max sync speed (1/200 sec for my 5D Mark IV)
-Key Light set to 1/32 power
-Fire a test shot and evaluate.
Next, we’ll power up our fill light. However, this time we’ll have an idea of where our power setting will need to be. One of the keys to success in clamshell photography is to keep your Fill Light about two ‘bumps’ darker than the Key Light. This ensures that you don’t end up looking too ‘underlit’, which can make a photo look a little Halloween-esque and uncomfortable. In the example above, assuming that my Key Light is giving me a good exposure at 1/32 power, I’ll set my Fill Light two bumps lower which, on a YN560IV speedlight happens to be 1/128 power. In my personal workflow for clamshell lighting, I just happen to know that I like the way this exact setup looks at these power settings with this lens and this exposure. I no longer have to take test shots because I set the shot up the same every time I do it and I adjust as I go.
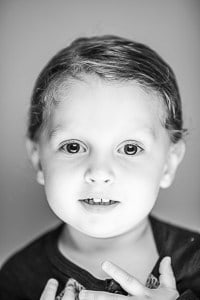
 Now that our lights are set up and ready to go I will try to verbally guide my subject to orient their face so that two things are happening: First, I want their eyes to be the focal point of the entire image, so I will make sure I’m using a single auto-focus point (the center point is usually the sharpest) and focus on the nearest eye (there’s always one that seems a bit closer depending on how your subject holds his/her head.) If nothing else is in focus, that’s fine – as long as the eyes are tack sharp. First, I’ll have them tuck their chin and look slightly downward while keeping their eyes fixed on me. This will bring their eyes and some of their nose into the focal plane. Virtually everything else will melt away into the background, which is visually very captivating. After I’m happy with that image I’ll direct them to look up slightly until their mouth enters my focal plane along with their eyes. What I’m doing is putting their eyes and their mouth at an equal distance from my lens so that I can get their smile and their eyes in focus while everything else goes out of focus.
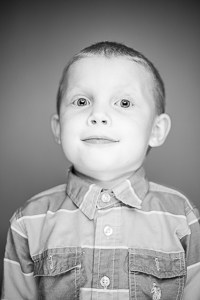
These two shots alone will usually be the best shots of the session – after I’ve verified that those are in the bag I’m free to get creative.
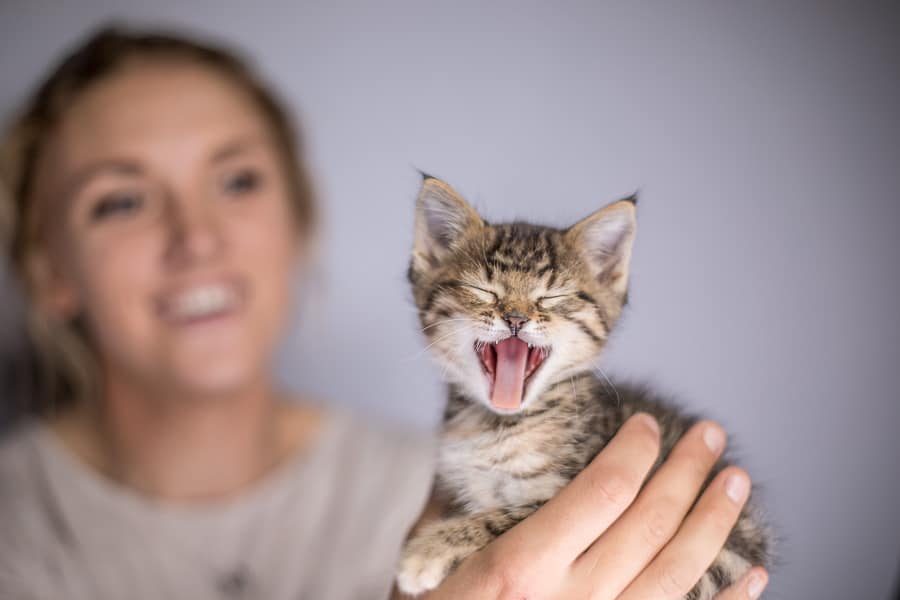
I think you’ll find as you experiment with this lighting arrangement that the images are quite stunning and unique. I recently undertook two projects (an entire elementary school picture day and a family portrait session) using this arrangement and I was very, very pleased with the results. I hope you will be, too!
(A special thanks to my wife, boys, and cat for letting me use their images for this article. Aren't they beautiful!?)
Until next time!
This is known to get the chrome browser.