
Framing is an incredible experience. If you have never had an opportunity to frame your work, you should try it. Take one of your absolute favorite images, print it (as with all things photography – the bigger the better), and have it framed. Either learn how to do it yourself, or take it to a framing service. Either way – frame your image!
When you step back and look at it, there will inevitably be such a rush of excitement and pleasure that comes from seeing your image in a frame that you will, like myself, become mildly or incredibly addicted to the process. Something about seeing an image that you painstakingly captured, edited, had printed, and set inside of a frame to be placed on a wall or other surface for all the world to see, in perfect view for all who will walk by gives a wondrous sense of finality to your image. It is finally home.
I’ll be honest: the first time I framed some of my images, I teared up. I had worked so hard to get them to where they were, and then I had to spend far more money than I anticipated on the frames. I was crying because I was broke.
Framing prints is expensive.
This doesn’t change my previous sentiment, however. It is expensive (especially if you utilize a service to do the framing), but man, oh man, oh man, do your images look slick once they have been framed. So, what follows are some tips and tricks for framing without breaking the bank. As with all things there will be exceptions to these rules, and they will themselves run on a spectrum dependent on your location and particular photographic journey.
For the most part, the following tips assume that you are taking the images to a service to do the framing for you, so I will focus on ways to find the frames themselves for cheap. However, there are a couple tips that deal with the actual process of framing and how to limit those costs (spoiler alert: it requires an investment).
Tip #1: Watch for deals!
If you live in the United States, keeping an eye on Michael’s frame inventory is a great idea. Undoubtedly there are going to be similar deals in crafts stores around the world, so spend some time investigating local shops and ask how often they run deals; Michael’s frequently run BOGO (buy one get one) deals, for instance.
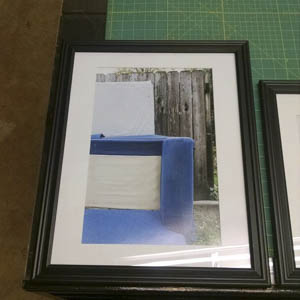
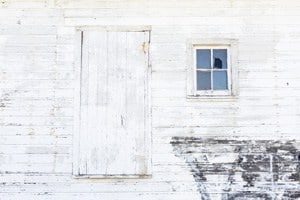
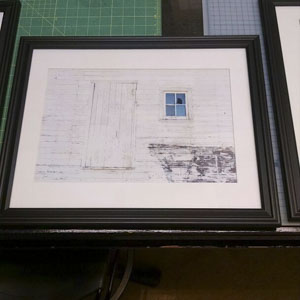
I was preparing several photographs for an exhibition recently, and I needed to purchase four frames. I ran to the local Michael’s, and almost every frame they had in store was part of a BOGO offer – you buy one frame, you get a second one for free! Cell phone photos of some of those images are what I use as examples within this article.
As a result, I was able to frame all four of my images for the cost of two frames. What could have been an $80 purchase was only $40. Okay, $45 because I threw in some candy at the cash register, which leads me to my second tip:
Tip #2: Avoid impulse buys!
If your “money personality” is that of a spender, you understand how difficult it is to avoid the impulse buys. Clever marketing, beautiful photography, and catchy phrases dull your senses to the silliness of refusing to wait before purchasing product – a better deal will always come along. This is especially true if you are at a big box retailer such as Hobby Lobby, Michael’s, Target, Walmart, or online at Amazon. Rarely do any of those retailers get product that is so unique it will never be marked down.
Tip #3: Keep it simple!
We are all photographers. This means that we are all visual people. This means that when faced with a choice between a $60 frame with a really beautiful and ornate design, and a $15 frame with a simple plastic border, we almost always gravitate towards the former. However, when it comes to helping your work shine, you should remember that simpler frames will (generally) give more focal power to your photograph. You want people looking at your image, not at the beautiful frame. The frame should complement the image, not overpower it visually.
The best part about keeping it simple is that you will almost always walk away with cheaper frames!
Tip #4: Shop around!
We like consistency. This is a (mostly) undisputed fact of general human tendencies. Companies like Target, Walmart, and McDonald's have spent millions of dollars learning how consumers (that’s you!) think, and have based their business models around one driving theme of human behavior:
we do not want to change how we do things.
If you have, until now, always purchased frames at Walmart, do some research into other retailers that sell frames by you.
This goes beyond specific retailers and into types of retailers as well – always shop online? Keep an eye on your local brick and mortar shops. Always shop at big box stores? Keep an eye on the small local stores as well. Everyone is competing to try and get a piece of the pie (your money), so make them have to work for it. Believe it or not, most everyone has the lowest price for a frame at some point in time. Don’t let yourself get trapped into only going to one place because of the convenience.
This author just recently found out that even Ikea has some beautiful, clean, simple frames! That is a store that until researching this article, I had never associated with framing (though may bee another photographer's go to shop). Research, research, research. You have no idea what you will find to help you save money.
Tip #5: Print in standard sizes!
Take some time to get to know the standard sizes for frames. At least have quick access to the information (yes Google, but consider if you don’t have your phone or smart object with you, how will you know?!). Be honest with yourself, though, you do not want to have to google standard frame sizes every time you are trying to figure out how large to make your image. If you print online through a lab or through a box store, you are often given the standard options, but if you start printing for yourself you should know what to expect.
If you print a custom size, getting a custom frame can exponentially increase the cost.
Tip #6: Learn to do your own framing!
I am a big believer in being able to have your hands all over the process of your image from creation to conclusion (not physically touching the lens or print, of course). I think that you will start to appreciate your own work more, and you will develop a deeper affection for the art, if you are actively involved in the process the entire way. Because of this, I think you should learn to do your own matting and framing.
Now, this tip might seem a little incongruous, because good mat cutter (such as this Logan Graphics cutter) are expensive. But, purchasing mat board, cutting it to size yourself, and then framing your own work will save you so much money, because you will not need to outsource that work to a service. If I am totally honest with you, matting and framing really is not that hard, especially after you practice a few times.
Tip #7: Buy packages with multiple frames/in bulk
As with most things in a seller/buyer setting, the more of a particular item you purchase at one time, the cheaper it is. If you see packages of frames (sometimes they come in packages of 2, sometimes 25, depending on size) in sizes you even semi-regularly print for, try and buy those. It may only save you pennies at a time, but if you frame regularly, those pennies add up (to a new lens)!
Tip #8: Reuse old frames!
At a lecture, Tim Wallace told an entire room of photographers that if our portfolio is not constantly changing, we’re not doing something right. I’ve tried to take that to heart – but as an artist, I become attached to images that I spend a lot of time with. This is true of both my online portfolio, and the portfolio I present to the people with whom I spend time.
Anytime you decide to frame and display an image (those are two actions that should always go together), you are asking anyone in that space to look at your work. It has become a portfolio piece for you. This should help you think through what you are framing (the best of the best of the best, sir!), but also – it should be changing! If you have a beautiful sunset photo from one of your very favorite locations, and you take another even MORE amazing sunset photo, don’t put both of them in frames (unless you are trying to make a portfolio of sunsets, of course) – replace the old one!
Put the newest image in the frame, and either sell or archive your old photo. I’d aim for selling your older work though, to help pay for new frames!
Tip #9: Get creative/DIY!
In my preparation for this article, I reached out to some of the various photographic communities I am a part of/connected to. There was one particular suggestion which I thought would create a really interesting framing idea that I had not previously experienced, but am hoping to investigate on my own sometime in the near future.
A photographer would take two rods (could be wood, steel, whatever is available/cheap to purchase) and pinch the top of the image between them, using string (or any kind of wire) to hold the rods together. Then the bottom of the image would be similarly pinched with another two rods. If the pinching on the bottom is tight enough, the rods would be able to hang utilizing friction, else you could use string/wire to connect those to the top rods (effectively creating your four sided frame). From there the photographer could hang the image in whatever way deemed convenient – the photographer who inspired this discussion hung them from the ceiling using the same strings. There is no reason you could not hang them on a wall as well.
Tip #10: Ditch the frame, print borders!
Okay, hear me out on this one. I will sing the praises of framing from here to the moon and back, and keep going after that. However, there are some images that just look better without frames. Something about the edge of the frame being present interrupts the flow of the image. There are many options available for “invisible” frames, but why waste your money? You can use sticky tack to mount your images to the wall while doing no, or occasionally minimal, damage to the back of the print (but no one sees that side anyways).
In the tip, I say print borders. Much like the rest of the article, this is merely a suggestion. Borders give you some real estate to work with which to utilize clips or sticky tack without placing anything on the actual image. If an image sometimes doesn’t look good with a frame, it also sometimes doesn’t look good without borders. There’s not hard and fast rule for this – sometimes it just works. It really depends on how you, the artist, want the image to function photographically.
Command, Scotch, and 3M are just three of the many brands that put out some great product designed to specifically hang objects without damaging the item or the wall.
At the end of the day, framing will still cost money. You can help limit those costs buy exhibiting strong consumer sensibility and learning to do as much of the work yourself as possible. It can seem daunting, but if you print at a consistent size, and practice framing on your own, there is no part of the framing process that isn’t possible to learn. Hey, the first time I framed my images, I loaded them in upside down! I have managed to avoid that since then! We learn from our mistakes, so don’t make the mistake of overpaying for frames, or a framing service, any longer!
In the very first pages of his book “Photography for the Professionals”, Robin Perry writes:
“…a professional photographer has to do many things that have nothing at all to do with photography.” (Perry, Robin. Photography for the Professionals. Livingston Press, 1977.)
Framing, while enhancing our images, may not seem like something worthwhile for a photographer to learn to do. However, framing can and will dramatically enhance your love of your own images, generate a professional appearance, and give you a strong visual portfolio for all who visit your home, office, or wherever you choose to have your images displayed. Keep your wallet protected, and frame efficiently.
Resources to investigate for frames (not a comprehensive list):
- Michael's
- Walmart
- Target
- Sam's Club
- Costco
- Ikea
- Dollar Store
- Amazon
- B&H Photo
- Adorama
Your suggestion about framing impressed me. If someone wanna show his photo to people, he have to use frame, Otherwise the photo will be damage soon. Frames keep safe a photo.
Thank you so much for this sharing. Guys If you need to have one of the best portal where you can easily know about documents windows 10 as it is an upgraded feature of windows 10. Try out for once surely you will be having all beneficial information.