
This guide should help you to go to the photographer’s paradise of the Skellig Islands and gives you a few tips when you are there. The Skellig islands are tow rocks in the sea 12 km from the coast of Ireland has become really popular since they have filmed parts of the Star Wars films there. It is a great photo location for many different kinds of photography but the access is limited. This Guide should help you to make this once in a lifetime experience and use your limited time on the island in the best possible way.
If you want to go to Ireland you should consider visiting the Skellig islands especially as a photographer. It is a photographer’s paradise and a unique experience. The island definitely not as overcrowded as some other places in Ireland like the Cliffs of Moher or the Dark Hedges in Northern Ireland because of the limited access.
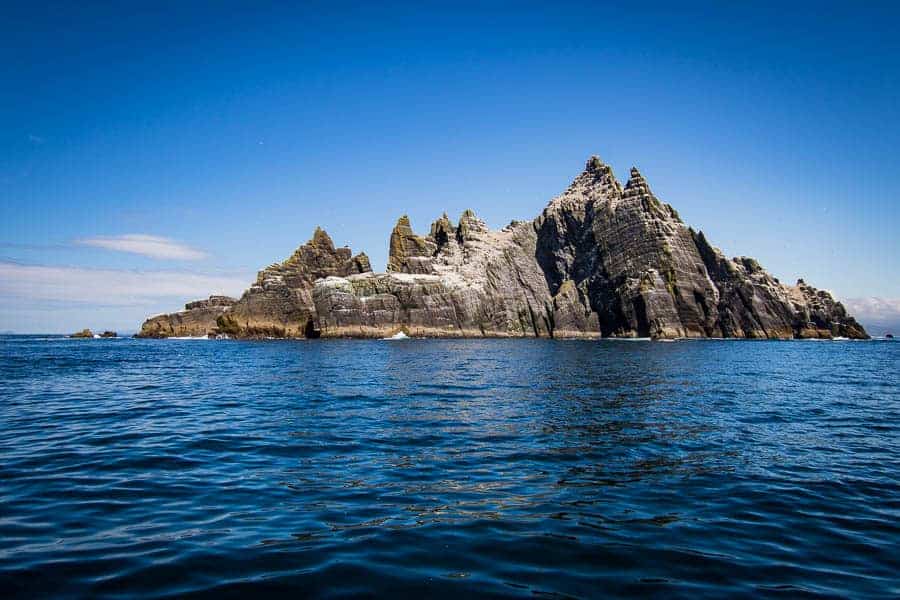
Since the Star Wars: The Force Awakens the Skellig islands have become very popular. It is the Island in the end of the film where Rey meets Luke Skywalker. There are a lot of Star Wars Fans which want to visit the Island. The islands are an important bird area and the monastery on Skellig Michael is a UNESCO World Heritage Site. You can only enter Skellig Michael which is only 21.9 ha (54 acres) big. You have about 2.5 hours to explore the island. This all means you have a lot of people which want to go on a very limited and protected place.
Booking
If you know you are going to Ireland and want visit the Skellig Islands book the tour way in advance. The landing tours are available from mid-May to early October. The tours are booked out long time in advance so book at minimum a half year in advance, if you are there in busy season much earlier. There is an official list of tour operators at the website of the Skellig Expirience Center. I recommend to only book at the tour operators on this website. Some of the operators do not have a website so you have to call them to book your tour. If you are calling from abroad, you can use Skype to avoid high calling costs. Keep the time difference in mind. The price per person for a tour is about 75.00 to 80.00 Euros. Be sure you book a landing tour and not an eco tour where you ride around the islands. If there is no landing tour available you may check out the eco tours.
Here are links to some tour operators where you can book online.
https://www.skelligmichaelcruises.com/
https://skelligislands.com/
https://www.skelligsrock.com/
https://skelligwalker.ie/
https://www.skelligmichael.voyage/
https://skelligtours.com/
If you are not lucky there check out the website of the Skellig Expirience Center and call the operators.
www.skelligexperience.com/other-sea-tours/
What to see
You have so many different things on the tour. You can see many different animals like seabirds, seals and if you are lucky even dolphins, whales or basking sharks. The islands itself are great for landscapes and during the breeding season also for bird photography. There is also the old abandoned monastery with the iconic bee-hive huts.

Gear
Because you can see so many different things to photograph you can bring nearly all of your gear, but your drone has to stay at home. Drones are prohibited around the Skelligs because there are so many birds and nobody wants to have minced birds, but it seems it is possible to get permission. Photographers can bring nearly all of their gear and actual use it. Consider that you are on or near the sea and things could get wet. You have to carry your gear from sea level to the monastery which is 180 meters (600 feet) above the sea level. If you are not fit, pack light or leave some things on the boat. Here is a short list of gear and why you should bring.
| Camera | Of course every photographer brings his camera. |
| Second Camera | Good if you go during the breeding season. I wish I have had brought a second camera because I had a long lens on my body and sometimes you cannot change lenses. |
| Under Water Camera | If you have something like this you may be able to use it when you see marine life. |
| Wide Angle Lens (10-20mm) |
Good for landscapes on the island. |
| Normal Lens (24-70mm) |
Also good for landscapes. Sometimes you need a smaller field of view to cut out other people or you want to compress the picture a bit. |
| Long Lens (70-200 or longer) |
Highly recommended during the breeding season to photograph puffins. Also good for other Wildlife. |
| Teleconverter | Bring it. If you can extend you lens a bit, perfect for wildlife. |
| Tripod | Maybe bit bulky. If you have a small one perfect for longer exposures or multiple pictures to remove other people out of your pictues. (link Artikel) |
| ND Filter | You are on the island around midday. The light is not great but an ND filter can make your pictures more unique. |
| Drone | Generally prohibited, leave it at home (or hotel). If you are a professional drone pilot you may get permission from the OPW |
| Binoculars | Good for wildlife searching. |
| Camera Strap | Definitely good to bring because it is better to have your hands free. I recommend the alternative, Peak Design Capture |
What to wear
It is the best to wear outdoor clothes which you can easy take on and off. It can be very different weather during the tour. If it is a rainy day, do not worry too much, the tour operators provide rain clothes for everyone. If you have bad luck you can sit the whole day in the rain. The wind on sea could be also pretty cold and it will not get warmer when you are sitting the whole time, so bring a warm jacket. On the Skellig the weather can be different then on the Irish Island. You can have a sunny day when it is cloudy on the main land. When you climb the stairs to monetary it can be very warm. Wear good shoes especially on rainy days. The stairs can be very slippery and you do not want to smash your gear.
The day you go
The boats leave from Portmagee and Catherdaniel, so check from where you boat is leaving. It is a 45 min ride between the two points. I recommend being a bit earlier there before the boat leave. You also have to have bit luck with the weather, the tours will be cancelled if the weather is too bad but this happens only at real bad weather. If you get seasick easily bring something against seasickness. The boats are small and the waves can get pretty high.

The tours start between 8:30 am and 10:30 am and end between 2:00 pm and 3:30 pm. You could be eight hours on tour, so bring something to eat and drink. The boats usually have toilets on board. On the boats you normally sit outside even if the weather is nasty. If the weather is bad bring also something to protect your gear, especially if you want to take pictures during the ride. Gear can usually be stored in the cabin but if you want to have your gear near to you think of a dry bag.
Talk to the skipper and tell them that you are a photographer and ask them for the thinks you want to see. They will help you to find the right spots, tell you where to watch if you are looking for wildlife or when to get ready with your camera. They can also tell you about the behaviour of the animals.
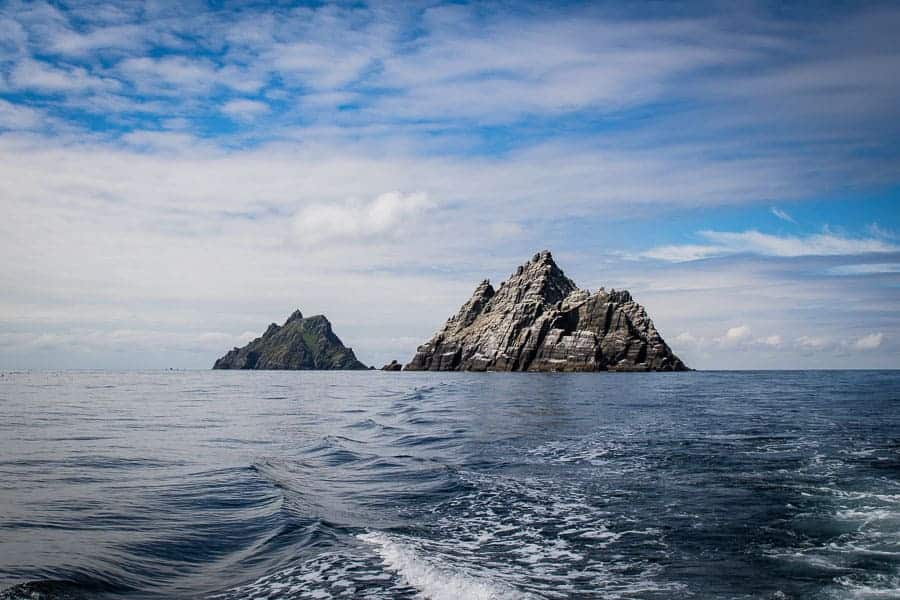
Little Skellig
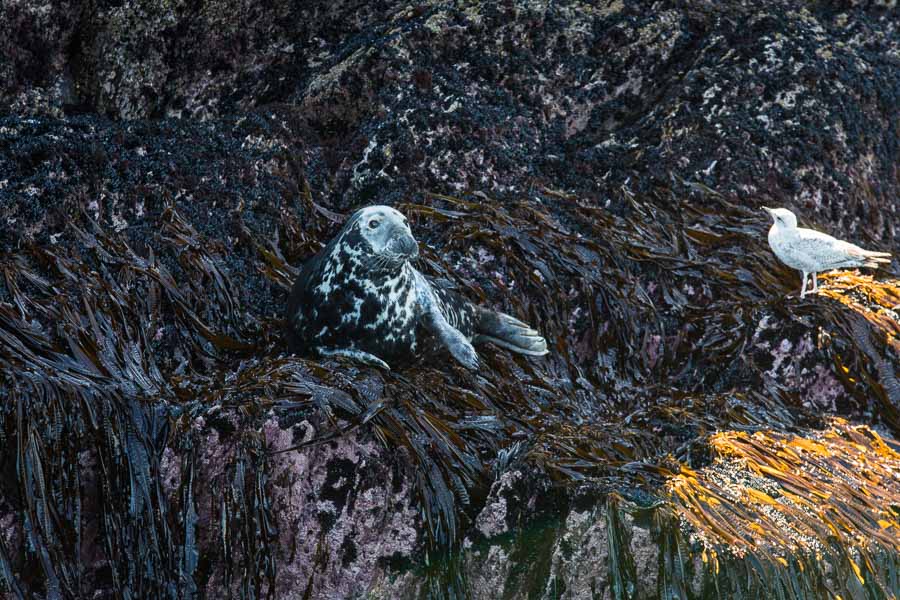
The Little Skellig is the smaller of the two islands. You are not allowed to land on it and I do not know if it is even possible. There is one of the world largest gannets colonies on the island and some other birds nesting there, so it is a strong protected place. When you are making a tour to the Skelligs you will probably ride around the Little Skellig. The island is great for landscapes but keep your long lens (with teleconverter) always near, you have the chance to see some seals resting on the rocks. If possible keep sitting in the boat while shooting and keep in mind that the boat is shaking when you are setting your camera settings.
On Skellig Michael
When you are going to land on Skellig Michael you should have your hands free to climb out of the boat. If you need to go to the toilet go on the boat, because there is no public toilet on the island. You have not so much time on the Island, about 2.5 hours, so here a few tips to use the time the best you can. If you are using the rGPS App (really Good Photo Spots) there is only Skellig Michael as one spot.
When you are on the Island do not rush. There are people on the island anyway and you will not miss one thing. I recommend going up to the Monastery first. Do not stay too long on the other places at the beginning. If you see a puffin it will not be the last. Plan the most for the way back. You will see the scenery better from above on the way down. On the way up you are also faster out of breath and the groups on the stairs are bigger. Not the best conditions to take pictures. I made a little map to with the most important ways and spots to help you.
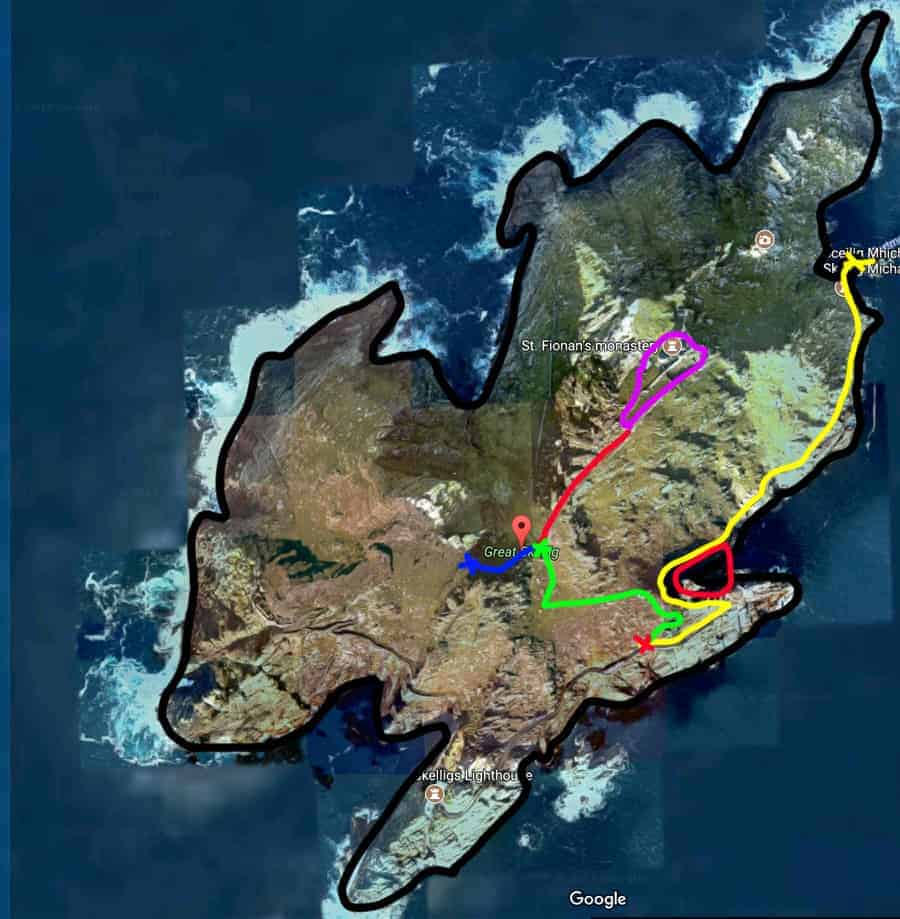
Landing Point (Yellow X)
This is the landing point where every visit starts and end. As soon as you have landed you can go on because there is nothing interesting to see.
Coast Way (Yellow Line)
The Way along the coast is not very interesting. You can some nice pictures from the rocks near the sea and take some cool pictures from landing birds. This is something for the way back if you have some time left.

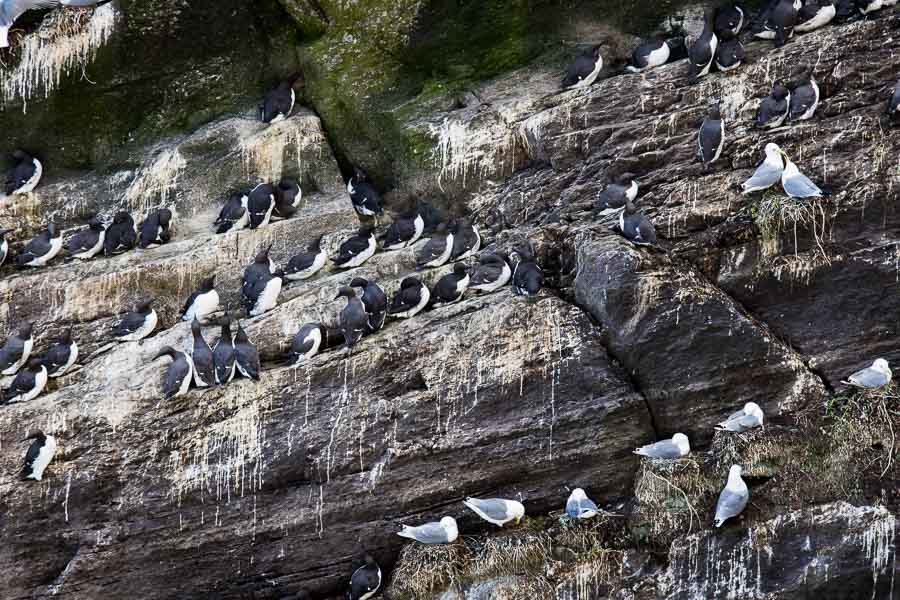
Bird Colony (Red circle)
This is a bird colony where in the nesting season seagulls and guillemots. It is a good spot if you are interested in bird photography but a lens longer than 200mm is recommended. If this is not your type of photography, you can make some pictures on the way back.
Instruction Point (Red X)
Here you get some information from a ranger. They wait until a group has gathered together. They tell you something about the wildlife, and how you have to behave on the island. You have to wait until you get a full instruction, but they will not be very long.
First Stairs/Puffin field (Green Line)
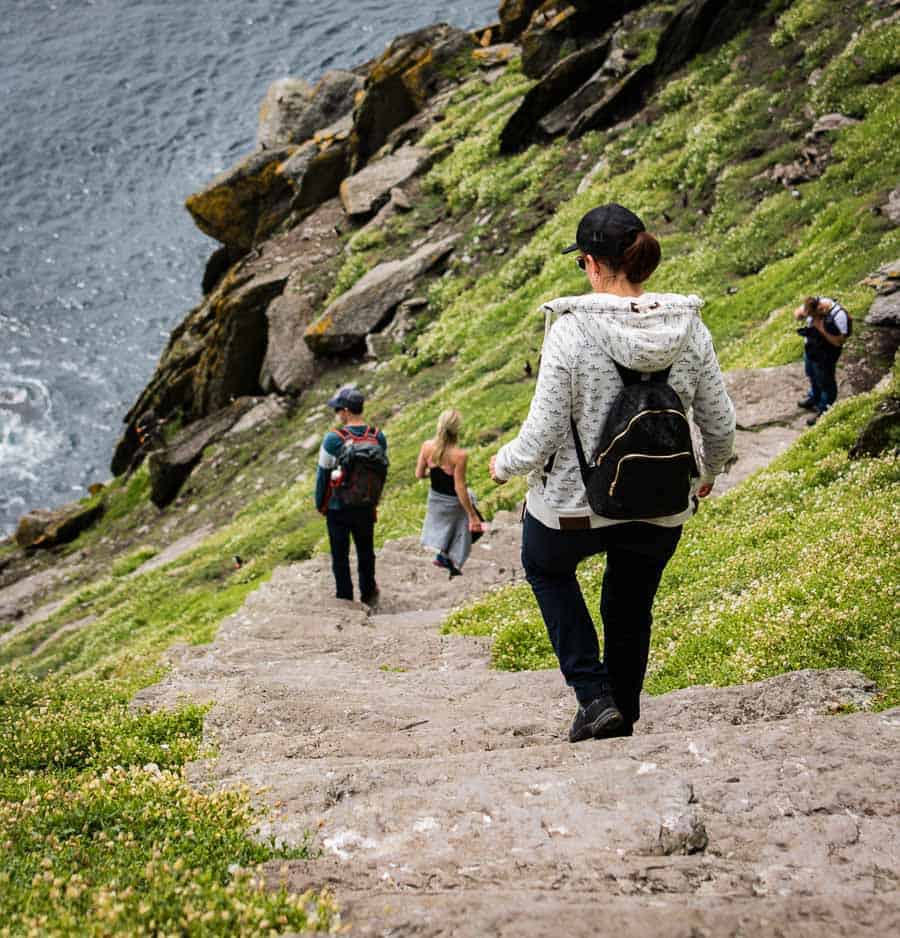
The first stairs are the longest and heaviest to climb. It is also the most spectacular on the island and during the breeding season there are puffins everywhere even on the stairs. On the way up do not stay to long there and take pictures when you are coming down. There will be a lot of people which are coming up with you and you will block the way. You are out of breath and have to concentrate on your feeds. The best view is to look down the stairs so you have to turn around for pictures, so keep your camera stored and concentrate to walk up.
You have to walk the same way down. This is the best time and area to take pictures, so plan enough time for the way down. The view on the stairs is amazing and during the breeding season there are puffins everywhere. It is good to have two cameras so you do not have to switch lenses. If the puffins are there put a long lens on your camera. The puffins are not shy and you can take wonderful pictures of them. I highly recommend sitting down while you are taking pictures with a long lens, it is easy to fall over on the stairs. Do not sit in the middle of the stair so other people can pass.
First Viewpoint (Green X)
At the first viewpoint you can enjoy a beautiful view over the stairs and the sea. It is a good possibility to stop and take a breath, but there is nothing special.
Stair to the Monastery (Red Line)
The second stair is the one to the monastery. Also on this stair it is better taking pictures while going down. The flat part right before the monastery is really spectacular because it goes straight down beneath the path.

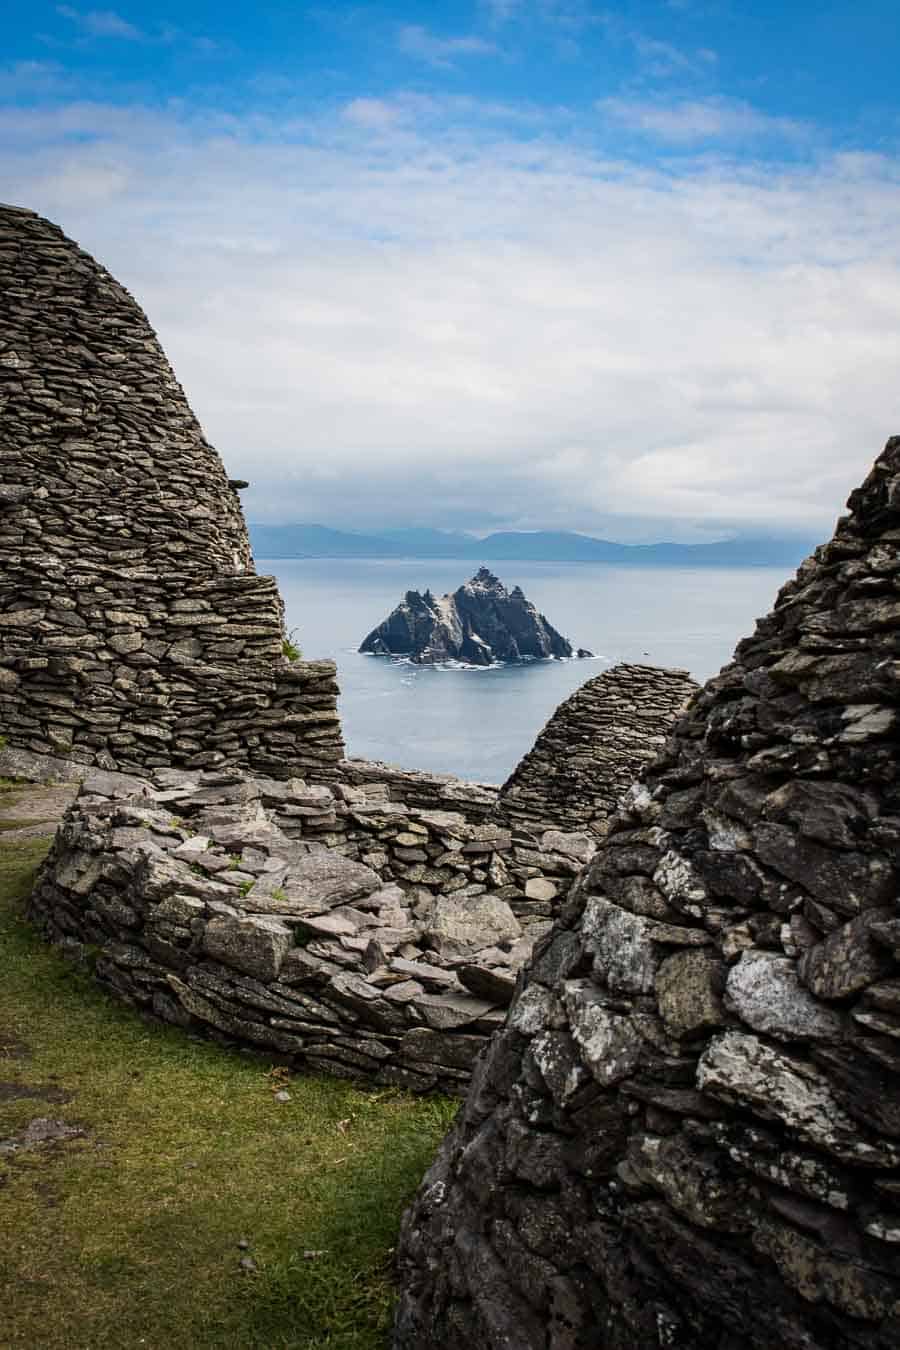
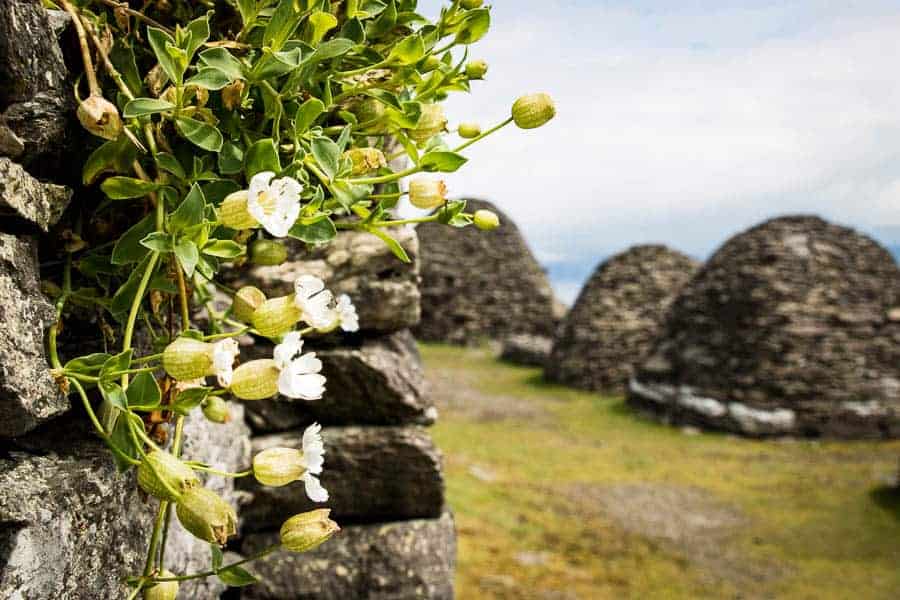
Monastery (Pink Circle)
The abandoned monastery is one of the most amazing and spectacular places I have ever visited. It is 180 meters (600 feet) over the sea level and has a great view to the Little Skellig. The monastery is famous for its iconic huts, the bee-hive huts. It is a protected area and sometimes birds are nesting in the houses (the rangers will tell you) so do not make any damage.
Path (Blue Line)
It is a path up to a viewpoint. There are no stairs up there and the way is a bit slippery even when it is dry. When it is wet you should not go up there.
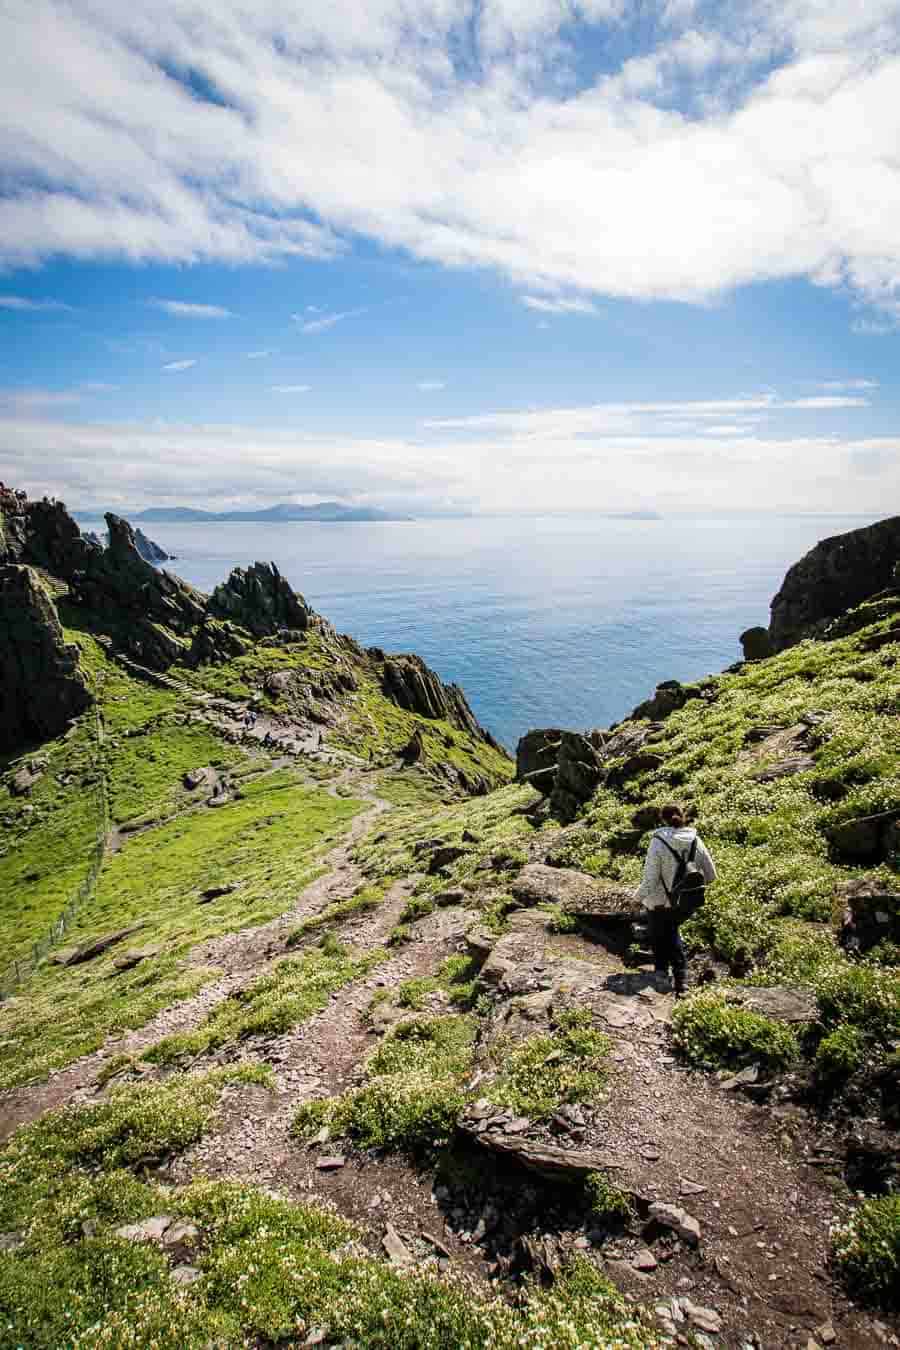
Edge Viewpoint (Blue X)
A natural viewpoint, where you can see the cliffs. Not very spectacular but if you have time left and the weather is good definitely a good spot. Most people do not go up there, so you can get a more unique picture.
Birds
There are many different birds on the Island. You can see different gulls and other birds like guillemots, fulmars or puffins. If you are interested in bird photography this is a really good spot for you. The best time is during the nesting season starting in April. When you go on the first tour in the year (Mid-May) you will see many different birds. The nesting season ends in June or July depending on the birds. If you are not interested in bird photography you still have the Puffins. They are not shy and you can make really beautiful pictures. A list can be found here.

Puffins
The puffins are a very good motive for pictures. The colorfull beak is an eye catcher. They are nesting on Skellig Michael and you can see them there from April to July. If you want so see them do not go too late in July, just to be safe. I do not know when they start to feed but I have been there in the end of May and did not see any feeding activity. To photograph the puffins a focal length of 200mm is enough.

Marine Life
You can see many different animals in the water around the Skellig Islands. Seals are resting regularly at the Little Skellig. Other animals you can see regularly are basking sharks or dolphins. If you are lucky you may see whales. Keep your camera always near to you on the boat, the animals can disappear really fast. It is better to have a long lens and a wide lens near to you. Sometimes the animals are real close to the boat and sometimes they are far away. If you have something for underwater pictures, like an actioncam, keep it ready. A list can be fond here.
Further Informations
Some more Informations can be found at the Website of the Skellig Experience Center. It is the official information center on Valentia Island near Portmagee. If you have any more questions leave a comment, and I try to answer it.
Great guide! I went just two weeks after the puffins had left. What a magical place.
I’d love to visit this island for my next vacation trip. That would an awesome experience. Especially, I want to see marine life.
Thanks, great article, headed on the landing tour this morning and am beyond excited!
This was a great help for my visit to Skellig Michael this week. Thank you for taking the time to put it all together. 🙂