The Nikon D850 is finally here and it could be one of the most important cameras that Nikon has released in its 100-year history. Nikon hopes the D850 will appeal to everyone from working pros to amateurs and work just as well as a sports or wildlife camera, and as a wedding or portrait camera. In this article though I will take an in-depth look at the D850 as a landscape camera. Is it the perfect camera for the outdoor and landscape photographer?
As Nikon celebrate their 100th anniversary the D850 enters a camera market very different than it was even a few years ago. Camera phones, mirrorless bodies, and more affordable medium format cameras have all shrunk the DSLR market. However, for many people, the DSLR still offers the best photography experience.
The rumour mill had been talking about a replacement for the hugely successful D810 for over 12 months so when they announced the D850 in August 2017 and the specs were released there was a lot of excitement from the Nikon loyalists and the photography community as a whole. With no serious mirrorless offering, reported financial and organisational troubles, this could be the camera to get people excited about Nikon again.
The D850 has been designed to be a workhorse of a camera and given the power that Nikon has pumped into this camera, it should appeal to a much wider range of photographers than its predecessor the D810. Much like the D810 though, the D850 should be well suited to landscape photographers.
I was lucky enough to get my hands on one of the first D850s to hit the shelves. Over the last few weeks, I’ve been putting this camera to work shooting landscapes so I can share with you my opinions and experiences with this camera.
Specifications
First things first, let’s take a look at some of the specs that will be of interest to the landscape photographer:
- 45 megapixel, full frame (FX) sensor.
- 12-bit and 14-bit NEF (RAW) files.
- 100% viewfinder coverage at 0.75 magnification.
- 180K pixel RGB exposure meter.
- Matrix or centre weighted metering down to -4 EV.
- 153 focus points (55 selectable) including 99 cross type.
- Dedicated AF-On button.
- SD and XQD card slots (one of each).
- SnapBridge Technology (wireless and Bluetooth).
- 10 pin remote terminal for connection of remote cords.
- Video up to 4K 30p.
- ISO 64 to 25600.
- 2359k-dot, 8cm (3.2 in) tilting, touch-sensitive LCD screen.
- EN-EL15a battery capable of up to 1840 still images.
- Approximate weight of 1005 g (2 lb, 3.5 oz).
- Approximate dimensions (W x H x D) of 146 x 124 x 78.5mm (5.8 x 4.9 x 3.1 in).
In the D850 Box
So you’ve just spent £3,499 on the D850 and for that you get:
- Nikon D850 camera with body cap
- Battery and battery charger (with power cord)
- HDMI / USB Cable clip
- Manual and warranty card
- USB Cable
- D850 branded camera strap
Setup
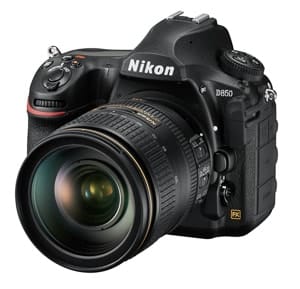
Once out of the box the Nikon D850 will feel very familiar to anyone who has owned a Nikon DSLR in recent years. However, when it comes to button layout, you’ll probably find things will have moved around a little. Nikon seems to tweak button layout for each camera they release. I didn’t find the button layout confusing but if you move between Nikon cameras you may need to adjust your muscle memory on where certain buttons are.
Button layout aside, the camera menu is of the standard Nikon type. In the menu you can configure:
- Playback – configure playback / image review options.
- Shooting – configure file naming options, memory card functions, image control, ISO options, white balance, bracketing, interval shooting, and focus shifting.
- Video – configure file naming, frame size / rates, ISO, audio and time lapse.
- Custom – configure autofocus, metering / exposure, timers / exposure, shooting / display, bracketing / flash and custom controls
- Setup – card format, monitor, time / date, AF fine tune, touch controls, location data, Wi-Fi / SnapBridge
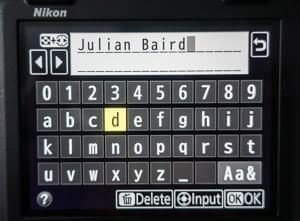
One of the key features of the menu system on the D850 is the touchscreen. At first, I was scrolling through the menus using the selector button as I’ve done with previous models but once I had trained myself to use the touchscreen, navigating the menu was significantly faster. Data entry also becomes much easier. I have the camera add copyright text to the EXIF data and entering all that text was so much easier than using the selector to scroll around an on-screen keyboard.
In the D850 all the menu options that you configure can be stored into banks. This allows you to change the entire configuration of your camera quickly and easily. So you can use one memory bank for your landscape configuration and another bank for your portrait configuration.
How you configure your camera is largely down to personal taste, but here are some of the options that I configure that I think are important:
- Playback | Playback display options – Highlights and RGB histogram both selected
- Shooting | Image quality – NEF (RAW)
- Shooting | Image size – RAW L
- Custom | Metering / exposure | C1 Shutter-release button AE-L – Off (focus only with the AF-ON button, commonly known as back button focusing).
Obviously, there are many more options I would consider setting but these are the core options I configure straight away.
Storage Cards
As I mentioned in the specifications the D850 comes with one SD card slot and one XQD card slot. It would have been nice to have the option to buy the camera with either matching XQD or matching SD slots like the D500. So if you are currently using a dual SD card setup in your camera now you’ll need to budget for a new set of XQD cards if you want to maintain the ability to write to two memory cards (something I would always recommend).
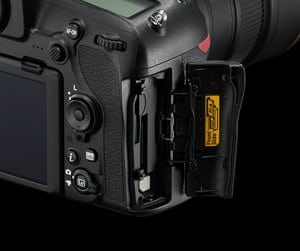
So, you may be asking what size of memory card should I buy. This will depend on your shooting needs but to give you an idea my 64 GB cards can store around 635, 45 megapixel, 14-bit, lossless compressed NEF files. Each file is approximately 50 MB.
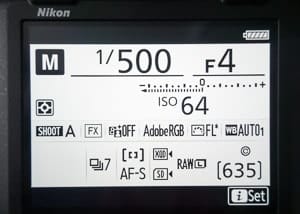
As I am writing this article from a landscape photographers point of view I am assuming that the typical landscape photographer will want the biggest, highest resolution files possible. If you change the quality settings or dual shoot with JPEG the number of images you can store on a card will vary.
What about card speed? While having super-fast cards isn’t necessarily the primary consideration for the typical landscape photographer having faster cards will allow those big NEF files to be written more quickly from the buffer to the card. Almost as importantly though, they will transfer to your computer faster when you get around to importing them.
If you are going to shoot video, and yes, many landscape photographers do, you should get the best card you can budget for (at least UHS-II, Class 3, SDXC if you plan to shoot 4K).
Whichever size or speed of card you select don’t buy cheap or unknown brands. Buy a memory card from one of the leading brands. You’ve just spent £3,499 on camera, don’t put at £10 SD card in it.
I should point out that at the time of writing this article, Lexar has pulled out of the consumer storage market and the Lexar brand name has been sold on. While stocks of Lexar cards remain in circulation this does leave Sony as the only XQD card manufacturer on the market.
Using the Camera in the Field
Live View / Rear LCD Screen
The Nikon D850 features a rear LCD screen that is both touch sensitive and can be titled. The screen is 8cm (3.2”) with a 2359k-dot resolution that you can articulate up and down. It doesn’t articulate out to the side so it’s not well suited for vlogging. However, this is unlikely to be an issue for the landscape photographer. (As a landscape photographer and vlogger I tend to use a separate camera for capturing video for my vlog).
Though the LCD screen is tiltable it does not feel like a weak point. It’s easy to manipulate without feeling like it might break off. It feels even more sturdy than the screen found on the D750, a camera which I used heavily for 3 years and had no issues with durability of the LCD screen. The screen is very bright, but this can be controlled manually. It is easy to view even in very bright conditions.
It offers 100% viewfinder coverage so it can effectively be used to compose your image. It still won’t completely replace my use of the viewfinder, but there are still many situations it comes in very handy. As with my use of the D750, I found myself using the LCD screen in an articulated position to compose an image when using the viewfinder would have meant getting my body to do some gymnastics!
Another great feature of the LCD on this camera is the ability to touch to focus. This is a feature our mirrorless camera cousins have been using for some time now. Though you can use the focus point joystick to select your focus point, the simple speed and pleasure of touching to focus is a great time saver. You can configure the camera take the photo as soon as focus is found, or as I have it configured, just to focus on touch.
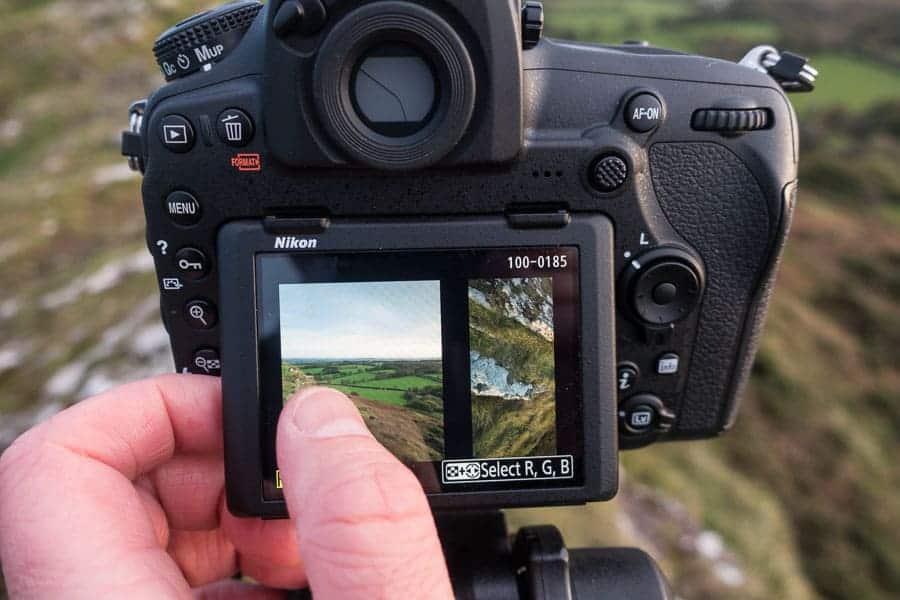
On the topic of focusing, another great feature is split-screen display zoom. This handy feature is accessed using the “info” button on the back of the camera. It splits the display into two boxes, each showing a different area of the frame, side by side, at a high zoom ratio. You can use the button controls to navigate the different frames around the image area. This is very useful for checking this like focus in two different areas of the image.
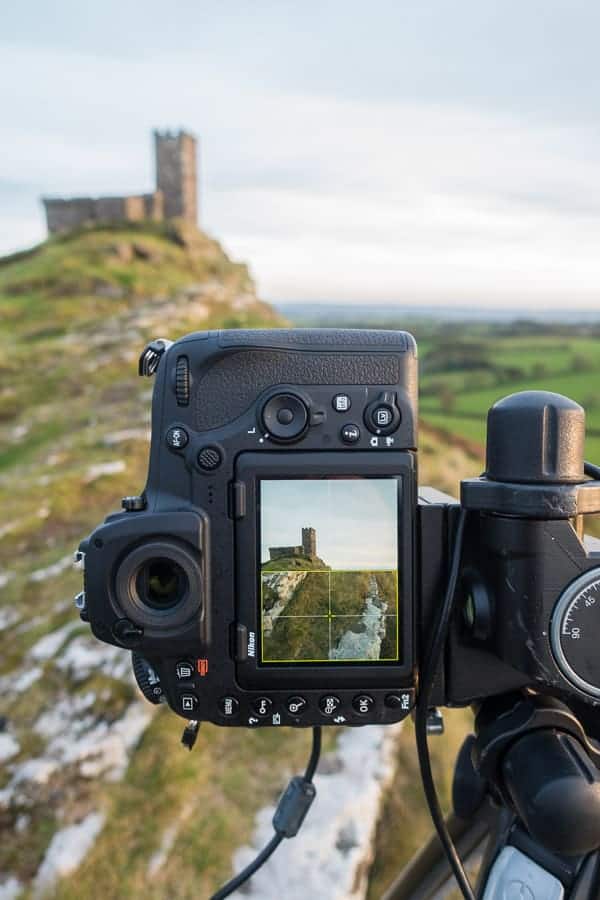
The LCD screen also allows you to view some important information that you might find useful:
- Artificial horizon
- Live histogram
- Grid lines
- Shooting / camera information
Using the LCD screen will, of course, increase battery use, but not to any great extent that you might need to worry about it. Unless you have the screen on all the time it’s unlikely to cause you any significant issues.
Perhaps the biggest limitation of the LCD screen is that you can only use contrast-detect AF. Compared to the phase detect AF that is used with the viewfinder, contrast-detect is slower and can struggle more in very low light conditions.

Image Review with the LCD
You can now use the touch capabilities of the LCD during image review. Like viewing images on your smartphone, you can flick through your images by swiping left and right. This is fast and responsive and I quickly moved to just using touch to flick through my images.
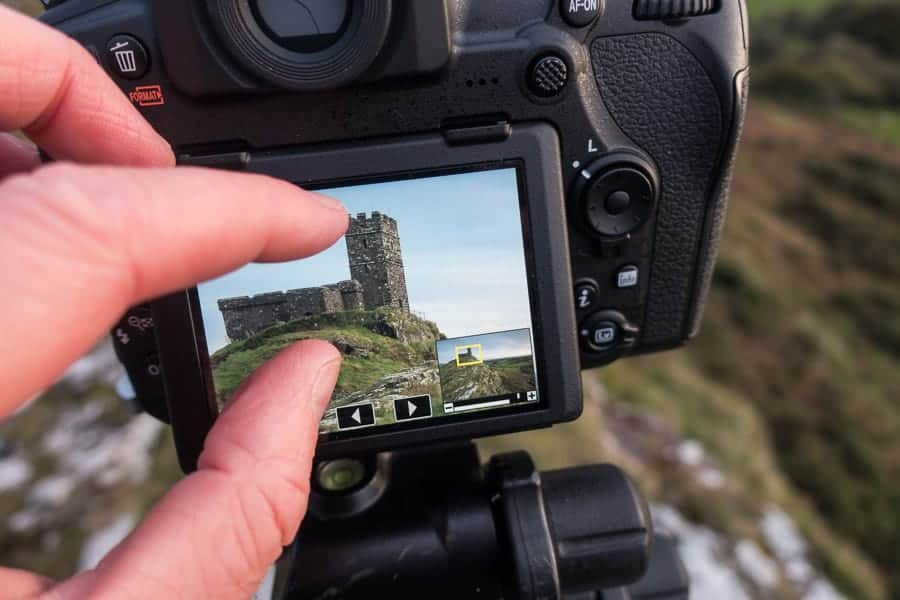
The touch LCD also allows you to pinch to zoom. Again this is fast and responsive, with no apparent lag. You use the touch screen to continue to adjust the level of the zoom or pan around the image. Panning is something that is far quicker using the touch LCD than it is using the physical buttons. While zoomed in, two image advance buttons appear on the LCD allowing you to move between images while maintaining the current magnification. This means you don’t have to zoom out to pan to the next image.
Viewfinder
Some will find the lack of an Electronic View Finder (EVF) a little disappointing while others will welcome the continued use of an Optical View Finder (OVF). Having used an EVF in other cameras I can definitely see the advantage of using them. While I can view much of the information I would see in an EVF on the rear LCD screen, this isn’t always practical or convenient.
Lack of EVF aside, the OVF on the Nikon 850 provides 100% coverage at a magnification 0.75. The information displayed inside is a fairly standard Nikon affair and includes (but not limited to):
- Focusing
- Metering mode
- Shutter speed and aperture
- Exposure indicator
- ISO
- Shots remaining
Composing an image with the OVF is a great experience. The view is bright and you have access to the key information you need to get the shot. Perhaps the biggest advantage of using the OVF overview the LCD screen is that autofocusing is performed using the faster phase detect AF system. (I discuss the different AF systems a little further down the review).
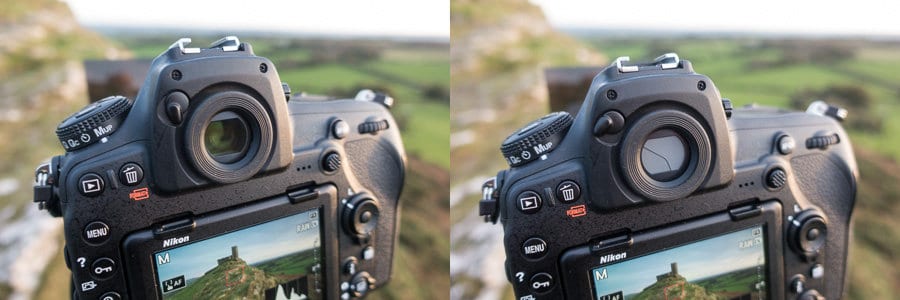
For those landscape photographers who like to do long exposures, you’ll be very happy to hear that you can close off the eyepiece by a simple flick of a switch. Those owners of Nikon professional class bodies (D800, D810, D500, D4 etc) will have noticed this switch already on their eyepieces.
For everyone else in the Nikon system, the only way to cover the rear eyepiece (to stop light leak during a long exposure) was to remove the soft rectangle eyepiece cover and replace it with the supplied blanking cover. While not the greatest of problems it did mean a lot of switching about if you wanted to use the eyepiece between frames. There was also the chance you would lose the eyepiece cover (something I did a few times). For me, coming from the D750 and being a long exposure fan, the closable eyepiece cover on the D850 is a wonderful thing.
Focusing
The focusing system is largely the same system found in Nikon’s flagship camera the D5. The phase detect AF system offers 153 focus points (including 99 cross-type), of which 55 are selectable. There are the normal AF-S, and AF-C modes, and focus areas can be set to single point, dynamic point, 3d tracking, group-area and of course auto-area.
When out shooting landscapes, the AF system works very well. In everything but the very darkest of conditions, focusing is fast and accurate. For my landscape work I tend to use a single focus point in AF-S mode, and using the dedicated focus point selector joystick on the rear of the camera makes selecting that point quick and easy.
With the focusing working down as far as -4 EV, even selecting a focus point in a dark area the camera seems to lock on with ease. It’s not faultless though. If you are shooting in very low light conditions and are selecting a point that lacks contrast it can struggle. I shoot most of my landscapes during the golden hours, so I start to shoot a good 30 minutes before sunrise and 30 minutes after sunset, and I rarely found the AF system struggling.
As I mentioned earlier, you can also focus using the touch-enabled rear LCD screen. While the ability to touch to focus is really useful, focusing using live view uses the slower contrast detection AF system. This doesn’t work as well as the phase detect system, especially in very low light conditions. It is a weak point of the camera as I would still find myself having to use the OVF to focus when there was very little light. This can be a struggle when shooting at difficult angles.
Overall though I found the AF system to work very well for landscape photography and coming from a D750 there were noticeable improvements in speed and accuracy, particularly in low light conditions.
SnapBridge
SnapBridge is Nikon’s software that allows your camera to maintain a constant connection to a mobile or tablet device. It uses a low power Bluetooth connection that allows your camera to talk to your device so you can do things like automatically transfer images. However, there is one obvious problem with the current implementation of SnapBridge in that it doesn’t support RAW transfer. It will only transfer JPG files.
To be fair, even with the D750 and its WiFi connection to Nikon’s WMU app, I only used to transfer RAW files when I was photographing a music concert, so personally, this isn’t a problem for me when landscape shooting. For those landscape shooters that like to process RAW files in Lightroom mobile the lack of NEF file transfer will seem like a missing feature.
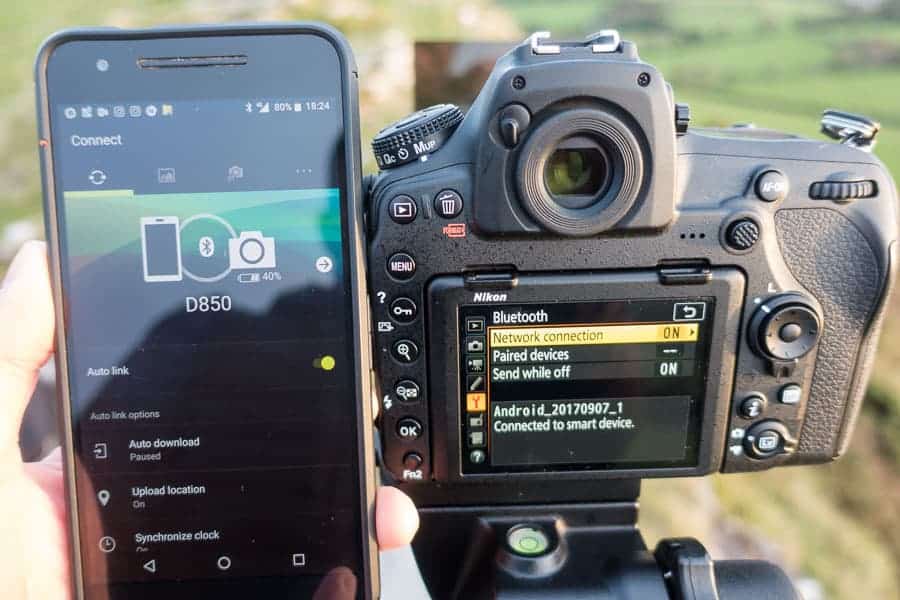
Not all is lost for landscape shooters and SnapBridge though. Though I see the ability to remote control your camera has having limited applications there a couple of really useful features.
The first is the ability to take the time on your device and synchronisation the clock on your camera. For some having the exact time in the EXIF data isn’t that critical, but for anyone who has gone to another country and forgot to change the time on their device will know how annoying that can be. Yes, you can correct it in Lightroom later but it’s easier not having to deal with it at all.
The other great feature of SnapBridge is its ability to take the GPS location of your device and add it to the EXIF data. Again, there are many other ways to do this such as syncing a tracking log from your device to the timestamps of your photos in Lightroom or buying an expensive and optional GPS module, but having SnapBridge gives you one less to think about. And best of all, it just works.

Once you’ve processed your images you will know that if you upload it to a service like Flickr, 500px or Improve Photography’s Really Good Photo Spots app, you’ll know the GPS data will be accurate.
ISO and Dynamic Range
Like the D810 before it, the D850 offers the ability to shoot at ISO 64. This isn’t simply the same as Lo 0.3 on a camera with a base ISO 100. ISO 64 is the camera’s base ISO and not an extended ISO setting. This means that it’s perfectly good to use and should offer the best image quality and dynamic range from the sensor.
I’ve not been able to compare the dynamic range of the D850 with other cameras other than my previous D750. One thing is clear though, the amount of detail that is captured by the sensor when shooting at ISO 64 is phenomenal. I’ve shot some images where my foreground shadow areas have be very dark but I’ve been able to recover significant amounts of detail with very little or no noise.
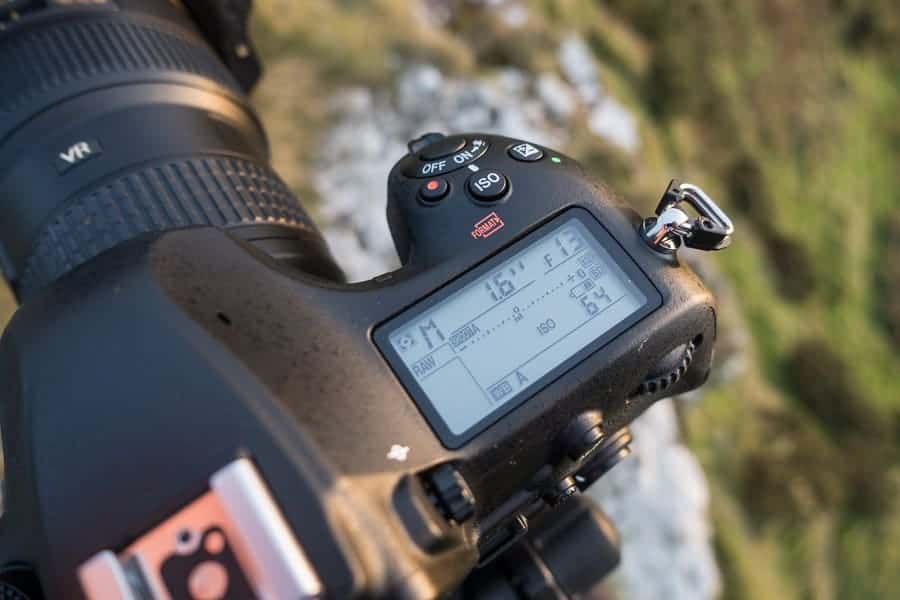
The D750 was no slouch in terms of dynamic range but the D850 is noticeably better and the ability to shoot at ISO 64 will allow you to push your images even further. While some photographers will just bracket images to get similar results, those wishing to do as much as possible in-camera will love the dynamic range delivered by the D850 sensor.
ISO 64 may also be useful for fans of longer exposures. Exposure times are longer than equivalent exposures at ISO 100.
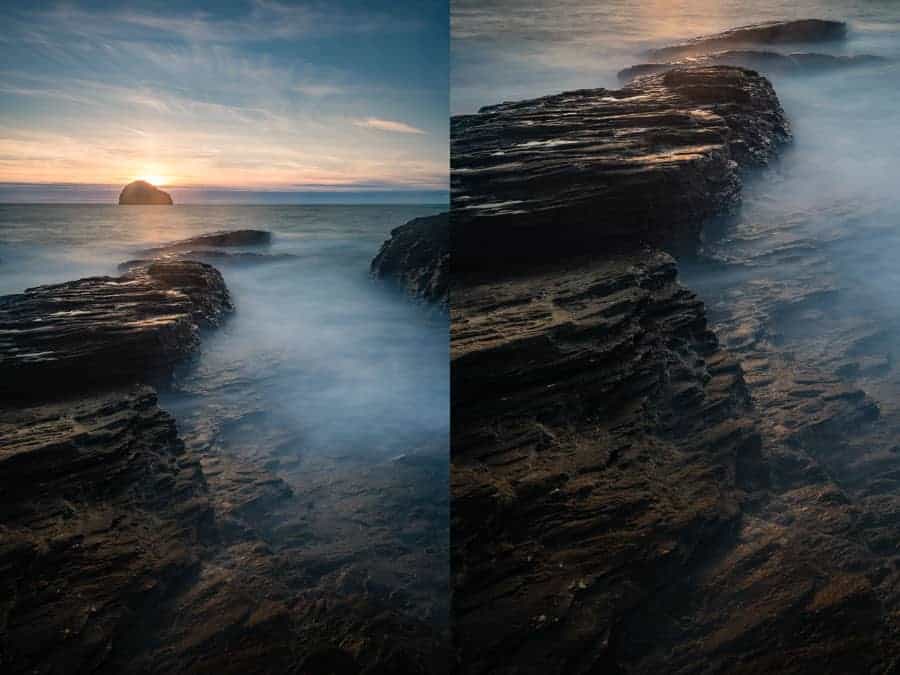
Image Quality
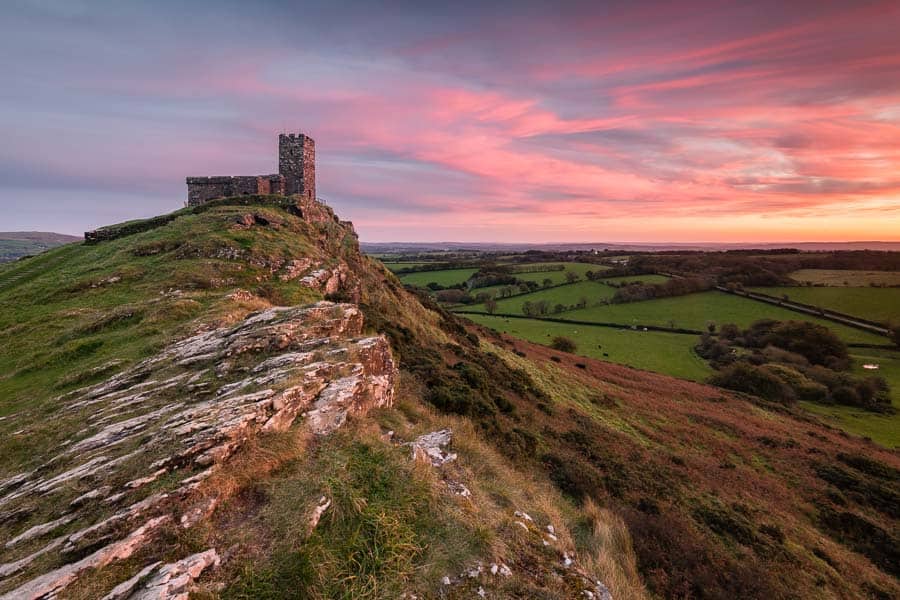
Thanks to a very useable range of low ISO settings and the dynamic range of the sensor, the quality of images that this camera produces is nothing short of amazing. As I mentioned in the previous section, the dynamic range captured by the sensor allows for a considerable amount of scope for post-processing. Then there is the sheer amount of megapixels you have to play with. When images are viewed at 1:1 on a computer, the level of detailed captured in those 46 megapixels is truly staggering.
Now many people will argue few people really need 46 megapixels. Certainly, more megapixels was not one of the selling points of the camera for me. However, I’m not complaining that I’ve got them. It gives lots of scope for post processing crops. If I want I can create a 3:1 crop of a single frame and still have plenty of pixels to play with (22 megapixels to be precise). I can also use some of the perspective correction tools without fear that the resulting crop will result in a loss of overall image quality.
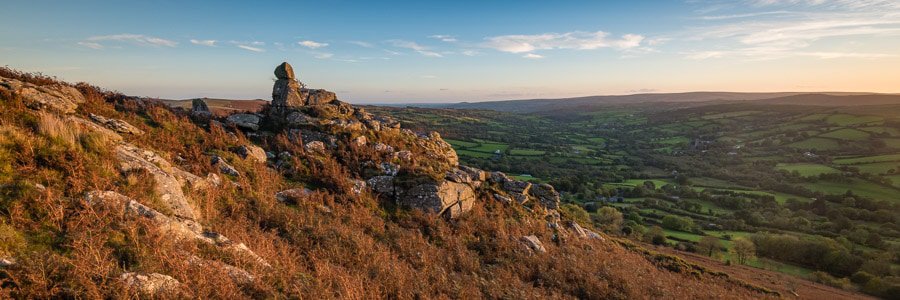
You don’t need to shoot with all 46 megapixels as the D850 has the ability to shoot medium and small raw files. As a landscape photographer though I will always want the camera to capture the most amount of data I can get from the sensor. This means I always have the camera set to capture 14-bit, large raw files.
Other than requiring lots of storage to hold all these large image files and a fast computer to process them on, there is little to complain about the image quality of the D850.
Focus Shift Shooting
A new feature of the D850 is the Focus Shift mode. This lets you take a series of images of the same scene but the camera adjusts the focus distance automatically for each frame. Typically, the camera is set for a relatively wide open aperture like f/4 or f/5.6. You then use an application such as Photoshop to stack all the images together to give an image that is tack sharp from front to back.
This feature will be particularly useful for macro photographers who often have to deal with very shallow depths of field. As a landscape photographer, this feature will allow me to use my lenses at their optimal apertures when I need a big depth of field. So rather than using f/16 with a single image, I can now shoot a number of images at f/5.6.
While this has always been possible by manually controlling the camera, having this feature in camera makes it more accessible and easier to do. You can configure:
- The number of shots – up to 300.
- Focus step wide – the amount the focus distance changes from shot to shot.
- Interval between each shot.
- Exposure smoothing.
- And turn on silent shooting – effectively keeping the mirror up.
While many photographers will still want to do this process manually, for many it will speed up the process and increase accuracy.
Interval Timer Shooting and Time-Lapse
Another new feature of the D850 is the ability to do in-camera interval shooting and create time-lapse movies. You can get the D850 do all the heavy lifting for you by using the Time-Lapse Movie function. When you enable this function, you can specify the interval between the shots, how long to shoot for, exposure smoothing and the use of silent photography. The camera then creates a movie file for you from the resulting shots (up to 4K in resolution).
If you want more control, and even more resolution than the 4K that its delivered with the time-lapse movie function, then you should use the Interval Timer Shooting mode. In this mode, you can take a series of photos at each interval rather than just the one. For example you could take 3 images, every minute for 2 hrs. There are additional options for even finer control but you will also need to create your own video (up to 8K) using optional time-lapse software.
If you are interested in time-lapse photography you should definitely check out these two Improve Photography articles:
General Handling and Design
The D850 sits in Nikon’s range of professional spec DSLR bodies. As soon as you unbox it and place it in your hands you’ll know why. It feels like a solid, well-built bit of kit. A camera you’ll be confident taking out into the wilderness. It has a well-designed grip providing you with the confidence that it’s not going to slip out of your hands when the conditions are wet.
Compared to many of its consumer and DX brothers it’s a little on the large size, but not so much that it’s an issue. It might not be as small as some comparable mirrorless offerings but given the capabilities of the camera, you’ll start to wonder why it wasn’t bigger!
On the top left of the camera, you’ll find a standard Nikon control dial for single shot, continuous shooting, quiet continuous and mirror up. On top of that dial, there are dedicated buttons for white balance, metering mode, image quality, and shooting mode (PASM). On the right-hand side, you find exposure compensation, movie record and ISO.

Also on the top of the camera is the on / off switch, with the shutter release in the middle. Turning the power switch, all the way clockwise also illuminates the top LCD camera display. Those who shoot in the dark a lot will very much enjoy the fact that all the buttons on the camera are also illuminated making it much easier to change those critical settings in very low light.
Along with the touch-sensitive screen, you’ll find a wide range of buttons on the back of the camera. Though I found myself using some of those buttons less as I started using the touchscreen more, there are still some very useful buttons. Other than using the touchscreen to focus, a dedicated focus selector joystick makes selecting your focus point easy.
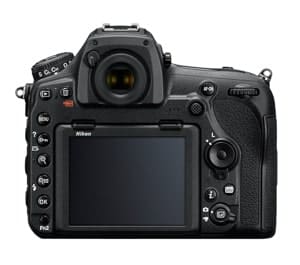
For those that love to use Back Button Focusing (BBF), a dedicated AF-On button is always welcome. If you don’t know what BBF is or why you should use it you should read this Improve Photography article on Back Button Focusing.
There are also a number of buttons that you can configure the function of yourself. Both the Pv and Fn1 buttons can be configured to do a whole range of functions. I tend to keep the Pv button with the default function of aperture preview but set the Fn1 button to turn on the grid in the viewfinder. Oddly Fn2 is almost useless as it is limited to My Menu and Rating functions. I would have liked this button to have the same configuration options as the other two buttons.
Post Processing
As this camera is still new to the market, not all the post-processing applications have native support for the raw files. This leaves you with a couple of options. Shoot JPEG (but I wouldn’t recommend this) or use Adobe’s free DNG converter to convert your NEF files to Adobe’s open file format (most applications support DNG).
Fortunately, Adobe just recently updated Lightroom (CC and Classic) to support the native raw files from the D850 without conversion. Adobe Photoshop CC has been able to process the files since the camera came out. Support for Adobe Lightroom 6 should be available by the time you read this.
Comparing with Other Nikon Models
If you already have a Nikon DSLR should you upgrade? This is always a tough question. For me, coming from the D750 the choice was relatively easy. Better autofocus, improved dynamic range, touch-sensitive LCD and improved weather sealing all sealed the deal for me.
If you are coming from the D800/E then you will also benefit from better dynamic range (at ISO 64), more resolution and improved autofocus. The decision to move from the D810 is less clear-cut. You’ll still benefit from more resolution, better autofocus and the touchscreen, but those differences might not justify the cost for you.
If you have a consumer based DX body (not the D500) or a much older FX body, the D850 will deliver significant improvements in image quality and focusing. The decision to buy a D850 will largely be down to cost and whether you think you need this camera. The D810 and D750 still remain excellent upgrade options.
Optional Accessories
There are few optional accessories that you may wish to consider:
- 2nd battery – never leave home without a spare battery. Fortunately, the camera is compatible with both the older EN-EL15 and the newer EN-EL15a that is shipped with the camera.
- Remote Cord (MC-36a) – I still shoot with a remote release and though some of the interval functions that are on this remote can now be set in the camera itself, I still like using it when in bulb mode for long exposures.
- Multi-Power Battery Pack (MB-D18) – if you think that the 1800 or so shot capacity of the standard battery is limited, this grip allows you to use the battery from the D5 (EN-EL18B) which is good for 5000 shots. However, you will need to also buy one of those batteries and a charger for it. Useful if you are on an expedition, but day to day shooters will be better off with a spare EN-EL15(a) battery. The grip also allows for the use of AA batteries which could be useful when in a squeeze.
- Film Digitising Adapter (ES-2) – lets you turn colour or monochrome images shot on film into high-quality digital files without using a scanner.
Conclusion
So, is the D850 any good as a landscape camera? Undoubtedly yes. Sure, it has a few shortcomings and compared with some of the tech in mirrorless cameras it can look like it’s lagging. However, as a DSLR it’s probably the best landscape camera Nikon offer. The 14-bit raw files that the camera are a dream to work with. It’s not just the resolution, but it’s the dynamic range that makes them so great to process. It’s staggering the amount detail you have in those files.
Features that you might not think you will care about like the touch screen change the way you use the camera, and for the better. Focus stacking is something I’m sure to use more of now, and I can see time-lapse becoming a bigger part of what I do. The camera has not only improved my workflow but opened other ways of working.
As a photographer that likes to shoot in all sorts of conditions the build, handling and weather sealing of the camera inspires confidence in its reliability and durability. A strong battery life means I can shoot all day if I need to.
Is this camera enough to make landscape photographers switch camera brands? For some, it might well be. If you are considering a transition from crop to full frame, then you’ll struggle to find a better DSLR for taking landscape images. For those with significant investments in full frame lenses by the likes of Canon, the case is less clear-cut.
If you are already in the Nikon system, and you need the absolute best in image quality and build for your landscape photography you won’t find better than the Nikon D850.
You can pick up a Nikon D850 from Amazon by clicking this link here.