
Photographing a concert requires good camera skills and a sharp eye but taking good images is only part of the job. You need to build trust with the bands, their management, and the venues by delivering a quality and consistent service. In this article, I will share with you my top tips that will help you plan, execute, and deliver a successful concert shoot.
Fail to Prepare, Prepare to Fail
Whether you are just shooting for yourself or someone else, you should prepare for the shoot in advance. No matter what type of photography you are doing, being prepared will ultimately lead to better results. Here are the things you should do even before you head out the venue.
1 – Know Who Is Playing and When
In all likelihood, you will be going to photograph the headline act, but do you know who else is playing? Support bands are an integral part of the show and you need to know who they are so you can photograph them as well as the main act. Don’t dismiss them in favour of the main act. I’ve shot some artists who were relatively unknown at the time who later go on to become massive.

2 – Do Some Research
Photographing an artist for the first time can be exciting as you won’t know what’s going to happen when they get on stage. However, as exciting as this might be there is a risk that you could miss a key moment. Does the lead singer jump in the air halfway through the first song? Does the lead guitarist strike a pose at the end of track two?
The easiest way to get an idea of what an artist might do in the first three songs is to check them out on YouTube. Most bands and artists will l have some sort of live footage on YouTube and even if they don’t look for fan-generated content. Look at the footage to see how the band typically comes on stage and any signature moves or poses they might have.
If you know something is coming, you much less likely to miss that key moment.

3 – Social Media Tags
When you are at the venue you should be aiming to post some of the images as soon as you’ve shot your first three songs (see later tips). However, save yourself a bunch of stress and confusion by taking a note (electronic or paper) of all the relevant hashtags (#’s) and account names. At a minimum, you will want to note the social media details of the bands and the venue. Try also gathering details of the record label or PR company.
I normally start with the band or artists website. They will typically have links to their Twitter, Facebook, Youtube and Instagram sites. This will give you all their social media account names. Check Twitter and Instagram for any special hashtags. For example, the band might be on a 20th -anniversary tour and so might have a special hashtag.
If you want to be super organised, I write my social media posts in my favourite electronic notes application, together with all the account names and hashtags. This way I can just copy and paste the text into Twitter or Instagram while I'm at the gig.
4 – Think About Your Shots
Have a rough plan of what shots you will want to take. If you are shooting for the venue consider the types of shot they want. More often than not, venues love big wide shots that include the crowd cheering. Whereas a band or artist might want you to capture a specific moment or facial expression.
Also, take into account the type of artist you are shooting. Is it one person with a guitar and a stool, or a punk band that stage dives into the crowd? Think about how the style of the artist will impact what shots you will take. See my previous tip on doing some research on how to get a heads up on artist performance.

5 – Prepare Your Gear
This should go without saying but make sure your gear is all ready for the gig. Get your batteries charged up and select your lenses. If it’s a new venue you are shooting check out some videos on YouTube to give you an idea of what it might be like to shoot there. This might be helpful if you are going to need the 16-35mm more than the 70-200mm.
I also set up my camera at this point. I go through all the settings such as focusing mode, shutter speed, aperture, ISO etc. Sure, you can do this when you start shooting the first act but you’re far more likely to miss something in the heat of the moment. Having a baseline set of settings will mean you will only have to make minor adjustments to your settings at the gig.
If you shoot other things, like landscapes (as I do), this is even more critical. You don’t want to miss that one moment when an artist makes an epic entrance onto the stage only to find you’ve got the camera in ISO 100!
At The Concert Venue
6 – Get the Running Order
Most of the time you’ll need to wait to get to the venue to find out what the running order is. Most venues will pin the running order up on some nearby walls. If it’s not, then the security staff often know so it's worth checking in with them.
7 – Get into Position Early
Once you have the timings I recommend you are in the pit 5 minutes before the artist start time, and if there isn’t a pit I would get into position at the front of the stage around 10 minutes before. In the pit you’ll have plenty of room to move about, but if you are in with the crowd get into your spot early.
Whether you’re in the pit or in with the crowd make sure you get into the right spot. If you’ve done your research (see previous tips) you might well have identified a spot that you want to be in to get a shot. You might be sharing the pit with other photographers so it’s worth getting your initial spot sorted.
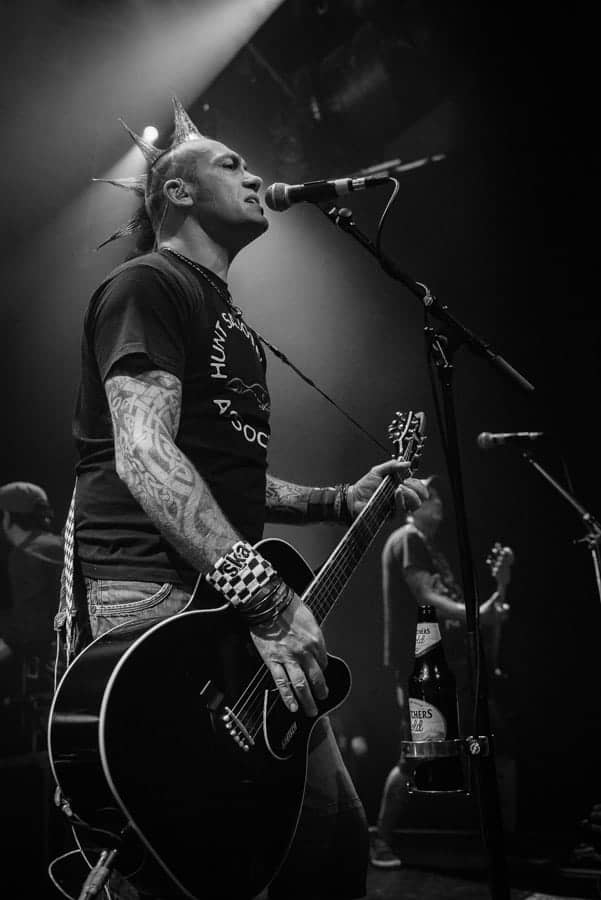
8 – Photograph the Support Bands
If you followed my planning steps you’ll already know who the support bands and artists are. Getting shots of the support band is important for a number of reasons. Firstly, it allows you to get in the zone with your camera. It might have been a few days, or even weeks since your last gig shoot so getting your brain back into gear before the big act is worth doing.
It’s also a good opportunity to sort out your camera settings. Although each band or artist may have a slightly different lighting setup, shooting some early frames will give you a really good idea of your settings for later on.
9 – The Lighting Engineer
Try and find out who the lighting engineer is and introduce yourself and let him know what you are doing. Ask them if they wouldn’t mind giving you a little extra light during the first three songs. It’s not always possible as some artists have a specific lighting sequence, but in smaller venues, with smaller acts, this might be possible.
Shooting in low light conditions is all part of being a concert photographer, but any additional light you can get will always make your life a little easier.
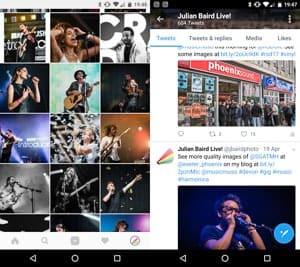
10 – Get Your Images on Social Media
If you can get your images from your camera and onto your mobile or tablet device, then edit some and post them up onto social media. Even if you can’t get a RAW file over, a JPEG will do. There a few mobile apps including Lightroom and SnapSeed that have a rich set of features including RAW processing.
Make use of these tools and get some live action shots up on the Internet. Tag all the relevant account names and use those hashtags that you noted down when you did your preparation. Beat the rest and make yourself look amazing as you post images of the band while they are still on stage.
11 – Networking
A concert is a great way to expand your network of contacts, both in the photography and music industries. If you can, introduce yourself to the bands or artists. The easiest way to do this is at the merch table. The bigger the venue, and the bigger the artist the harder this becomes, but generally at the smaller venues the bands will have a merch table so they can sell their music and meet fans.
Wait for the queue of fans to die down and introduce yourself. If you’ve already posted some images of them from their set this is a great icebreaker. I’ve never met an artist or band that didn’t think it was awesome to see a photo of themselves on Twitter from the gig they just played 15 minutes ago.
Other people to track down are the band manager and the venue manager. Show them the images you’ve just posted up on Twitter, Instagram or Facebook. By demonstrating your craft, professionalism and the speed in which you can deliver results will make them want to work with you next time.
It’s always worth offering them a couple of images to use on their social media.
After the Gig
11 – Import, Backup and Tag
The first thing you should do when you get back from the gig is to get your images from the camera and onto your computer. Once they are on your computer get them backed up, and if you have the capability, get a copy synchronised or backed up to a cloud service. Remember that disaster can strike at any time so make sure you get all that data backed up in different locations as quickly as possible.
Once your images are in something like Lightroom, make sure you spend 5 minutes adding any relevant tags or metadata. It may seem like a drag to do, but it will make life so much easier when it comes to finding images later.
12 – Deliver On Time
If you are creating content for a publication or website, make sure you deliver your content on time and as agreed with your client. Even if you are shooting for yourself getting your work out there as quickly as possible is key. Interest in a gig or a concert fades quickly over time, and your images will get a lot more traction if you deliver within 48hrs of the gig rather a one or two weeks later.
13 – Blog
Even if you are creating images for a publication, they will normally allow you to also publish them on your website as well. So, make use of those images and create a blog. Even if the images you captured won’t be used in your portfolio, posting them on your blog and telling a story with them is a good idea. When people visit your website and see your blog they can get a good idea of how busy you’ve been and what type of gigs you’ve been photographing.

14 – More Sharing
As you hopefully did when you were at the gig, post your images to social media. Use some of your final images and remember to use all tag the relevant account names and hashtags.
15 – Follow up with Networking Contacts
Finally, make sure you follow up with any people connections you made at the gig while you were networking. Let them know about all the good work you’ve done with your publications, blog and social media sharing. This is especially important to do if you have the contact details of the band manager or venue manager. It will show that you are capable of producing results and that you are worth considering for the next gig the band does or the venue hosts.
It may seem like a lot of work but shooting a concert is more than just turning up and snapping a few images. If you want to make the most of your time and more importantly get recognised as a great concert photographer, then having these steps in your workflow will help you deliver results that will help you achieve that goal.
If you want more tips and advice on concert and gig photography then check out my other articles on Improve Photography:
If you have any questions or other tips then let me know in the comments below!
Thank you
Very interesting tips Julian, especially the Hashtag tips. I just shot (or tried to shoot) a concert in a pub with my 70-200 where the 16-35 would actually have worked so much better, so research as to the venue is critical!
Hey Glenn, thanks for reading the article and for leaving a comment. Glad you liked the article. Yeah, a little venue research is never a bad thing. There’s almost always some video footage on YouTube from a venue, even if it’s user generated content.
Great tips. Thanks for the article
Hi Laurens, glad you found the article helpful. Thanks for reading!
I like to go early while the house lights are up because stages are configured differently. If there’s a runway out from the main stage into the audience, you need to figure out how much the lead singer will be out there vs on the stage with the band. I ask the lighting people to add a white light wash to the first three songs if they only plan to use colour washes. Nothing worse than a singer’s skin being green or pink . With a white wash you still get the green or pink (or whatever) on their hair, but the skin tones look more natural. When I can’t get that, a lot of images become B&W.
Although you mostly shoot directly at the stage front (I steady my arms leaning on the actual stage) some artists only let you shoot from the lighting / sound table as they reserve the area at the front of the stage for their in-house video guys. IN those cases, I try to negotiate shooting from the edge of the venue or from kneeling in an aisle to get a little closer. Because you may not know how close to the stage you’ll get, you need to bring lenses with some reach. That’s why making friends with the sound / lighting people is important, they will let you leave your gear protected with them while you shoot.
I never try to stay for an extra song, or force the security to come and remind me that my time is up. When the last notes of my song limit are still playing, I;m making my way out. That is noticed and appreciated by the security and the promoter – who you will likely see again, and again at the same venue. Security people give me ear protection when I forget mine because they see me so often.
I always try to talk to the concert promoter several weeks in advance. I offer two or three shots for their personal use, and this relationship has resulted in backstage photo opportunities, advance notice of concerts coming up, and the word gets around to other promoters that you’re easy to work with and don’t push the limits.
Hi Allen, thanks for the reading the article and for sharing your advice as well. Good point on exiting on time after the first three songs. Like you I’m often exiting the pit just before the end of the third song.
The use of hashtag tools like hashatory in hashtag research would be very handy.