
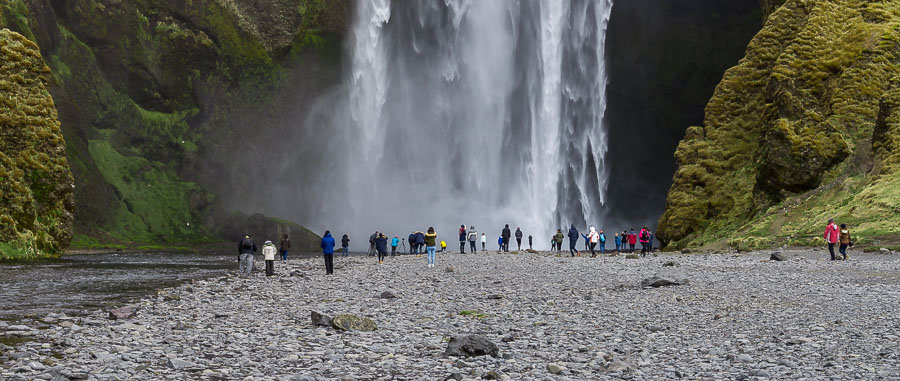
We’ve all been there. You spend lots of time planning a location for an epic image, even travelling from long distances to get there, only to find the location buzzing with activity from other people. Enough people to detract significantly from the image you were planning on getting. And returning at a later, quieter time isn’t an option. So what do you do? Remove the people!
The tools we have today make removing people from your digital images quick and easy to do. And without the need for a megaphone to yell at all the people to get out of the way. Here are a couple of Photoshop techniques you can use to get that epic, people-free image that you have pictured in your mind.
Image Stacking
Popular locations do get lots of people visiting, but they tend to be moving around the location rather than staying in a single spot. Image stacking takes advantage of this by assessing multiple images of the same scene, where the people are in different places within the scene. It looks for the common pixels across the multiple images you have taken, removing everything that changes and keeping everything that stays the same. When it sees the people in the different places, the people will be removed and all you will be left with is the background you wanted.
What you’ll want to do is take multiple images of the scene you want, with the people being in different places in your scene. Try to aim for 20-30 seconds between shots, as it will often give enough time for people to move about the scene. Taking between 10-20 images is usually enough for the image stacking process to assess the scene. The time between shots and the number of images you need can vary, depending on how quickly or slowly the people are moving in your scene.
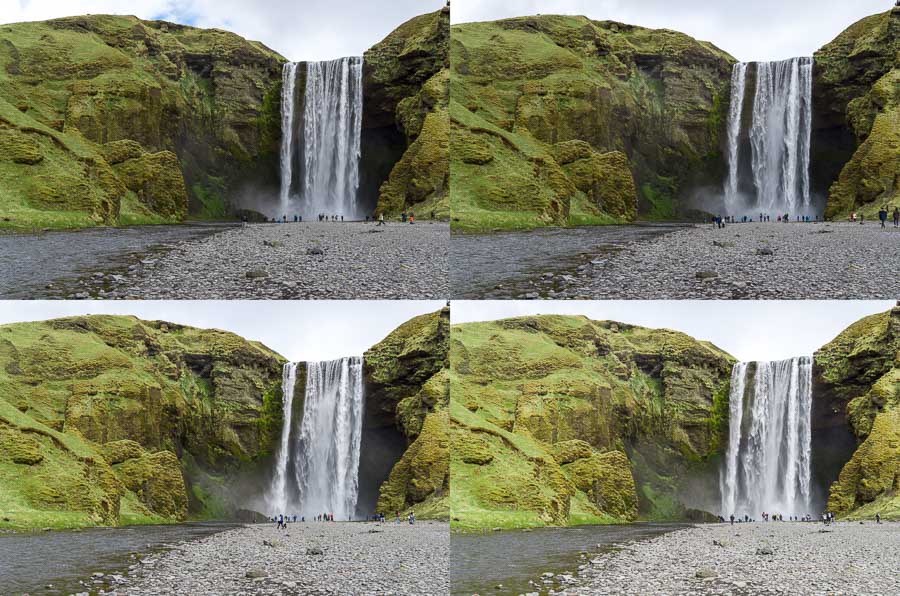
The more the scene in your images line up, the better the results in Photoshop will be so you will ideally want to have your camera on a tripod. If you don’t have a tripod, try to keep the camera as steady as possible, even by leaning the camera on something stable for support to get that consistent composition across the multiple images.
You could also use an intervalometer to program the number of images you want and the time between images to be taken, but that’s optional. If you prefer more control over when you take the images based on where people are at any given time, you can use a remote shutter release cable to eliminate camera shake you may get from using the shutter release on the camera body.
Load Images as Layers in Photoshop
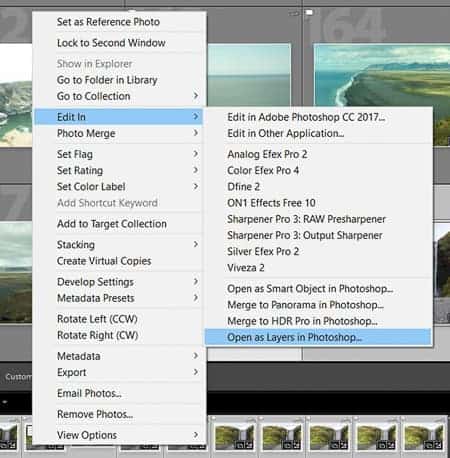
There are a few ways to get the images into Photoshop. What I usually do is edit my images in Lightroom first. Since the composition and exposure are the same across all my images, I do my edits on one of the images and then sync the changes to the rest of them. Once my initial Lightroom edits are done, I import the images into Photoshop. To move them into Photoshop, select the multiple images you want to work on in Photoshop, right click one of the highlighted images and choose: Edit In > Open as Layers in Photoshop.
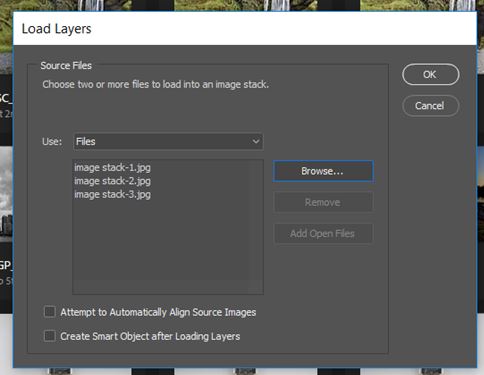
 Alternatively, you can load the images as layers into Photoshop from outside of Lightroom by going to: File > Scripts > Load Files into Stack, and then browse for the files you want.
Align and Stack your Images
Once the images are in Photoshop as layers, you’ll want to make sure the layers are aligned for image stacking to work. This is important to do if you didn’t use a tripod but even if you did use a tripod, the images could still be slightly off due to camera shake if you weren't using a shutter release cable, or if there was a strong enough wind. You can check this by hiding the individual layers one by one by clicking on the “eyeball” to deselect and see if there is movement in any of the layers. Make sure you select the “eyeballs” again to unhide the layers once you’re done.
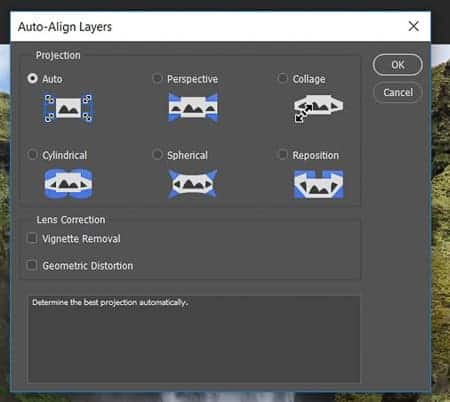
To align the layers, you’ll need to select all the layers and then go to: Edit > Auto-Align Layers, and select the Auto option.
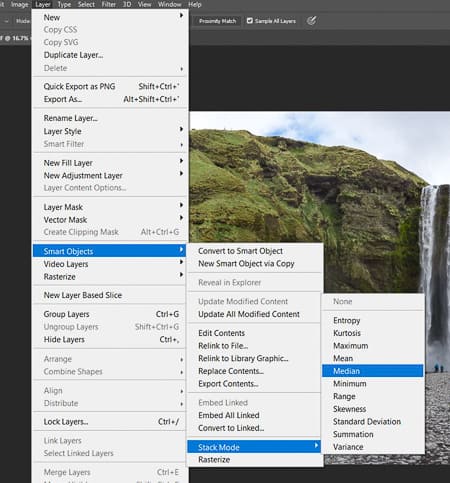
The next step is to create a smart object from the aligned layers. With all the layers still selected, right click on one of the highlighted layers and choose Convert to Smart Object. After the smart object is created, go to: Layer > Smart Objects > Stack Mode > Median.
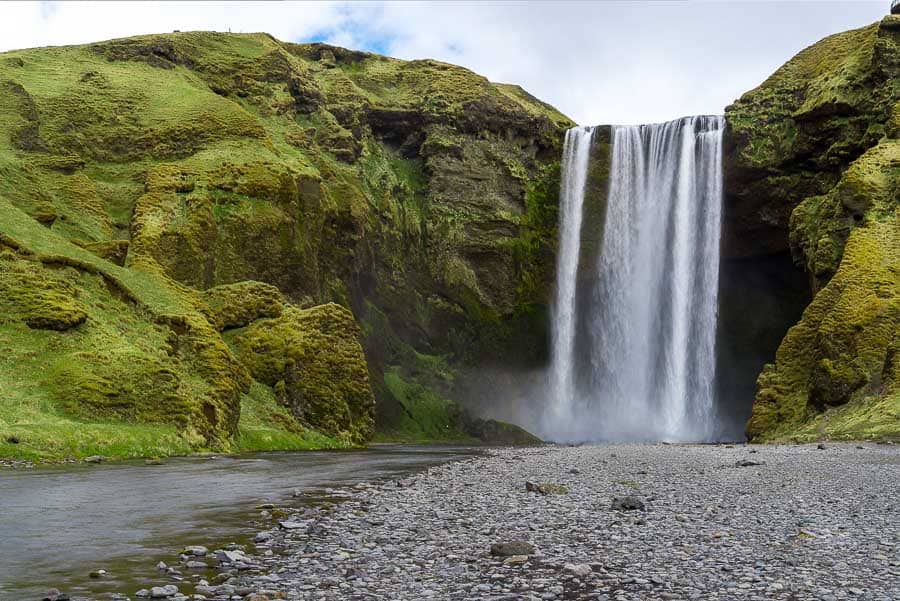
Any remaining people or ghosts that are left in the image can be erased by using tools such as spot healing brush, clone stamp, content aware fill, etc. Even though I had several images at this waterfall to work with, I found the image stacking process detected the movement of the waterfall as well as the people, so there was a lot of ghosting that I had to clean up. Movement in the scene as well as the people is another factor to keep in mind when you want to try this technique, as it will contribute to ghosting in the stacked image. Once you have your cleaned up image, you can then do any additional Photoshop edits you may want to do. If you imported the images from Lightroom, you should save the final image in Photoshop so that it appears back into Lightroom for exporting or any final edits that you want to do.
Statistics Script method
Here is an alternate image stacking method. It reduces most of the steps outlined above into a single step, which can make the process faster. This method however, is only available in Photoshop CC. You won't be able to “round trip” from Lightroom either. To use this method, go to: File > Scripts > Statistics. In the Image Statistics window that opens, set the stack mode to “Median”, then click Browse and navigate to the file folder where your images are saved. Select the images you want to open in Photoshop and make sure the tickbox is selected to attempt to automatically align the images.

This will provide you with the fully stacked smart object in Photoshop, where all you will need to do is clean up any remaining people or ghosts, and do any other editing that you may want to do.
Blending
If there are a small number of people in your image, using blending techniques in Photoshop may be easier than Image Stacking. You’ll need fewer images, maybe two or three, but you’ll need to make sure that people have moved to a different location in the scene before you take your shots. Using a tripod will be important to make sure that the images you are taking are aligned.
To blend the images, you’ll need to load the images into Photoshop as layers, align the layers if required, and then use layer masks to erase the people from your images. With the people in different locations across the different images, you’ll have background detail in one image where there's a person in another image. With layer masks, you can erase the people on one layer and reveal the background from the other layer.
If you happen to have people overlapping across the layers where layer masks won’t completely erase them, you can use other blending tools such as spot healing brush, clone stamp, content aware fill, etc. to erase them.
Ultimately, it’s personal preference on the approach you take to remove people from your photos. There are different benefits for each technique. Even though it’s more involved, my workflow centers around Lightroom, with the file management system and my initial post-processing, so I prefer to “round trip” my images into Photoshop. I also like the additional control I get from doing each detailed step of the process. Give it a try and see what you think. It's a great technique to help your image stand out from all the other images that are out there.
This is such a great new feature of Photoshop. I will need to buy a tripod so i can try this 🙂
Glad you enjoyed the article Asger!