

What Is Plotagraph?
Plotagraph is software that utilizes an animation technique that brings motion to still images. Many of you may be familiar with a related technique called a cinemagraph. A cinemagraph utilizes a video clip and freezes a portion of the video while allowing other parts of the video to play forward. This gives a unique effect of it being a still image with parts in motion. However, the cinemagraph technique requires careful planning, a tripod, and a somewhat steep learning curve on the processing technique. Essentially, you need to know ahead of time you want a cinemagraph and plan it out.
With this new Plotagraph software, all you need is a still image. The software will add animation to the image where you want it. The results can be spectacular.
According to Plotagraph Inc.,
Plotagraph is a professional image animation software and sharing platform that is now available in a lite version for iOS with iPad and soon to launch on the iPhone. The Plotagraph technique allows users to add motion to any still image. This exciting new medium sits in-between a still image and a traditional video. The loops are created from a photo, illustration or painting that is animated using proprietary algorithms creating an endlessly looping video or APNG (Animated PNG). Plotagraph is the evolution of art and photography and pushes the envelope for the future of dynamic looping content.This animation technique was created by Troy Christopher Plota in 2009. Plotagraph was founded by partners Troy Christopher Plota and Sascha Phoenix. Plotagraph is a family-owned software company that launched their pro paid beta on 4th of July, 2016 and had their official launch in October, 2016 at the Photo Plus Expo in New York.
I will admit that when I first heard of this and saw some of the images, I had two thoughts. One, I thought this is a gimmick, these examples are the best of the best and probably impossible to replicate on my own. Two, I could probably do the same thing in Photoshop (which I already have). I was wrong on both counts.
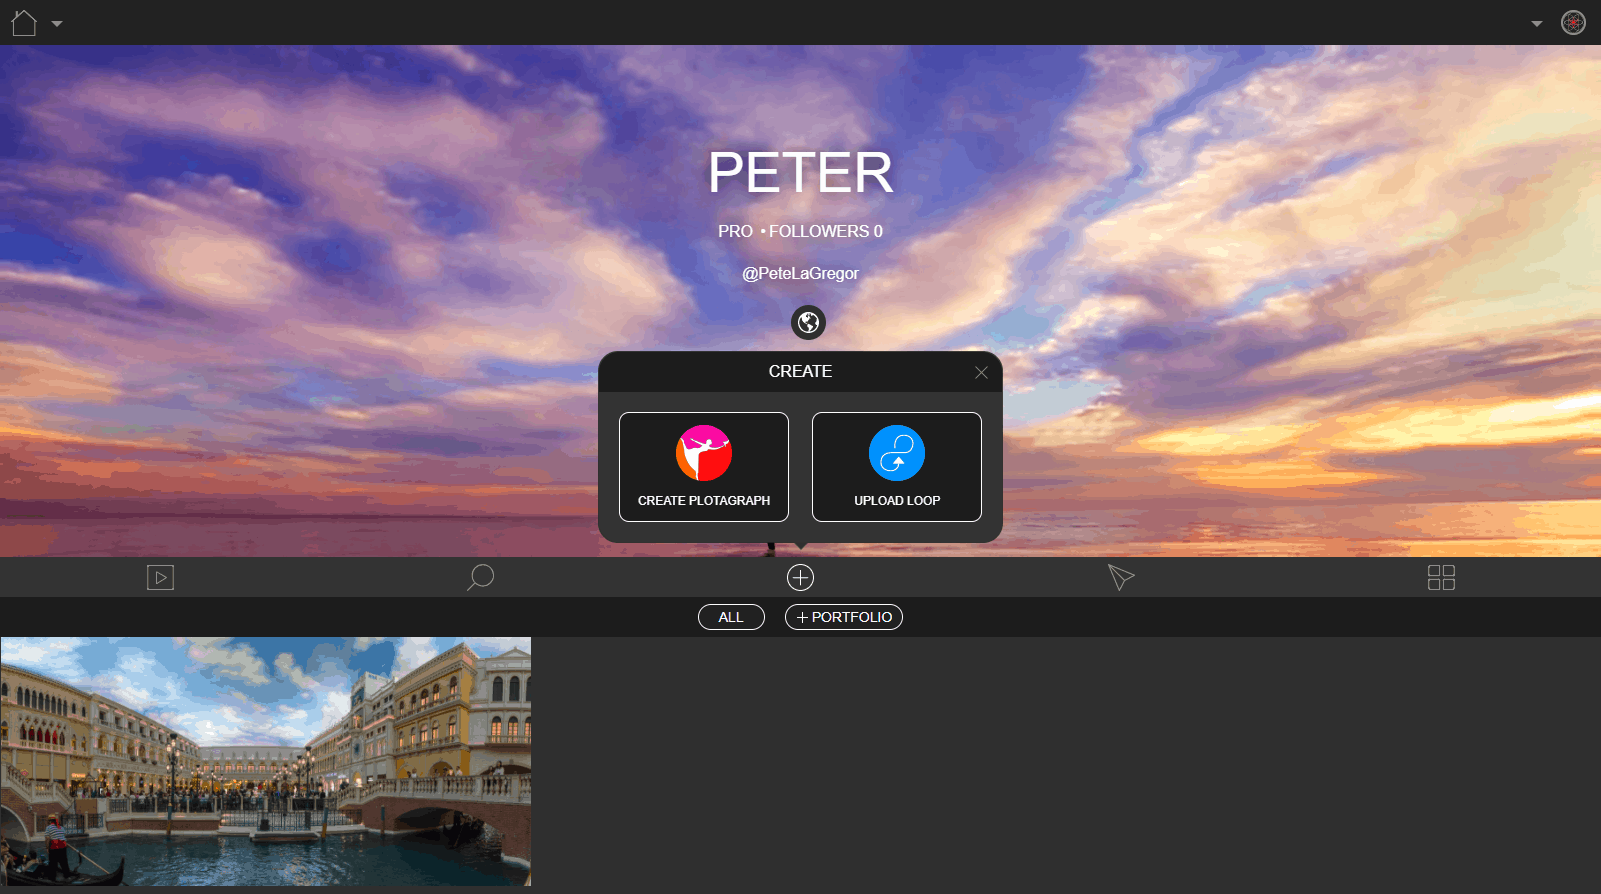
After spending about a month using Plotagraph, I can say that it is not a gimmick. There is some serious processing going on under the hood of this software. I was able to take some of my old photos and animate them in ways that I never thought possible. Once you register as a user (there is a free option) you get your own “Galleria” to showcase your work. This is a page that you can send people to in order to see your work.
I will also add that Plotagraph offered me a limited free trial to test their software but is not compensating me in any way for this review.
How Does It Work?
Plotagraph uses a number of tools, some that function in a way you may be familiar with from other editing software, and some completely unique tools. Generally speaking, these tools all work together to tell Plotagraph what to animate, what to keep still, what direction to animate it, how fast to animate it, and how it will loop.
Masking
This works just like any basic masking tool you might be familiar with. It masks off the selected area from rendering any animation. You can adjust the brush size to get into the more precise areas. There is an eraser tool to correct any masking of areas that should not have been masked. Plotagraph also lets you feather the masking to avoid any hard edges in the transition area from animated to still.
One very useful masking feature is the ability to start with the entire image masked and then erase where needed. In most photos, the animated areas will be much smaller than the still areas. The ability to start with everything masked, saves a lot of time in this circumstances.
The masking does have its limitations however. Areas on the edge of the masking sometimes get caught up in the animation and start to blur out a little. For example, if you are trying to make water under a dock move, you might start to see parts of the dock closest to the water blur into the animation a little. This is solved by the stabilizer points that are described below.
Animation Points
Animation points are the engine that drives this software. The animation points are little arrows that control where the animation occurs, the direction it moves the image in, and the speed at which that movement occurs. They use a click and drag method of placement.
The direction that you drag will be the direction that the movement occurs. As best I can tell, the software moves the pixels with some motion blur effect and then loops that motion. This works best with larger areas of fairly uniform content, such as clouds, water, or even a large flowing dress. If you get some singular objects caught up in the animation, you can distinctly see the repeating pattern of movement. However, with something like clouds, it really does give the effect of the clouds moving across the frame.
The length of the animation points controls the distance that the animation moves during each repeated cycle. The essentially makes it move faster or slower as well. I found myself experimenting with different length animation points to get the effect that I wanted. This is really where the control of the artist comes into play. I was surprised at how something so simple could have almost infinite control over the animation.
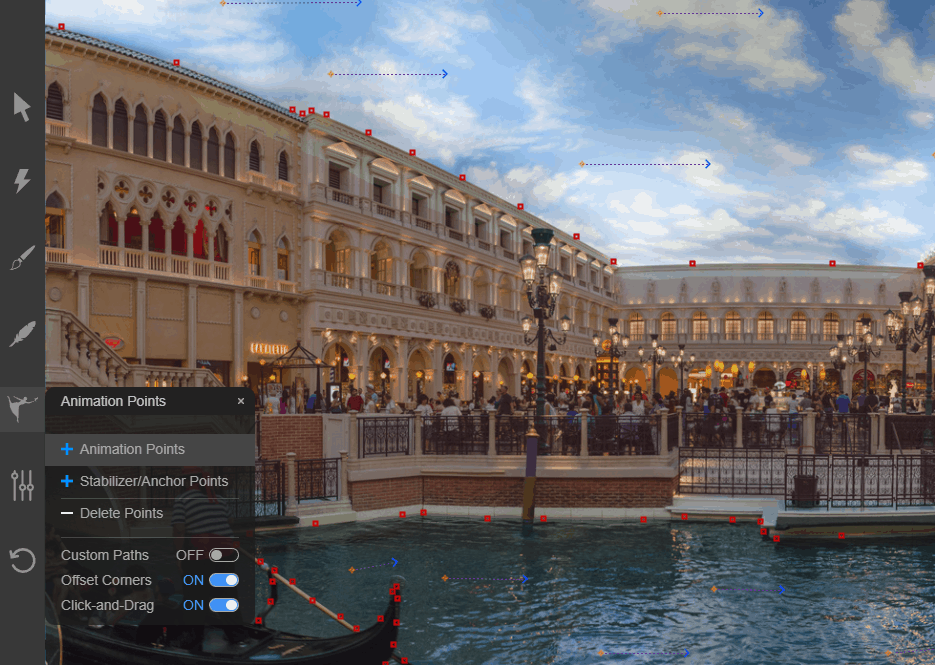
Stabilizer Points
Stabilizer points are more precise and, in my opinion, more useful than the masking. These are single click placed points that designate a point that will not move. I found these to be of paramount importance along the edges between animation and still areas. The way I have found most useful is to use them to create a border around areas that you don't want to move. I start by placing a few of them and then test the animation. If I see any pixels moving that should not move than I drop a stabilizer point on them and test again.
Sometimes too many stabilizer points can give a more unrealistic look to it so you may find yourself going back and deleting a couple. However, I found myself adding points much more often than deleting them.
I'll also note that in many circumstances, you can skip the masking altogether and just use the stabilizer points. The masking is nice to have for larger areas, but is really made unnecessary by the stabilizer points. On the other hand, you can't really have full control over your animation without stabilizer points.
Animation Properties
Animation properties is where you can have more control over the global settings on your animations. Here you can control the speed by lengthening or shortening the duration of the animation loop. A longer duration means that the animation takes longer to get from beginning to end and therefore goes slower. A shorter duration makes the animation loop finish faster and therefore the pixels move quicker. Keep in mind this is not the final duration of the end video, this is only the duration of the loop. You can make a much longer final video. All that happens in that case is that it loops more times.
Here you can also control what kind of animation loop occurs. The standard, or “infinity” mode, is a continuous loop that blends seamlessly from end to the beginning again. “blend” mode is similar to infinity but it seems to do a little better job at rendering movement across a longer area, such as clouds across a sky. The “circular” mode lets the animation go forward and then have a hard start again at the beginning. This lets you clearly see the beginning and end of the animation. It makes quite a jarring transition from the end of one loop back to the beginning. I haven't quite figured out a use for this. You can also have the animation go back and forth in what they call “end to end,” which is similar to the boomerang effect of Instagram. “Pendulum” is similar to the “end to end” mode except it adds kind of a stretching rubber effect to the end to end movement.
Layers
Layers allows you to see the various settings you have in place, such as the animation points, masking, and stabilizer points. It also lets you see the framework of the “mesh” overlaying the animation. This lets you see how the animation is being rendered by the software. I found it quite interesting to see but can't quite figure out a practical use for it other than perhaps making it more clear what is moving and what is not.
You can also hide the image altogether and just see the points you have placed. This may make it easier to make changes so that you don't miss any unwanted points in place.
Overlay Library
This is Plotagraphs library of pre-rendered overlays for snow, rain, and fog/smoke. With the right image these can really complete your project. They were pretty cool and very well constructed. If I had an image that needed one of these effects, I wouldn't hesitate to put one of these overlays on it. However, I didn't really have occasion to use them yet, other than to test them out.
You can also add some stock audio to your video as well as upload your own logo file to overlay on it.
Brightness/Contrast
This tool contains some basic brightness and contract adjustments. I didn't find it all that useful, although under certain circumstances, I could see the need to adjust these after adding animation to accentuate the animation. For the most part, though, you should do your editing in your dedicated photo editing software of choice.
Type Tool
Not much to say here…it lets you add words. If you just want basic type overlaying your video and want to avoid having to go back into your video editing software, this can be useful.
Crop Tool
This is your basic crop tool with an added touch that I wish was available in more editing software. It gives you presets for various outputs such as square, iPad, iPhone, Instagram Landscape, Instagram Portrait, Facebook Cover, widescreen (16:9), and even Google+ cover or profile (for anyone still using that). I can't count how many times I wanted to upload a new cover photo for Facebook and had to look up the aspect ratio so that it fit correctly and didn't crop off anything important. This needs to be in more software…Adobe, I'm looking at you!
iPad Version
This is where I started before I even contacted Plotagraph about reviewing their product. The cost barrier for entry is fairly low and you get most of the features available in the paid PRO version. This is also where I would recommend anyone with an iPad also starts, mainly for the cost factor.
Social Media
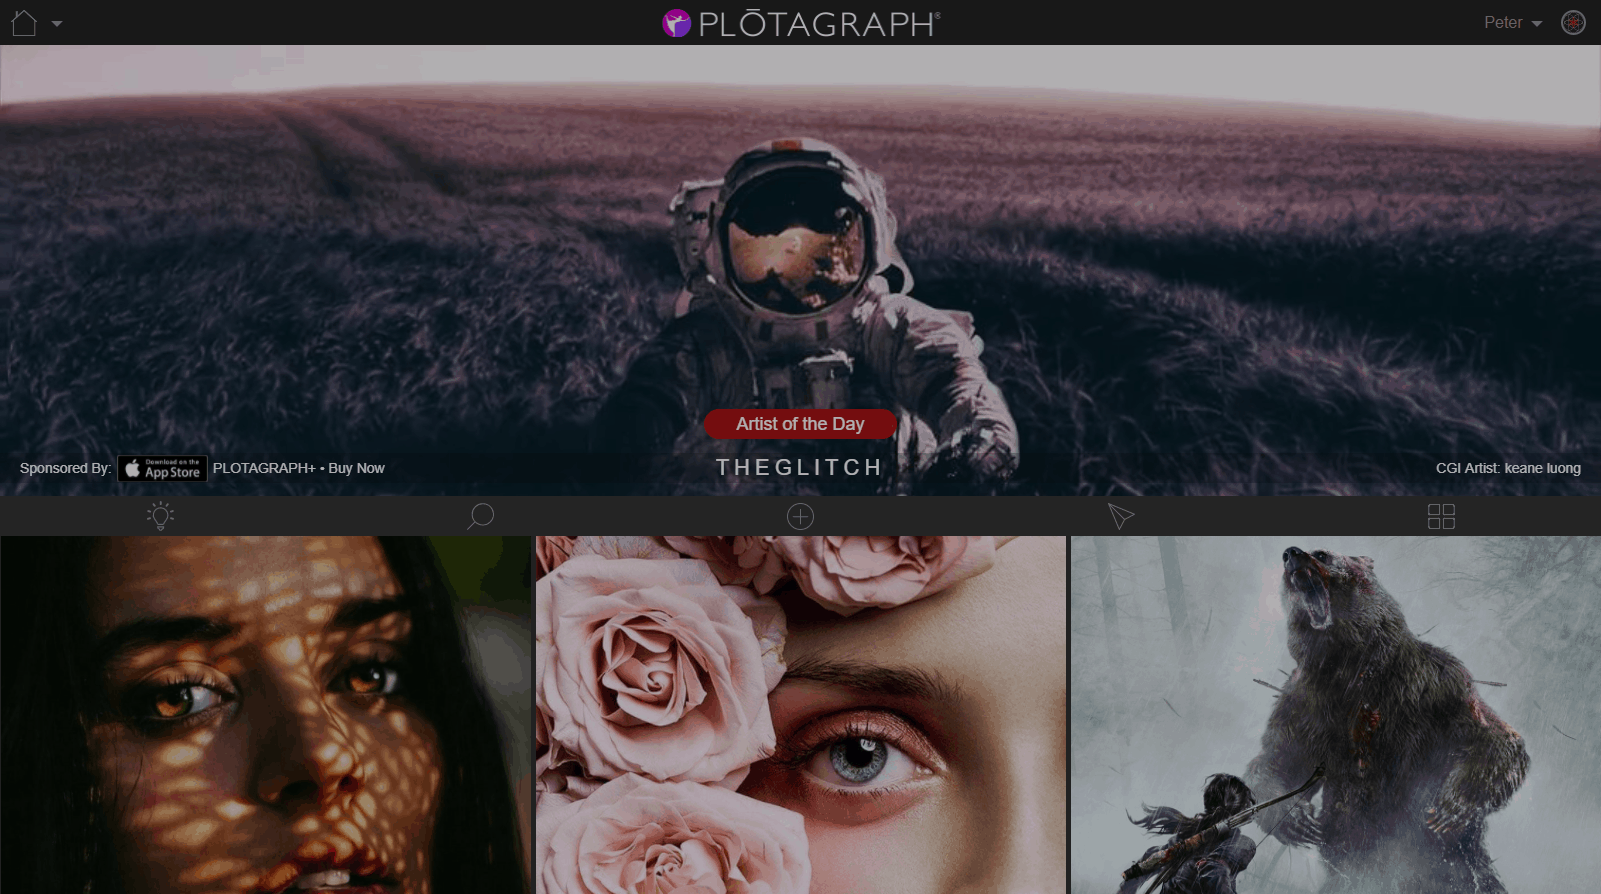
In order to share these animations you have created, Plotagraph has created their own social media platform that is optimized for sharing Plotagraph created animations. You can still export in video format to platforms such as Facebook and Instagram, but the Plotagraph platform really handles the animations well. As you scroll through it, they begin to animate as you hover your mouse pointer over them. This is a great way to learn new techniques and get inspiration for new ways to use Plotagraph.
Cost
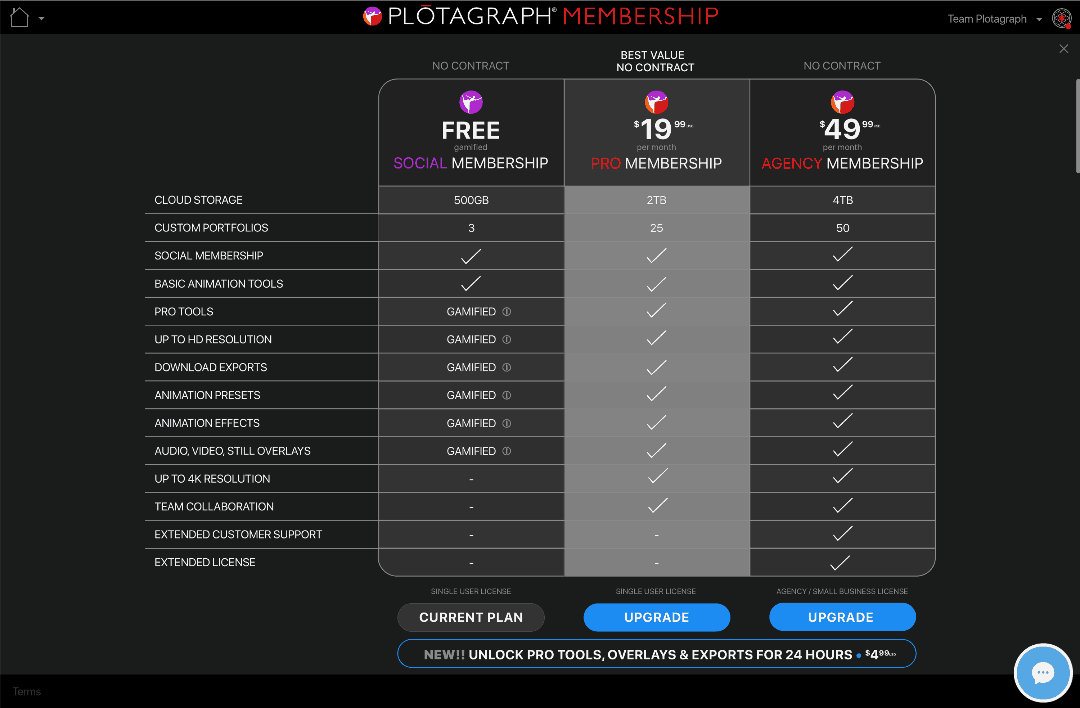
Basic functionality of Plotagraph is totally free. This gives you a good opportunity to check it out and see if its for you. For me, the biggest reason to upgrade to PRO is the HD resolution output. In 2017, I wouldn't put anything out there with my name on it that is not at least HD.
After that, it gets a little pricey. The pro version costs $19.99 per month. I really like this software, but this is the only negative thing about it. Considering I am paying $9.99/month for Lightroom and Photoshop, it is a little difficult to pay double that for software that is more of a niche product. Don't get me wrong, its an awesome product, but given the limited applications, that seems high.
However, one interesting, and cool feature that Plotagraph uses is the “gamification” of upgrades. This means that as you gain social followers, you unlock features that are reserved for paying PRO version users. For example, if you get 25 followers on their social platform, you unlock the masking brush and feather tool. However, for HD resolution output, you need 10,000 followers!
10/24/17 EDIT: They have added a new option to unlock all pro tools for a duration of one day for $4.99. This is pretty cool in my opinion. It's a great way to try out the full depth of features and make some cool images at the highest resolution possible.
Practical Uses For the Working Photographer
Ok, so you have read all of this and right now you are probably thinking the same thing I thought, “This looks really cool, but does it have any utility in my photography business?” It is a good question and one that I have been seriously considering over the past month. I think the answer is yes, to a degree.
I could definitely see myself using some Plotagraph generated animations on Facebook, Instagram and my website to grab attention. In fact, I just changed my Facebook background to a Plotagraph animation (and it looks pretty awesome). I can also see a huge use for this software in the commercial photography sphere. If you are creating images for companies to use on Facebook and Instagram to promote their products, this could represent a big value add (and upsell) for your clients. For the wedding and portrait photographer, the usefulness is more limited. You certainly can make some attention grabbing social media posts and MAYBE sell some video animations to clients, but I think the real value of this kind of animation will lie with commercial work.
Conclusion
I really loved this software. It was easy to use and the results were amazing. Like anything, you get out what you put in. You are not going to put in a mediocre photo and get out a stunning animation. Also, even if you put in a stunning still image, that image may not be the right fit for an animation. However, there is tremendous potential, and when you have the right photo and apply the right settings to it, you can get some quite unique and stunning imagery.
Thanks for the information. I’ve been starting to see these popping up in facebook and I’ve been wondering how they’re made. Now I know!
You’re welcome Jeremy. Thanks for the comment. It’s definitely fun to use and try out!
I have tried the Ipad version a few times. Have found the results to be a bit of a mess unless the image is very simple. Would love to try the desktop version – but their pricing is completely whacked out. This should be a one-off purchase at $60 max (with perhaps some in app upgrades) and when you compare their monthly price to other subscription models (even Netflix) – $19.99 is ludicrous. The sad fact is they would get a lot more users if they didn’t adopt the subscription model
I think you’ll find that image simplicity is very important using the desktop version as well. If not, then you will spend a LOT of time masking and using stabilizer points.
i have been using their software for years,,,there are a few new alternatives that I am going to test,,Zoetropic and photomirage,,we will see??? I for one will look for alternative to spending $$$ monthly…
Sometimes they are good. Other times they are just horrible. Saw one where some guy animated the milky way but the stars were moving too. Made a joke about it and he blocked me. Lol
Yeah that sounds about right. Done right, its really cool, but like any imaging technology out there, there are many many instances where people are looking for a one-click enhancement and don’t want to put in the work to make a high quality result.
Oh yes the problem i need to find. Your article provides useful information that i am looking for. I will often visit this site.