
In this article, I will share with you a robust and repeatable workflow that will ensure that each time you use an ND filter you'll get great results. The Neutral Density (ND) filter remains an essential piece of equipment for many photographers. Their use can extend exposure times to several minutes and can make focusing and exposure tricky, so having a solid workflow for their use is essential.
Are Filters a Thing of the Past?
For most landscape photographers the inclusion of filters in their kit bag is almost as important as a good tripod. Even with the dynamic range of modern sensors, there can still be the need to reach for a neutral density graduated filter to balance the exposure and prevent the highlights being clipped in the sky. The blending of multiple exposures in post processing has become very popular but many photographers still like to “get it right in camera”, choosing to spend less time on the computer and more time in the field. However, the effects of using a ND filter or a polariser are either very difficult or impossible to replicate in post-production.
What is a Neutral Density Filter?
The purpose of the ND filter is to reduce the amount of light entering the camera through its lens. The filter, normally square in shape, is a darkened piece of glass (or other material) that sits in a filter holder attached to the lens. Though there are circular ND filters that attach directly to the filter thread of the lens, these are typically used by videographers as the strength of the filter can be varied by rotating it, allowing greater control when aperture and shutter speed must be fixed.
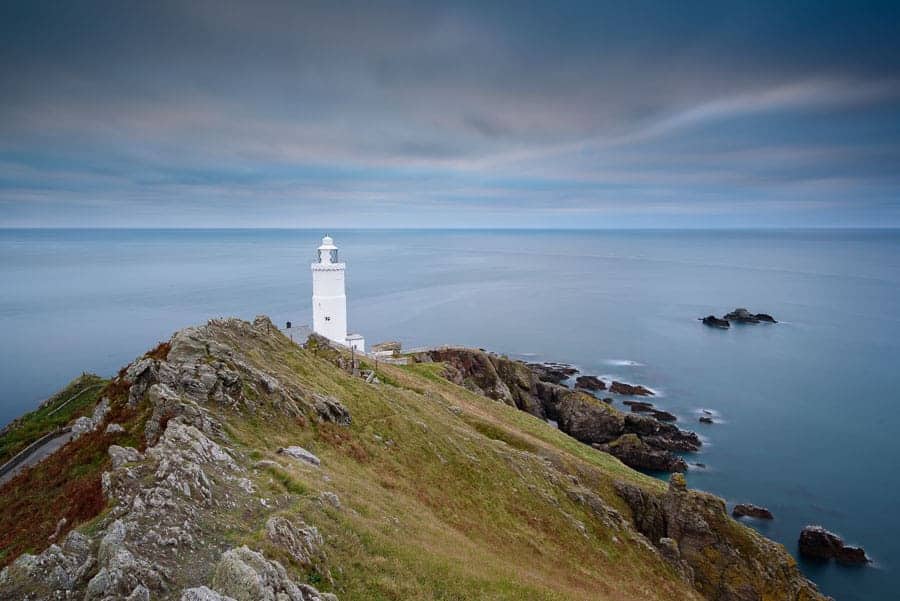
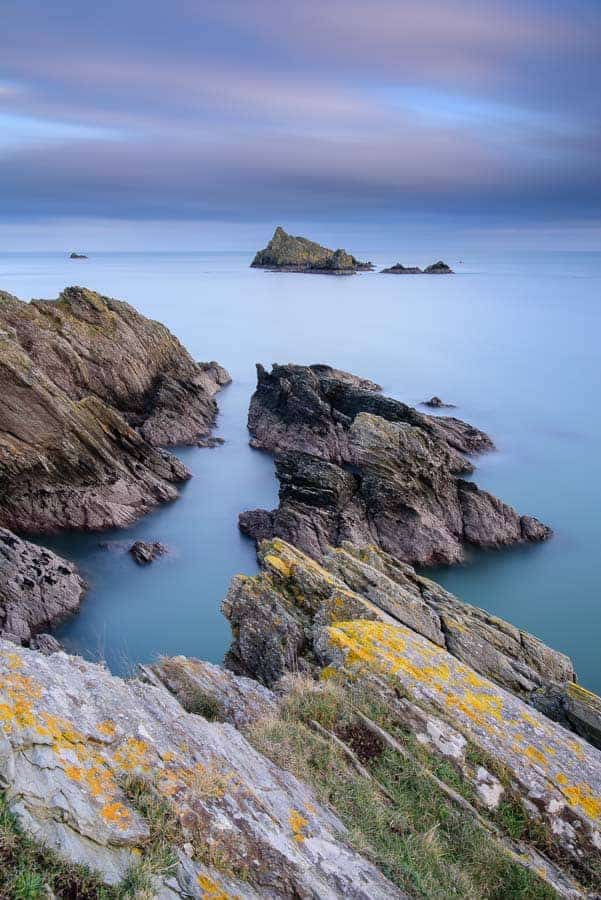
ND filters come in a variety of strengths including 3 stops, 6 stops, 10 stops and even 15 stops. Each stop reduces the amount of light entering the camera by half, so exposure times can vary from a few seconds to a few minutes. Used correctly, and for the right reasons ND filters can smooth out water, give rivers and waterfalls an ethereal look, make clouds streak across skies and even make moving objects like people disappear. The ND filter isn’t just for landscape photographers and it can be used in any genre of photography where long exposures are needed such as cityscapes.
No matter what type or strength of ND filter you use, the steps laid out in this article will help you use them successfully.
8 Steps to Success
The use of ND filters can extend exposure times to anything from a few seconds to 10 minutes (or more), and with the lack of light entering the camera, it can be difficult or impossible to focus or compose when the filter is in place. No one wants to waste several minutes on an exposure only to spot a problem later when you look at the image on the back of the camera. The light can change very fast, so by following this workflow, you can make sure that when the shutter opens and your long exposure starts you have a good chance that your image will turn out well!
1. Keep it Clean
This should go without saying, but before you head out with your ND filter, check it, and any other filter you are planning on using, is free of dirt, grit, fingerprints, sea spray or just dust. Depending on where you are going, the last thing you want to be doing is trying to clean your filters on location. Each manufacturer will have their own cleaning recommendations but a micro-fibre cloth and some anti-static cleaning fluid normally does the trick. If it’s just a bit of dust try a blower. Remember to take your cleaning equipment with you in case you need a mid-shoot clean. The blower is actually rather handy for blowing little droplets of water of your filters so it’s worth taking as well.
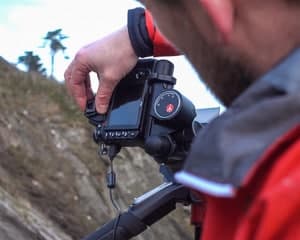
2. Set Your Composition
While it may be possible on some cameras or on really bright days to still be able to compose an image with a strong ND filter attached, I would recommend getting your composition sorted before attaching the ND filter. If the ND filter is attached and each shot takes 2 minutes, you’re going to spend a lot of time each time you fine-tune your composition. Get everything placed in the frame the way you want it and then make sure it’s locked in using a sturdy tripod.
3. Take a Base Image
Without any filters attached take an image and then check it for sharpness and exposure. Is the image acceptably sharp in the areas you need it be? Is the image well exposed? Could you expose more to the right, or have you got blown highlights? The idea of the base image is to make sure the fundamentals of the image are correct before adding filters.
Though not essential, I would recommend starting out taking your base image in manual exposure mode. You will need to do this later anyway, as adding a strong ND filter will likely prevent the automatic exposure mode on some cameras working correctly.
If you aren’t comfortable in manual exposure mode at this stage, don’t panic, just use aperture priority for now and let the camera work out the exposure for your base image.
4. Add Other Filters
Once your base image is sorted you may choose to add a polariser or ND graduated filter. Perhaps you found that the highlights in the sky are being blown out? Now is the time to add your ND graduated filter.
Take your image again and do all the same exposure and sharpness checks. If you added a polariser at this stage you will need to check your exposure again as polarisers tend to also reduce the amount of light entering the camera.
Remember to leave the slot in the filter holder that is closest to the lens free for your ND filter. ND filters should always be placed closest to the lens.
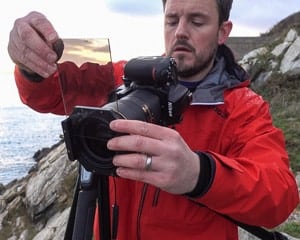
5. Prepare the Camera for a Long Exposure
Time to go to manual mode! Take note of your aperture and shutter speeds from your last image, set your camera to manual exposure mode, and input the same values. You will change the shutter speed in the next step, but it’s handy to dial in your base image values now.
You will also need to set the focusing mode to manual as well. With the stronger ND filters in place, the metering systems aren't the only automated system on the camera that could struggle. If you are already using Back Button Focusing (BBF) you don’t need to switch to manual focus as the camera’s autofocus is already decoupled from the shutter release.
One last thing, it’s good practice to cover the viewfinder of your camera during long exposures. I typically only do this if the exposure time is more than a minute or if the sun is directly behind me but getting into the habit of doing it will do you no harm. Some cameras have a built-in switch to do this, others you have to slot a cover in, but if your camera has none of these either cover it with your hand, tape, or a bit of cloth.
6. Select your ND Filter
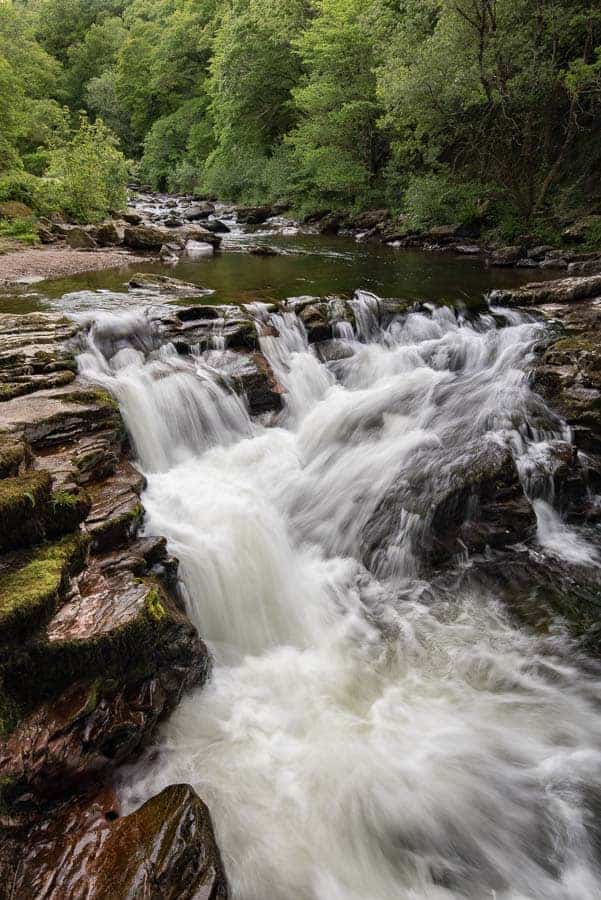
Your selection of ND filter is really a creative choice. Pick carefully though as stronger isn’t always better. Rivers and waterfalls typically only need a ½ to 1 second exposure time, whereas cloud movement may need 30 seconds to a couple of minutes.
Selecting which ND filter to use comes with experience so you may need to experiment a little. Remember though, use the ND filter with purpose as it won’t make a bad image a good image, but used in the right circumstances it can really change the way a photographed is viewed.
7. Calculate the New Shutter Speed
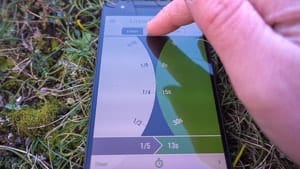
With your choice of ND filter in place, the amount of light entering the camera has reduced so you will need to set a new shutter speed. You can do the math in your head by doubling the exposure time for each stop of the ND you’ve selected, but anything past 3 stops and I’m reaching for an app! I personally use the Lee Filters app as it already has options for 6, 10 and 15 stop ND filters, and it has a handy little countdown timer built in.
Generally speaking, if your base exposure was correct, the calculated value should give you a similar exposure in the final image. However, a lot of this will depend on your actual filter. For example, some 10 stop filters might be closer to 9.5 or 10.5 stops, but with experience of your own kit, you should be able to make your own minor adjustments.
Where things may not be so straightforward is when your exposure time is measured in minutes and the sun is either rising or setting. At these times of days, the amount of light can vary a lot over the space of a minute. There really aren’t any hard and fast rules here. You will learn from experience to either shorten or lengthen calculated values.
If you’re just starting out though, the calculated value from an app will get you great results most of the time!
8. Take the Photo!
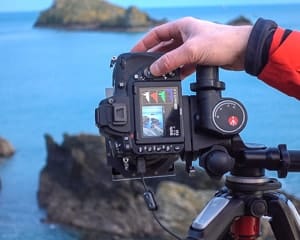
Yes, finally you get to release the shutter. Either use a short timer to trigger the shutter, or use my preference of a remote release and mirror lock up. If you are using a 3 stop, or maybe a 6 stop ND you typically won’t have to wait too long for your image. You may have to wait a bit longer for a 10 stop image and probably sit down and read another IP blog article for a 15 stop image though.
Once the exposure has finished check it all again on the back of the screen. If you followed the previous steps your image should be sharp, well exposed and look great!
And Finally
So there you have it, 8 easy steps to how to use an ND filter. OK at first that may seem a lot of work but I strongly suggest you stick with it. By preparing your camera, settings and composition before adding an ND filter you reduce the likelihood that your last two-minute exposure will need to be repeated because you didn’t check something.
Like any good camera technique though, the more you practice with it, the quicker it will become 2nd nature to you.
When you get home to process your images you may notice that some ND filters, particularly the stronger 10 and 15 stop variety will add a colour cast to the image. Don’t worry as this can easily be corrected in post-processing if shot your images in raw. Alternatively, the colour cast can be used creatively to set a certain mood for your picture. It’s up to you.
Remember to clean your filters when you get back from a shoot. I almost guarantee at some point you will forget to do step 1 and head out without cleaning them first. I’ve done it myself so I’ve got into the habit of cleaning when I get home as well.
Finally, if you want to know more about filters and why to use them (rather than the how that I've described), check out Mark's post on Filters 101.
Good luck and let me know in the Improve Your Photography Community below how you get on with workflow. Also, I'd love it if you shared your favorite filter tips!
Hi!
I still don’t get the results I want. Maybe you can help me along here because I don’t quite understand what metric I have to follow to get it right..
Let’s say my baseline exposure is something like this: ISO 100, f/16 and shutter 30. This makes the foreground nicely exposed and sharp.
I use an app (LongShots) to calculate how long exposure I need. So I type in my baseline Exposure, and under “target exposure” the shutter speed is changed to 120 using a 0.6 grad (2 stops).
So here is my question(s); * Do I change the shutter on my camera to 120 and take the picture as the target exposure says?
* Or do I change the shutter to 120 as suggested with the timer of 2 mins and take the picture?
* Or do I just leave the shutter at 30, and let it expose for 2 minutes as the app suggest on the timer?
Thanks!
/Anders
Hi Anders,
Thanks for reading the article and leaving a comment.
Is your question about using an ND grad or just an ND filter? An ND grad is typically dark at the top and then graduates to clear at the bottom of the filter. An ND filter is dark all over the filter. The reason I ask is that you mention you are using a 2 stop grad in your question. The correct answer to your question will depend on what type of filter you are trying to use.
Let me know and let’s see if we can help you out.
Hi!
I was referring to the 0.6 ND grad. Maybe I got the stops wrong?
Looking forward to your reply!
Hey Anders, thanks for getting back to me. The process for using a ND grad is slightly different than if you were just using an ND filter. You mention that when you take your base image that your foreground is nicely exposed and sharp so you are already on your way to using the ND grad correctly.
When you add your 0.6 (2 stop) ND grad all you are doing is darkening the part of the image that is over exposed (or nearly over exposed), so slide the filter down until the transition area (where the filter goes from dark to light) to around where your horizon is, and then take the image again. There shouldn’t be any need to change any of the exposure settings on the camera because your foreground is already exposed correctly and the ND grad should reduce the exposure in the part of the image that was a bit brighter (by around 2 stops).
This is unlike a ND filter where the whole of filter is dark, and without adjusting your exposure time, the entire image would be darker. This makes using a ND grad arguably easier than using a ND filter, though they do very different things and I will often use both at the same time, i.e. I want to darken an area of the image (e.g. the sky), and I want a longer exposure time.
Happy to answer more questions if needed, so let me know how you get on!
Hi Julian!
I have been traveling in Italy the past few weeks doing a lot of photographing and I understand now 🙂 It was as easy as it looked and I am happy with the results. Thank you very much for your help!
/Anders
Hi julian
just a quick quistion really, when am using nd filters and say for etc my setting are 100 sh speed and f11 and when doing the conversion on the app it says 40 sh speed am guessing i have to alter the sh speed to that on me camera and what exsposure mode is best to us with nd filters and grads
yours sinererly
joe devereux
Hi Joe, thanks for reading the article and for taking the time to leave a comment. Yes, once you’ve calculated the exposure length on the app you should dial that into your camera. In terms of exposure mode, just use the same exposure mode you used to work out your base image. When you switch to manual mode after you have added in the ND filters, the exposure mode becomes unimportant. Hope this helps! 🙂
Hi, I have a Nikon D750, I did all the steps (today I got my ND10) thread on the filter, change my speed to 30 minutes, click my shutter release, the camera does not take the pic, why? and when I look thru the viewfinder there is not a focus and 2 flashing arrows. What am I doing wrong? you and others guys said shoot, but my Nikon it does not agree with you all. Can you help me?
Thanks,
Rc
I take it you are in autofocus? It sounds like it’s hunting for focus. So back right up and try this. Auto focus on subject, then flick it to manual focus on the lens or body, only THEN will you insert your ND filter, dial in the info you need and take the pic. The flashing arrows indicate it was hunting and struggling to find anything with any kind of contrast to focus on as it was too dark through that filter set up for the camera to ‘see’. Hopefully that’s works for you
Matte
Roy, auto focus on your subject first, then flick it to manual focus and leave that alone . Your camera cannot focus through something that dark hence the flashing arrows. Only then new will you fit the ND filter, dial in your settings and take the picture
Hi, I am new, just got my ND64, I follow the steps, use f16, which ask for 8’53”, I need to use B (Nikon D750, manual) but when I release the shutter, nothing happens, the camera does not take the picture, can you explain why? I will appreciate your help. Thanks,
Rc
Hi
I am using a Canon 6D and following your steps to get composure. focusing etc and take a photo that i am happy with. now i switch to manual mode and make sure that i sat the same exposures as the correct shot. i then use my lee filter app and dial in compensated exposure. Attach my 10 stop ND filter and my exposure is miles off (under exposed) what am i doing wrong ????.
Great site by the way