
At some point in our progression as landscape photographers, we need to gain a greater understanding of composition if we want our photography to continue to improve.
The first composition tip any photographer will typically learn is that of the Rule of Thirds, which states that you should place the interesting elements of your photo on imaginary grid lines that evenly divide the photo into thirds, both horizontally and vertically. Next, the idea of leading lines is usually introduced so that we can use features in the scene to guide the viewer’s eye into it. These are both fantastic composition tools, and I still use them all the time in my photography. However, just because one tool works well enough for many situations in photography, that doesn’t mean you shouldn’t reach for a more specialized tool compliment it or replace it to take your photo to the next level.
The following is a list of 12 composition tips to keep in mind next time you are setting up your camera to capture a scene.
1. Survey Possible Compositions BEFORE Setting Up Your Tripod
Whenever I first reach a photo location, I do my best to survey the scene with only my eye before holding up a camera to it. I always want to examine what is in front of me, take it in, and figure out what about it I find to be visually interesting. Once I do that, I tend to bring my DSLR up to my eye, move around, zoom in and out, and see at how the scene looks through the viewfinder at different angles and focal lengths.
I tend to avoid setting my camera up on my tripod at first for two reasons. First, holding the camera up to my eye allows me to move freely throughout a scene to examine many possible composition options. Second, once I commit to a composition and set up my tripod, I tend not to move until the good light is finished, so I better make sure that composition is a good one. Unless you are really pressed for time, try to commit to giving yourself a predetermined amount of time, something like 5 minutes or so, to explore different options before setting up the tripod. I find this to be useful especially if there is an obvious composition at my location, because those tend to suck me in and guarantee that I won’t find a spot that is potentially more interesting.
2. Rank Your Foreground, Midground, and Background by Level of Interest
When you are in those first moments at a photo location, deciding the things about it that you find appealing, keep in mind that you have three main “zones” in your image: foreground, midground, and background. These zones are obviously roughly defined and will change based on the scene in front of you, but we can think of them as the things that will be the closest to your camera (the foreground), the farthest away from your camera (the background), and all of that good stuff in the middle (the midground).
If you decide that the foreground is the most interesting zone in your composition, you will likely want to choose a low tripod height and/or camera angle to emphasize its details. If the background or midground in your scene make the foreground look ugly by comparison, getting the camera higher off the ground will be the way to go. As a result, determining which part of your composition deserves the most attention will help to narrow down the options of where you will need to stand and how you will need to position your gear to capture your vision in a photo.
3. Use Block Method Composition
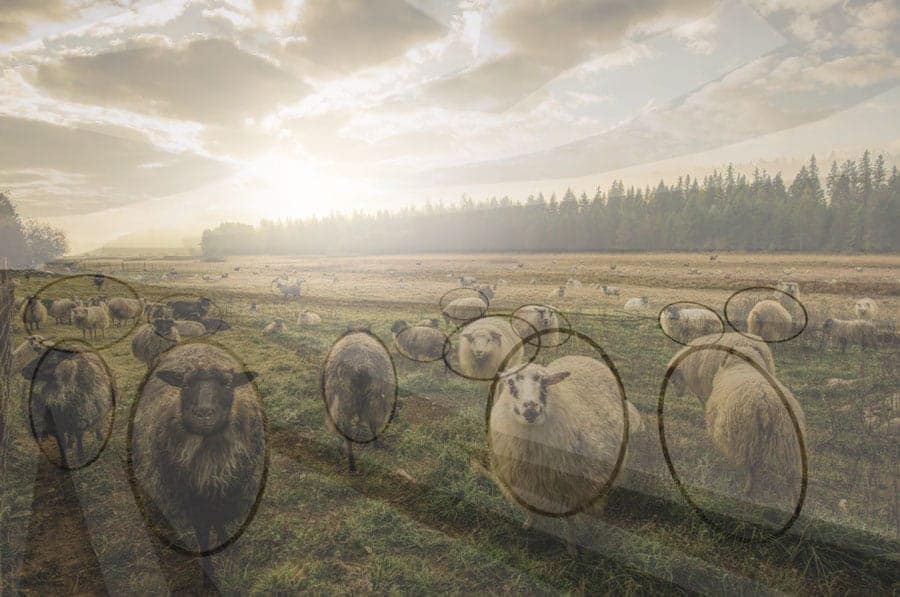
Block Method Composition is all about taking all of those pesky details in the scene in front of you and ignoring them. When using Block Method Composition, try to filter out the details in your image in favor or seeing the overall shapes that work together to form a composition. What shapes do the dominant features in your images create. Does a large mountain turn the scene into an unmistakable triangle? Does the framing of a lake shore and tree branches turn the scene into an oval? With Block Method Composition, the key is to determine what dominant shapes lie behind the mountains, rivers, trees, and rocks that comprise our composition, and figure how those shapes can work together to make a compelling image that is pleasing to the viewer. For more on Block Method Composition, check out Jim Harmer’s 90-minute video tutorial available on the Improve Photography Store.
4. Pretend You’re a Painter
This is a simple piece of advice that has the most consistently positive effect on the compositions I chose in landscape photography. A painter gets to create a scene with paint and brushstrokes as they see fit. Whether it be from memory, imagination, or from a scene directly in front of them, a painter gets to decide which details will be incorporated into a composition, and which ones don’t make the cut. When deciding on your composition, take a look at different elements of the scene and decide if they would be placed onto a canvas if you had a paintbrush in your hand. I find that asking myself this helps me to decide if an element is important or distracting, and, as a result, if I should try to include it in a composition or try to eliminate it.
5. Learn How Focal Length and the Distance From Your Subject Affects Its Size in Your Image
A few years ago, I took a trip to Ireland. If you look in my portfolio, however, you’ll notice that I don’t have any photos from Ireland in it. The reason for this is that while I was driving around the country, I was very focused on learning how to get a specific type of shot: ones with dominant, detailed foregrounds that make you feel like you can stick your face through the photo and be present in the scene.
I’m not saying that this type of composition is a bad idea. On the contrary, in fact; compositions with dominant foregrounds are some of my favorites. The issue I ran into in Ireland was that I had almost no understanding about how different focal lengths exaggerated the apparent sizes of the foreground and background. When shooting at ultra-wide angles (15mm on a full-frame camera, for example), small foregrounds can look enormous and 13,000-foot mountains can look minuscule. Meanwhile, longer focal lengths (such as using a 70-200mm lens) compress a scene, making far off objects appear to be closer to objects in the foreground and midground that they would at longer focal lengths.
6. Use Composition to Frame Your Image’s Focal Point
There are some very obvious ways to put a “frame” within your composition. Shooting from inside a doorway and having the door frame comprise the outer portions of your composition forces your eye to see what is beyond the doorway. In nature, however, composition framing can be subtler. When out in nature, examine your image to see which features create stark transitions of light and dark, well-define transitions from one color to another, or hard lines. These features can be used to capture the eye in a certain part of your image.
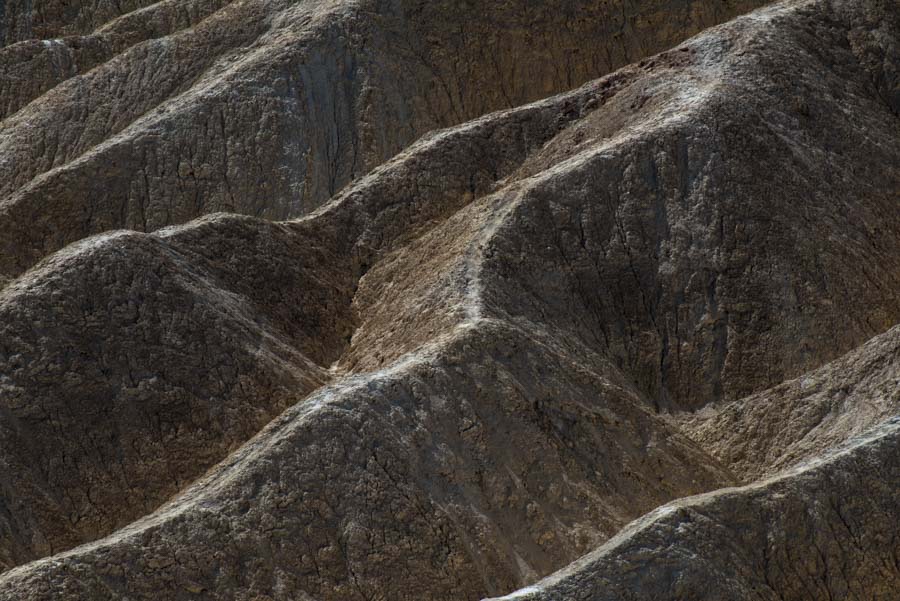
7. Embrace the Golden Triangles
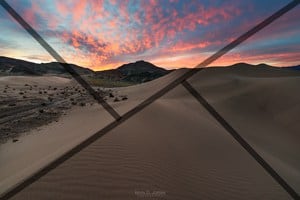
After examining some of my favorite photos, I realized that many of them share the composition technique known as Golden Triangles. I wish I could say that I use this technique consciously, but these examples are entirely by accident. Or, I at least didn’t have the term “Golden Triangles” in my head when composing these shots.
Take this shot from Ibex Dunes as an example. The boundaries of the dunes help separate the image into zones on, while the shapes of the clouds help contribute to the triangles on the upper portion of the image.
8. Look for Patterns and Find Ways to Break Them
There is a reason that our fabrics, clothes, architecture, and more have patterns. Repetition of shapes and colors are pleasing to the eye. When we used these patterns in our composition, they provide an opportunity to isolate a focal point in our image. By breaking the pattern, your viewer’s eye will gravitate towards the object in the image that is different, and which therefore stands out. In nature, patterns are less likely to be geometric shapes (although it’s still very possible), and more likely to be color or textures. When taking time to survey a scene, try to look past the basics like leading lines and notice which patterns emerge in front of you.

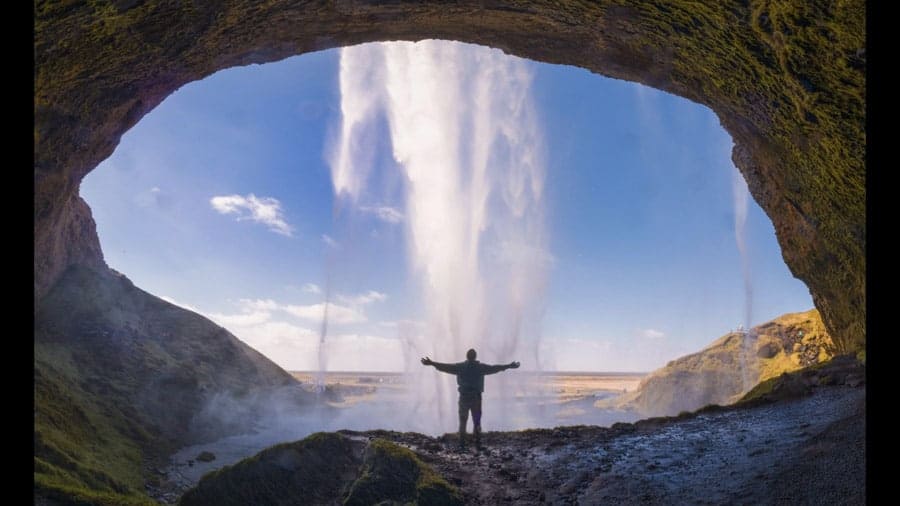
9. Look for Ways to Apply Scale
There are many grand landscape compositions that are dwarfed by wide angle lenses. This makes it hard to convey the sheer size of the areas we stand in or the elements of nature that tower over us, or that we stand on top of.
The most obvious way to apply scale is to place a person in your photo, which can make the enormous scale of something like a mountain or a sequoia immediately apparent. The reason a person works for scale, however, is because we know that most people are probably somewhere in the 5-foot to 6-foot tall range. By that logic, so long as the size of the object you want to use for scale can be estimated by the viewer (a boat, train, car, lighthouse, etc.), it will serve the purpose of bringing and added benefit to your composition.
10. Bake A Few Slices of Layer Cake
Layers are an important compositional tool that bring an often much-needed sense of depth to a two-dimensional image. And cake is delicious. That second part has nothing to do with landscape photography, it’s just true. Put these two facts together, and the “layer cake” can be a sweet composition tool to utilize in your photography.
Layers run rampant through nature. Mountains extending into the distance, sand dunes, trees, and more can all provide layers. The ones that are most effective combine forces with light that accent their shapes, thereby adding to the sense of depth.
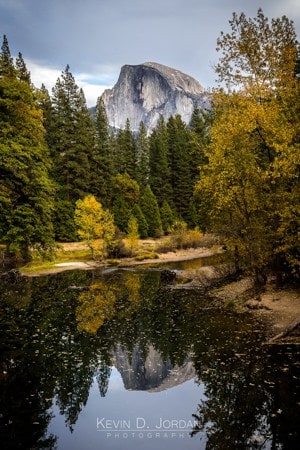
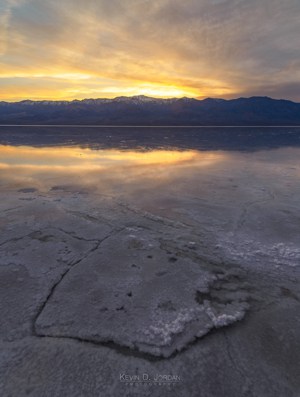
11. Look for Symmetry in Nature
Composing photos with strong elements of symmetry is commonplace in disciplines such as architectural photography. However, finding symmetry in nature is sometimes a more difficult task. Symmetry is often easier to create in landscape photos with a simpler composition, mainly because there are less shapes and elements in your frame that need to balance each other. However, some more complex scenes do lens themselves well to symmetry, especially when you can involve a reflection.
12. Color Theory
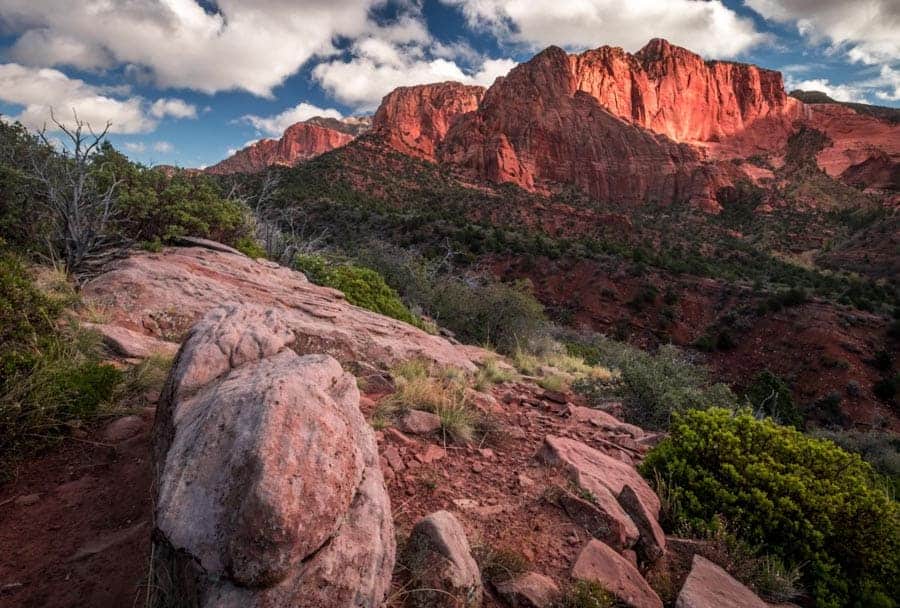
While light and shapes are important focuses in composing a photo, color should not be overlooked when trying to build a strong composition. Books have been written on color theory, but the most basic principle that can improve your photos has to do with complementary colors. If you look at a color wheel, you will notice that some colors are located on opposite sides of the wheel from each other. These colors—blue and orange, purple and yellow, red and green—tend to be the basis for visually appealing color schemes.
To take this idea a step further, we can venture into divided complimentary colors, which more or less splits the color wheel into thirds to show groups of three colors that work well together. For example, red, green, and light blue work well together. For this reason, Jim Harmer notes in his Block Method Composition Tutorial that he loves to photograph the red rocks of Arizona in daytime, because the blue sky compliments the rocks and green vegetation in a way that improves the composition.
Final Thoughts
You might already be using some of these composition tips. If not, it’s time to add them to your photography toolbox so you can use them out on location as needed. As a test, go back to your favorite photos and try to examine why you like them. You may find that you used some of these composition tips and you didn’t even know it. Keep in mind that good old leading lines and the Rule of Thirds aren’t obsolete, but knowing when to compliment them with additional techniques or discard them when the situation calls for something else can make your landscape compositions go to the next level in a hurry. If you're ready to learn more about composition in landscape photography, check out Jim Harmer's Block Method Composition.
Most of your footage would be thought of snapshots – your pets, the flower, the instrument. Not that there’s something wrong with taking footage of these subjects it’s simply that they’re rarely as fascinating to others as they’re to you.
Most of the content is very suitable for me and every files which are for the related to the cookies how to delete internet explorer cookies in windows 10. If you are not satisfy with your browser and want to clean and smooth for the use of application then this help would be simple for you.