
In many previous articles I have mentioned that I am one of the “mentoids” who have been concentrating on my wedding and portrait photography with Erica Coffman. If you haven't read it yet, you can see some of the reasons why this is an incredible opportunity in this article. But today's article is actually an outgrowth of a conversation that took place among the various other mentoids, and Erica. I have shot several weddings, and while I know and appreciate that producing a great album is an essential part of wedding photography, I was definitely not in love with the very substantial amount of time I was spending doing album design and layout. When I brought this up, Erica was very quick to recommend her software solution, Fundy Designer.
I reached out to Fundy, and I want to thank them for their willingness to provide a copy of their software for this review!
So the first positive experience came within about 2 minutes of launching the application. Before jumping in to an entire album design, I decided I would just try out their blog/collage utility. In less than 2 minutes, I was looking at TONS of super-cool collage layouts from my recent wedding shoot! Basically you just drag and drop images and as you work, the Fundy handles all of the design elements. Everything is totally customize-able, so it isn't like you are “forced” into a particular template, but the built in options provide dozens of absolutely amazing looking “jumping off points.” I was able to add my logo and a little accent bar at the bottom, and in just a couple of minutes I had something that was clearly a lot more polished and professional looking that just slapping the photos up in a Facebook or Instagram post. SUPER cool stuff!
The next thing I discovered was totally by accident. When I clicked over to start exploring the album creation portion of the software, there sat all of my photos! So basically, Fundy arranges everything on a “project” basis. So, let's use the most likely example of a wedding, or a family portrait shoot. You create one pool of images for your project, then as you switch from one section of the software to another, you are actually just working with the same set of images.
I poked around with the software for a few minutes, and quite honestly, I think I would have intuitively been able to design an entire album in there, without even glancing at the instructional videos that Fundy provides. I decided that since I was testing this software on a REAL wedding, with REAL clients, I didn't want to do anything less than an amazing first album. So, I sat down and went through every video that they have on their site, explaining a suggested workflow that integrates wonderfully with Lightroom, Photo Mechanic, or Bridge… or frankly, probably just about any culling/organizing program which you would use. I highly recommend these videos for anyone that decides to get this software. Even though the software is remarkably intuitive, these videos make some fantastic suggestions, and the workflow they describe is super effective.
So here are a few takeaways and thoughts about both the workflow, and the capabilities of Fundy Album Designer:
Start by “Culling IN”
One of the big obstacles to putting a great wedding album together is dealing with the large number of very similar shots. When you are going through to select the images to import into the Fundy software, you will do the initial culling in your existing software (Lightroom, Photo Mechanic, Bridge, etc.) In my case, I am still holding on to Lightroom. {insert snarky comment toward Adobe to get on that software improvement!}
So in Lightroom, go through and select truly the BEST amongst the multiple similar images, and that is your “5 star” image. Any other acceptable image can be labeled a 4, and it will go into your “alternates” pool. Having the alternates is particularly useful, because this software is also absolutely terrific for using as a client presentation tool. If a client doesn't like a particular image due to an expression, or whatever other reason, you can immediately access your “4 star” photos, and swap one out on the spot… making you a hero.
After you have gone through your entire inventory of images for a wedding, you export the images at their full resolution. Create a specific folder that you will use for the project. In my case, after watching the videos, I only exported my 4 and 5 star images. There was no point in exporting anything lower than that, because you do not want the 3-star images landing in an album that is representing the best that your photography studio has to offer.
Once the export is complete, you drag and drop all of the photos into your project in Fundy. Fundy utilizes the metadata in your image to determine the rankings. You can go into the filter in the Fundy software, and show only the “design selects” 5-star images. These are the ones that you will build your initial album from.
You can certainly build out an album one page at a time, and drag/drop/maneuver photos around in any way you choose. But the real treasure trove here is in the auto-design feature. In order to get the auto-design to think along the same lines as you, it is a very good idea to go through and do a bit of “pre-designing.”
The pre-design process
Main Image/Panoramic
Select your very best images throughout the gallery as “main image.” These images will be featured as the largest images on various suggested layouts. If you want to designate an image as a full-page spread, label it as panoramic. When the Fundy software does it's ‘thing,' your pano images will be featured in full glory, and the mains will be the center pieces around which the album is organized.
Grouping (G key)
If you have a set of images that you want together on a page, group them ahead of time by selecting all of them, and just hitting the “G” key. You will see tons of different layout designs, but this grouping will be kept together, and you will then just pick which design you like the best. Or, pick the closest one to perfection, and then implement the human element, and make it exactly how you want it.
Auto Designer
After you have identified your design select images (5 stars), selected ‘main' and ‘panorama' images, and created whatever groups you are interested in keeping on the same page, you head to the Auto Designer. In the third drop-down menu, you want to go in and switch to “design selects.” If you select the 3:2 aspect ratio, there will be no cropping on any of the photos that are used in your album. (This can all be changed later.) You can select how many pages, and how many images you want the album to be. That's it! When you are finished, it will create an amazing looking album, right out of the starting gate.
Adjusting
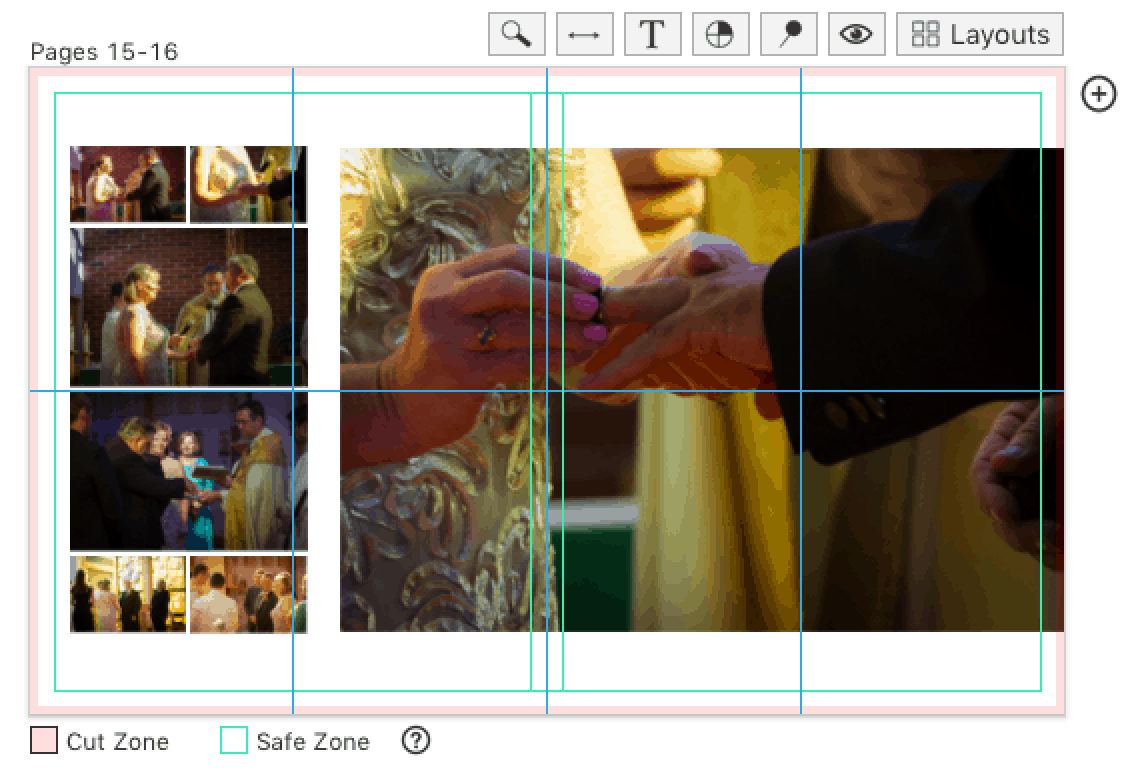
Computer software can do amazing things, but it's also incredibly important to go through and explore what options there are. With each page, if you don't love the “feel” of the suggested design, you can open up a wide array of other options. Select the one that you like the most, and then either use it exactly as it was generated, or you can very easily go in and adjust everything from aspect ratios to the cropping of each individual photo. In just minutes, you can go through the album and refine.
The photo below is one page of a sample albumI created.
If that layout isn't what I'm looking for, with one click, I get the following options:
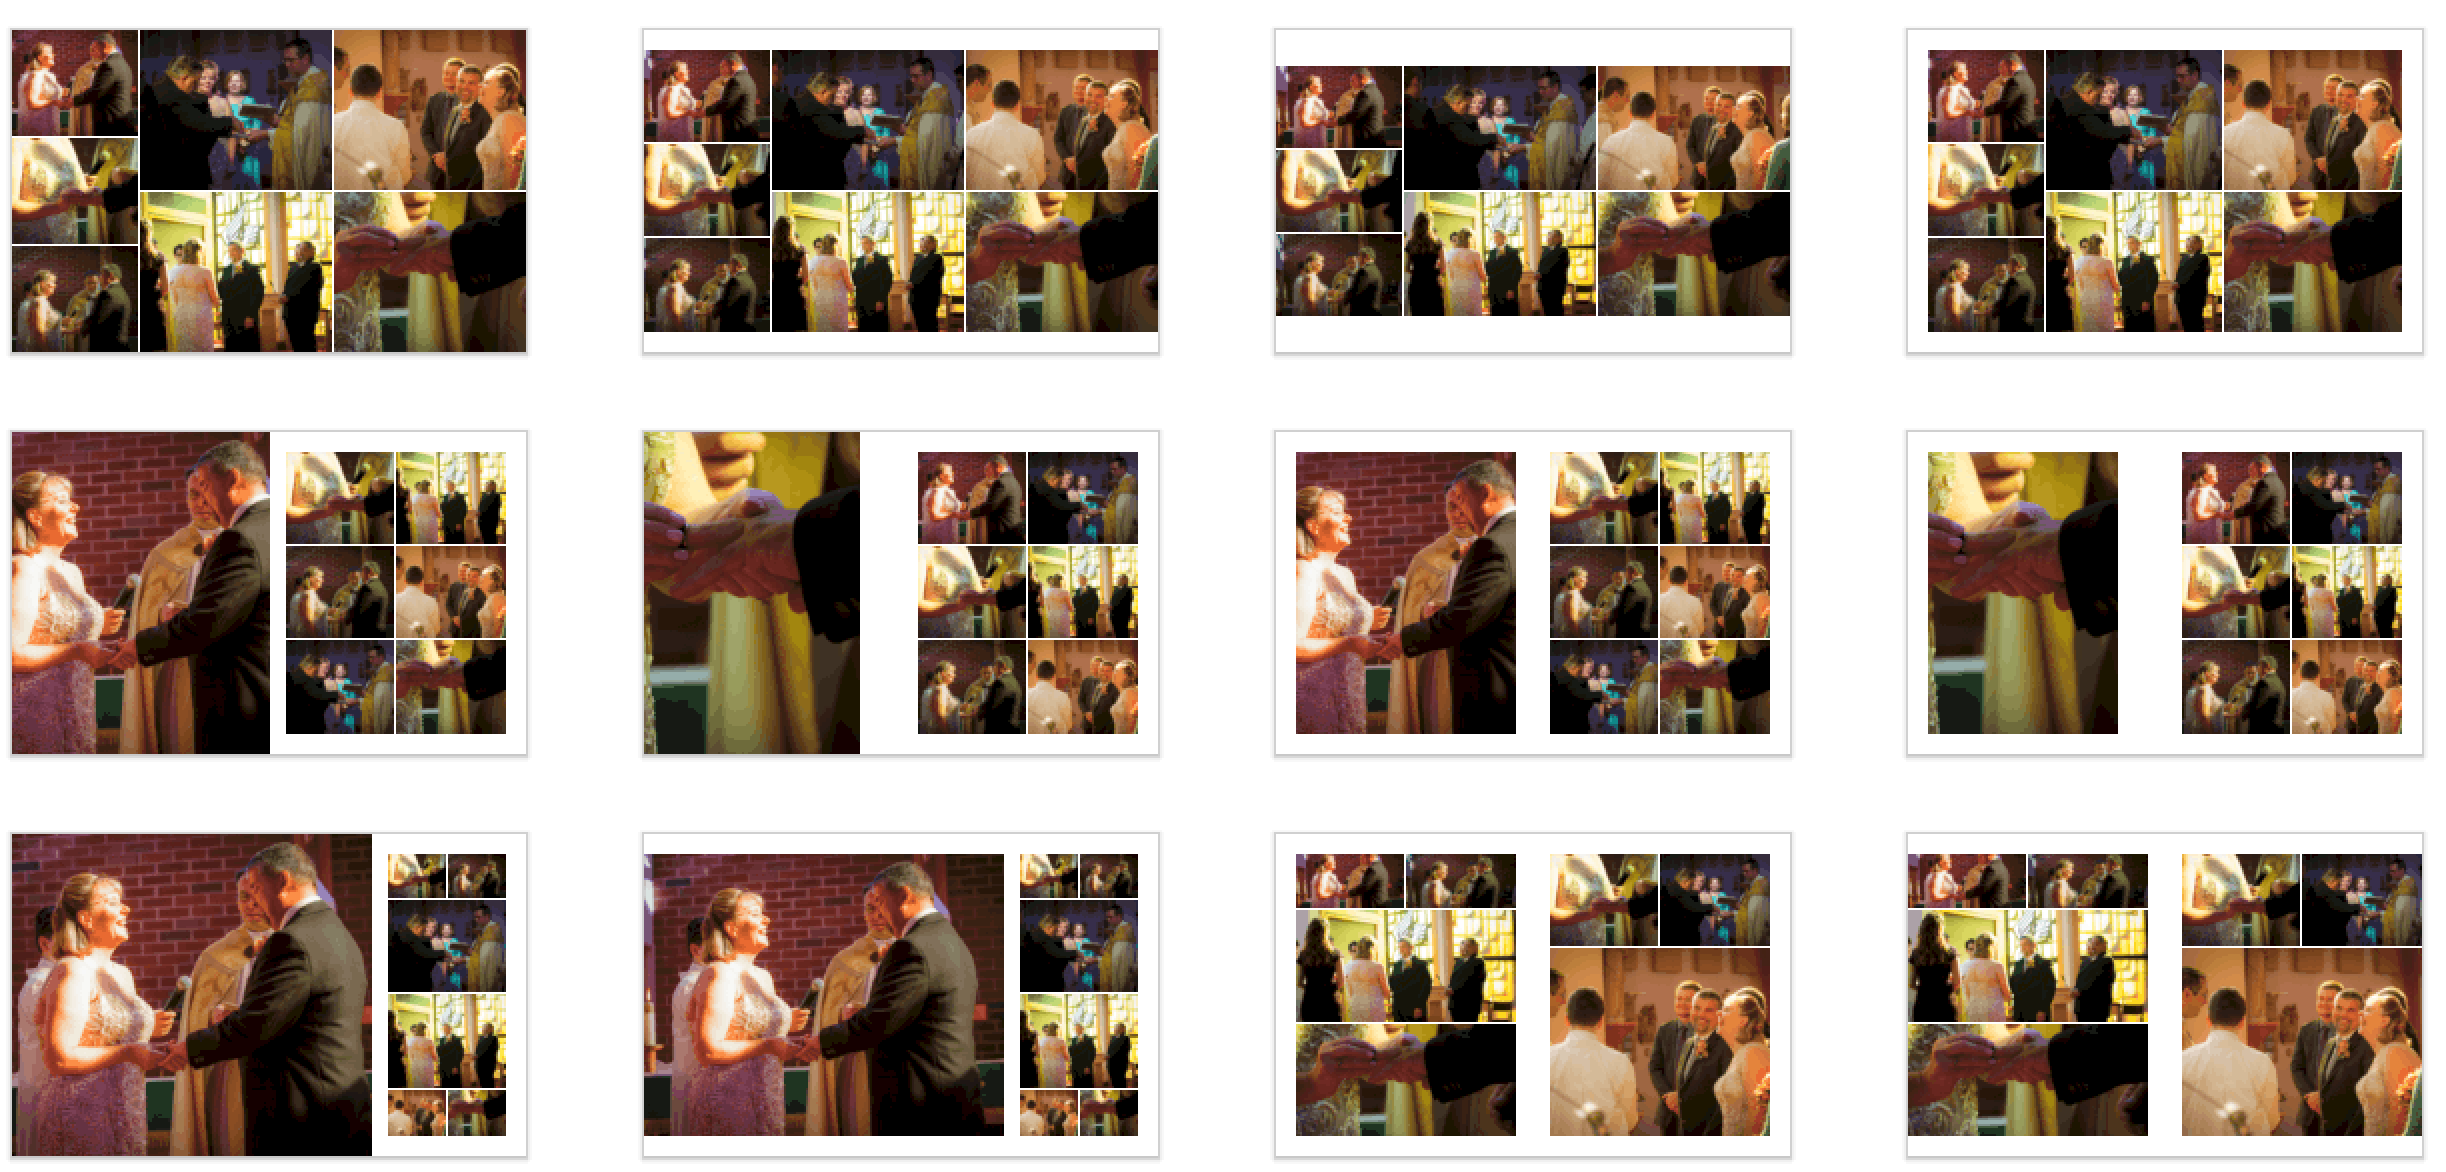
Any of these suggestions can then be easily customized/adjusted however you wish.
Client Proofing
This is an area of the software that I hadn't even talked with Erica or the other mentoids about. It's worth mentioning that several of the other mentoids in Erica's group already use Fundy. I was one of the only ones still working out of a drag and drop editor from one of the major print labs. It worked…but it is SLOW, and just extremely clunky. I can't stress how much faster and easier this application makes the process!
So back to the topic of Client Proofing. One of their videos shows a fantastic option of using a dual monitor setup. The client views the actual album pages. Your computer, however will actually have the full design application open. Here is where the 4-star alternate images are invaluable. If a client sees an image that they don't absolutely love, you can immediately go to those 4-star images, and just drag/drop one in place of the one that the client didn't love. In front of their eyes, the replacement just shows up in the album proof, and you are indeed a superhero!
This can be done with live proofing, where you are showing the materials on a projector up on the wall, or via a skype presentation, where you are sharing out that view. Another GREAT capability is that if you upload to a proofing gallery, the client can click on images that they want to have changed, and the software takes you right there. You can go from one to the next, swap them out, and send back to the client to re-proof.
Retouching After Creating An Album
I'll preface this by saying that you want to retouch all of your photos BEFORE you export them and load them into Fundy. BUT, if you realize after the fact that you have some editing to do, Fundy has you covered. First of all, you can select an external editor to attach to Fundy. If you want to externally edit in Photoshop, or Lightroom, you totally can set it up to automatically launch your chosen application.
If you end up deciding that you need to do additional edits on a lot of the images, you can still do your work in Fundy, and then when you go back and redo the edits, just make sure that you re-export to the exact same folder, and keep the original names. Overwrite the images, and when Fundy opens and populates the album that you created, the new edit of your photo will appear.
Sales Tool Extrodinaire
So the album sales techniques discussed on the videos are absolutely fantastic. It is very easy to see how this software proofing method will result in higher album sales, and also larger albums, which will equal more profit. The other incredible tool in the Fundy suite is the room designer. You can plan wall displays based upon actual photos of a client's room! Or, you can use standard room setups as an example. This is especially good for demonstrating why a client wants to invest in larger print products. It can be directly linked to your lab, and once the client approves the display, you can order right through Fundy! Here is an example of how to demonstrate the benefit to larger prints, vs a set of 12 x 8 wall prints. Allowing the client to visualize the photos actually hanging on the wall will definitely influence them toward the larger products.


After seeing these two illustrations, which sizes would YOU want to purchase? You can explain to a client until you are blue in the face, but actually showing them, using photos of their OWN space… not only a better client experience, but clearly a stronger sales approach.
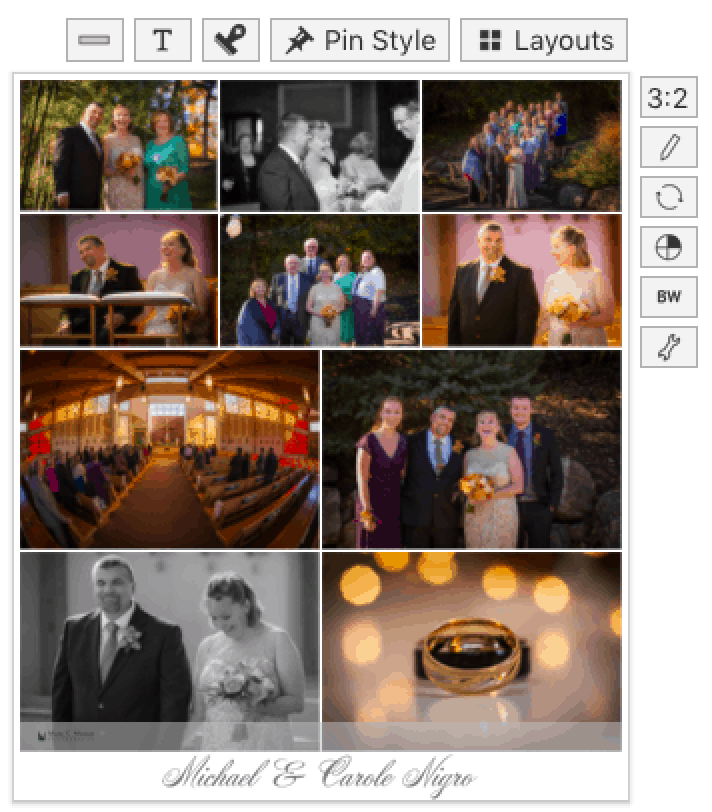
Blog Posts and Collages Made Simple (and nearly instant)
Setting up a collage of photos for sharing out via blog isn't the most time consuming task on a photographer's to-do list, but it's certainly something that would traditionally take a chunk of time. With Fundy, you just drag and drop the photos you want to include, and then the software gives you a TON of options for layouts and looks. This is the first collage I did with Fundy, within 2-3 minutes of installing the software. It's incredibly fast/easy to do.
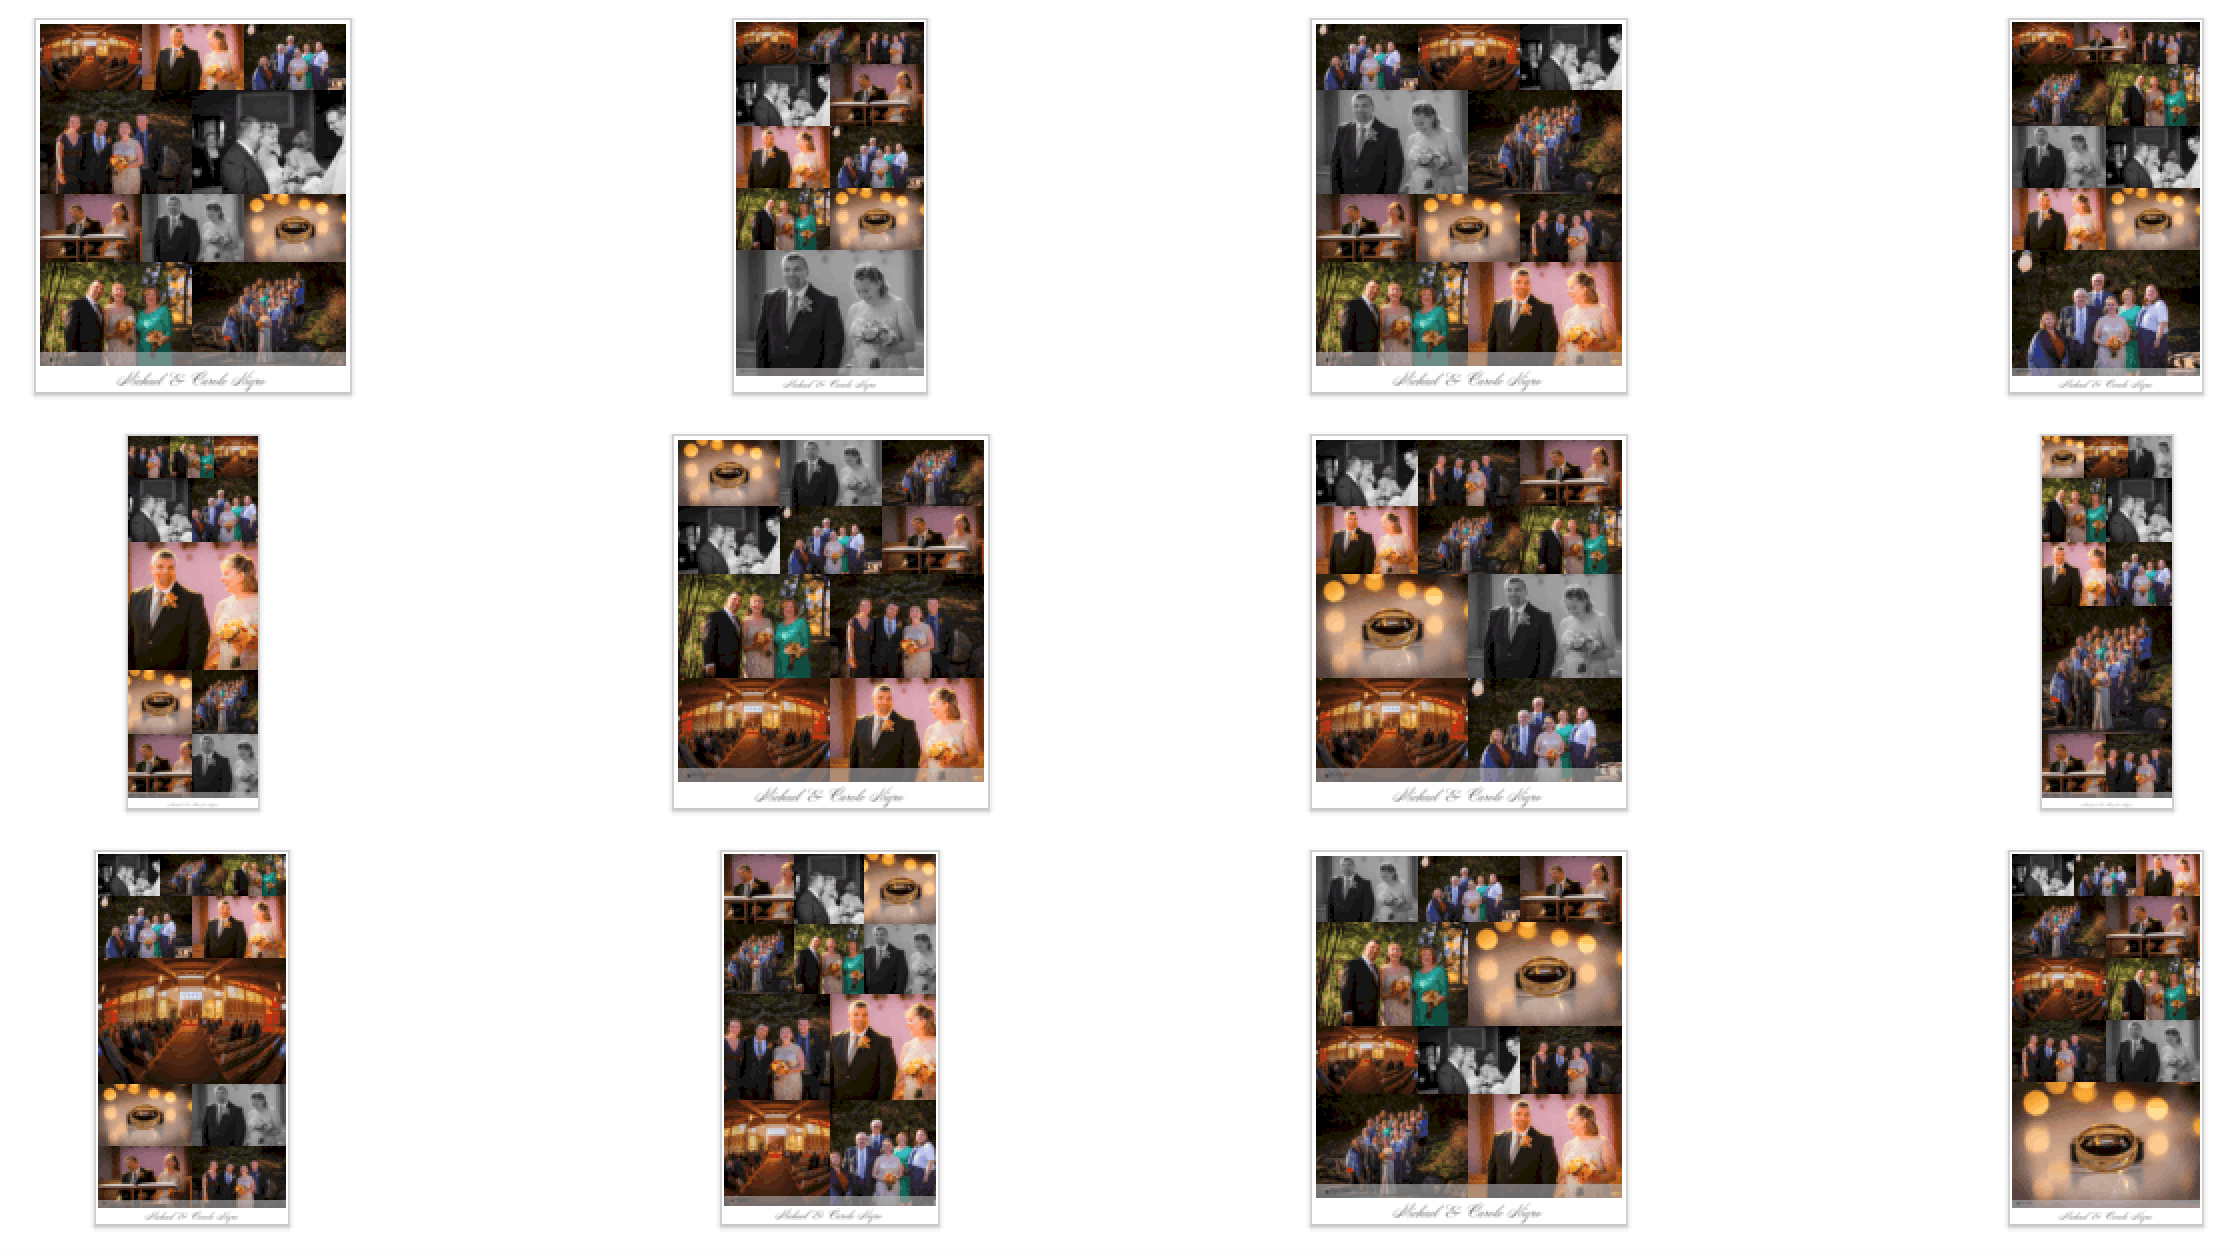
As with each design you create, just click the “Layouts” button, and you will have a vast selection of other options:
Why I'm Thankful for Fundy
- Fundy gives me time back to spend with my wife, and to get out and shoot more.
- The sales potential from this software is incredible. I have no doubt my sales for albums and wall art are going to improve dramatically.
- It's incredibly easy. There is always a learning curve, but this is an extremely easy piece of software to use.
Thoughts from Erica Kay
Since using Fundy was a suggestion from Erica, I asked her if she would contribute some thoughts on using their product. Here is what she has to say:
For Album Design: “I used to hate designing album. I spent so much money on album templates. I spent so much time on Photoshop designs. Now, similar to my blog collage process, I just add the images to Fundy and drop the images onto a canvas that's designed specifically for the lab and album of my choosing. Upon export, the designs are sized according to the lab and album I chose, so there's no guessing game on my end. I actually enjoy designing albums now that I can do a whole 15 spread album in about 20 minutes!!”
And for Blogging: “Fundy has absolutely streamlined my blogging process. I used to have to build collages in Photoshop, resize them, export them, blah blah blah. Now, I just upload the photos to Fundy, drag and drop into collages, make any changes I want, select my saved sizing profile based on my blog's specifications, and export. I can now design my blog collages in a fraction of the time it used to take using Photoshop. It's like a Christmas miracle!”
Thanks for reading, and I hope you all enjoy checking it out!
Hi, would you be willing to have a look at Moments Album Design Software also, it’s similar to Fundy. Link is in website field. Let me know. Thanks.