
I am guessing many of you have a similar story to me. I have always enjoyed shooting landscapes–all the way back to my disposable film cameras as a kid. As I got older and started traveling more, I broadened a little to include typical travel photography, but that was the extent of my photography for years. I never even thought of shooting a portrait, other than the normal snapshots of my family. The more I learned and the more I followed Improve Photography, I got interest in expanding my abilities and try new things with photography.
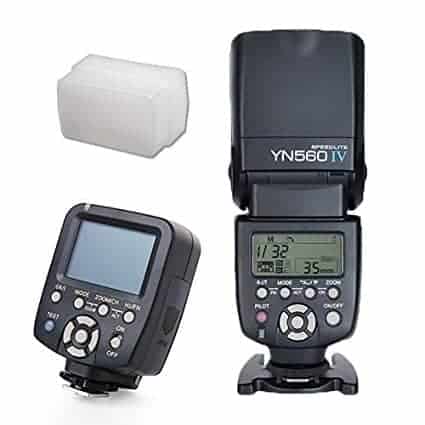
Sometime last year I decided it would be fun to try flash photography. My wonderful wife got on my Amazon wish list and bought me a speedlight and remote trigger for Christmas. Unfortunately, it mostly sat in my camera bag, coming out on a few occasions to shoot a kid's birthday party or my daughter's gymnastics. With no modifiers, I quickly learned the harsh and unflattering effects of direct light and was left to mainly bouncing the flash off the ceiling where I was able.
A few months ago, I decided it was time to get serious and learn flash photography. I started out watching Jim Harmer's Lighting in a Flash Workshop. This video was a great crash course that taught me a lot of the basics to get started. It is also available on the seriously awesome Improve Photography Plus, which offers so much training that I have thoroughly enjoyed. I would also recommend checking out this quick and easy breakdown of all the basics.
Once I had a basic understanding of how to get started, I set about getting the right accessories for my flash. I decided I would take you guys on my journey as I tested out some of the new equipment and learned how it would affect my light. I apologize for those experienced, but I hope this is beneficial to those that are just getting a start in flash photography and want to learn with me.
My first stop for accessories was Savage Universal. They looked to have some good equipment at reasonable prices. I started with the bare basics: the 9 foot drop stand; the 36 inch black and white umbrella; and the 43 inch 9-in-1 reflector. Also used in my first tests were my Fuji X-T1 with 18-135 Fujinon lens, my Oben CT-3561 tripod, The Yongnuo speedlight and trigger from Improve Photography's Recommended Gear page.
The Savage 9 Foot Drop Stand
The light stand is awesome. Before I got the stand, I was using an old tripod and it was very limiting. The light stand is so much easier to use and allows you to get the light up high for flattering portraits.
It is very easy to use and is very sturdy. It pops right up so you don't have to fiddle with the legs at all like with a 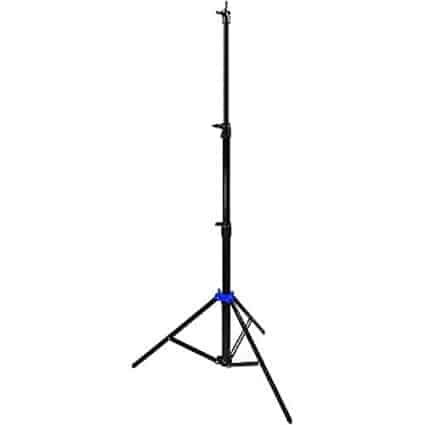 tripod. There is also only one section on each leg so the extensions are on the center column, which is convenient because it makes it fast to extend. It is also really quick and easy to turn the knobs that tighten the column so it is really simple to get the height you want.
I used the cheap flash bracket on the Improve Photography Recommended Gear page and it attached really easily to the stand and was easy to use with the umbrella. Overall, the light stand was very easy and convenient to use. It added so much more capability to using the flash because it allows you to go off camera and have the light coming from almost any angle you want. The only real limitation is you cannot get the light low to the ground, but I imagine the occasions where you would need that are rare. The only other downfall I encountered was the stand was not particularly compact, but since I don't see myself needing to hike with a light stand, it should not really be an issue.
If you are getting into flash photography, I think a light stand will really make your life easier. It was so much better to be able to throw the speed light on a light stand instead of using a tripod or otherwise trying to get the speed light where it needs to be. The light stand is a little bit of an investment at around $85 on Amazon, but it is well worth it given how easy it will make using your flash off camera.
THE SAVAGE 36 INCH BLACK AND WHITE UMBRELLA
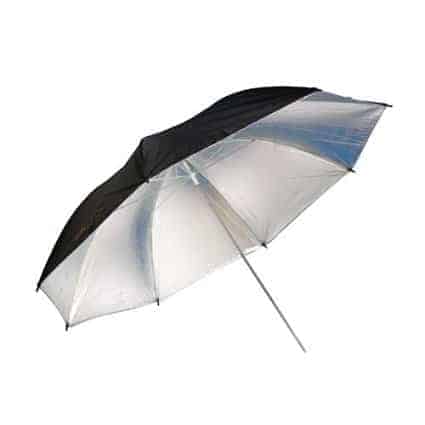
When working with a speed light, you quickly learn the bare flash is not flattering. There are so many light modifiers out there, but an umbrella is probably the easiest and cheapest option to get started. The Savage umbrella worked really well. It was very easy to use. It has a black cover over the white that is very easy to detach and reattach when you want. The only downfall with the umbrella is the very thin fabric, which is obviously necessary to let the light through, developed a small tear early while using it. It was a very very small tear and did not spread at all and did not affect my use of the umbrella in any way so I was not too concerned about it. An umbrella is an absolute necessity when you are getting serious about using flash and you can pick this one up for only $12 on Amazon, or you can get just the white umbrella for even cheaper.
THE SAVAGE 43 INCH 9-IN-1 REFLECTOR
I figured the next inexpensive tool I thought I needed was a reflector. Because I am only using one speed light right now, I needed a way to overcome the shadows that result from using a light source. A reflector is super easy to use and can be used in so many different circumstances. Even if you prefer natural light, a reflector can be a great tool balancing out the sunlight on your subject.
The actual fabric material on the Savage reflector was really good quality. It was thick yet durable. The real problem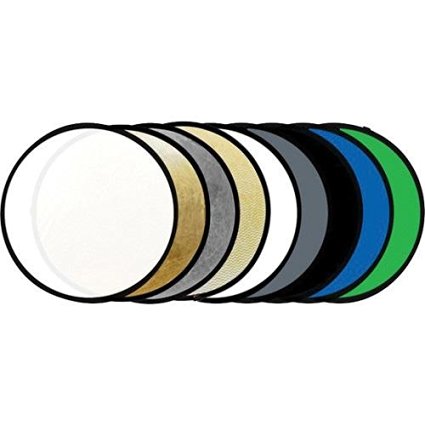 I had was with the zippers. The 9-in-1 reflector consists of a white, somewhat translucent reflector. There are then two fabric coats that go over the reflector. Each side of the coat is a different color so when you put the coat over the reflector you have a color on each side. You can then turn that coat inside out to get two new colors. With the two coats and the original reflector, you have nine different color options. The zipper on one of the coats worked fine for the most part, but the other zipper was very difficult to zip and even felt like it might break a couple time. The more I used it, the more difficult the zipper became, but I was still able to use it many times and it never actually broke. Finally, the reflector comes in a really nice carrying case so you don't have to be afraid to damage it while you are not using it.
The reflectors are super easy to use as you just have to hold it opposite your light source. The bigger size reflectors, like this one, can also be used as a great diffuser if you don't have a light modifier or just want to diffuse the light coming from the sun or some other source to which you cannot attach a modifier.
The reflector includes the original translucent white, solid white, black, blue, green, gray, gold, silver and a gold/silver combination. I think a reflector is a must have. There are lots of hacks out there you can use to make your own reflector as well, but if you want comfort and ease and don't mind spending $65, you can pick this one up at Amazon. You can also save a lot of money if you get the more traditional 5-in-1 reflector or a smaller size. It all depends on what you want and how much you want to spend.
REAL WORLD PRACTICE
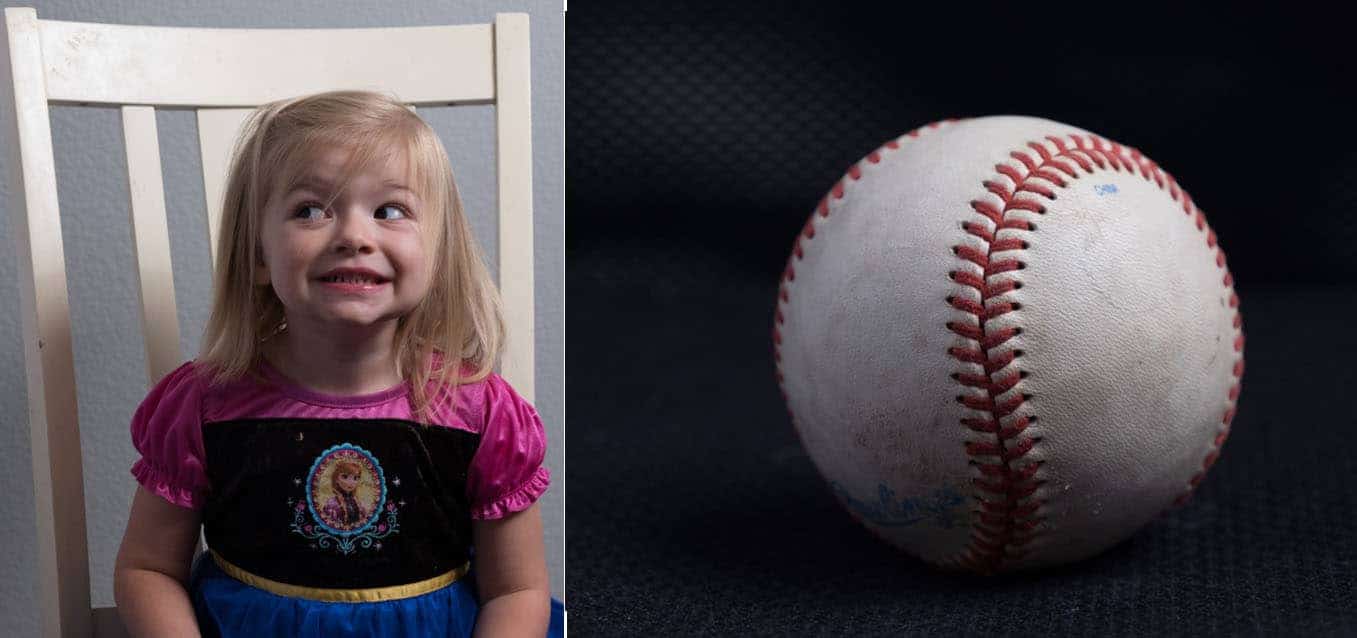
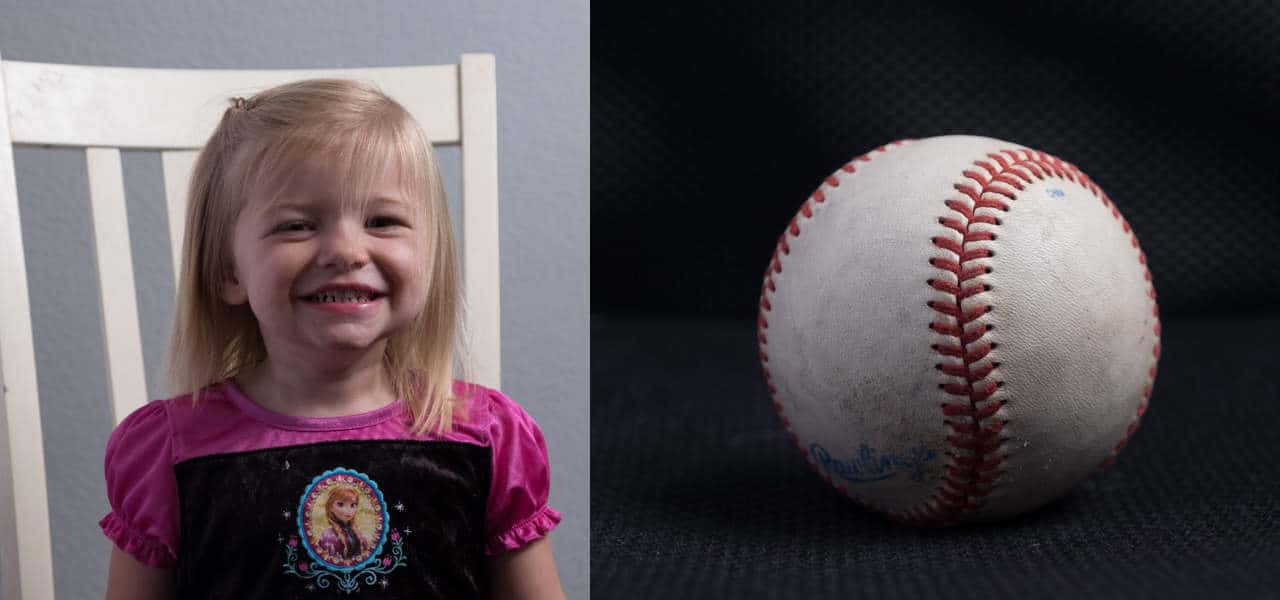
So now that I had all this new gear to use with my speed light, I wanted to learn what exactly the affect of each piece of equipment would have on my images. I was originally planning to use my wife as a subject, but the only time we both had free was late at night when my three-year old insisted on staying up to help. This meant my daughter became the model in her sweet Frozen pajamas. Unsurprisingly, she refused to sit still or listen to pretty much anything as it was well past her bed time so many of those images were not great. Eventually I decided a white baseball would really capture the reflecting light and give me a good sense of what I could expect using the reflectors.
I set up the speed light and umbrella to the left (the subject's left or the right side of the image) of and slightly above the subject. The reflector was placed on the subject's right side.
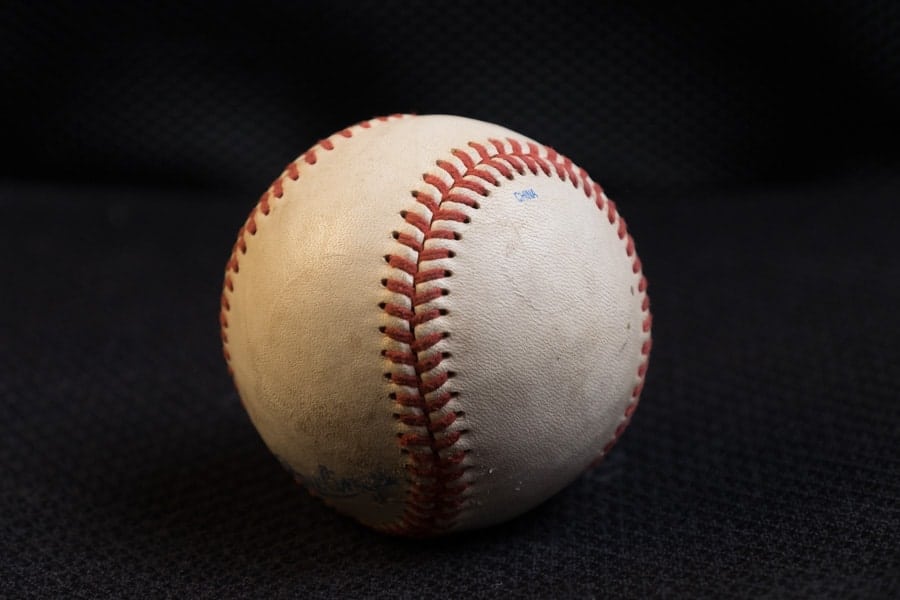
None of these images have been edited in any way and reflect just what was captured in the raw file. All images of the baseball were taken at f/5.3, 1/60 sec. and ISO 1600 with the speed light at 1/32 power. All images of my daughter were taken at f/5.0, 1/125 sec. and ISO 1600 at 1/64 power.

This image was taken with the white umbrella on the speed light, but without using any reflector. You can see the light hitting the right side of the ball is soft and evenly spread out as compared to if I was just using a bare flash, but the left and bottom of the ball are in pretty deep shadows.
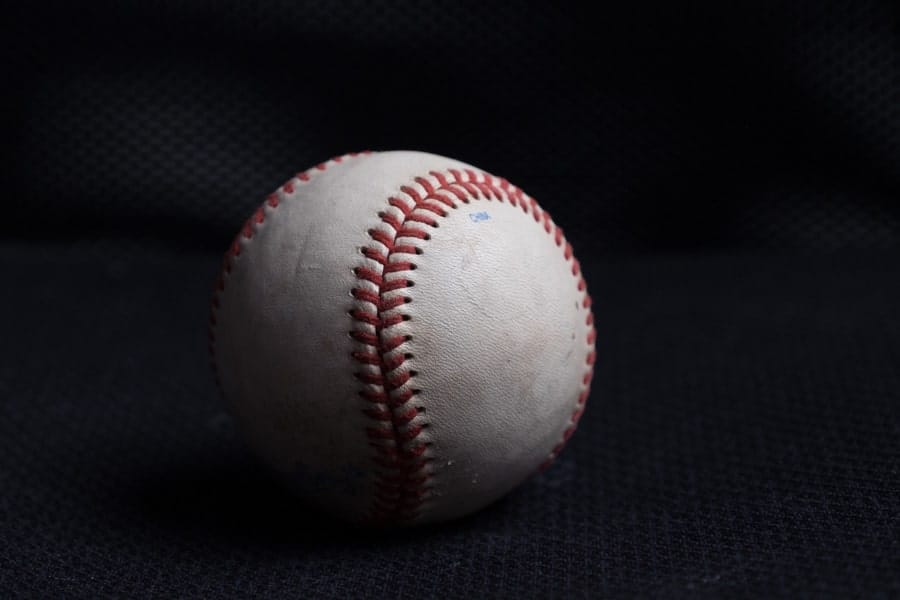
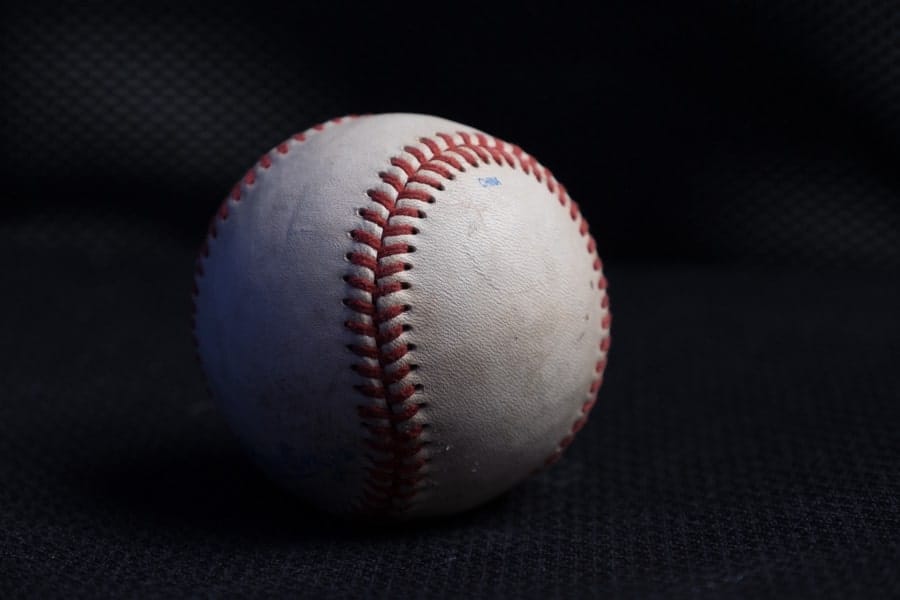
These images were taken with the basic reflector that is a somewhat translucent white. You can see it really helped even out the light and get rid of some of the shadows without providing any kind of color cast.
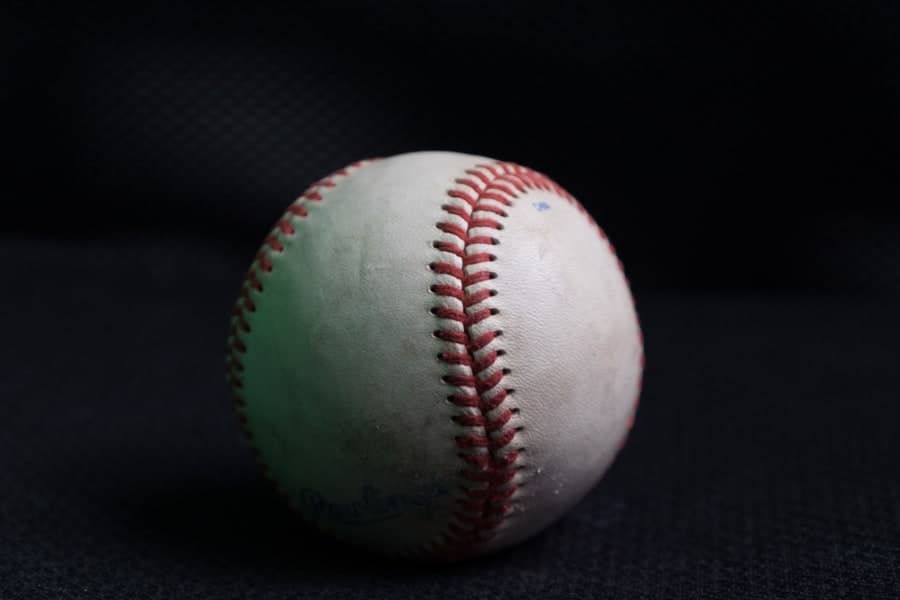
This image was made using the black reflector. You can see the black eats up the light and preserves the deep shadow. While this may sometimes work the same as not using a reflector, think of using the black reflector in situations where you want to be able cut off light. Perhaps it is harsh sunlight you want to block or a secondary light source you need to block in order to preserve the shadows. In this test, the black reflector cut off any reflection that would have come off my gray walls to maximize the shadows.
This image was made using the blue reflector. The blue was dark so it preserved quite a bit of shadow and also left a blue tint on the side of the baseball where the reflector was placed.
For these images, I used the silver reflector. You can see the silver reflector bounced back a lot of light, basically making even light on both sides.
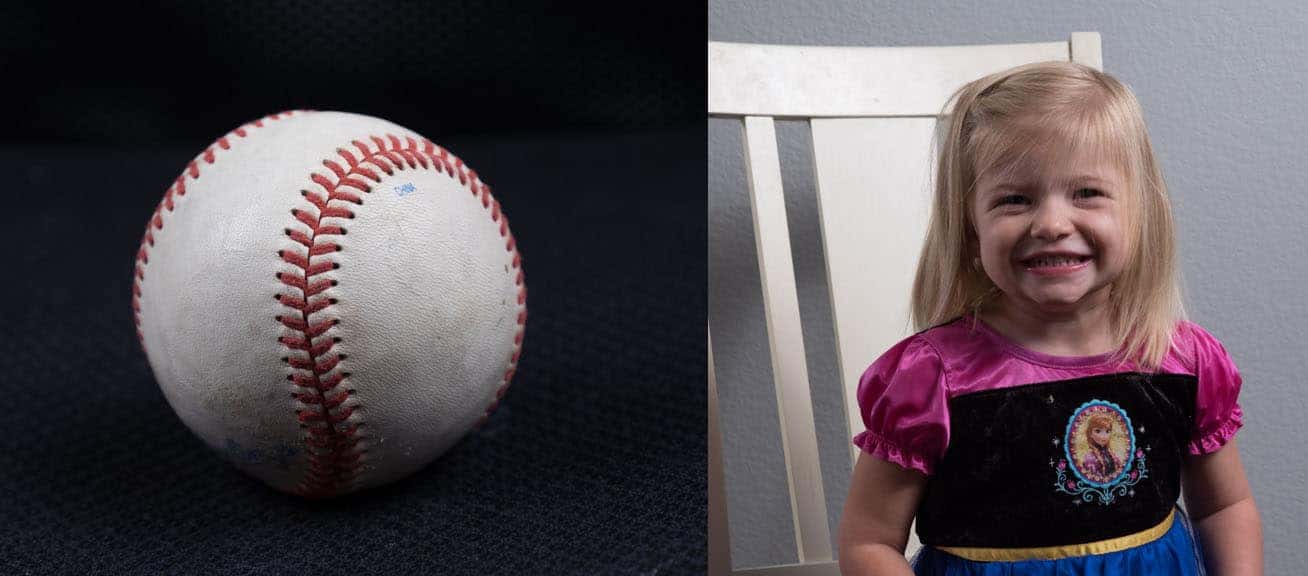
This image was made using the gold reflector. I really liked this reflector as it added a nice warm tone where it reflected the light. In this case, it made the baseball appear much more used than the same ball in the other images.

This image was made with the gray reflector. As you would expect, the grey reflector preserved a lot of shadow, but not quite as much as the black. This is a great tool for giving you a little extra control over how much shadow you prefer.
I am guessing you can tell this image was made using the green reflector. The dark green preserved a fair amount of shadow, but left a really evident green tint. Obviously, there would not be a lot of use for this in portrait work, but I could imagine a lot of creative uses.

This image was made using the silver and gold reflector. It provides a really nice balance of a good amount of light being reflected with a softer warm tone.
These final images were made using the white reflector. This is very similar to the original reflector and the silver reflector in that it bounces a lot of light and it does not cast any color at all.
This is a video game and from childhood i like all video game but this game is now make me happy so that i want to stay so long here on this site.