
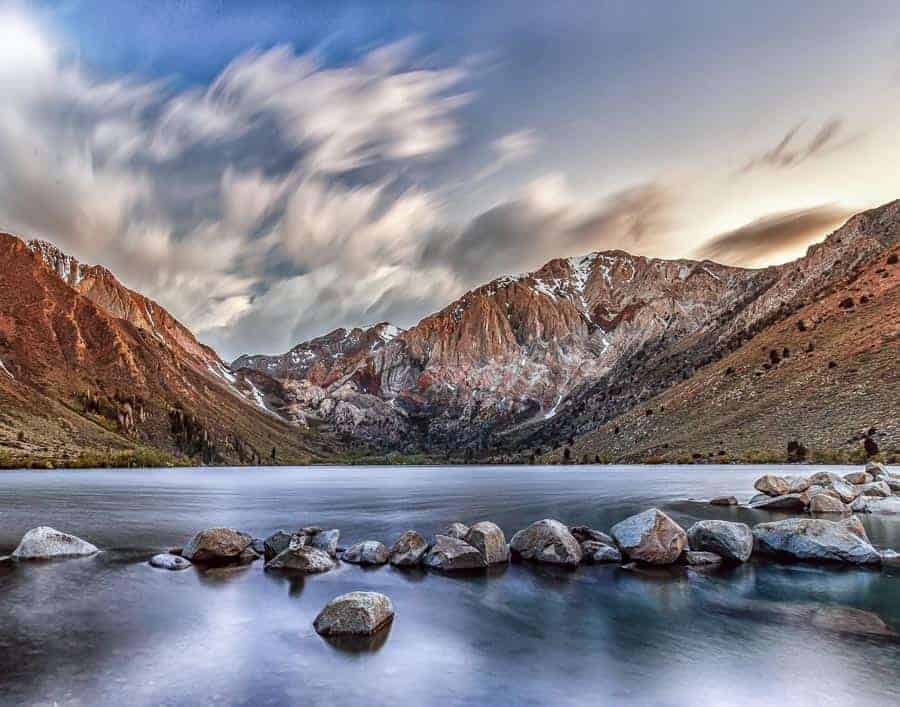
Name the best time of day to shoot photos. Most photographers, particularly those specializing in landscapes, are apt to say “The Golden Hour,” that time within an hour of sunrise or sunset when the light is warm, low, and generally softer. Cinematographers have a similar term, “The Magic Hour,” which is the hour before sunrise and just after sunset when the light is diffuse and even. You might also hear discussion of “The Blue Hour,” the time at dawn or dusk when the sun is still well below the horizon and the sky is very blue. What you won’t hear from anyone is “Mid-Day.” The sun is high, the light is harsh, sunlight areas are very bright and the shadows are deep making for a very wide dynamic range. Tough shooting conditions for sure.
So should you just put your camera away during mid-day and not shoot? Go take a nap? What if you’re traveling and the only time you will be at that great location is mid-day? It happens, quite often actually, and while the conditions may not be as desirable at that time, knowing some tips will allow you to still make good shots during mid-day.
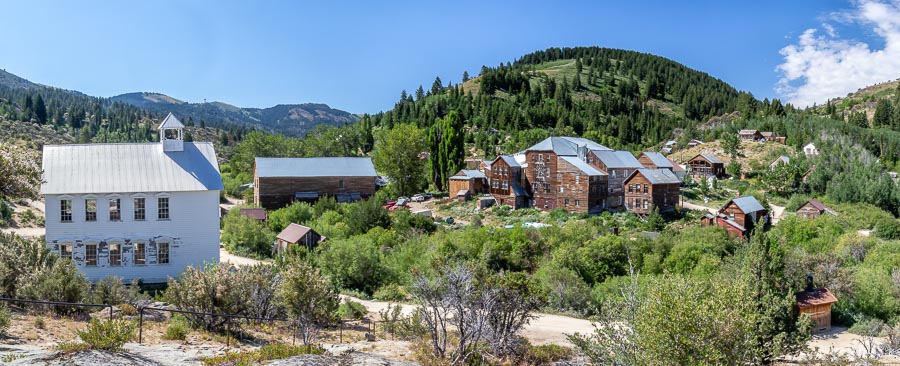
Shoot-out in Silver City – A mid-day photo session
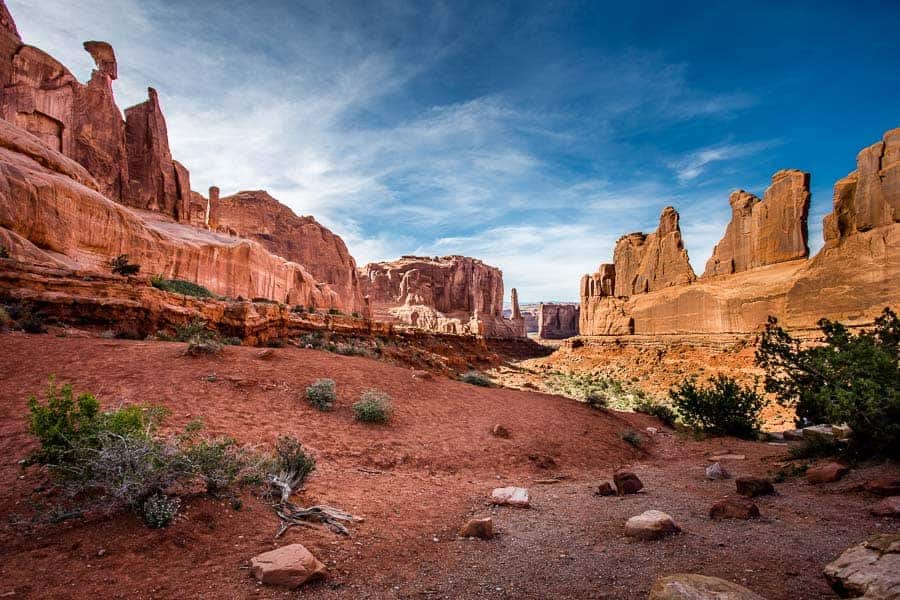
A hot July day on the dusty streets of Silver City, Idaho. A group of photographers from the Boise Camera Club had made the 2-hour drive on a rough dirt road to make photos of the remote historic ghost town. From the 1860’s to early 1900’s the boom town had about a dozen streets, 75 businesses, 300 homes, 12 ore-processing mills, and over 250 operating mines. At its peak, some 4,000 people called the town home. Over 60 million dollars of precious metals were taken from the area and that would be far more at today’s prices. The town was the first in Idaho to have electric and telephone service. But then, around the time Idaho became a state in 1890, the ore began to run out and the remote town slowly withered. During World War II, the power lines were removed for the copper wire.

Somehow, the town has escaped the fires which have erased many of the old west ghost towns. Today, about 70 of the original structures have survived. During the summer months, about 110 residents live in some of the restored buildings which function mostly as vacation homes. If they have power at all, it is from solar systems. Most residents leave when the road closes in early October and doesn’t reopen until early June. The town hires a winter caretaker to keep an eye on things, a cold and lonely job when only those willing to make the 25-mile trip in from Murphy, Idaho on snowmobiles or ATV’s might come by.
The sun was already quite high in the summer sky when the photographers arrived in Silver City, ready like the characters in an old western, to “shoot up” the town. Golden Hour? Not hardly. This was bright summer sun. So what tips did we have for our “camera-slingers?” The same I’ll offer you here should you have to make photos during mid-day.
Under Expose
The mid-day sun typically gives very bright highlights and deep, dark shadows, a high dynamic range most cameras have a hard time capturing. Your choice; 1) Try and capture the shadow detail at the risk of blowing out the highlights or 2) Underexposing a bit, being sure the highlights don’t go off the histogram at the right though the shadows might be quite dark.
The right choice in this case is number 2, expose for the highlights. Once they are blown out there will be no detail to recover. Be sure that doesn’t happen. If the shadows are blocked up a bit, you may still be able to pull detail out of them. If Lightroom is your editor of choice, bring down the highlights slider and bring up the shadows slider. Yeah, you might have to watch for noise in the shadows, but in bright sunlight you’ll likely be shooting at a low ISO and there won’t be too must noise anyway.
There are a couple of things to try while shooting. See what your camera says is a proper exposure and then roll in some minus Exposure Compensation (EC) as needed to get a shot where the histogram has the highlights to the right edge, but not past it. The other option, and a good way to hedge your bets, is to bracket the shot. Many cameras will allow you to set up a multiple-shot Auto Exposure Bracket (AEB). My Canon 6D will shoot a 5-shot bracketed series, other cameras may allow up to a 7-shot bracket. Whatever your camera allows, having a group of bracketed shots give you options. If your camera doesn’t have this feature, shoot a bracketed group manually. Space your shots about a third to a half-stop apart. Later in edit, you can see which of the group has the best overall exposure and use that one. Or, you can blend the multiple shots in an HDR program. Or a third option, layer the shots and blend them with masking to select the best exposures for different areas of the shot, (i.e. the sky, the land, etc.) If you’re really skilled, luminosity masking might be the ticket.
Keep the Sun at Your Back
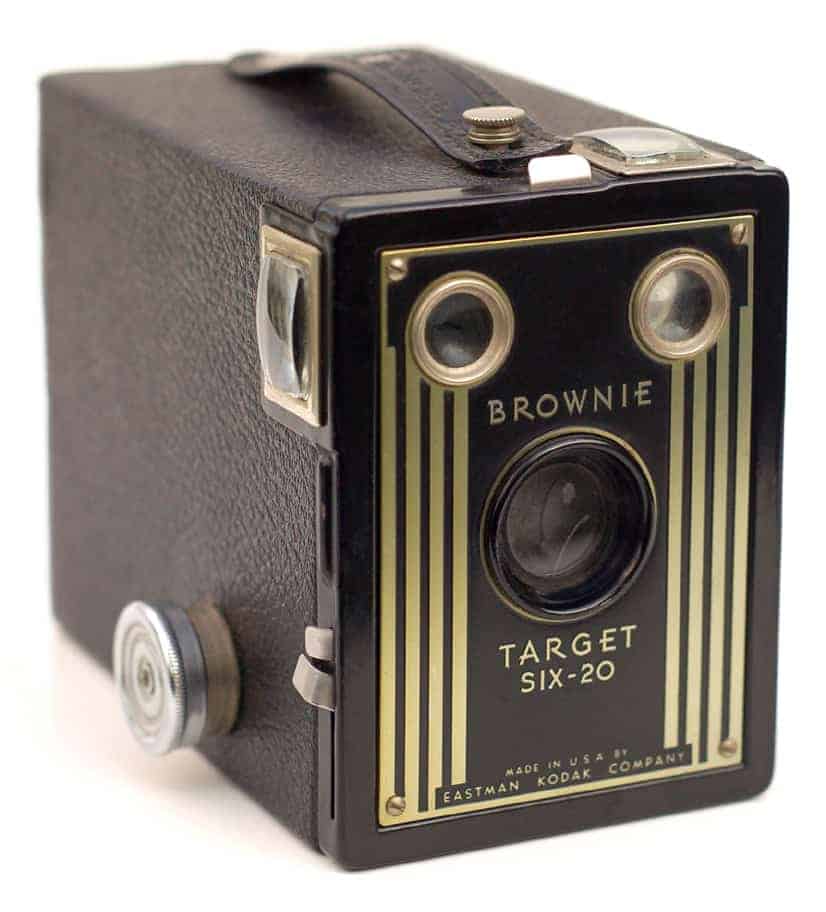
My very first camera was a simple Kodak Target Six-20 Brownie. My grandfather told me to take the best photos I should always have the sun at my back and the subject facing the sun. I probably took a lot of shots with my own shadow in the picture and my subjects squinting into the sun, but for the most part, it was good advice. Better than having the sun behind the subjects and turning them into silhouettes against a bright sky.
So let’s adjust that advice a bit. Yes, when shooting opaque objects having them front lit when the sun is bright and overhead is probably preferable. Of course like all photo advice, there is that caveat – “It Depends.” Let’s look at other situations where you may want to shoot differently.

Side-lighting
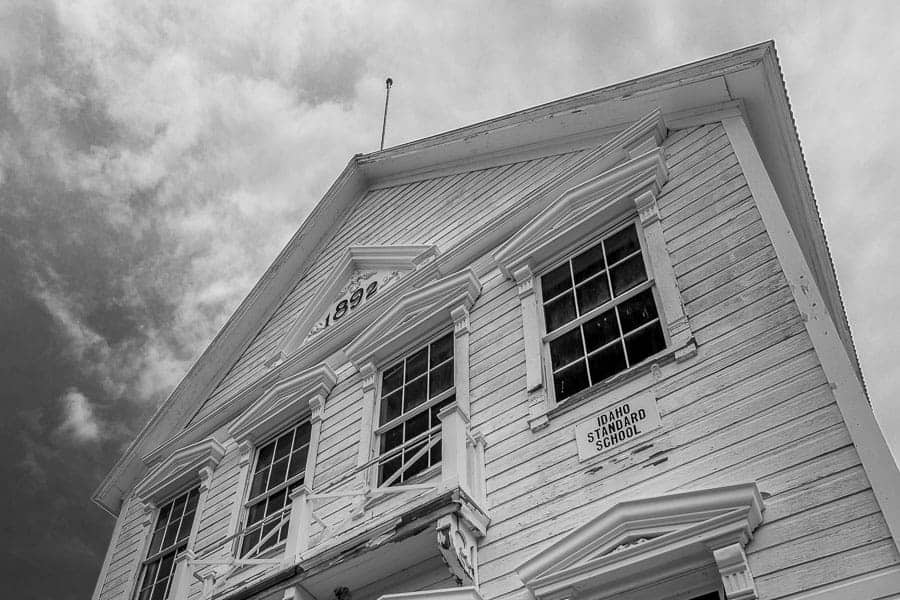
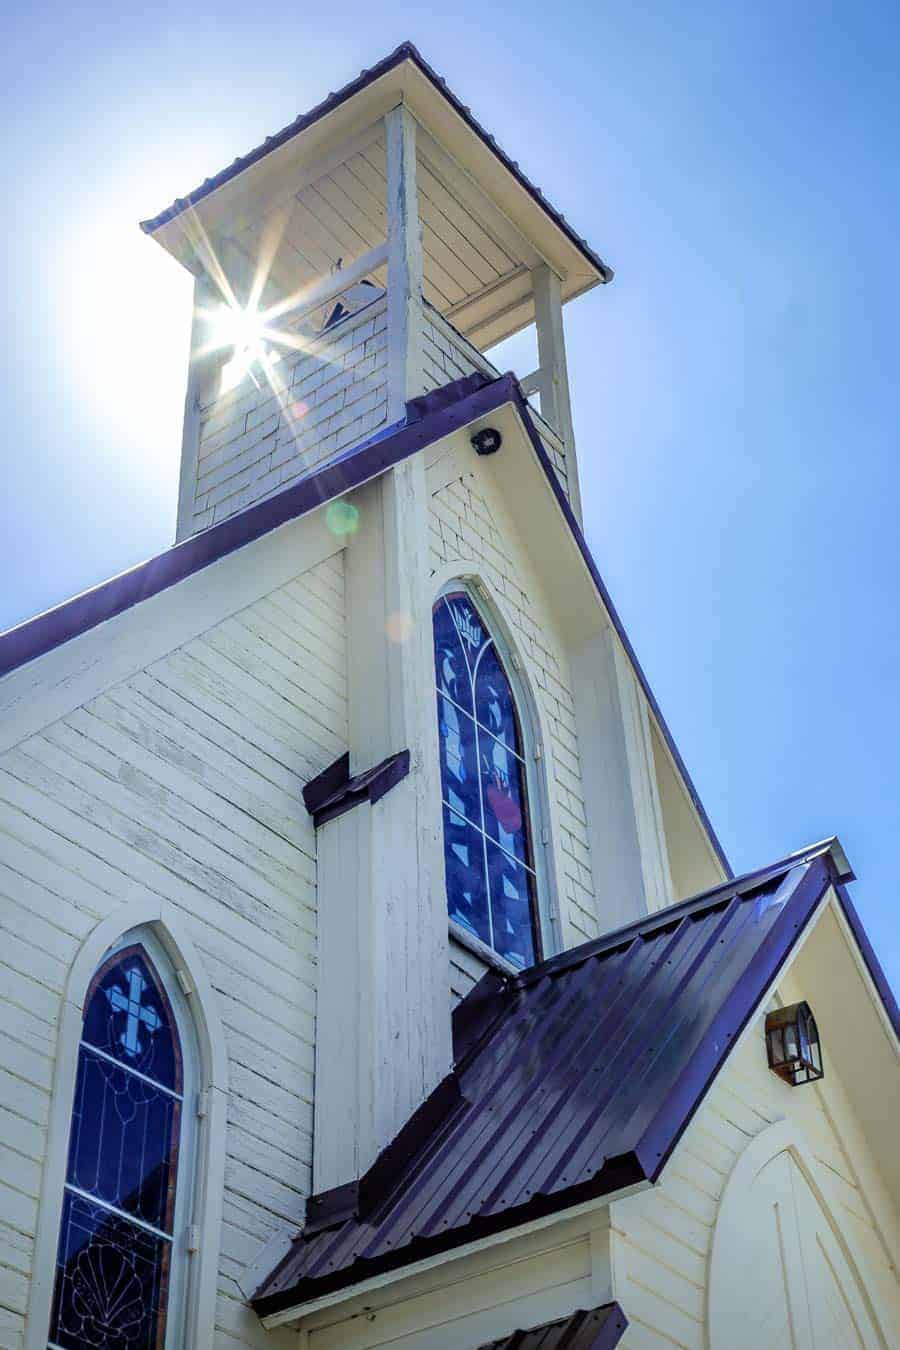
Bright, harsh mid-day when there are no clouds might not be what you want for portraits, but it does do one thing well, particularly if you side-light your subject – it brings out texture and detail. For us shooting the heavily textured worn wood buildings in a ghost town, often that light was perfect.

Back-lighting
Except perhaps at high-noon in the summer when the light is directly overhead there will always be a sunny and a shaded side of objects. Sometimes you might want to create a silhouette. If so, shoot with the light from behind, expose for the highlights and let your subject go dark. When editing, bring up the highlights a bit and either leave the shadows alone or bring them down a bit. Adjust the blacks and whites as needed to get your subject to become a silhouette against a properly exposed sky.
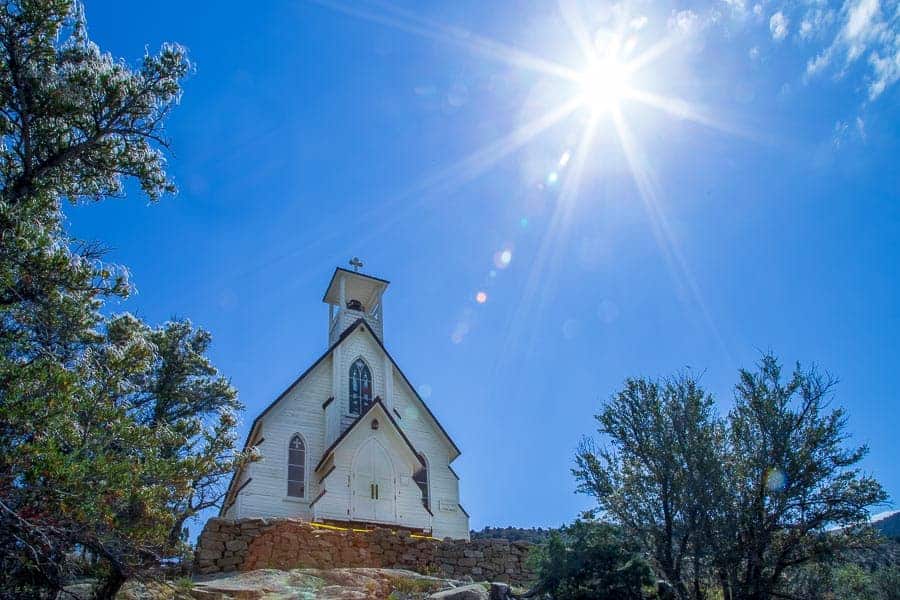
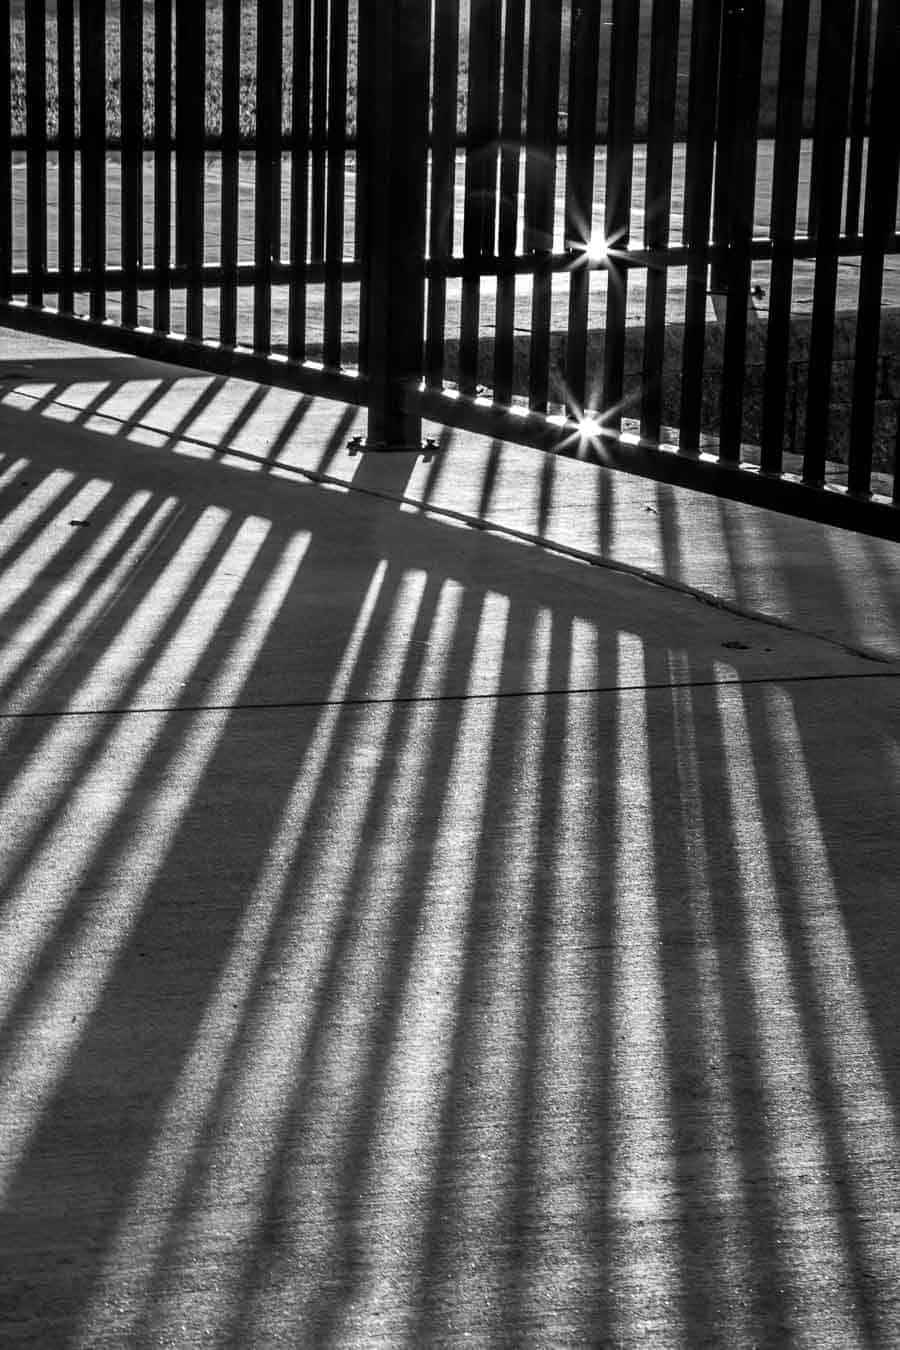
Creative Starbursts
When the sun is bright in the sky you can try to find ways to avoid it, or…. If the image you want to create is conducive to it, work with the sun to create a creative sunburst “star” effect. This can be done with the sun itself or any shiny object where bright, specular highlights are found. To do this:
- Go to Aperture or Manual mode
- Set your f/stop to a small setting (i.e. f/16 or smaller if possible). You will be shooting the sun or the highlight so enough light ought not be a problem. Determine what shutter speed and ISO are needed to get a proper exposure at that f/stop and ISO combination. Aperture Priority might figure this out for you, but be prepared to adjust.
 If shooting the sun, consider using a foreground object to block a portion of it keeping the beam of light as small as possible. This is the same with other specular highlights – the smaller the highlight, the sharper and more defined the “star” will be.
- Try different lenses. The shape of the “star” and how many points it will have is dependent on the shape of the lens iris blades and how many it has. Different lenses will give different looks.
Use your Lens Hood!
Any respectable cowboy expecting to be out in the mid-day sun wouldn’t be caught without his hat. Not a fashion accessory, a prime function of a cowboy’s hat is to keep the bright sun out of his eyes. Think about your lens hood the same way, as a means to shade the camera’s “eye.” Overhead bright mid-day sun has a nasty habit of introducing light flare into your shots and even a skilled editor will have a difficult time fixing a shot with flare. You will also see that even if you don’t have a pronounced flare in the shot, an almost imperceptible amount will hurt the contrast detail in your image. There’s also that dust. The effects of even a slight coating of dust on your lens or a few specks here and there will be magnified greatly if combined with flare. Keep your lens clean and use a lens hood there cowboy!
Use large reflective surfaces as bounce
Sometimes when shooting during mid-day you might have buildings, rock cliffs, or other large structures off to the side of your shot that will act as “natural reflectors” bouncing light into your shot. Look for these and study how they might possibly enhance the lighting in your image. Also be aware however that whatever color the “reflector” might be, that’s color of light that will be reflected. For example, in the “red rock country” of the west, often the rock cliffs will reflect warm, red light. Sometimes that will be great, other times maybe not.
Time for the 5-in-1
Portrait photographers often have a 5-in-1 reflector in their kit. These collapsible devices come in all sizes and have zip off covers that allow 5 different surfaces to be used; black, white, silver, gold, and without the cover on, a translucent white material that will pass softened light through it. Mid-day when the light is bright can be a great time to have one of these as what’s needed to make them work best is bright light. Let’s look at how the various sides of the reflector can work;
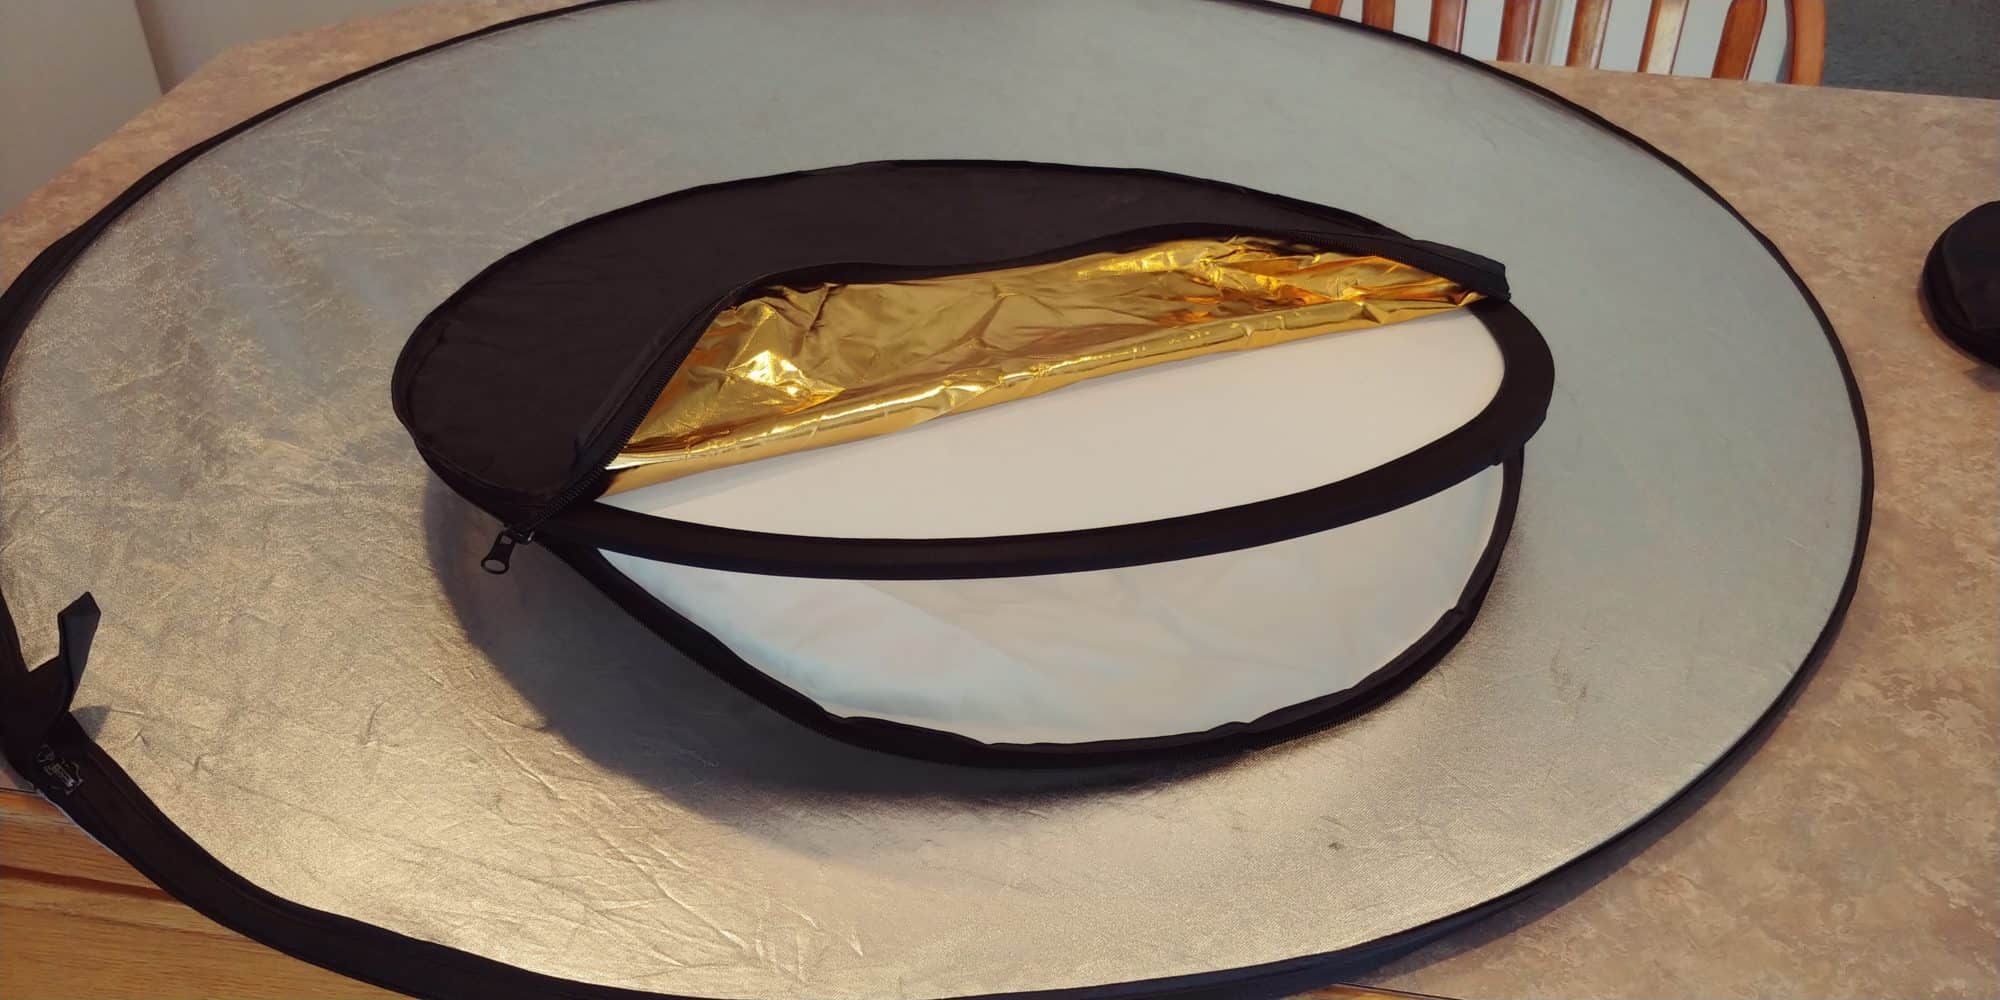
As a Reflector – A reflector is a great way to bounce light into the shadows of your shot. Use the white side and you will have a nice, soft fill light. Control how much by the angle and distance from your subject. If you use the silver side, the light will be more intense and somewhat harsher. The silver will pretty much give a neutral color to the reflected light.
The gold side will reflect much warmer light onto your subject. Use it when you are trying to perhaps simulate the light of Golden Hour but shooting at mid-day. Some reflectors have a mixed gold/silver which will be slightly less warm than the solid gold color.
As a “Softbox” – In the studio, a softbox is a light modifier into which a studio strobe or perhaps a speedlight is placed. By diffusing the light and making the light source “larger,” softer light is produced with less harsh shadows. Outside, the sun is a very bright pinpoint light source and will produce harsh shadows. But, whip out that 5-in-1 reflector, zip off the cover and use the diffuse panel to soften the sunlight. Voila! – You have a “solar-powered softbox.” This works great whatever the subject, be it portraits or maybe macro shots of small items.
As a “Flag” – A movie industry term, a flag is something used to block or shape light and provide what they call “negative fill.” We’d probably call that “shade,” especially when using it outdoors in mid-day sunlight. I have often used the black side of my 5-in-1 as a way to shade portrait subjects when no tree or natural shade is available where I’d like them to stand for the shot. So when the sunlight is too harsh, “throw some shade” with that handy 5-in-1, an umbrella, your jacket, whatever is handy.

I’ve used a large 42” 5-in-1 reflector for many years when doing portrait photography. I don’t know why I hadn’t thought to get a smaller one to keep in my backpack for other kinds of shots before this. A nice little 23” version (which collapses down to a small 9”) now goes with me on my outdoor photo ventures.
Made in the Shade
On a hot summer day when the mid-day sun is beating down overhead it feels good to get into the shade. It can also make for nicer photos when you have to shoot at that time of the day. The light is softer and more diffuse, there are no harsh shadows, and if you are photographing people, they relax, open their eyes and make for much happier, prettier subjects. If instead you put them in the sun, they will squint, sweat and complain while harsh light reveals every blemish and shadows cut across their face. Not good. In the shade, with less light, you can also open the aperture more for less depth of field, a nice way to minimize a distracting background. It seems a no-brainer to shoot people in the shade if that’s an option, right? I wish I had a dollar for every time I’ve seen vacationers trying to make nice photos in the blazing sun. Sure, wait for the Golden Hour is that’s an option, but if you have to be back on the cruise ship by 5:00, sometimes you gotta shoot at mid-day. Head for the shade, then fill with a reflector or maybe a touch of flash. Better pictures, happier subjects, done and back in time for happy hour. Mo betta!

A couple of precautions – Be care that you put your subjects in full shade, not the dappled sun you sometimes find under a tree. Nothing looks worse than a speckled pattern of dark and light spots over your subject and no amount of editing can fix a shot like that. Also be aware that the green leaves of a shade tree will often cast green-filtered light onto your subject. Green is not usually a nice compliment to skintones. Be prepared to bring down the greens a bit and perhaps boost the magenta to counteract that when you edit. The Tint slider under White Balance in Lightroom can be your friend!
Be a Shadow Shooter!
If the overhead mid-day light is harsh and contrasty and the shadows dark and distinct, maybe you can make the shadows themselves your subject. Be observant and look to see how shadows play across the ground. Can you use them to enhance your photo “story?” Do they work well in making an abstract image? Perhaps a monochrome is the answer.
Check that ISO!
An old film guy, remembering that I can change the ISO whenever I want isn’t quite natural. For the generation that has never shot film, here’s a history lesson. You bought your film at a certain ASA (the term prior to ISO) speed and that was what you used for the entire roll. There was no changing from shot to shot. It was ASA 125 for Kodak Plus-X, ASA 400 for Tri-X, 100, 200 or 400 for Kodacolor VR, maybe ASA 50 or 100 with Fuji Velvia. There were lots of films with various ASA “speeds”, but whichever you dropped in your camera, that’s what you used for the entire 12, 24, or 36-shot roll.
Now, ISO is changeable from shot to shot, a controllable factor in the Exposure Triangle. That’s a great advantage when shooting at mid-day too! As film grain increases with “faster” films, digital cameras produce more noise at higher ISO speeds. A big plus of mid-day shooting, lots of light! More light and you’re able to keep your ISO lower and your images more noise-free.
That’s a long way to tell you that when the light is bright, keep your ISO low. If ISO 100 gets the job done, go with that. (Some cameras will allow an ISO of 50, but there is debate whether that reduces noise any more than ISO 100). Then, when you need to move into the shade, raise the ISO if you need to.
Of course you might also consider Auto ISO where the camera can adjust that for you too depending on lighting conditions. Quite honestly, I’m not the one to explain that one to you just yet. As an “old film guy” I’m still trying to get my head fully around that option!
Try some “Black Glass” Magic!
The light is bright, you’ve turned your ISO all the way down to its lowest setting, set your aperture to its smallest setting and you still can’t get the several second shutter speed you want for creating that silky water effect while shooting that famous waterfall. Coming back when the light is low isn’t an option. Whatja gonna do? Break out some “black glass!” That’s a term some use to describe neutral density (ND) filters which, depending on how strong they are, can be so dark that you can’t even see through them. Think of them as sunglasses for your camera. So you put one on, and with less light, can now get a slower shutter speed and still properly expose the shot.
Neutral density filters come in many different “strengths,” or f-stop reductions. Say you had a 6-stop ND filter. If without it your proper exposure at ISO 100 was 1/125 sec. @ f/16, with it you could reduce your shutter speed to ½ sec. (6- stops). If you had something like the Lee “Big Stopper” a 10-stop ND filter, you could shoot an 8-second exposure in those same conditions. Black Glass can open your options when you have to shoot at mid-day!

Polarize It
When shooting at mid-day, consider a circular polarized filter. Like polarized sunglasses, it can be useful for helping kill reflections on water, shiny surfaces, and even on the leaves in some shots giving a much richer color to the image. It can also be used to darken skies. Working best at a 90-degree angle to the sun, at mid-day that’s in almost all directions. Often for best effect it’s good to turn it until you see the darkest effect and then back it off a bit so as not to get “fakey-looking” images. (How much that is of course is up to you). A polarizer will also take about a stop to 1.5 stops of light, sometimes also helpful in bright light.
Be careful when using a polarizer on a wide-angle lens and having a lot of sky in the shot. Because of how the light at different angles will be affected differently, a wide expanse of sky may look “patchy,” darker in some spots and lighter in others. I learned this the hard way, shooting a great sunrise with my Canon 17-40 lens equipped with a polarizer. It looked spectacular through the viewfinder. Back in edit… not so much. Lesson learned.
 Get your Head in the Clouds
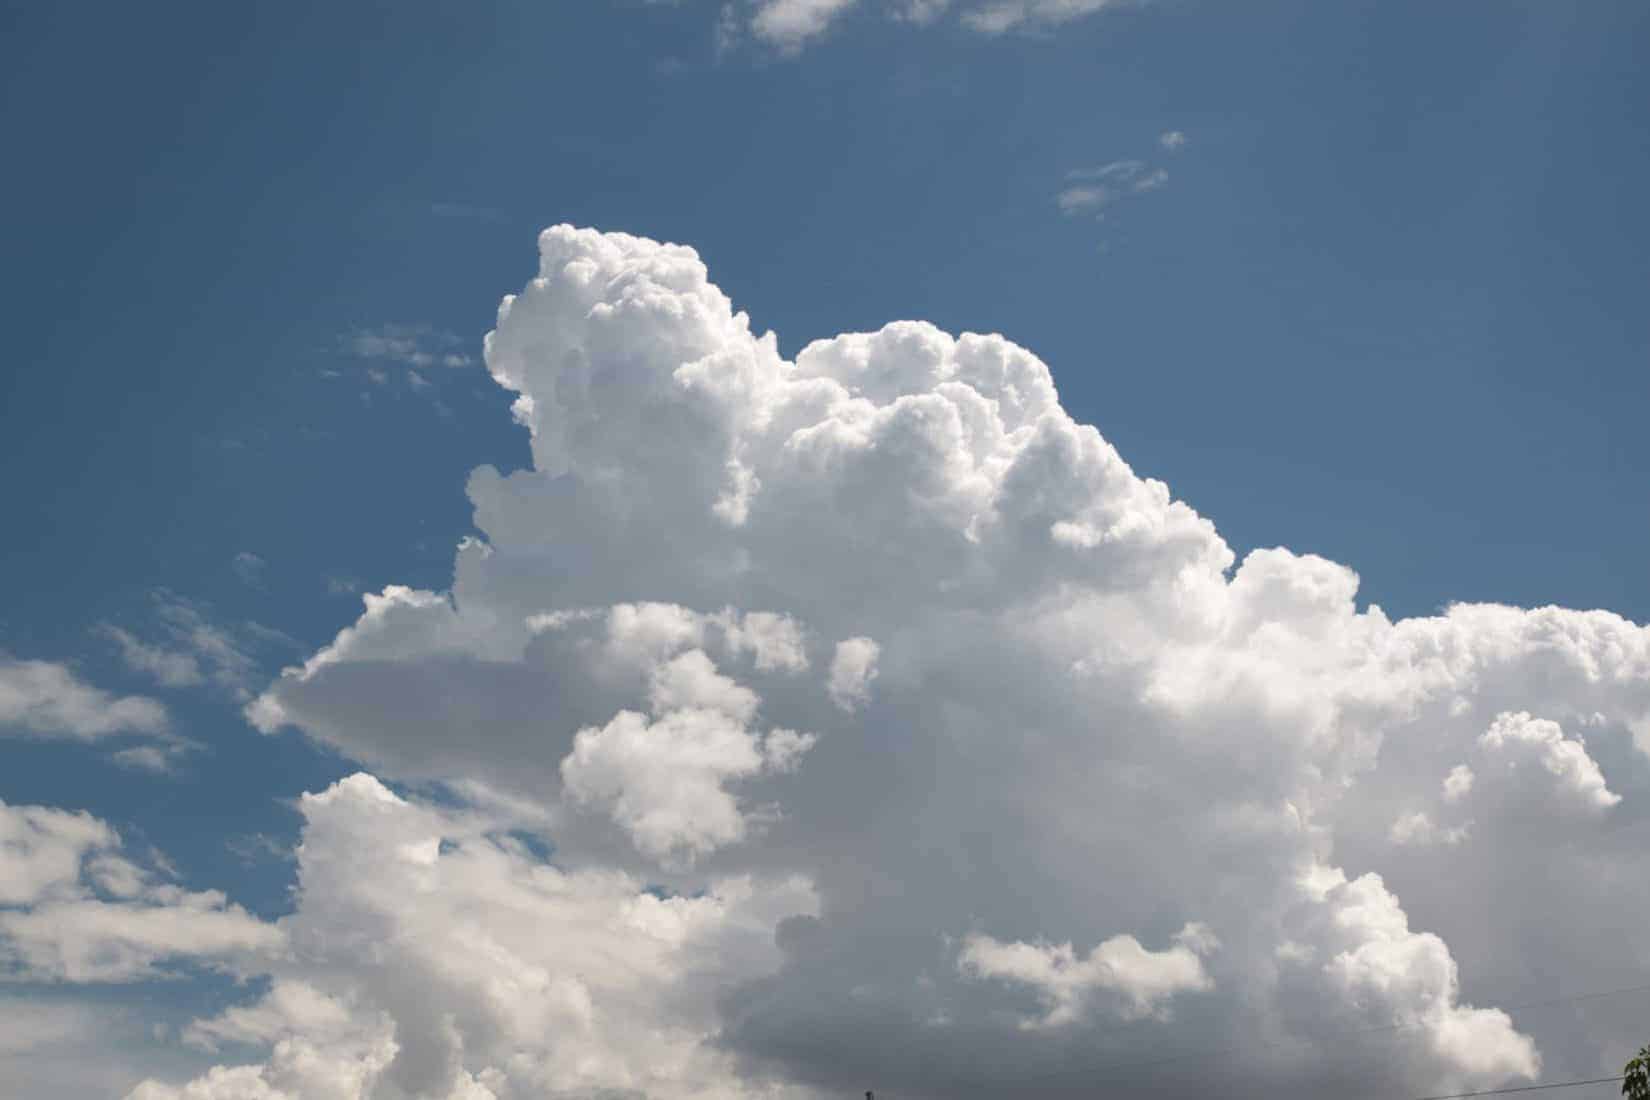
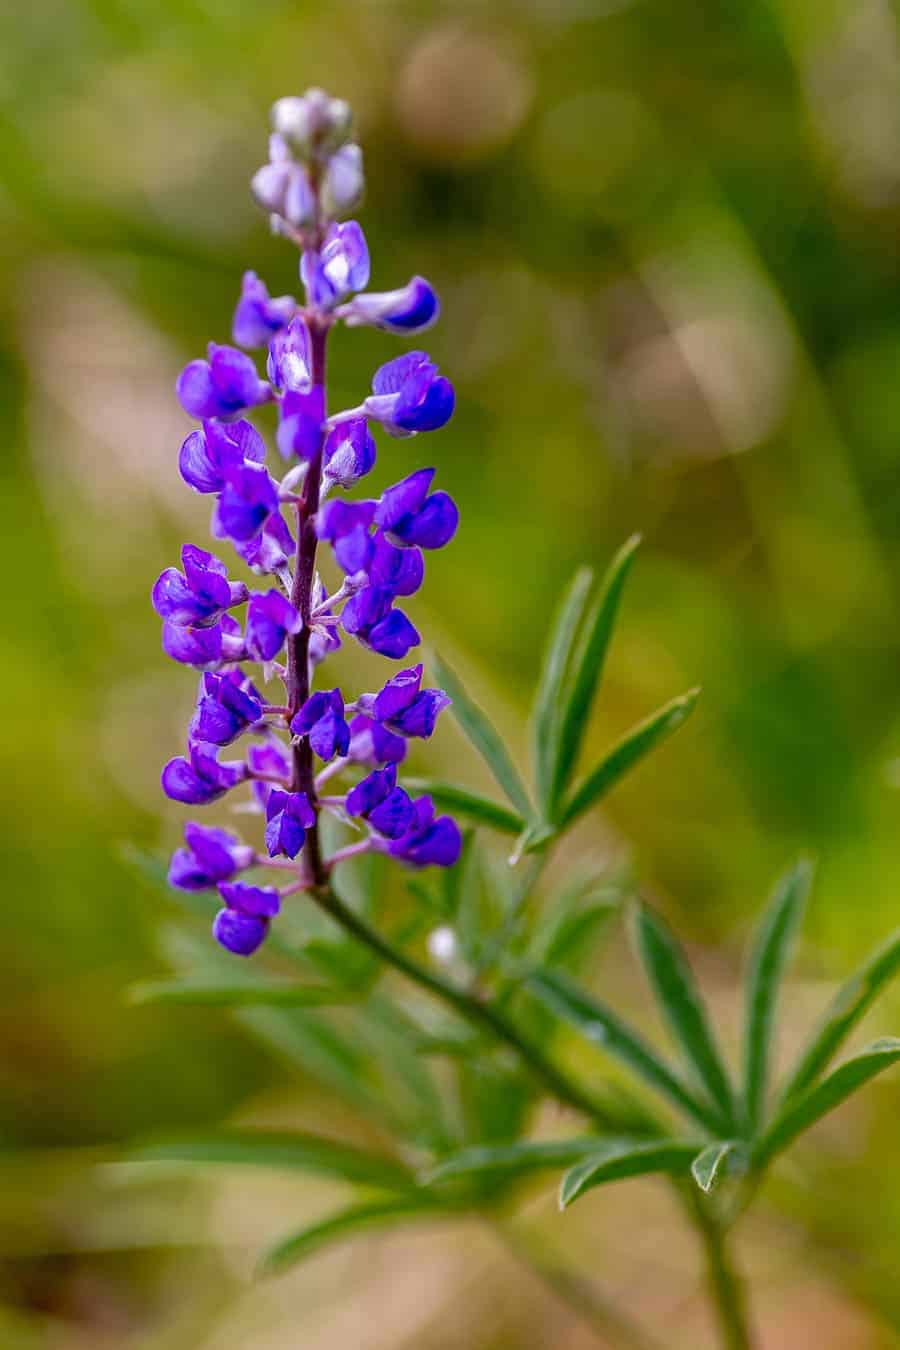
If you’re lucky, you might have some clouds during your mid-day shoot. If one happens to cover the sun, bingo! Instant softbox! If the entire sky clouds over, expect that the light will become quite soft and maybe rather “flat.” Will that be a good thing? It’s that same photo answer again – “It Depends.” Often bright overcast days at mid-day can be great for making portraits in very soft, almost shadowless light. Macros of flowers and outdoor subjects can also benefit from the even light of a bright but overcast day. Then there are those days when the interesting cumulus clouds float through a blue sky like ships sailing the sea. On days like that the clouds not only help your shot, they ARE your shot!
Use your Flash
I wrote about using a reflector to fill shadows while doing portraits in the shade. You can do much the same thing with your speedlight. For many years I did high school senior photos and my standard practice was to shoot my subjects in the shade, using a speedlight for a little fill and to put a nice catch-light in their eyes. You may need to adjust the flash output to find the right balance, enough to fill the shadows and create the look, but not so much that the images look like “flash photos.”

Shoot Action – The Need for Speed
When shooting high-speed action and wanting to freeze the motion, a high shutter speed is a must. But, with a fast shutter comes the need for lots of light. You don’t want to increase your ISO more than necessary to reduce noise and you may not want to open the aperture too much and reduce depth of field. More light gives you more options. Under mid-day sun, shutter speeds at the camera maximum, say 1/4000th or 1/8000th of a second are possible. Besides, for most sports and action photo opportunities, you have to go when the event is held, at mid-day, not necessarily when the light is “pretty.” Learning how to use mid-day light and achieve fast shutter speeds is a good photo skill to master.

Go Inside
Back on the dusty roads of Silver City, the temperature by mid-day was getting into the 90’s. Using some of the skills mentioned, shots could still be made, but the enjoyment factor was diminishing in the wilting heat. It was time to duck inside somewhere and get out of the sun. Yeah, that was no longer practicing the techniques of learning to shoot at mid-day… or was it? Often when you are traveling or out on a photo trip there will be interesting places to photograph indoors somewhere and that can be a good option. There will be a whole different set of camera skills needed for varying light conditions, but that’s the fun of photography – learning to adapt to what opportunities present themselves.
Or, you could always go take a nap and wait for the Golden Hour.
Very interesting and helpful!
Thank you!
Many great tips. As a semi-pro I use some of your tips already including using shadows…bracketing helps to. However I truly appreciate the support on using higher settings on film speeds, shutter speed and natural lighting. Thanks!
A lot of really good tips in here!
Very good tips. Often we forgot the most practical and obvious solutions and go for the complex ones. Thank you!
Thank you Rick ….. great tips and thought provoking reminders.
I frequently forget to grab my reflectors. Although I still have not figured out how to get the birds to wait for me to set up a reflector 🙂 I had to smile when you mentioned a “fast” shutter speed on the hummer of 1/1600 … it is a great reminder that we all have our shooting biases and to not get stuck in those biases. Being a bird in flight photographer where, 1/2000 is fairly slow shutter speed I forget in many other situations a much lower shutter speed can be my friend. Shooting that cool flower in the shade I see waiting for the birds comes to mind.
Auto ISO works better with some cameras than others. I use Auto ISO when shooting in manual in highly variable light with my subject moving quickly through those variations. That allows me to keep my depth of field and shutter speed where I want it. I frequently have the upper limits on Auto ISO set to 12,500 or as high as 25,600 depending on the camera. Auto seems to work best when I have faster shutter speeds set 1/3000 to 1/8000. Keep an eye on the histogram and or blinks to watch for those blown highlights Rick warned us about. I have a habit of setting my ISO to the lowest number before I switch to auto so i know where my starting point is when I turn auto ISO off.
A tool I like to use for nature shots at midday is a CPL with a warming filter … I use Hoya Mooses it can turn high noon to golden hour.
Very good topics, thanks.
Thanks folks for the nice feedback. I always hope to reach people with some helpful information so I appreciate knowing my articles are useful. If you want to see more of my stuff, this link will bring up all my articles, 21 at this writing for IP. I publish every two weeks. https://improvephotography.com/author/rohnsmanmsn-com/
Great piece Rick. I really appreciated the tips. I need to remember to take my reflectors with me more often. I had to smile at the “fast” shutter speed 1/1600 on the hummingbird. As you know I do a lot of bird in flight photographs and my normal shutter speeds are frequently 1/2000 to 1/8000. Your article will help me to remember that slower shutter speeds can be useful when I am shooting still or slower moving objects … allowing me to use lower ISO and or smaller apertures. In other words I need to remember to not get stuck in a shutter speed rut.
I do shoot a lot in mid day light, if that is when the birds are flying. Auto ISO and manual mode can be very useful when the birds are flying through shade, dappled shade and bright sunlight in a second or two. Some camera models handle Auto ISO better than others. There are a number of keys to using Auto ISO but as you hinted that could be a whole other article.
I do not use my ND and CPL filters enough thanks for the reminders. I sometimes remember to use a CPL/Warming Filter from Hoya called Moose’s warming CPL that is pretty good at changing high noon to golden hour especially when photographing waterfowl.
What camera do you use?
My main camera is a Canon 6D. My backup is my older Canon 50D, (a crop sensor). Sometimes, the shots in my articles will have been taken with the older 50D and occasionally, with the “camera I always have with me,” my LG V30 cellphone.
Great article! Informative and inspiring. I’ll make no bones about it, when it comes to outdoor landscape and nature photography, I’m a certified Golden/Blue Hour snob. To me, there’s no comparison. I cringe when forced to make images in the mid-day. Sometimes, as you say, it’s unavoidable. Your tips are useful when in that situation. So, a 10-stop ND filter is a fun tool during that time. Also, at that time, I usually think in monochrome emphasizing lines and forms, mid-shots and close-ups. However, unrestricted by that time of day is architecture. Keep the good writing coming.
Great article Rick! Actually, ALL of your articles are excellent! (And your photos are also great!). Thanks for documenting your mid-day sun tips, they are very helpful. I too had the experience of a circular polarizer and wide-angle lens creating varying dark patches in the sky. Regarding ND filters for waterfalls, what do you suggest for number of stops? I realize the answer is “it depends”; maybe a variable ND filter is the way to go? But I’ve heard that reasonably priced variable ND filters are optically poor and degrade images. So I’m stuck.
You’re right…. the answer is… “It depends.” Now for some personal “for what it’s worth” thoughts. I have a variable ND. I’d be happy to sell it cheap. It’s ok maybe for a little light darkening of a subject, but turn it too far and all kinds of weird artifacts appear. Not good. It is a Promaster, not an expensive brand. I can’t say if more expensive variable ND filters are any better, I just know I won’t buy another.
Now I have a B&W 6-stop ND. The 77mm needed for my lenses wasn’t too expensive, under $100.00 and I’m quite happy with it. As for the need for a 10-stop Lee Big Stopper, I’m not there yet with my skills, but I do hear good reports about it. Bear in mind that with the really dark NDs you will have to compose first, then carefully put on the filter – they are way too dark to see through them to compose. Also put an Exposure calculator app on your phone – they’re great for doing the calculations to figure out what shutter speed you’ll need.
Thanks for your kind comments about my articles!
Very interesting and helpful!
Thank you!
Thank you so much for the sharing this site its so good for the all because here we can get more information.