

With security screening procedures changing frequently, it's more challenging than ever for photographers to fly with camera gear when going through TSA security with camera gear in your carry-on. Changing rules, unclear rules and TSA officer discretion are just a few things that add to the confusion over what you can pack in your carry-on and what you can't. Here are 9 tips for traveling through TSA security with camera gear. While these tips will help you get through security more easily, keep in mind that TSA officers can decide to do random searches of your bags and can make judgement calls over what can proceed in your carry-on onto the plane, and what can't.
1. Camera Batteries
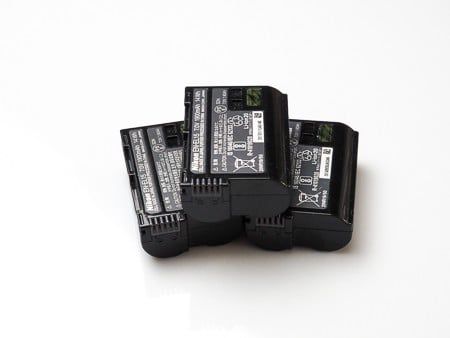 Batteries are the lifeblood of your camera gear, so it’s quite common to need to bring along extra batteries when travelling. For smaller gear: cameras, flashes, etc. (I’ll get to drones separately), the requirements for safely packing your batteries are the same, for the most part. The one difference is with lithium batteries.
Lithium batteries are not allowed in checked bags so must be part of your carry-on. They must also be protected from damage or short circuit when in your carry-on bag. To do this, you'll need to have the batteries in their own container or well secured in your bag. What I do is keep my batteries in a separate, smaller pocket in my camera bag, and I use gaffer tape to secure the plastic terminal covers that originally came with the batteries onto them. If you don't have the terminal covers, you could use gaffer tape to cover the battery terminals.
2. Drone Batteries
Drone batteries are considered large type consumer electronic batteries, which have special regulations governing them. Depending on the number of watt-hours the batteries are rated for, the regulations are different. There may be limitations on how many batteries you can travel with, and also whether you need permission from the airline to fly with them. For the most part, based on Jim’s research, most drone batteries are okay. Check out Jim’s video below for more information about these regulations, including how many you can fly with, and other information about flying with drone batteries.
3. Laptop
The recent changes to TSA rules state that electronics larger than a cellphone must be scanned through the x-ray machine outside of any bag or carrying case, and in a plastic tray of its own. Laptops have been one of these electronics that have been separately scanned for years. When going through TSA security, you’ll need to make sure your laptop is readily accessible for individual scanning. Make sure that your laptop is easy to access or even in a laptop bag that is separate from your camera bag, since most airlines allow one carry-on bag and one personal item. Do not pack the laptop so tightly in a bag where you will have to completely remove contents from your bag to get to it. Speaking of packing, that leads into my next tip.
4. Carry-on bag
 Make sure your carry-on is packed in a neat and organized manner. If you’re asked by the TSA officer to have carry-on contents in addition to your laptop or camera body inspected, a neatly organized bag will make things easier and quicker to unpack those items for inspection. Also, the better organized and less “stuffed” the bag is, the easier it'll be for the TSA officers to view your carry-on contents on the x-ray monitors. The easier it is for them to identify the contents, the less chance you’ll have of additional scrutiny of your contents.
5. Tripod
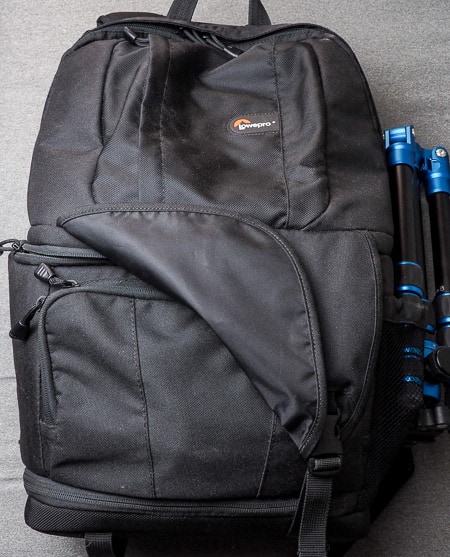
There’s been a lot of debate about whether tripods with the ballhead attached are allowed inside your carry-on bag, or attached to the side of your bag. The short answer is yes it’s allowed. I know of many photographers, Jim included, who have been able to get their tripod through TSA when fastened to the side of their bag. Right now, the TSA prohibited items list states that tripods are allowed in carry-on bags but as with anything, it’s up to the discretion of the individual TSA officer. This is where a lot of the debate has come from.
Some TSA officers may decide not to allow tripods because it could be used as a weapon or be considered dangerous, in particular if there are spikes mounted on the tripod legs. So yes tripods are allowed as carry-on, but the decision is still subject to the discretion of an officer. If you do have spikes, the best thing to do to improve your chances of getting the tripod onto the plane in your carry-on bag would be to remove the spikes and pack them in your checked bag. One of Jim’s stories shows just how random their discretion can be…while Jim has been able to get his tripod on a plane dozens of times without issue, his son’s plastic ninja star toy was taken. Go figure!
6. Take lens off camera
 When you pack your camera in your camera bag, make sure you remove the lens from the camera body, and use the camera bodycap to cover and protect the camera's sensor and internal electronics. If the TSA decides to run the camera through the x-ray out of your camera bag, which it likely will given the new rules on electronics, there’s still the risk of the camera sliding around and banging against the sides of that plastic tray. With a lens attached, if the lens housing has any significant force against it from being banged around, there’s the risk of damage to the threads that the lens attaches to the camera body on. This can happen at other times too, when the camera is packed snugly in the padded sections of the camera bag, if the bag is dropped or knocked.
While there’s still uncertainty about what is considered an electronic item larger than a cellphone, some photographers have found that it's only the camera body that is subject to inspection. In view of this, keeping your lenses off your camera will allow you to keep them safe during inspection within your camera bag. What I would do is place the camera body in the scanning tray face down (with the display screen facing up), to avoid any scratches to the display screen if the camera were to slide in the tray.
7. Film
For those of you who still shoot film, or have thought of shooting with film, you may already be aware that undeveloped film is very sensitive to the x-ray machines. You’ll need to take extra care of your film when going through TSA screening, unlike digital cameras as memory cards will not be damaged by the x-ray 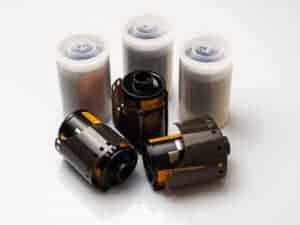 machines. Film should not be packed in your checked bags because the equipment used to scan checked bags can damage your film. You should keep your film with you in your carry-on bags. Even then, the x-ray machines at the TSA screening area can still damage your film so when packing film in your carry-on, here are a few things to keep in mind.
Lead lined film cases will help, but are not perfect. Some x-ray machines have different intensity levels, and different lead cases have different thicknesses of lead. The manufacturer of the film cases will outline the parameters of how effective the cases will be. The ISO sensitivity of your film also makes a difference. The more lights sensitive, the more prone to damage the film is…ISO 100 film is less prone compared to ISO 1600 film. Film loaded in your camera can also be damaged, so make sure your camera is empty of any film. You can also let the TSA officer know you have camera film and request for it to be hand searched instead of going through the x-ray machine.
8. Keep an eye on your camera gear
Going through the security checkpoint can be a location where you risk losing your camera gear, given that you are separated from your gear as it goes through the x-ray machine and you go through personal screening. Granted the risk is low, but it is there since other travelers behind your or in front of you could grab your gear by mistake. Make sure you keep a close eye on your gear as you go through screening. If you do happen to lose your gear while going through the TSA security checkpoint, you should contact the TSA group at the airport in which you lost your gear. Speak with a TSA officer at the checkpoint or call TSA. To find the right phone number, go to tsa.gov Web site and search for “lost and found”.
9. TSA Precheck or Global Entry
 If you are a frequent traveler, you can avoid a lot of the security inspection processes by signing up for TSA Precheck. It costs $85 for a 5 year membership, and will let you go through security without needing to remove your shoes, laptops, liquids, belts and light jackets. Of course, the TSA officers have the right to do random searches to anybody but for the most part, TSA Precheck can give you an expedited security screening process.
To sign up for TSA Precheck, all you need to do is submit an application online and schedule an in-person appointment at one of several hundred enrolment centers across the US. The in-person appointment will include doing background checks and getting your fingerprints taken, as well as some other optional checks you can read more about here. Once approved, you'll receive a Known Traveler Number which you can include in your airline bookings. Your boarding pass will have the TSA Precheck symbol printed on it, giving you access to the Precheck lanes at airports across the US.
Another option is Global Entry, which is a U.S. Customs and Border Patrol program. It includes TSA Precheck plus other expedited entry benefits. At select airports, you would just go to Global Entry kiosks, present your passport or U.S. permanent resident card, scan your fingerprints on the scanner and complete a customs declaration. The kiosk will issue you a transaction receipt and will direct you to baggage claim and the exit. The application process is similar to TSA Precheck, but costs $100 for a 5 year membership.
These are a few simple tips that will help you get through TSA security more easily. Since the rules are constantly changing, it’s always a good idea to check the TSA website for the latest rules before you pack. Do you have any other tips that have helped you when going through TSA? Share your experiences in the comments below!
This fix how you can manage the game and its timing also, if you are not interested in the first version of the game then after it some more series of the game are available free online spades games.
It is definitely a great fact that this given article is contributing all the tactics regarding such photography based fields in an efficient manner. They can also check from adobe error df024 that will help them to guide in a proper direction.