
If you’re looking to up your selfie game and create a professional quality headshot of yourself this article is for you. Professional photographers, such as myself, use all kinds of expensive cameras and lighting equipment to create stunning headshots for their clients. But if you’re on a budget and you’re looking for a new profile pic for social media, business cards, or a resume I hope this article will help you create a quality headshot without all the professional gear (or cost).
 What Kind of Camera Will You Use to Take the Image?
 What Kind of Camera Will You Use to Take the Image?
The first thing you should take into consideration when planning for your headshot is which camera you will use. These days most people will rush to use their cell phone camera – and this is most likely your best option, especially when it comes to ease-of-use. However, if you’re anything like me you might actually have a point-and-shoot digital camera tucked away somewhere you’ve almost forgotten about. I’ve owned several small digital cameras over the years (long before I really got serious about my photography) but as the advent of the serious cell phone camera came about I started opting for that instead and leaving my digital camera at home. I found that I was much more inclined to actually take photos when I didn’t have to carry two separate devices around, so the digital camera ended up in the junk drawer. But if you have a similar story maybe consider pulling that camera out and seeing what it’s capable of. Sometimes those little cameras can be surprisingly capable, giving you a measure of control over your image that you might not necessarily have with your cell phone camera.
If you do decide, however, to use your cell phone camera don’t feel like you’re choosing a lower path. The cameras in cell phones these days (especially cell phones manufactured in the last few years) are incredibly capable machines. With high lens and image sensor quality available at your fingertips the modern cell phone camera is an obvious contender – not to mention the fact that there are a plethora of incredibly powerful apps for post-processing your images available for free (or cheap).
If you choose to employ your cell phone camera to take your headshot, get to know the camera app you will use. Most newer phones will have manual or “pro” modes built into the native camera app to give the user more control over the performance of the camera and the final image. For a quality headshot, it might be worth it to learn how to use those manual or “pro” modes to create quality images. To do that, you’ll need to understand at least three things: Shutter Speed, ISO, and White Balance (or Color Temperature).
Shutter Speed: This setting will determine how long your shutter will stay open when you press the shutter button. DSLR and other, more advanced cameras have a variable aperture which can be changed to control the brightness of a scene (and the blurring of background/foreground details to isolate a subject). Cell phones, however, do not usually give users the ability to adjust aperture – the aperture is usually fixed. Aperture (basically) controls how much light the camera lets in and shutter speed controls how long that light will be let in for. We can’t adjust our aperture on a cell phone camera but we can adjust our shutter speed.
Shutter speed is measured in fractions of a second. The longer (slower) your shutter speed, the brighter your image will be. However, too slow of a shutter speed will lead to blurry images because even the slightest movements will be recorded by the camera. This is usually the biggest issue in self-portraits taken in low-light areas. When there is plenty of light you can use a faster shutter speed, but when there is very little available light a slower shutter speed will be necessary. Therefore, if we want a sharp, bright headshot image we need to make sure that we take it in plenty of light… but more on that later.
ISO: There is another setting which gives you another option to adjust the brightness of your image. This is called ISO. It’s a complicated concept, especially if you are learning these settings for the first time. If you’re playing around with the settings and you adjust the ISO you’ll notice that the image gets a lot brighter as you increase ISO. What you might not notice is how “noisy” the image is getting. Noise is an unfortunate but all-too-common issue with high-ISO digital imagery. As you increase the ISO your camera – for the purposes of this article – creates artificial or digital “light” to increase the overall brightness of a scene. The consequence, though, is grainy, fuzzy looking “noise”. It can dramatically decrease the quality of the image, so make sure you don’t crank this up too high. All you really need to know is that you really want to keep this setting as low as possible. Set your ISO at its lowest setting and your shutter speed as high as possible. Slowly increase your ISO and decrease your shutter speed as necessary to find that careful balance between noisy and blurry. Take a test image and zoom in tight on the eyes to make sure your image is sharp, in-focus, and not too noisy. This will take practice, so don’t worry if it takes you a while to get it right.
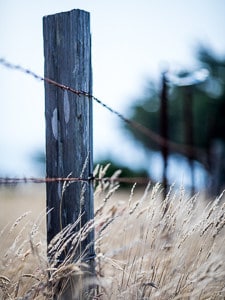 White Balance: Sometimes this can be corrected after the fact, but it’s better to get it right as you take the image. This is the overall color “feel” of your image. In the art world, a “warm” image is one which has more of a red or orange feel – sort of golden – and a “cool” image is one which is made up of blues and violets. If you’re familiar with the light spectrum (or if you’ve ever bought a light bulb) you might be familiar with this concept. Getting this wrong to one extreme or the other can make an image very unsatisfying or unpleasant. When you set the white balance for your image the most important thing is to get the tones of your skin right. This, too, might take some practice to get right.
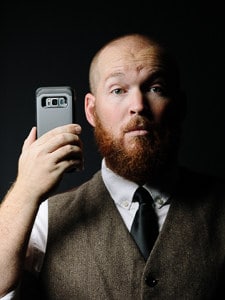
***Note*** Whenever I mention a cell phone camera in this article I am most certainly referring to the rear camera – not the front facing “selfie” camera. The front-facing camera is almost always completely sub-par for a serious headshot. It would be silly to use the front-facing camera if you could literally almost double the image quality by simply turning your cell phone around.
The TL;DR here is this: Pick a camera and know how to use it well (preferably in “Manual” or “Pro” mode).
Will You Need Any Other Gear to Take this Image?
We’ve already picked our camera for this project, so a lot of the hard part is already out of the way. Now we need to think about what else we will need for this endeavor. Some non-professionals may not realize just how much goes into a professional level headshot. While we’re not going for that level of complexity here it is important to realize that there might be some tools available to you to help make your image just a little bit better.
The first recommendation I would make would be to find a helper. I don’t recommend the use of the front-facing camera on any cell phone, and it can be a little awkward trying to take a picture of yourself when you can’t see what you’re doing. If you don’t have a helper available see if you can find a self-timer on your phone’s camera settings somewhere or find an app which has one. If you do have a helper available to help you things will be much, much easier. Find somebody who makes you feel comfortable – a spouse, close friend, etc… You don’t want your new headshot to make you look awkward, uncomfortable, or anxious – so it really helps if that’s not how you’re feeling when you take it. The person taking your photo is almost single-handedly responsible for this (portrait photographers, take note. People look better when they feel better – so be nice and make people smile!)
Another piece of gear you might consider is some white foam core board from your local craft store. Foam core is great for reflecting light and bouncing light onto your face. And the best part about foam core? It is DIRT cheap. (Pro Tip for U.S. buyers: Don’t buy foam core at big name craft stores. It’s much, MUCH cheaper [as it should be] at more general stores. Look for it in kids’ school and art supply sections.) Make sure you get white, though. Otherwise, the color of the foam core will bounce onto your face as the same color. Unless you want lime green highlights in your photo, stick with white foam core.
Another thing you might use if you only want to use things you have laying around would be a roll of aluminum foil from the kitchen. Like foam core, aluminum foil is great for bouncing and reflecting light onto your face. Be careful with foil, though. The reflections and light can be harsher than they will be from something white. Because of its metallic surface light reflects at full brightness. If you find the light reflecting back at you to be too harsh, bright, or generally unappealing, try moving the foil away from you until the light looks more appealing.
The last type of light modifier you might consider would be a large white layer of fabric. A large, white t-shirt, a pillowcase, a bedsheet, a white sheer curtain – anything of that type works great to diffuse light and spread the light out from a small light source. We’ll talk more about lighting in the next section, though. For now, see if you have something of that sort available to you. You might find it useful.
A tripod is another useful bit of gear. The great thing about phones is how light and small they are. Tripods for a big DSLR camera can be unbelievably expensive, but for your phone, a tripod can cost less than $10. If you don’t have/don’t want to buy a tripod for your phone, just find something to hold your phone for you. Get creative – prop your phone against the wall up on a shelf or use some clothespins to build a stand for your phone. (Or, as stated above: Find somebody to help!) A lot of phones these days have some sort of hands-free option for taking photos. My Samsung Galaxy S8, for example, allows me to gesture at the camera to initiate a self-timer or say the word “Cheese” to take a photo from a distance. This is a great feature when shooting from a tripod.
What Kind of Light Will You Use to Take Your Image?
Lighting can be extremely complicated – in fact, as photographers, lighting is literally everything in photography. The very word “photograph” means “a recording of light”. Without light, there is not photography. There are all kinds of intricacies we could discuss about how to use light and what kinds of light to use for different situations but, for the purposes of this article, there is actually not much you need to know.
The first thing you need to know is this: Have plenty of light. Better to have too much than not enough. Daylight is an amazing type of light and it’s completely free! If you’re not going for something unusual or specific consider using regular old daylight as your light source.
The second thing you need to know is this: Soft light is usually better than hard light. What I mean by “soft light” has less to do with the light itself and more to do with the transition between the lights and the shadows in your image. An image with very hard light (meaning there is a relatively sudden or abrupt change from light to shadow in the image) is typically less appealing than an image with soft light (an image with very gradual fall-off from light to dark). There are certain artistic purposes for hard light – so it isn’t universally bad. But, generally speaking, a headshot will look much better with soft light.
The third thing you need to know is this: Soft light is obtained by a large light source as it appears to the subject. The larger a light source appears to a subject, the softer the light will be. The sun is an incredibly large light source, but to my eye at noon it appears to be no bigger than a dime. Therefore, the light from the sun is very hard and harsh on me at noon. However, if I sit next to the light coming through a sliding glass door in my house the light looks incredible, soft, and flattering on me. In fact, window light is often the best example of soft light for a headshot such as this.
So other than a window or a large glass door how can we create soft light? Diffuse the light. Remember that bedsheet/shirt/pillowcase you put aside earlier? Time to pull that out. If I have a nice, bright light fixture somewhere in the house I can take that diffusion material between myself and that light fixture to get nice, soft light for my photo. Tall floor lamps are great for this. Remove the lampshade and sit on a chair with the lamp about 45 degrees above your head and 45 degrees away from you diagonally. Find some way to suspend the diffusion material between yourself and the lamp and take a test shot. Don’t be afraid to get right up close to the lighting, either. Just bring the camera closer to you to make sure you can’t see the diffusion material in the frame – or just crop it out afterward.
***Safety Note*** Please be sure to use common sense when dealing with hot light bulbs. Don’t drape a thin, dry material over a bare light bulb. You could start a fire or very seriously injure somebody. Please, please, please use common sense.
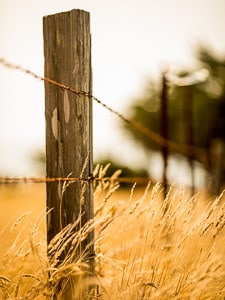
Again, the easiest way to find good, adequate light is to use daylight. Using lamps and indoor light fixtures works great, but there’s something very pleasing about natural daylight. Sit by a window at a quarter profile to the camera or go outside and take a photo in some nice, clean shade. Even better, take a photo with the sun at your back within the hour leading up to sunset. This is called the “Golden Hour” in photography and the light is a beautiful, rich golden color. The atmosphere is acting like a big diffusion material and the colors are phenomenal. Play around with some daylight photography and see what looks best for your features.
What Kind of Background Will You Incorporate in Your Image?
 What Kind of Background Will You Incorporate in Your Image?
The next consideration to tackle is background. For some self-portraiture, it might be good to have a good deal of background detail. Often, people take pictures of themselves at an event or in a memorable place. A selfie in front of a major landmark is a wonderful thing – but that’s most likely not what we’re going for here. If we want to create a professional headshot for business or networking purposes it is important that whatever we convey with our image be very intentional – this image will do a lot of “talking” for us before we actually get a chance to speak for ourselves. We need to make sure it is saying the right thing.
Sometimes this means that the best background is no background. It might be a good idea to find a clean, blank wall somewhere and take our photo there. White, black, textured, brick, etc… It really doesn’t matter as long as our own face is more interesting than our background. We are the subject of this photo and, while it may seem a bit narcissistic on the surface, it is important that we draw our viewers’ attention to the subject of our photo – not some distraction in the background. A clean, perfectly white background will most likely be very hard to create without extra lighting or some post-processing so that might not be something to shoot for. What will often happen with a white background, though, is that the ambient light will look a little more dim on it than it does on your face, so it will have more of a gray appearance. This is actually perfect for a professional headshot. Gray is a very acceptable color for a professional headshot background because it is a very “serious” color. It isn’t a playful or childish color like some primary colors might be. It’s very pleasant and easy on the eyes and, best of all, it is about the least distracting color possible – meaning you’ll be the only attention-getter in the image. Perfect. White walls, plain colored walls (bright colors aren’t always childish or playful – it’s all in the presentation), patterns such as bricks or shiplap, etc…
A good, non-distracting background is extremely important to a good headshot – but what’s in a background is a lot less important than what’s not in a background. So, for the sake of all things professional, here is a brief and by-no-means-comprehensive list of things which shouldn’t be in the background of your headshot: broken down cars, toilets, other people, the backseat of your car, drug paraphernalia, embarrassing revelations in mirror reflections, evidence of illegal activity, etc… Every time I think I’ve seen it all the internet reminds me that anything is possible. Check, re-check, and re-re-check your background to make sure it’s free of anything embarrassing. With that being said, it’s absolutely ok to have background detail. I’ve seen some incredible portraits of white-collar professionals in outdoor scenery. Even something like a single tree in the parking lot of your apartment complex can add a color pop that compliments the image and causes someone to look at your image a little longer. It’s important to remember, though, that this is a headshot. There should be very little of anything but your own face in the image. That means that whatever background you choose you should realize there will be very little of it in the image. This means that if it’s cluttered you can isolate a single feature of your background without having to worry about everything else. Alternatively, if you’re hoping to capture a ton of detail in your background you should realize that much of your background will not make it into the image. At the most, you want to capture the texture and/or color of your background. Too much else and the image becomes subconsciously confusing because there is simply too much going on – the viewer doesn’t know what he’s supposed to look at. Keep it simple.
 What Kind of Pose Will You Use in Your Image?
 What Kind of Pose Will You Use in Your Image?
You might not think that there would be much to say about posing when it comes to a headshot, but there is actually quite a bit of posing necessary to pull off a good headshot. There are a handful of tricks to make a headshot look good… and there are about a million things you can do to make it look bad. Photography is a funny thing because there are all kinds of little intricacies to consider. For example, the focal length of a camera’s lens (measured in millimeters) determines quite a bit – but most people don’t know this and don’t know what the focal length of their phone’s camera is. One thing to consider is that the smaller a lens’ focal length is the more distorted sizes and shapes will be in an image – especially as subjects get closer to the camera. This means that whatever is closest to the camera will look bigger than things that are further away from the camera. This is especially problematic when it comes to headshots because your camera is closer to your face than normal. It might be a good idea to not hold your phone too terribly close to your face, opting instead to open a photo editing app in your phone and crop the photo down to a tighter shot to avoid this distortion.
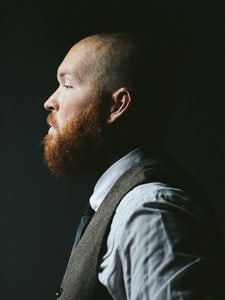
One major problem many people have when taking headshots is how to hold their head so they look their best. The first and easiest thing to remember is that angles are a good thing. Sometimes a good, squared-up, head-on portrait is captivating and compelling. Often, though, angling your body away from the camera at a diagonal of 45 degrees or so and then slightly turning your head back toward the camera is a more flattering pose. This allows the light to fall on and off of your face’s contours and convey depth and dimension to your viewer. Consider combining the window light from our earlier discussion with this angled pose and see what kinds of shots you’re able to get.
 Another thing to keep in your mind is your neck and jawline. To adjust this part of the body, steer the head with the chin. This means that if you want to draw out the neck and accentuate the jawline you do so by pointing the chin in different directions. Pointing the chin (rather than the nose) slightly toward the camera is more flattering than pointing the chin at the floor below the camera. This can bunch up the neck and cause an unflattering pattern to appear under the jaw.
There is much to consider with the head in a photo, but the neck tends to be one of the most important to address. However, it should also be noted that most people have a side they prefer to be photographed on. If you don’t know which side you prefer to be photographed from take some test shots and see what you think. Try to light and photograph in a favorable way for that side of your face.
Finally, to smile or not to smile? This is completely subjective. I would probably not want my smile to look too forced or goofy. But, on the other hand, I wouldn’t want a non-smiling picture to make me look grumpy or even rude. I think this really depends on your face, your smile, your personality, and your intended audience. Are you normally a happy, smiley person? Then you should probably smile! Are you more serious? Is your intended audience more serious? Then maybe consider a more serious portrait. Try both and see which one you like better. You might be surprised at what you learn.
How Will You Dress for Your Headshot?
Think of this photo as a job interview. If first impressions are everything then realize that your first impression is often not when you first meet somebody – but when they first meet you online. This image speaks, remember. What do you want it to say? Say something for yourself with your style of dress. Don’t go over the top here, either. You want to look professional. You don’t necessarily want to dress up in a tuxedo for this. Whatever your intended audience would expect you to wear is probably exactly what you should wear for this image. It might seem obvious to you as you read this, but very often I see people dressed incredibly inappropriately for the intended audience of their photo. Make a good impression and dress for success.
 What Kind of Framing/Composition Will You Use in the Image?
 What Kind of Framing/Composition Will You Use in the Image?
Framing (or composition) are very important in photography. This is also true for headshots. While there isn’t much room in a tight headshot you still have some options here. You could opt to center yourself completely and frame the photo so that your shoulders and the top of your head are in the frame. That would make for a nice, safe, traditional headshot. However, you might decide to put yourself off to the left or right third of the frame for a more engaging image. You also might decide to tighten the framing up a bit and cut off some of the top of your head and your shoulders. There are still several options with the composition of a headshot – it’s absolutely worth considering!
A Word on Focus
Focus is one of the easiest things to mess up and one of the hardest things to get right, sometimes. Your photo needs to be in focus, yes. But what part of the image should be in focus? We talked earlier about blurry backgrounds, so we know that a background which is far away from you will look better than one which is closer up because it will be blurrier. It’s ok for a background to be blurry but it is absolutely detrimental to a photo if the face in out of focus – specifically the eyes. The eyes are supposed to be the centerpiece of the headshot. If the person in the headshot is the subject of the photo, the eyes are the most important feature of the subject. If you’re facing the camera straight on then both eyes need to be in focus. If your camera has a touch screen focus system or a selectable focus point make sure the focus is on the eyes. If you are angling yourself toward the camera then pick the closest eye and make sure it is in focus. This is absolutely crucial in a good headshot.
What Kind of Editing Will You Do to Your Headshot?
Finally, once you’ve got a photo you’re happy with you should open it up in a photo editor and play around with it a little bit. If you’re not a professional photographer, don’t fret! There are literally hundreds of free photo editors worth their salt. My personal favorites are Google Photos and Polarr. The key here is subtlety. Don’t jack the contrast slider all the way up, please. You’ve worked hard to get this far so go easy on the editing. It’s very subjective but, often, making the shadows (not the blacks) a little brighter and the highlights (not the whites) down just a little bit can make a photo look really good. Then add just a touch of contrast and, if the photo looks a bit dull, add in a tiny, tiny bit of saturation or vibrance. Usually, that’s plenty!
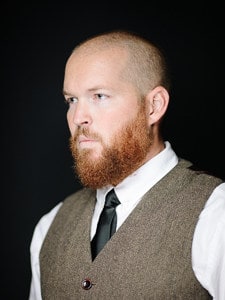
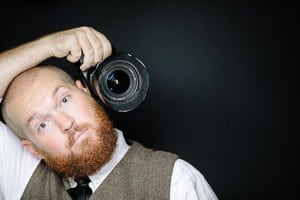
There are a million more things that could be said about taking high-quality images on a budget but I can’t cram it all into one article. I’m a big-time cheapskate, though, so expect to see this topic come up again. Next time I might even walk through a DIY photoshoot step-by-step. If you’d like to read more tips on making your photography look even better take a look at this article Jim Harmer put together on making your photography look more professional. (And, in case you're wondering, all of the self-portraits in this article were taken by me, alone, using a tripod and a timer. I had one single light that I was moving around to try out different angles and I had nobody helping me – except Mattis, the Wonder Dog, of course.)
Until next time!

Great article. Another great topic would be the same with a DSLR and a photo editing software. Assuming that, I would expect a paragraph where will be explained how to add a custom background with a photo editor. Thank you