
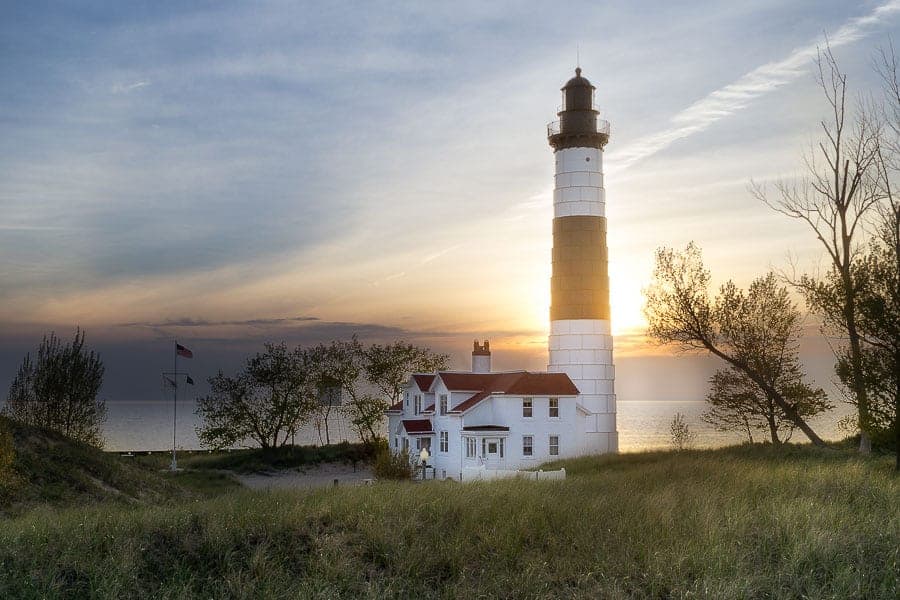
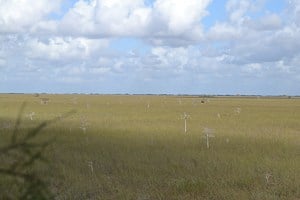
Standing in a beautiful location, with the splendor of nature surrounding in all directions, it is still more than possible to walk away with a completely unremarkable photograph. I can think of dozens of times when this has been the case for me. I've stood in the Everglades of Florida, on Isle Royale in Lake Superior, and in other magnificent locations, and come away with images totally unworthy of the real glory of those places. Has this ever happened to you? Have you found yourself saying to your friends, “oh, you just had to be there,” or, “places never really look the same in pictures?”
I have since learned a process that allows me to do better. It is a workflow, more or less. At the very least, a series of thoughts to have as you are taking your landscape photo. By considering what you want your image to say, reducing your image down to essential components and eliminating distractions, and getting the technical aspects right, you will produce an image worthy of a beautiful scene.
Consider what you want your image to say
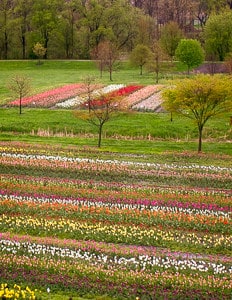
The very first step in the process of photographing a landscape is to survey the scene. Before you pick up your camera and definitely before you start extending those tripod legs, walk around a bit, and look all around you. What is actually interesting in your scene? Sure, it is beautiful, but what makes it beautiful? Is there something really interesting like a rock formation up close? Is it a sweeping vista? Are there repeating textures or patterns? Often times when beginner photographers are starting to take pictures they want to capture everything in one frame. This is rarely the most compelling photograph. A photograph is not reality and will never be reality; it is rectangular in shape, typically has a focal length different from what we see naturally, and is a frozen moment in time, or a blur of those moments. Rather than taking one ultra-wide shot in the name of capturing reality, find an element or grouping of elements that are actually interesting and can capture the essence of your location.
As you are starting to see the beginning of your image, how does it make you feel? What would someone who is viewing your image, not having been with you, say about the location? A photograph that sends a message is more compelling than one that simply documents some rectangle of Earth. These messages can have varying degrees of narrative, and that's OK. It could be a strong narrative, such as the power of life shown by a tree growing on some impossible rock, or it could be weaker, like the passage of time on a sand dune beaten down by the wind, but the point is that if you can see these things and your eventual audience can see these things, the photograph with have something to say, and therefore be more attractive.
Here are some compositional concepts to consider at this phase:
- Balance: Different objects will have different “weights” in the frame. These can be derived from literal size, or can come from a sense of importance or emotions associate with those objects. Begin to consider how you will arrange the objects in a way that finds a sense of balance. Check out Jim's article for more on balance.
- Rule of thirds: When I teach photography workshops, I always ask if anyone knows any “rules” of composition. This one almost always comes up. Placing key elements on the third lines of a frame can help your composition much of the time. That said, don't rely on it. Sometimes subject in the center is best. Sometimes you may find another arrangement that works. Consider it as part of your overall strategy, but enjoy breaking this rule whenever it makes sense to go another way. Check out Jim's article for more on rule of thirds.
- Block method composition: Jim has made a tutorial that is really helpful in figuring out a composition. It is a method that extends beyond the “rules” and gets into the way shapes can be arranged in your frame. Check out the tutorial here.
- Subject: You should be able to answer the question, “what is my subject?” It could be something like a geological formation, or it could be a repeating pattern, or it could be a tree or plant, or a person, or something else, but you should know what it is.
Reduce down to essential components and eliminate distractions
When looking at two images of the same landscape, the simpler photo is almost always the better photo. No doubt there are exceptions to this, but it is a good thought to have in your head while you are trying to compose your landscape. In the first part of this process, you've already looked around and found the essential components of your landscape. In this part of the process, you're going to work on fine tuning the arrangement of those objects and eliminating anything in the frame that may take away from their power and effect.
The first step is to consider foreground, mid ground, and background. Generally speaking, your subject should be featured prominently in the foreground. It should take up a large portion of the image. A tiny flower in the corner of your image is not a subject, it is a distraction. By making it large in frame, you communicate more clearly as a photographer. With background, consider whether the details of your background are interesting or not. You have a few tools to maximize or minimize background: these are focal length and aperture. With a wide focal length (mm is a small number, like 18mm) your background will seem farther away and smaller than it does when you look with your eyes. With a long focal length (mm is a larger number, like 100mm or even higher) your background will seem closer than it does with your eyes. Aperture will control how in focus your background is, with a setting like f/16 generally giving a background that is in focus, and a setting with a lower number like f/2.8 giving a background that is quite out of focus. In general, landscapes are shot at a wider angle and a stopped down aperture (around f/16), giving a sweeping wide view of an in focus background, but there are lots of exceptions to this, and you should choose your settings to give the result that you want. Lastly, consider your mid ground. In many landscapes, the mid ground is the least interesting section. Perspective is the best tool to deal with mid ground. Get low, and you can almost eliminate it; go higher, and you see a lot of it. Being intentional about the height of your camera can make a big difference in the overall effect of your photo.
After you have your elements arranged nicely, there are a few more details to check. Look for “high contrast intersections.” These are areas where the three-dimensional world has not translated well to your two-dimensional image. Is the horizon line running through your subject in an odd place? Do you have a tree sticking right out of the top of the old car you're photographing? By adjusting your camera slightly up or slightly down, could you keep your subject completely below or completely above the horizon? Making these adjustments can clean up your composition, so don't forget to look for them. It is also very important to check your corners and the edges of your frame. With corners, you should either have something interesting happening there, or leave it as negative space. You don't want something interesting almost in the corner; it should be in the corner or no where near the corner. With edges, you'll need to consider whether to have space between the main elements of the photograph and the edge of the frame or whether you'd like to have them go off frame. Either can work, but whichever you choose, you want to arrange things so that the eyes of your viewers want to stay on the frame and not look at the edge. This means that you'll want to leave sufficient negative space so that the eyes don't wander to the edge, or you'll want to make your edge at a place where the viewer's eye won't be tempted to wander off because he or she will naturally assume what would be there if the photo continued. Keeping the eye focused away from the edge makes an image more pleasing.
Here are links to articles that cover further the topics in this phase:
- Focal length: Understand Focal Length in 5 Minutes
- Aperture: Learn how aperture, shutter speed, and ISO affect exposure
- Shooting wide angle: 10 Tips for Shooting Wide Angle
Get the technical aspects right
Now that you have your composition nailed down, you have two main concerns: exposure and focus.
Exposure is the overall lightness or darkness of the photo. You control exposure using the aperture, shutter speed, and ISO settings on your camera. Each of these settings adjusts the overall lightness of the photo, but each have other trade-offs, so we use them to balance each other and get the exposure that we want. Using a wider aperture (lower f-stop number, like f/2.8) will add light to the image, but as I mentioned above, the lower this number, the more out of focus your background will be. Using a longer shutter speed (the amount of time the shutter is open), will add light, but will also eventually show motion, whether that's from motion in your image or from camera shake if you are not on a tripod. Increasing ISO adds more light, but also reduces image quality and dynamic range (the range that your camera can capture in between white and black). My suggestion for a typical landscape if you are just getting into how to use camera settings is to shoot in aperture priority, setting your aperture to around f/16 if you want everything in focus, and keep ISO as low as possible. If you are shooting on a tripod, your lowest ISO (typically 100) is fine. If you are hand holding, you may need to increase ISO to avoid camera shake, following the 1/focal length rule. When looking at the overall exposure of your image, there is a lot of room for creativity, but in general you want prominent elements to draw the eye, meaning that they will be bright and detailed. You should also avoid over exposing to the point where the brightest parts of your image go to pure white (called “blowing out”), unless you are doing so as a creative choice. If you are shooting in aperture priority, adjust the exposure using exposure compensation. If you are making the jump to manual mode, my advice is to find the aperture you want, compensate your exposure using your shutter speed, and use ISO if shutter speed is insufficient. The exception to this would be if you are wanting a particular shutter speed to show or to freeze motion; this may come up especially if you are shooting water or want a little bit of motion in clouds. In this case, set your aperture, find a shutter speed that works, and compensate using ISO.
The best place to focus in a landscape is about one third of the way into the frame. This will produce the best chance at acceptably sharp focus from front to back. You can consult hyperfocal distance tables and various apps if you want to be precise, but it's not usually necessary to take such steps. The main exception is if you are shooting a landscape that has a prominent subject close to the camera. In that situation, it is most important that you focus where detail needs to be the sharpest. If you can't get your subject in sharp detail and the background in acceptable sharpness, you may need to use a more advanced technique called focus stacking, where you take multiple frames with your focus point at various depths in the scene and blend them together using software.
White balance is one more detail to consider. White balance is the setting on your camera to control how blue/yellow and green/magenta the neutral white light is where you are. I usually leave my camera in auto, but if you notice that your camera is consistently getting white balance wrong, or if you're not going to post-process and it needs to be right in camera, you can set your white balance using one of the preset levels (like “daylight”), or you can use a more advanced technique like dialing in the level manually or using a grey card.
Here are links to articles that cover further the topics in this phase:
- Exposure: Photo Basics #1: Introduction and Exposure
- Camera modes: The Difference Between Manual Mode and Aperture Priority
- Hyperfocal distance: Where to Focus for Landscape Photography and How to Focus 1/3 Into a Photo for Deep Depth-of-Field
- Focus stacking: Get Focused! Image Stacking for Maximum Depth of Field
- White balance: How to Make Indoor Photos Not Look Yellow
Keep shooting until you nail the shot
It is unlikely that with the first click of your shutter you will produce your best image. The beautiful think about the digital age is that we can keep making minor adjustments and walk away with an image far better than the very first one that we snap. Some photographers will discourage you from “chimping:” checking the LCD on the back of your camera after every shot. I do agree that excessive reliance on the LCD can be a distraction, but you do have it, so you might as well use it. As you are shooting, consider the steps above, especially phases two and three. Is there a way to simplify the image? Would a slight adjustment in focal length or in perspective make the image more interesting? Would it be smart to make a creative adjustment to exposure and let my shadows go to black, or to let my waterfall blur out a little bit? Am I nailing the focus?
You don't have to get it right the first time, and there is a lot of fun to be had in the process.
A note on post-processing
The options that you have when it comes to editing your photo are vast. Landscape photographers have the ability to brighten shadows, increase contrast and clarity, sharpen, fix white balance and adjust color creatively, just to name some of the most common adjustments. Using software like Photoshop also opens the door for compositing, the combining of multiple images together. Landscape photographers fall on a spectrum between in-camera only and heavy editing. There is no right or wrong place to be, but I would encourage you to consider post-processing. Start with a program like Adobe Lightroom or Adobe Photoshop Elements where you can make basic edits, and then move up to more advanced programs like Adobe Photoshop if you so desire. I've heard many beginners say that they don't want to edit because they like to capture the world as it is, but as I mentioned earlier, a photo will never represent the reality that you see in a precise way, so you may as well clean up the photo a bit and give it that extra 20% that will make it stand out above the others. For a little more detail on what post-processing is and can do, check out Jeff's article: What is “post-processing” in Photography?.
Get out and shoot
Now that we've walked through the process of photographing landscapes from idea to finished photo, the best thing you can do is go out and practice. If you've been a casual photographer, this focus on intention will yield for you surprising gains in the quality of images that you produce. I hope that you will share them with family and friends, and that your photography will have meaningful impact on others. I know that with some effort you can get there.
This is the best way we all are knowing about this.