
In my own personal opinion Bryce is kind of one of those forgotten step children of the icons of Southern Utah. Not nearly as forgotten as Capitol Reef but not nearly photographed as Zion or Arches National Park. Because of this, almost all the compositions that come out of Bryce Canyon are… the same. Literally almost all the photographs of Bryce are from the same six spots. Though there is nothing wrong with this, there is so much more here to work with. Literally there is a never ending supply of bizarre hoodoos that are constantly shifting and breaking. The goal of this article is to hopefully get your brain juices flowing so that when you visit this location you can get the iconic shots and add a few more to your portfolio that people wont know.
[x_alert type=”success”]If you'll be shooting in Bryce, we highly recommend downloading the free Really Good Photo Spots app for the iPhone. It has TONS of great spots to take pictures in Bryce Canyon and in southern Utah in general. It's a pretty incredible app. More info here.[/x_alert]
Composition
Like all good photography, composition is key. Let me discuss some important aspects of composition that will be important for photographing Bryce Canyon.
1-Foreground
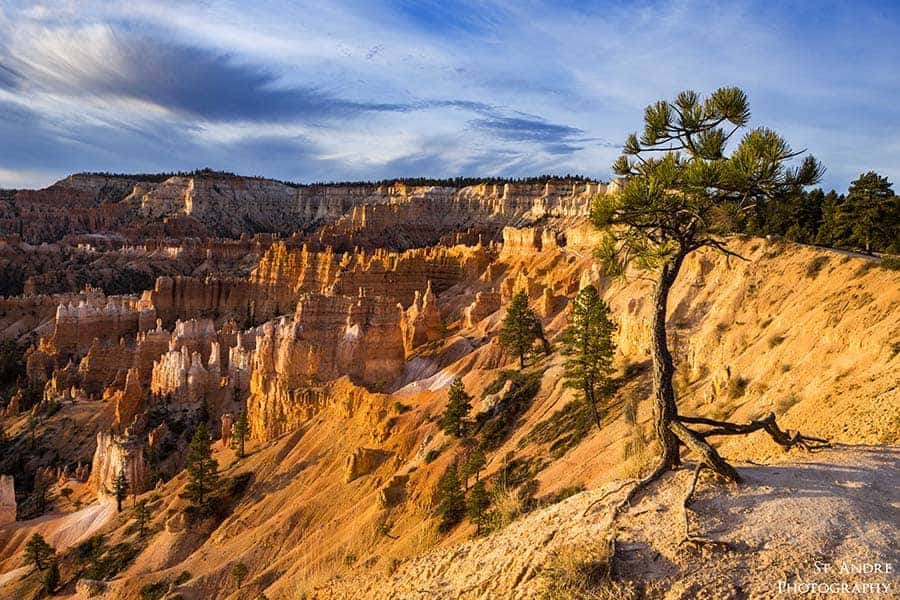
The key to help set apart your photographs in general from that of just about every average photographer is properly using foreground elements. This can be critical in Bryce because it is really easy to photograph grand landscapes that look like every other photographers stuff. The key to set apart your stuff is using some foreground work. As for what foreground elements to use let me discuss some issues with the park. A majority of the park that people photograph is from the overlook locations. Because of the general geology that makes up the park it is not very rocky, don't plan on using big rocks as a foreground element very often. There are a few hard caps of stone but a majority of the soil is soft clay that slopes off to a cliff rapidly. That leaves hoodoos and trees. Luckily Bryce has a quite a few of these two elements. To take advantage of hoodoo's as foreground you will have to go below the rim. As for tree's Bryce has a ton of really picturesque Ponderosa Pine (Pinus ponderosa) that are holding on for deal life on the edge of the cliffs. They also become twisted and deformed down below the rim. These can add for some really cool photographic subjects.
2-Avoid cluttering
I have killed a shot with too much clutter. Often in photography we are trying to isolate key aspects of a scene to try to tell a story of whats going on. It can be really difficult to do this in places like forests. Think of Bryce like a forest of hoodoo's. Literally there are thousands here. They form in odd clusters and towering walls with hundreds stacked in tight and deep. If you point your camera at one of these structures you will find yourself with a mob of lines going all over place. There will be no anchor for the eye to wrest on, and the photo will feel busy and uninteresting. One way to isolate a subject is find particular hoodoo's or hoodoo structures to be the main subject. Another way is to find some sort of fin or structure that acts like a leading line. All of these techniques will help you avoid clutter.
Location
Each location found within the park will provide some different perspectives. Above the rim shots will feel grand and majestic while shots from below the rim will be intense and super interesting.
3- On the Rim
I use to actively maintain a website called Southern Utah Hiking. I miss doing it, but now I have hit a point I don't want to disclose too many of my locations or I keep going back to the same locations over and over again. Anyways I have produced a collection of posts about Bryce. One of those posts is a collection of all the view points within the park. It has some descriptions but mostly it has a photo of each spot. If you are wanting to do some preliminary scouting this might be a good starting point. Click here to check it out.
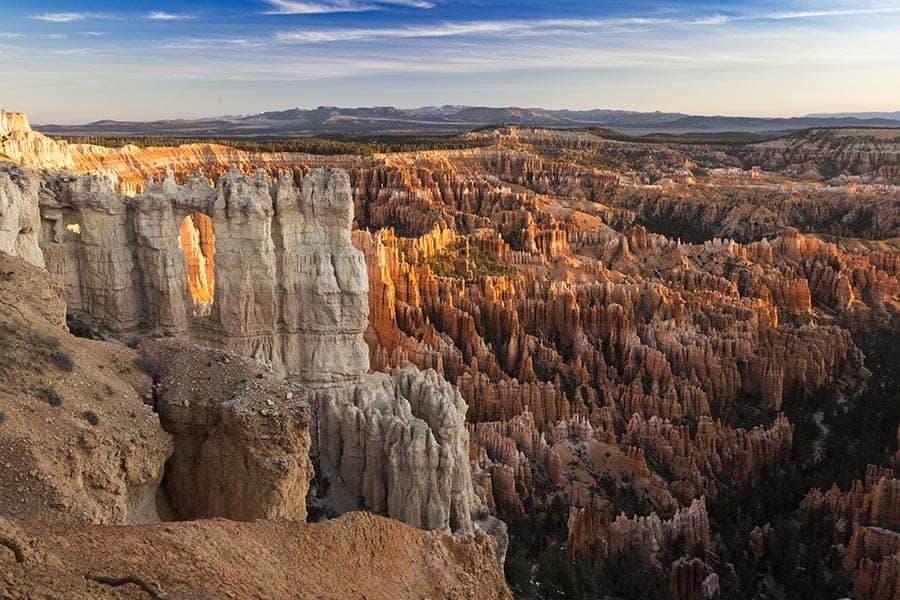
On the rim, in general, is the easiest spot to get good pictures. It doesn't require extensive hiking and there are endless possibilities to work with when you have a telephoto. I would recommend taking the rim trail between points to find your location where to photograph. The rim trail extends for a few miles and will bring you in contact with quite a few of Bryce's iconic sections to work with. It will also take you away from a majority of the crowds where you can find yourself with your camera and a few compositions that are all your own.
I would avoid spending all my photography time here though. Since 99 percent of the photography for the park happens on the rim, it is easy to find yourself repeating the same shots as everyone else.
4- Below the Rim
This is where the challenge of Bryce occurs. Since you are venturing below the rim to photograph, you will be entering no mans land of photographic compositions. Most of the images on Instagram or social platforms will be from here, but they will mostly be selfies. There are only a few serious photographers to come here enough to collect a bunch of portfolio worthy images. This means you have not a lot of source data to brain storm from. This also means that this place is the golden landscape of totally unique images. It requires a bit of work, but from here on out when I visit the park I will find myself down one of these trails at the golden hours of the day.
When planning a photoshoot. Hike the trails and look for interesting things that catch your eye. Spend time with your camera finding compositions and then GPS the point so you can come back to them.
Lenses
I don't think Bryce needs too much in the way of lenses to take advantage of the great views. An ultra wide is always good but a 70-200 will also be a really important piece of equipment for getting some cool images.
5- Wide Angle
Since I am a landscape photographer I love using these lenses. But in Bryce it can be a bit challenging. There are so many things to distract your eye while trying to compose an image. The more you have in your scene the easier it is to get a cluttered image (refer to point 2). The way to get around this to move close to your subject or zoom in a bit. One reason that this technique does not work super well in Bryce is because there are cliffs everywhere. I actually think the 24mm range is probably the best focal length for this park. Don't come here without a lens that covers that focal range. There is always use of an ultra wide though so don't feel like you shouldn't bring yours though.
6- Telephoto
The only telephoto you need for this park is the 70-200mm. Seriously don't bother with any other telephotos. Anything over that is a bit overkill in my opinion. To this date I have never said “dang I wish I had something with more zoom” within this park. Wildlife sure, but other than that, you will be fine.
My general technique is to begin with a wide angle as the light first rises over the horizon at sunrise. After I get those shots and as the light transitions I switch to the telephoto so get close ups on the hoodoo clusters that are beginning to glow in the strange way that they do in the morning.
Time of Day
Bryce changes a surprisingly a lot through out the day in color, brightness and photogenic beauty. These are my suggestions.
7-Sunrise
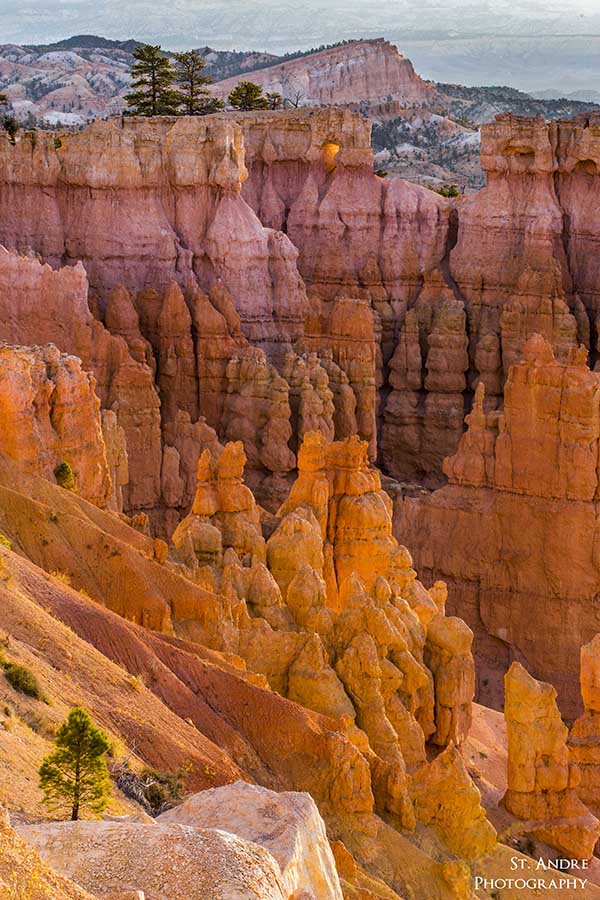
Sunrise is the best time to photograph in Bryce. The entire park is east facing so every single sunrise you can be out, do it. The other advantage is that the glowing light that bounces off the ground lights up the back of the hoodoos with this unbelievable radiance that can't be beat. It is only present for about 20 minutes when it is at it's best. Do not miss that opportunity to be out there and photograph this. Plan your sunrises the day before for the greatest chance of success and use a sun tracking app like Photographer's Ephemeris or Photo Pills. These are a must in the park because a different times of year the sun will rise earlier or later due to distant plateau's on the horizon. If you want the earliest light from the sun on the rocks, late summer to fall will provide that.
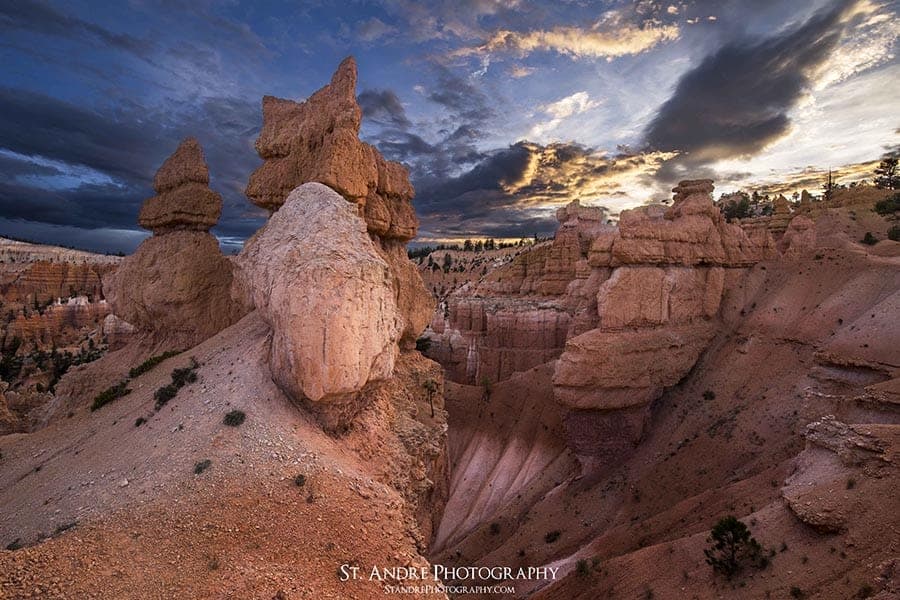
8-Sunset
The Rim is kind of sucky to be on for sunset unless there is a storm in the distance and you are getting rainbows like David West. Seriously I love that image so much I have come close to buying it my self. Anyways… to get the most out of photographing on the rim I suggest find a good point that has great foreground and hope the sky does something interesting. Other than that, I would say descend below the rim and photograph back towards the sunset. The hoodoo's are more interesting from that angle and they will look more impressive with an epic cloud formation and distant hoodoo formations.

9-Midday
Just enjoy your time. I would not plan on getting any keepers during mid day. Hike and search for composition ideas. The only time I would be out there is if there was a big storm, but that can be risky as the rim turns into a lightning rod during a storm and you are increasing your chances of getting struck by lightning. The one spot where I might find myself for mid day shots is down in the Navajo Loop Trail photographing the epic Ponderosa Trees that have been climbing skywards for probably hundreds of years.
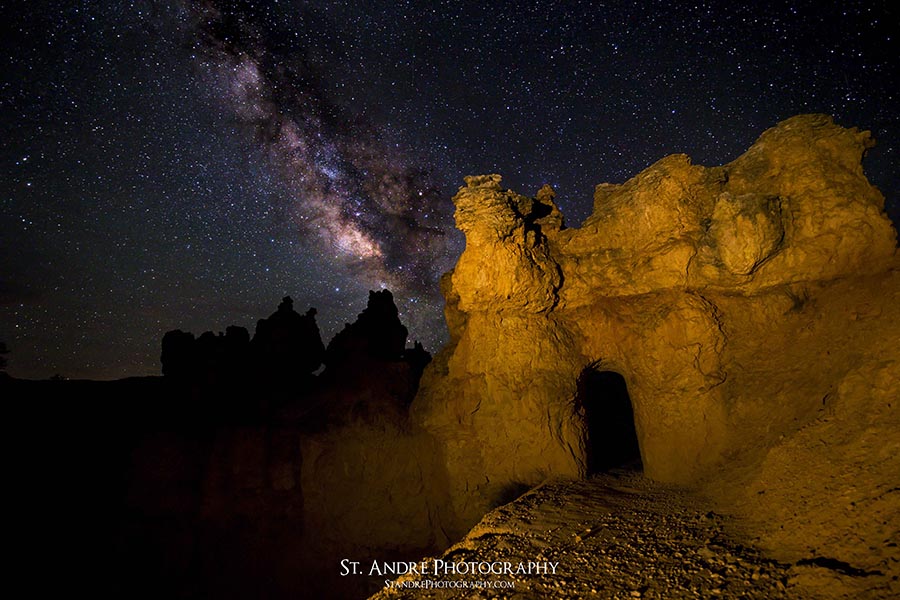
10- Astro
Bryce is not a International Dark Sky Park, but it probably should be one. There are a few aspects that make it dark park. One is that it is high elevation, so you should have less atmospheric movement to mess up your images. It also has tiny towns down below it so they produce very little light pollution. It's neighbor, Cedar Breaks is a Dark Sky Park so you will have good results. One of the challenges when it comes to photographing it is that a majority of the park is east facing so views that look south are a bit hard to come by, but early in astro season fantastic shots can still be gotten. If I were you I would only do astro there from April to July and possibly into August. But since I am not a huge astro shooter because I hate editing in photoshop when it comes to star stacking and like sleep, I might not be the best source for you to get your information from on this.
Time of Year
Each season in Bryce provides some unique aspects but some seasons are definitely better for photography and are more in your favor. I broke out each season but there is always some transition periods.
11-Winter
I love snowy shots of Bryce. They have this unique pleasant look. The snow melts and causes the rock to have a saturated color look. The contrast between snow and earth is really stark as there are plenty of opportunities for snow capped hoodoo's with deep orange and yellow rocks below it. There are also significantly less people here in the winter even though most of the park is still open. The most popular trail, Navajo Trail, is closed during the winter. You will battle with extreme colds though. The photograph used in this example was taken at 5 degrees Fahrenheit. To deal with these extreme temperatures, let your camera acclimatize to these cold temperatures. I often will just leave the camera bag in the cold just before I shoot to chill the lens and body so that it does not collect any moisture on it.

12-Summer
Summer will provide the most dramatic clouds to work with. I know this because I lived in the park at one point in my life. July is amazing as huge monsoon thunderstorms roll in every day in the afternoon like clockwork and will dump on the park. They often clear up by that evening but linger long enough for epic sunsets. If I were you I would visit this month. Be cautious though when photographing on the rim. If there is a huge lightning storm, do not go on the rim because it acts like a giant lightning rod and is the most struck section of the park. My wife, who also worked there, had co-workers who had to deal with a death caused by lightning.
13-Spring
Cold wet miserable, mixed with cold and warm spells. Not exactly my favorite time to visit the park. There are always good views to be had a sunrise, but I would not plan a photo trip around this time of year. There is always potential for great light when a storm rolls through, but conditions are not pleasant to be in your self.
14-Fall
Fall can bring a few new photographic prospects to work with. Early winter storms can dust these high elevations giving potential for winter wonderland views. Be aware that as you hike around during these times, the mud in the park will turn tacky and you will find yourself easily covered with globs of mud. If you are wanting aspens to photograph, there are not a lot within the park along the rim. I have only seen a few, so don't expect tons of colors like you might find on the North Rim of the Grand Canyon.
15-Wildlife
Bryce is known for three species of animals in particular: Mule Deer, American Antelope, and Utah Prairie Dog. All can be seen within the park readily. If you are wanting to photograph these animals be aware that they are wild and don't try to feed them or disturb them. I would suggest bringing a longer telephoto of at least 400mm. In general photo length will take care of all your wildlife photographic needs.
As when you can see these animals, early morning and evening is always a good time to catch a glimpse of them. As for the Prairie Dogs, you can see them in an open field right next to the turn off that goes to the lodge. There are signs all over the place for them so you won't miss it.
Conclusion
I hope these tips help you plan your trip to Bryce Canyon in the coming months to years. There is so much to see here and yet this park is really under appreciated when it comes to photography. I myself has not taken full advantage of photographing this wonderful park. In order to really get a full scale of awe and wonder within this park, you will need to visit it again and again in a variety of situations.
Bryce is one of my favorite NPs. Thanks for the information. It was a pleasure to read and when I get back there the tips will be greatly appreciated.
Thanks Again.
Thank you! Tough shoot to find new perspectives and new light. That is the challenge. I need a kick in the ass to remember that.
Very valuable tips for beginners and those new to Bryce Canyon National Park. Appreciate much help.
Nathan,
Thanks for this article. Our family is going to Utah this summer and I have a dumb question. How does one get into the park for a sunrise photo op? Do we have to camp inside the park?