

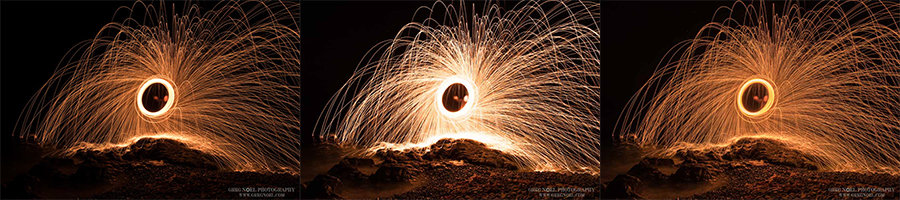
What is Steel Wool Photography
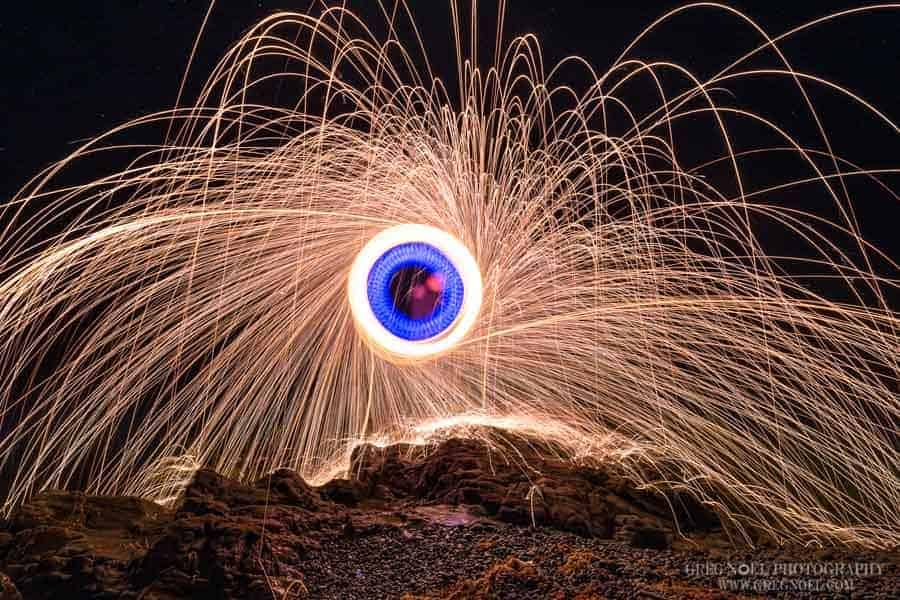
Steel Wool Photography is using long exposures to capture the motion of hot embers flying through the air through the act of spinning burning steel wool. These embers are so hot that they glow very brightly, and as they fly through the air the camera sensor captures the streaks of light created. If you have even tried photographing a camp fire you will notice long streaks of the light caused by the rising embers. You are artificially recreating this effect by burning and spinning Steel Wool.
Safety First
Before we even begin I have to stress that steel wool photography can be very dangerous. It literally involves playing with fire. You will be spinning extremely hot pieces of molten metal around while you work sending hot metal sparks in all directions. This metal can burn you or start fires if you are not careful. So Please, follow these safety tips to keep yourself, others and the environment safe:
- Wear proper protective clothing:
- Cover your skin and wear long sleeve shirts or jackets made from natural fibers (some synthetics such as nylon can catch fire easily)
- A hood or hat to cover your hair
- Eye protection. The last thing you want is a shard of molten metal hitting your eye. You can get a 12 pack of protection glasses on Amazon for a great price!
- Choose a location without flammable materials nearby. For example, grass, trees, vehicles, wooden buildings can all easily catch fire from the hot flankers. Never do steel wool photography indoors. Ideal locations include beaches, rocky/sandy deserts, or large parking lots with no nearby vehicles/buildings. The flankers from spinning the wool can travel a long way from where you are standing, depending on how fast you spin, so make sure you have plenty of space between you and the nearest flammable material.
- Choose a time when the weather and location are wet. I prefer to shoot steel wool photos just after a rainfall, or early in the morning when there is still dew on the ground. Winter shooting on the snow can also be a fun experience.
- Bring a fire extinguisher. Even if you are shooting in a location with no flammable materials, and shooting at a time when the environment is wet, surprises can happen. Be prepared by having a fire extinguisher nearby. I always keep a can of First Alert Tundra Fire Extinguishing Aerosol Spray from Amazon with me. It's a really compact spray can that can help you in case of emergency without taking up too much space and weight in your bag. My friends typically have a Kidde full size fire extinguisher from Amazon.
- Do a site walk after you are finished looking for any hot spots, burning embers, and/or smoke. Carefully survey the area to be 100% sure that nothing is burning after you finish up. A single hot ember can smolder for some time before finally igniting and causing a fire after you are gone. If you do come across any burning embers or hot spots then extinguish them with some water, sand, or your fire extinguisher before leaving the site.
- Keep people (especially children) pets, and other animals a safe distance from the location, or better yet leave them home. Having a hot flanker land on your dog’s fur on in your children’s hair will not be a pleasant experience, please just leave them home for this one.
- Never, I repeat never do steel wool photography near old wooden historic structures. Old abandoned houses, boats, and other historic sites might seem like a cool place to capture a creative steel wool photo, but there have been a number of occasions in the past where these structures have caught fire because of photographers using steel wool. Old wooden buildings and structures are extremely high risk to catch fire as the wood is often very dry, old paints are flammable and they are likely covered in oils, soot, or other flammable chemicals. Please use common sense and do not attempt steel wool photography near these types of structures. You risk a large fire, destroying a piece of history, and giving photographers a bad reputation.
Despite all the above safety recommendations, steel wool photography is still a risky endeavor. By partaking in this activity you do so at your own risk and I and/or Improve Photography are not responsible or liable for any injury or damage caused.
What do I need to create steel wool photos?
In addition to the above-mentioned safety equipment (long sleeves, a hood or hat, eye protection and a fire extinguisher) You will need the following supplies to create these types of photos:
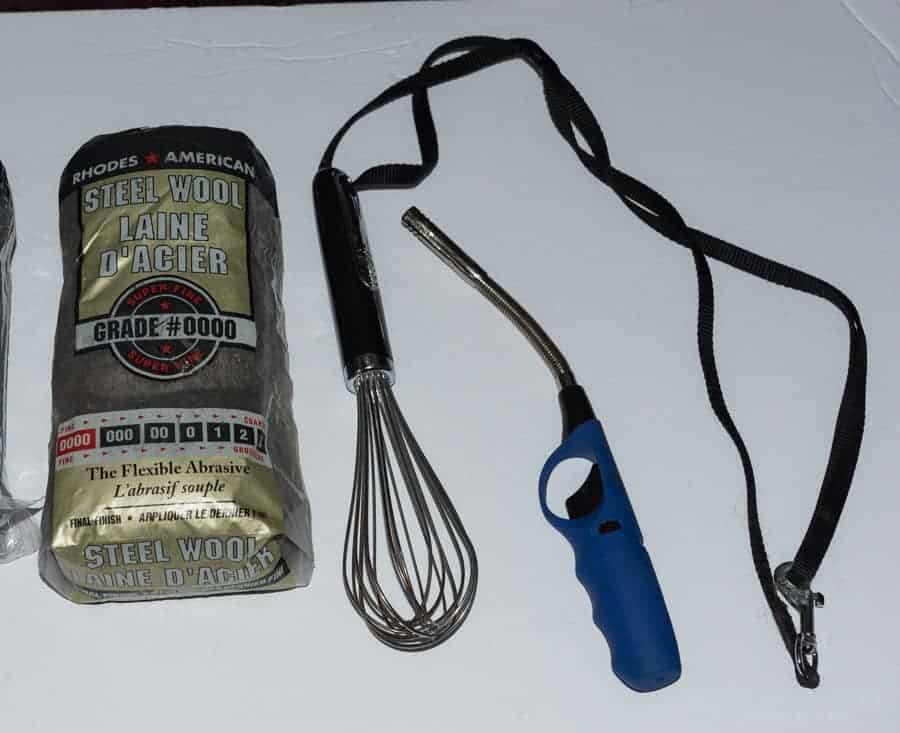
- Steel wool. This is an obvious item but the type of steel wool matters. Steel wool comes in a variety of grades ranging from 0000 to 4. The smaller the number the finer the grade of wool. For the best photos, you want very fine grade steel wool. Ideally either 0000 or 000. Grade 1 and higher will not work at all. I use Homax Steel Wool from Amazon.
- A metal whisk, with a loop at the end to attach a rope. Choose a metal one because the silicone ones will melt quickly. Also, don’t bring the whisk you plan to use for breakfast the next day. Steel wool spinning will likely destroy the whisk so pick up a cheap one like this 3 pack from Amazon.
- Some sort of rope or chain to attach to the whisk. I use a cheap dog leash like this PetSafe Dog Leash.
- Something to light the fire with. These new Rechargable Electric Arc Lighters are my favorite, but you could always go with the old fashion BIC multipurpose lighters.
- A camera that you can shoot in manual mode, and a tripod. You will be shooting in long exposures so knowing how to use the cameras manual mode will be required, as well a tripod to keep the camera steady during the exposure. Using a cable release will also help keep the camera steady when pressing the shutter.
- If you don't want to see the person through the hole, then wearing black will conceal them better.
All of these links will send you to the product on Amazon
That’s the basics of what you will need. Also, having a friend to spin the wool while you shoot, or take turns, so you can each spin/shoot can make it easier. But if it is just yourself you can do it by setting the camera's self-timer, interval mode, or shooting continuous with the cable release button held down.
How to Take Steel Wool Photographs
This is where the fun begins
- Attach the whisk to the rope or chain. I like to keep the length around 2 ft.
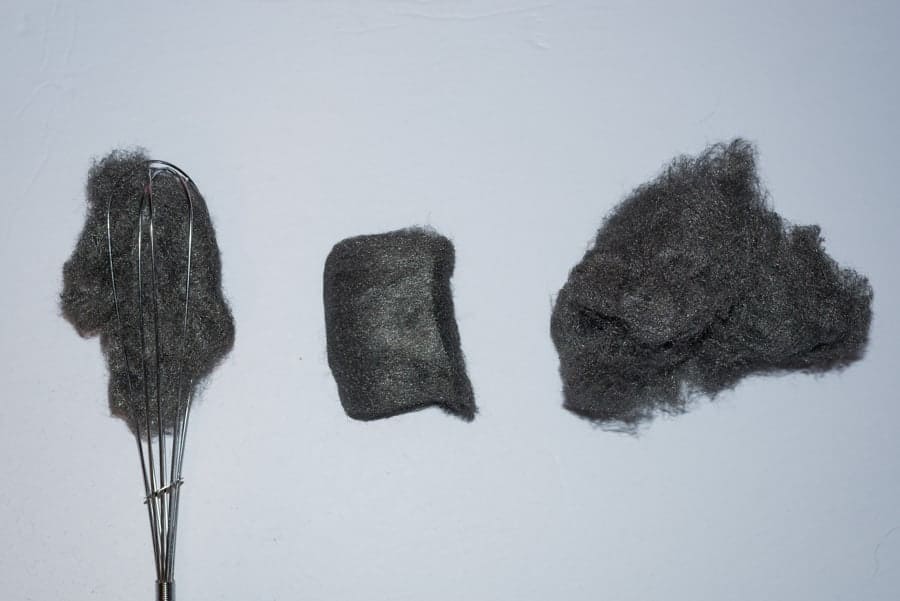
- Take a piece of steel wool and stuff it inside the head of the whisk. Don’t pack it in too tight as air will have to flow through it for it to burn. I like to “fluff” the out a bit before putting it in the whisk. This makes for better sparks.
- Light the wool using the lighter. You don't need the wool to be on fire, just a few parts to be glowing or making sparks is all you need. The air moving through as you spin it will ignite the wool and cause the sparks to fly.
- Holding the other end of the rope or chain spin the wool in a circle causing the sparks to fly from the end of the whisk.
- Just as the person starts spinning, press the shutter button on the camera to capture the image. If shooting at 10-second exposures then you should be able to capture 2-3 frames before the steel wool burns out completely.
As a note, you should practice spinning the whisk on the rope a few times before attempting it with the burning wool. Especially, practice stopping the spin slowly without hitting yourself with the whisk. This may sound trivial, but if the whisk hits you while you are trying to stop it you will get burned. It gets extremely hot during the process. I also like to keep a bucket of water nearby, if I'm not near a lake/ocean, to dip the whisk in after and cool any remaining hot wool before refilling it with more steel wool.
What camera settings should you use?
As mentioned above you will want to set your camera in manual mode to capture the long exposure. Because of this, the best time of day to steel wool photography is twilight and dark. You could do it in daylight with an ND filter but the sparks aren't usually bright enough for the best effect. So wait until the sun goes down or go before it rises for the best images.
Shutter speed: This is probably the most important aspect of the shot. You want to capture enough of the movement to show the streaking lights caused by the flying sparks. I generally shoot at exposures between five and twenty seconds.
Aperture: Ideally you want to choose an aperture that keeps the entire scene in focus. So I like to shoot between f5.6 and f11.
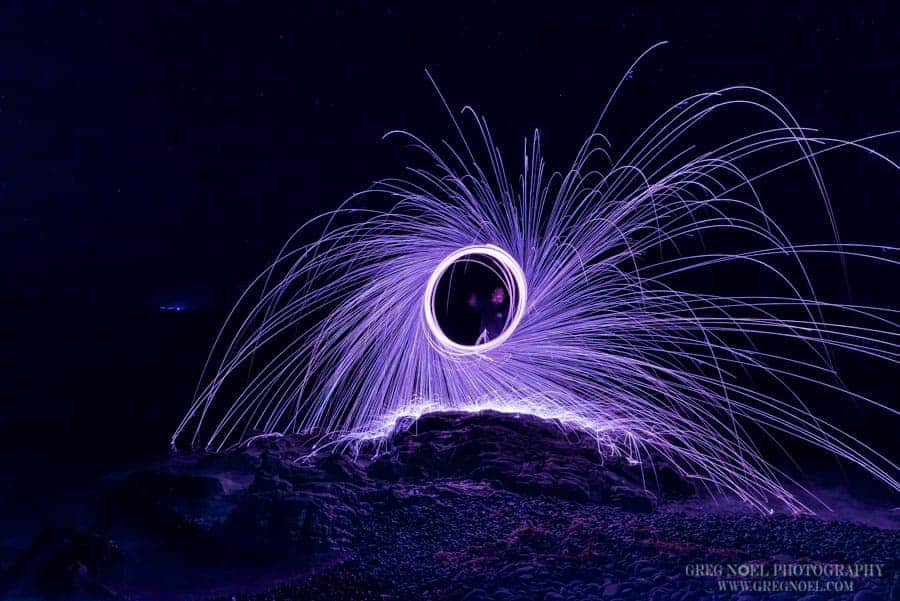
ISO: Keeping your ISO low will keep you from blowing out the brightness of the steel wool when it is lit. This means you can retain the color detail and adjust the color temperature and saturation in post-processing which will give more opportunity to be creative. I usually shoot at ISO 100 or 200 for this reason.
My go to settings are 10 seconds, f8, and ISO 200 for most steel wool shots I take.
Expose for the foreground or the hot wool? Both?
There are a few ways to do this depending on the available light. If it is twilight or there is a big moon in the sky, or other ambient light sources nearby you can expose for a long exposure and the surrounding environment at the same time; this is an ideal situation. At other times particularly in very dark locations, you may want to capture the environment using a longer exposure, wider aperture, or Higher ISO before or after shooting the steel wool and then blend the two in post processing. There is no right or wrong way to do this; it just depends on your vision for the photo and your post processing skills.

What Focal length is best?
The lens choice and focal length when shooting steel wool can make a difference to the look and feel of the final image, but you also want to choose a focal length that keeps the camera a safe distance from the sparks. I prefer wide angle, something in the 15-35mm range in order to capture the entire area the sparks fly and land. Something else to consider if you are shooting by yourself, the longer the focal length the further you will have to walk after hitting the shutter timer. One of my first times shooting steel wool. I didn’t have a cable release so I used the self-timer function on my camera and then would have to run to the spot, get set up and light the wool in the 30 seconds before the shutter clicked. That was a lot of running back and forth so I used a wider lens for that situation to keep the camera closer.
Focusing
As you will be leaving the camera on the tripod and shooting in low light you should manual focus on the spot you will be sanding while spinning. I won’t get into all the details on focusing in low light as I touched on that in a previous article. But for steel wool I just shine a flashlight on the spot I will be standing and then manual focus using live view. Also, if your lens has image stabilisation or vibration reduction then remember to turn it off when shooting on a tripod.
Post-Processing Steel Wool Photography
Post processing photography is a very subjective process. We each have a vision for how we want our images to look. So I won’t spend a great deal of time on this topic. But there are a few things to know when processing steel wool photographs. If you kept your ISO low and didn’t blow out the exposure of the highlights then you have a lot you can do to change the look of the image, particularity in the highlights/shadows and color balance. Adjusting those sliders can drastically change the look of the streaks, so take some time to play around with those sliders in your post processing software to decide what look works best for you. I generally drop my highlights about 50-75% for most of my steel wool photographs.
Get Creative
There a number of ways you can get creative with steel wool photos to make them even more interesting.
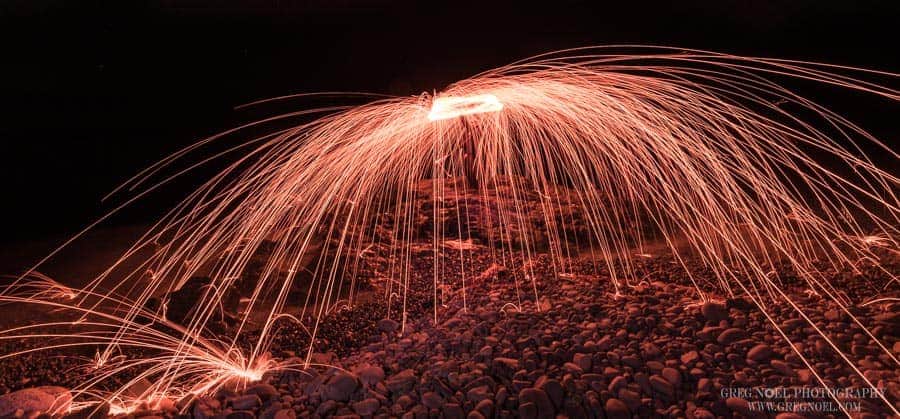
- Spin in different ways: Spinning over your head, horizontal, figure-eight patterns can all make varying looks to the images and send the sparks flying out in different directions for cool new images.
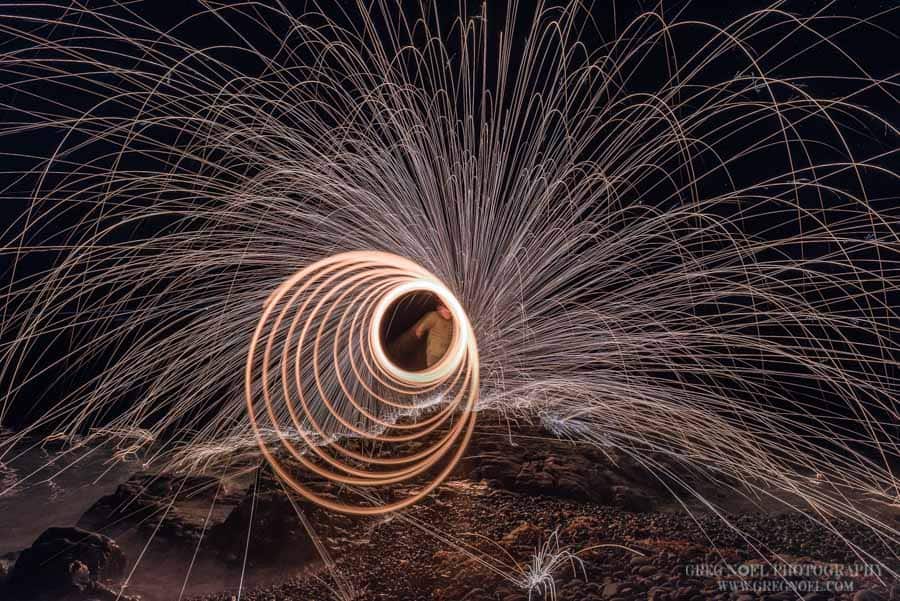
- Zoom in or out during the exposure to create cool spirals.

Zooming while the exposure is happening can create awesome spirals - Use additional light painting tricks. Including additional light painting aspects into a photo with steel wool can make the images pop even more. Try taping glow sticks to the handle of the whisk or rope, using gels and off camera flash, or light painting the foreground with a flashlight to create different effects.
- Introduce props or people. Adding a prop such as a person holding an umbrella to block the sparks, or standing in front of the sparks and lighting them with off camera flash can be a fun creative way to compose these shots. But keep in mind the safety tips above when adding in other aspects. Be safe and don’t use flammable materials.
Summary
Steel Wool Photography can be a fun and interesting new thing to try to add an extra dimension to your photos, or just to go have fun and be creative. I love to take an evening or night and go play with fire and see what kind of new photos I can create. Every image is different because of the direction of the sparks so you should have plenty to work with. But remember to be safe and use common sense. You are playing with fire, there are risks involved and we don’t you burning anything down or getting hurt. Hopefully, after reading this article, you are able to capture some amazing images. I’d love to see your work over on the Improve Photography Facebook Group.
Disclaimer: Improve Photography is a participant in the Amazon Services LLC Associates Program among other affiliate programs, an affiliate advertising program designed to provide a means for sites to earn advertising fees by advertising and linking to Amazon.com and other websites.
Great article, Greg! I have seen some of these photos, but haven’t taken the time to learn how to do it. You made it very easy to understand. 🙂
Thanks Deb, It’s a bit of fun. You should try it.
Great article, Greg. I’ve only done this a couple times and really enjoyed it.
Thanks Jim. It’s a great way to keep photography fun and interesting.
On eye protection, you want to double up. Wear safety glasses or preferably spoggles. Next, put on a face shield. I take construction photos and you really want to have double eye protection. Also, put a sacrificial filter on your lens. I eat through them and it is worth killing a filter over having a metal sliver in your lens.
Fun part of photoing welding, you need to wear welding eye protection, so you are essentially blind. You need to learn to manage your camera by feel completely and be aware of where you are aiming conceptually. Photo by zen.
Facebook
Thanks a lot for all this usefull information