
Lighting For Headshots
Alex Lagarejos is an award-winning photographer based in South West London. Originally from Glasgow, Alex moved to London as a teenager and pursued a career in the arts; to fund his way through drama school Alex was lucky enough to work as an assistant to some of London’s top photographers where he honed his craft. Now Alex has managed to forge his way as an acclaimed photographer; offering first class headshot sessions in both the acting and corporate world. Commercially, Alex Lagarejos Photography has also secured several large editorial, travel and lifestyle commissions.
https://alexlagarejos.com
There are thousands of articles online with thousands of different setups claiming to be the ultimate headshot lighting tutorial ranging from incredibly complex multiple light set-ups through to natural light set-ups. Nearly all of them miss the most crucial aspect photographers need to think about when considering their set-up – who they are photographing and where. I photograph a wide range of people on a daily basis and what works for an actor or performer will not work for a CEO or business executive.
Lighting set-ups are very like your photographic eye; something that needs to be developed and that is completely personal to your own artistic vision. Lighting can have such a huge impact on the feel of an image that it’s important to be completely aware of exactly what your lighting is saying. Personally, outside of some fashion and editorial shoots, I believe that your lighting should never overwhelm your subject; you can definitely over-light a headshot. I also believe that like everything, until you nail the simple you shouldn’t run before you can walk so every set-up I’m going to discuss in this piece only needs one light and a reflector – plus a bonus natural light set-up at the end.

I have one go-to set-up that I know I can rely on for those times I’m shooting clients who are likely to want a more traditional look and are not used to getting their photographs taken – which is pretty much the entirety of my corporate clients.
Lighting diagram 1
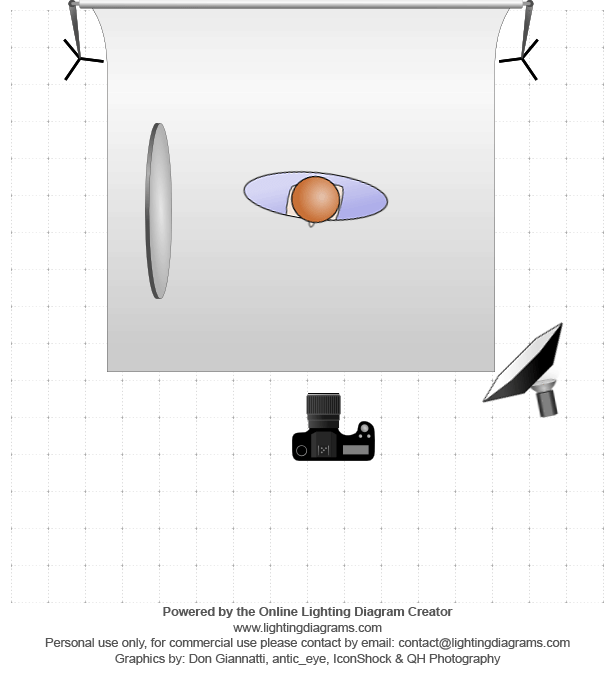
As you can see, this is a one light – one reflector set-up that is completely unobtrusive to the subject, is quick to rig up and with a large octabox modifier produces a very flattering light. What I love about this set-up is how simple, yet effective it is. I keep the light high and either to the right or left of me, quite close to the subject and forget about it leaving me to focus 100% on my subject and getting the most out of them. If I want a bit of shadow in the image I’ll either lose the reflector or for a bit more extreme switch it round to the black side.

A slight variation on this is when I bring the light in overhead behind me with a reflector on the floor to create a bit of bounce and soften shadows. In the diagram you can see two additional lights to light the background but are only needed if you want a white background
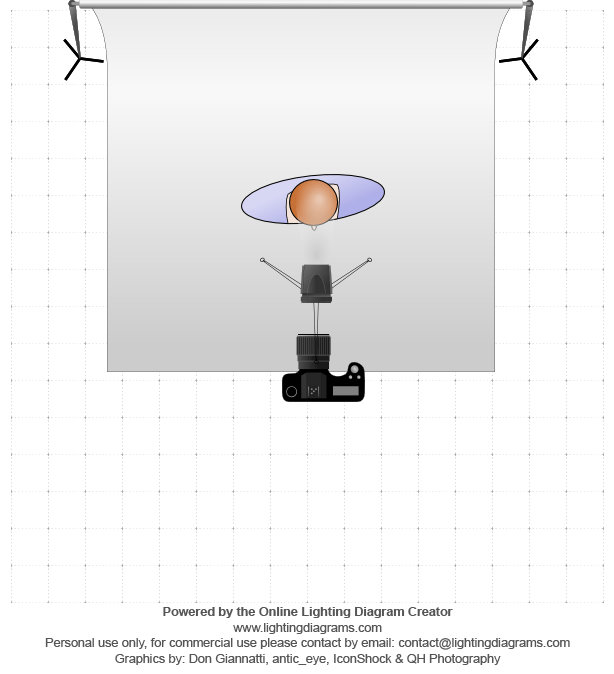
Lighting Diagram 2

If I’m working with actors who want something a little different to stand out from the crowd then I’ll sometimes shoot a few through my ring light – an incredibly cheap piece of kit that gives a really striking result – it’s not for everyone but it’s a lot of fun to use.
Lighting Diagram 3
Finally, here’s a lighting set-up that requires no kit, just some scouting and the right time of day. Find a doorway or archway and place your subject just inside out of direct sunlight. I’ve got a place I use that is perfect as the ground in front is tiled with dull, red tiles, acting as the perfect fill light without overwhelming my subject.

Whatever set-up you choose, your lighting needs to help, not hinder both your job and your artistic eye; my advice is always to keep it as simple as possible and concentrate on bringing your subject to life.
While having a simple one light setup is certainly a valuable way to create an image and will do perfectly fine without the necessity of additional lights such as background light (although sometime indispensable to create separation as might be the use of kicker lights), creating a pattern of light on the face is just part of the portrait creation.
Of equal if not greater importance is the posing of the subject plus a clean presentation of the subject and vitally, the expression captured as well as the cropped final presentation.
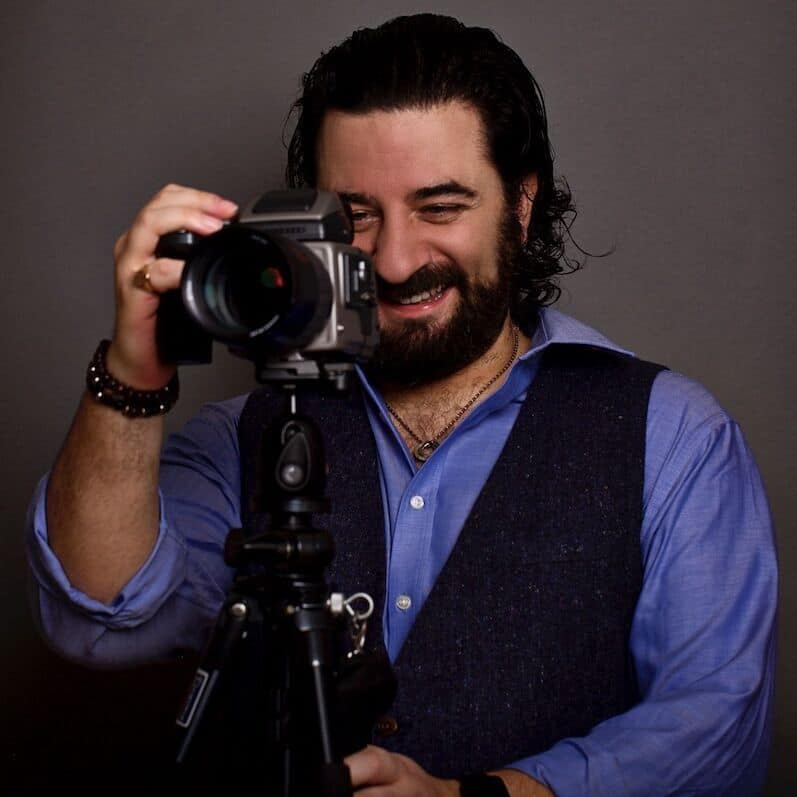
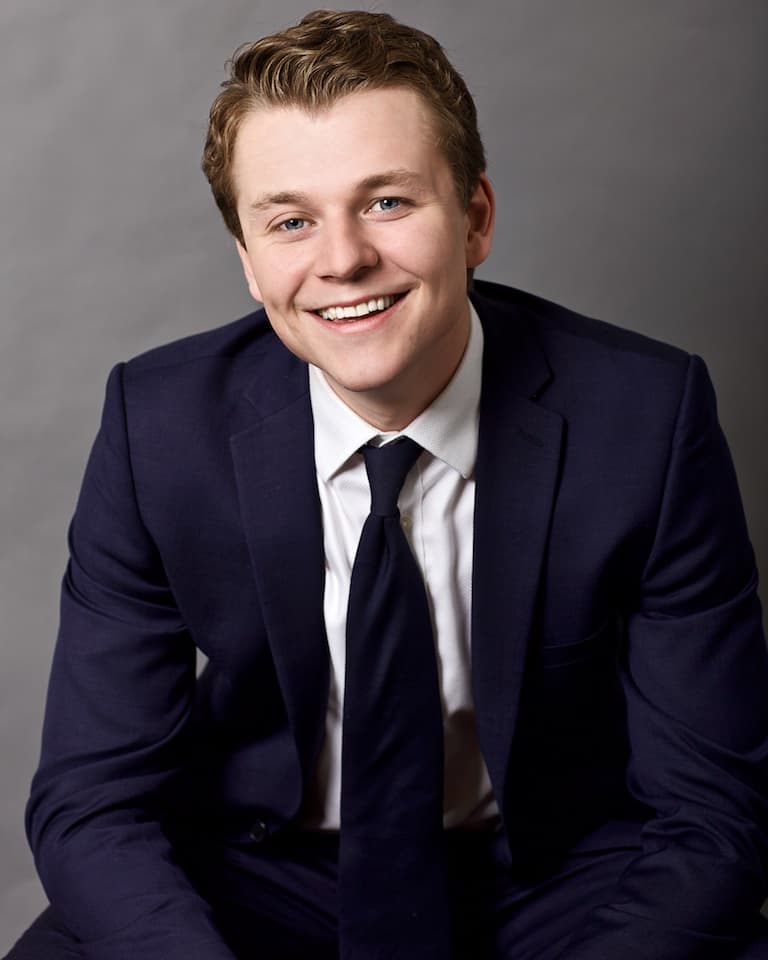
Unfortunately, in all of the images presented, the posing in all the images is straight on toward the camera which allows for no three dimensionality of the subject. When posing the male subject, ideally, the subject should be place in a 2/3 view by body position and turned toward the main light. The weight should be on the back hip/leg and the head should be perpendicular to the shoulder line. View the last male image presented here to see both the opposite head tilt and the expression leading to a most effeminate look to this male subject. Note that the head tilt of the female subject works but again the body is straight to the camera whereas a 2/3 body view with a head turned toward the light and away from the body direction would be more flattering to her.
Another reason to use a body position that is not full to the camera is then it is easier to use a 2/3 facial view for the male subject so that both ears don’t show (which is not a flattering way to present the male subject).
Another important aspect is the presentation of the subject and open jackets with ties all askew does not show a professional presentation when used with a suit which is generally worn with the expectation of looking professional and tidy.
Cropping is the last concern. In image one, the hands are cut off and in the image of the female, part of the head is cutoff. While some images lend themselves to cutting into the head, this one does not require that. In fact, all of the images are cropped much too close to the top of the head of the subjects. Always leave room above the head and try to follow the rule of thirds when placing the location of the eyes in the image.
Hopefully this information will be of assistance to those wishing to learn portrait photography.
@Murray – I agree with some of your points for sure. I also agree that the cropping on these shots could use some work. The heads are either not cropped enough, or there’s just this tiny sliver of headspace which feels unnatural.
However, I do have a different opinion on the posing. I actually like the posing in these shots quite a lot. It may not conform with the traditional 3/4 pose, but I feel like it’s a powerful pose and very trendy.
I guess Jim that the issue I have is that often trendy is because many folks just have not received the information as to how to pose the human form to create a nice flow and show the body well. Now of course this is not to say that a straight on pose can not ever be used but for a traditional head shot is not the best way to create the image.
Also, with equal weight distribution of the classic head shot portrait, it is difficult to get the most masculine pose. I think that the topic while being lighting, also was meant to be a simple way to create a nicely lit portrait but without the body and facial views the best lighting will seldom create a viable image.
This is a good discussion for those learning portraiture for sure.