

I have spent many nights over the last 8 years teaching photographers how to capture night photography images with their cameras. It's actually not as difficult as you might think, and at the end of this post you'll have exactly what you need to get the shot.
Step 1: Put Your Camera in Manual Mode
It's actually easier to shoot in manual mode than any other mode when shooting night photography. Trust me on this, and flip your camera from automatic to the “M” for manual mode.
Step 2: Find a Tripod or Something for Support
It will take your camera a minimum of 10 seconds to record a night image. This means the shutter speed is at least 10 seconds, so if you were to hand-hold the camera, the photo would certainly be blurry. You need a good tripod or to at least set your camera on a ledge or something where it can remain perfectly still for 10 seconds.
Step 3: Set Your Aperture as Low as It Goes
How low your aperture (f-stop) goes will depend on your lens. Some lenses go lower than others. Your lens may go down to f/5.6 or f/3.5, or f/2.8, for example. If you are unsure of how to change your aperture, I'd search Youtube for “change aperture” and then the name of your camera.
You may be tempted to shoot at a higher aperture like f/11 or f/16 if you're shooting a night landscape, but you need to make a compromise here in order to gather more light. As you get more advanced, you'll learn there are ways to mitigate the effects of the low aperture.
Step 4: Set Your Shutter Speed to 10″ (10 seconds)
As you will discover later, you may need to adjust your shutter speed up or down depending on how much light there is in your landscape; however, 10″ should give you a decent starting place for making the photo.
It may seem CRAZY to be recording the image for ten seconds, but you'll learn that this is not strange at all for a night photo. I have taken some night photo with exposures lasting over 30 minutes–just for one photo!
Step 5: Set Your ISO to 1600
As you increase the ISO, the image becomes brighter, but there is also more noise. This is simply a compromise you need to make at night to get a properly exposed shot. Most modern cameras can take a nice clean photo at ISO 1600, though.
Step 6: Take a Picture and Analyze the Exposure
Now it's time to take a photo. You'll see that it takes a LONG time for the image to record and to play back on your LCD screen. That's perfectly normal.
You need to judge if the photo is too bright or too dark. If the photo is too dark, increase your shutter speed to 30″ (30 seconds). Then take another photo. If it's still too dark, then increase your ISO to 3200. That will make the photo grainy, but that may be a compromise you need to make.
If the photo is too bright, then drop your ISO to 800. If it's still too dark, then drop your ISO even further or reduce your shutter speed to 8″.
[x_alert heading=”Quick Tip!” type=”success”]Because it's dark outside, your eyes will dilate, making the screen on your camera seem brighter than it actually is. Many new night photographers think the photo looks great on their screen, and then they come home and put it on the computer and it's very dark. I recommend shooting a bit brighter than what you think looks good to compensate for this difference.[/x_alert]
Examples of Night Photography Settings
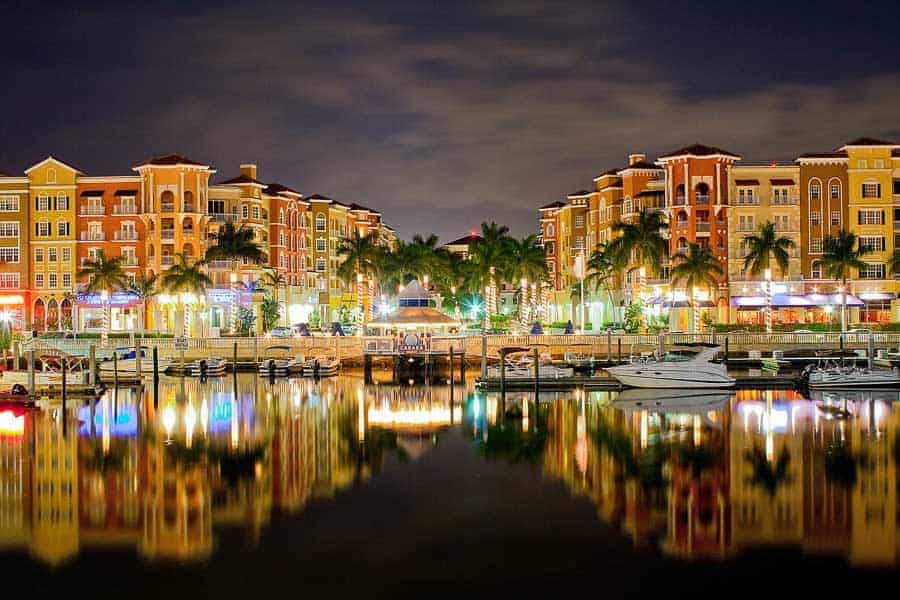
I took this photo in Naples Florida using a very old (by today's standards) Canon Rebel XS. It's not nearly as nice as my current camera, but it was still more than capable of producing great photos.
- Shutter speed: 30 seconds
- Aperture: f/4
- ISO: 1600
- Camera: Canon Rebel XS
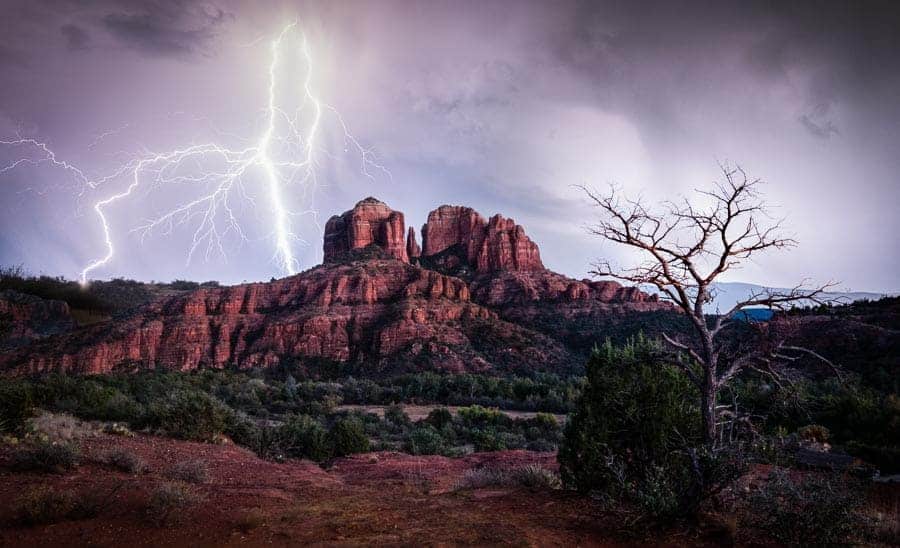
I got this picture of lightning over the mountains in Sedona, Arizona with very simple camera settings.
- Shutter speed: 30 seconds
- Aperture: f/4
- ISO: 640
A lot of people wonder how photographers get so “lucky” to take a picture right at the moment when lightning strikes. It's actually quite simple. You simply stand there and take multiple 30-second exposures until the lightning strikes. If you take back-to-back exposures for a few minutes during a lightning storm, you can often capture multiple strikes of lightning in the same shot!
When photographing lightning, you don't need a very high ISO because the lightning is obviously very bright and will illuminate the entire landscape for you. If you set your ISO before the lightning strikes and then take a picture, it will be overexposed because you selected your settings when there wasn't lightning.
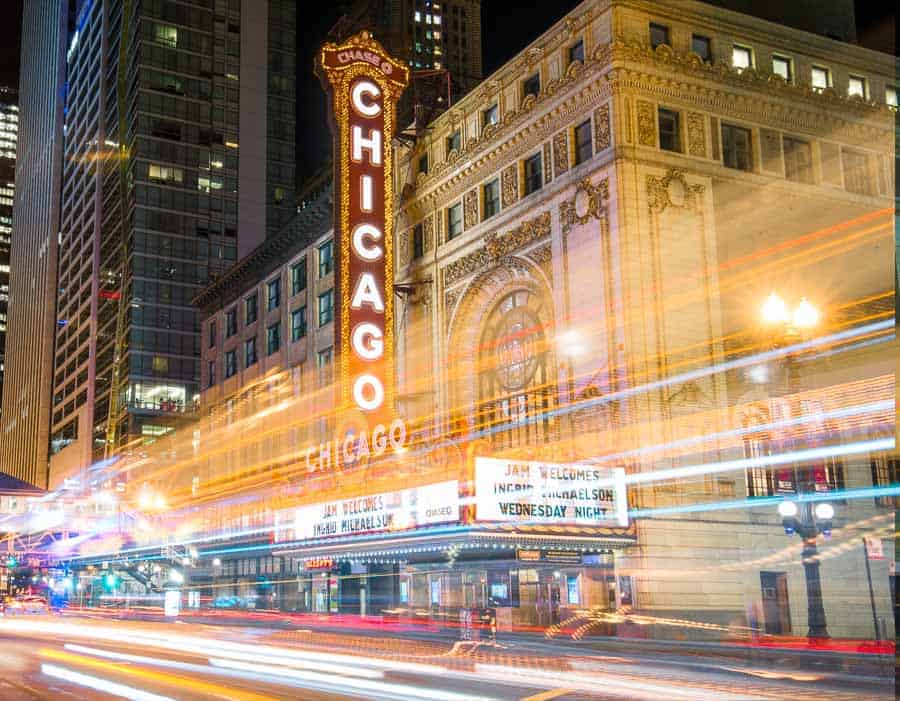
I made this photo of the Chicago Theater while teaching a photography workshop before speaking at a conference. The cool thing about shooting night photography in a city is that you can capture the streaks of taillights and headlights as cars drive past you.
Another benefit of shooting night photography in a city is that there are street and other lights which make it brighter, meaning you can usually drop your ISO slightly and get a less grainy photo.
- Aperture: f/8
- Shutter: 20″
- ISO: 800
Check Out My Beginning Photography Class
If you'd like to learn photography, I'd love for you to take a look at my Photography Start video training. It's a series of videos that you can stream on your phone or download to your computer and watch as often as you like. It's pretty inexpensive, and by the end of it I can have you CONFIDENT in selecting camera settings in any situation.
I have taught hundreds of thousands of new photographers how to shoot in manual mode, and I'd love it if you'd let me teach you through Photography Start.
Night Photography Equipment You May Need
- You need a camera that you can shoot in manual mode. This could be an advanced point-and-shoot camera, any DSLR, or a mirrorless camera.
- You need a tripod. Night photography simply won't work without a tripod since you'll be using a long shutter speed. Otherwise, the image will be blurry.
- A cable release. You don't need a cable release to capture night photography, but as you get more advanced, it can be a nice piece of gear to have. A cable release plugs into your camera and gives you a button you can press and lock so that the camera can take pictures for longer than 30 seconds (the usual max shutter speed of most cameras).
- A flashlight. If you think you may ever want to learn how to do light painting, then a flashlight is a must. Light painting means that you wave a flashlight around at the scene while you're capturing the photo. Check out my light painting tutorial if you're interested in learning more.
Conclusion
Night photography really isn't complicated. In fact, night photography is the first thing I want a new photographer to learn. It's easier than taking pictures in the daytime because everything happens slowly, you're on a tripod and can take your time, and it's easy to see the effect of shutter speed, aperture, and ISO.
In my opinion your recommendations make sense for night sky photography (stars, northern lights, etc.) where the shutter speed should not be too long. For city scenes you can normally use ISO 100, stop down to F8 and use bulb mode.
(The first image is not a good example for night photography; it is a merge of a sunset and a night shot with aurora which should be stated in a beginner’s article. The stream changes from deep blue to yellow and to green. This does look a bit strange in my opinion. Maybe you should only have merged the sky?)
@Stefan – The photo you mentioned is NOT a composite. That’s the rising moon and not the setting sun. It’s a single image.
Also, the river coloration is due to the colors of the moon, northern lights, and the natural color of the water. That’s how it actually looked.
Also, you said the article only gives night sky settings. Did you read the section where I discussed city settings under the Chicago image and said the same thing?
@Stefan
Maybe you shouldn’t be such a presumptuous snoot, and actually pay attention to what he wrote.
@Jim: Thanks for the clarification. The color of the moon looked so warm, that I assumed it to be the sun. Even better, if it’s a single image, I’m impressed!
Regarding your city image: You used ISO 1600 and 800 there, that was the reason for my comment. A beginner may want to know why. An explanation for the second image could be that you wanted the light traces to be as they are. (More than 20 secs could have resulted in too many of them.)
I really like the ligjtning image. Keep up the good work!
Great work of exploration nd expedition my assessment is that you have done very well in given us wider information on landscape photograph
I purchased your improve photography for starters and black out. The black out came through. So I thought I may have done something wrong so I purchased the improve photography for beginners again and nothing. Very disappointed here are my confirmation codes G133xdx and light29oxen
This is very helpful for a beginner like me. Thank you.
The question is, can I actually take a nice nighttime picture of my family for the holidays. Hahahaha. We’ll see.
Thanks again for the quick lesson & tip.
Don’t know how to change settings. Tried downloading the user manual which is about as much use as a chocolate teapot, and quite frankly you may find night photos simple to do, but you are obviously an expert photographer. I’m not, so I’ll stick to Auto Mode.
Steven Collier… I’m with you but missed an opportunity to photograph a bear on our deck tonight and now I’m going thru manuals and websites to learn how to do this and I’m getting frustrated because it’s not making any sense to me when I read up on the topic… I’ve worked with AV & TV modes on my camera but that was during daylight and now I’m trying to learn about DARK night photography…
@Deb & @Steven, it took me a very long time to actually learn what my shutter, ISO & aperture do and how they function. Don’t be disappointed because you read this article and still don’t know what to do. I spent hours on YouTube learning & only recently it all clicked in my head. You can start taking amazing photos after you understand those three things. Keep trying, look up videos, not paper guides. Good luck xx
Thank you! I am going to rent a camera to photograph the northern lights this winter and don’t have a clue how to do it. This is a good primer for a beginner like me.
thank you so much
????
Thanks for sharing! Just took my first night pictures of a little village in the hills of France. I’m impressed, this gets me exited!
Very good review,It will be helpful for very beginners,Thank u…..
For night photography how can I set proper mode on my smart phone Nokia 7 plus .How can I set aperture here,I could not get …could u suggest…….
Nice job. Thanks!
Excellent article, many of these tips will come in handy to me in the near future, since I plan a small photo trip!
Many thanks for sharing your knowledge and experinces with us. No i know what i have been doing wrong over the years.
night portrait photography click but tripod stand is must.
I’am for beginner Night Photography. If you very helping for me.
Very useful.
Advice given is golden.