
Resize, warp, distort, etc with Liquify – One of Photoshop's Premier Tools
Photoshop has many tools and features and one of the most beloved feature for many users is the Photoshop Liquify Filter. It is here in this totally separate interface within Photoshop that we can distort and move pixels around in such a way that the image quality is maintained (as long as you don’t go too far) and imperfections on a portrait can be fixed, for example.
This is the one area many call a “Digital Diet” since you can make a person appear much thinner, more muscular or any other way you please. There are some things that you should know when using these tools and they are included in this article.
Recently Added
Adobe has recently added a new Face Aware feature within the Liquify Filter. It allows us alter the eyes, nose, mouth, face shape, etc all from a special set of sliders and on image adjustment anchors. These new features will be discussed in this article also so let’s dive in!
Non Destructive Workflow using Filters
Anyone who has used Photoshop has heard the term “Non Destructive Workflow” over and over again. When we shoot RAW, we are always working a non destructive workflow since the RAW image file cannot be altered in any way in terms of image alteration. When in Photoshop, we are not working with the RAW file when it is sent over from Lightroom. The image file is opened in PS as a file type that you choose in your export preferences.
It is a good practice to get into the habit of working on adjustment layers that are independent of the PIXEL containing layers. Using Smart Objects is also a very smart way to work. Smart Objects are simply like a container that we can place pixel layers, text, shapes, etc into and they are not directly editable. I mention this because it is a very good idea to convert the pixel containing layer you want to use the liquify tool with into a Smart Object so you can always go back to those adjustments at anytime later and make changes – non destructively.
Preparing Image for Liquify
Once you have an image you want to bring into the liquify interface, you’ll have to first merge that layer so that it contains all your PIXELS on a single layer. This can be done by hitting Command-Option-Shift-E (Mac) or Ctrl-Alt-Shift-E (PC) when at the top of your layer stack. This will keep all your layers you’ve created thus far AND place a merged layer on top. If you’d like, you can simply merge ALL layers if you’re sure that you won’t be going back to edit previous work by using SHIFT/CMD(or CTRL) & E.
Once you have this layer, using the marquee tool (Tap M on keyboard), right click anywhere in the image and choose “CONVERT TO SMART OBJECT” to make this layer into a smart object. You can also right click on the layer in the layers panel and choose convert to smart object. As with many things in Photoshop, there are other ways to convert layers into smart objects but these are the best and make most sense when you want to work quickly without having to go into menus. You can’t directly edit or alter a smart object like you can a pixel containing layer. You can apply filters or create adjustment layers above or clipped to the smart object but you just can't actually work on the smart object itself. This makes this layer safe from edits and error and means you can always go back to the state of the image that you wish. Smart Objects are an entirely different subject alone but it is good to get in the habit of using smart objects when you can.
Moving Into The Liquify Interface
Once you have converted your layer to be brought into liquify, simply go to “Filters” and find the LIQUIFY menu option. The following Interface will appear (Or a similar variation of it):
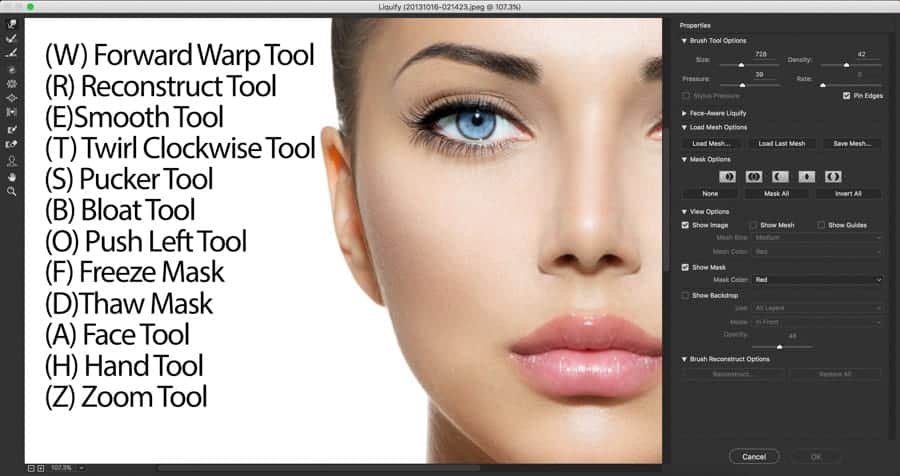
The following tools descriptions will help you understand better what each tool does.
(W) Forward Warp Tool
This will be the tool you will probably use more than any other one inside the Liquify Interface. It basically moves and pushes pixels around based on your brush settings. Those settings are under BRUSH TOOL OPTIONS on the right side of the box. Brush size is pretty much self explanatory. You can increase the size or decrease the size of the brush using the ] or [ bracket keys.
BRUSH PRESSURE controls how quickly (or slowly) the brush impacts the distortions and pixel modifications as you click and drag the brush along. These values go from 0-100. The lower the pressure setting, the slower it will modify the area you are brushing. It is a good idea to not use a brush that is too fast because it is much easier and more desirable to make subtle changes and have good control over the edits.
BRUSH DENSITY is basically like the HARDNESS and SOFTNESS in the BRUSH tool in photoshop. Again, this is a 0-100 adjustment with the lower values affecting the middle of the brush more and the larger values having an effect on the larger portion of the brush, out toward the edges of the brush tool.
BRUSH RATE is again a 0-100 setting and it controls how much a tool such as the BLOAT tool will change the pixels underneath that tool. A setting of 1 will give very subtle changes while clicking and holding over the pixels. An example here is holing the PUCKER tool over someone's nose while set at 100 will cause the tool to shrink the nose very quickly.
(R) Reconstruct Tool This tool simply erases modifications as you click and drag over the areas where modifications have been made.
(E) Smooth Tool When you are working with the liquify tool, there will be many times where altered edges will not be smooth. Use this tool to smooth those edges out. TIP: Often when using these tools you will distort the lines on clothes such as jeans. Run this tool over the lines within the fabric and it will straighten them out many times for a nice result.
(T) Twirl Clockwise Tool does just what it says. When you click on the area, it will send the pixels in a counter clockwise rotation. Holding down ALT/OPT will reverse the twirl. The modifier keys (ALT/OPT) are used in the liquify panel for many tools to activate the opposite tool.
(S) Pucker Tool is the tool that will make the pixels under the click pucker inward – the opposite of the bloat tool.
(B) Bloat Tool is the opposite of the Pucker tool. While using either one of these tools, simply press ALT/OPT to activate the other rather than having to change the tool. This is very important because often you will want to push and pull pixels until you get them just right and it is handy to not have to jump back and forth between the two tools over and over.
(O) Push Left Tool This is a tool that many don't use much of. It can be useful for some tasks, however. It works in a non intuitive way. When you drag up, pixels move to the left, Drag down, they move to the right. Dragging left will move pixels down and right will move pixels up. Again, holding down the ALT/OPT key will reverse the action with this tool also.
(F) Freeze Mask This tool is very important as it allow you to FREEZE pixels – they are protected from being altered. But Photoshop cannot make pixels for you so don't push too far near the edges or you will get undesirable results.
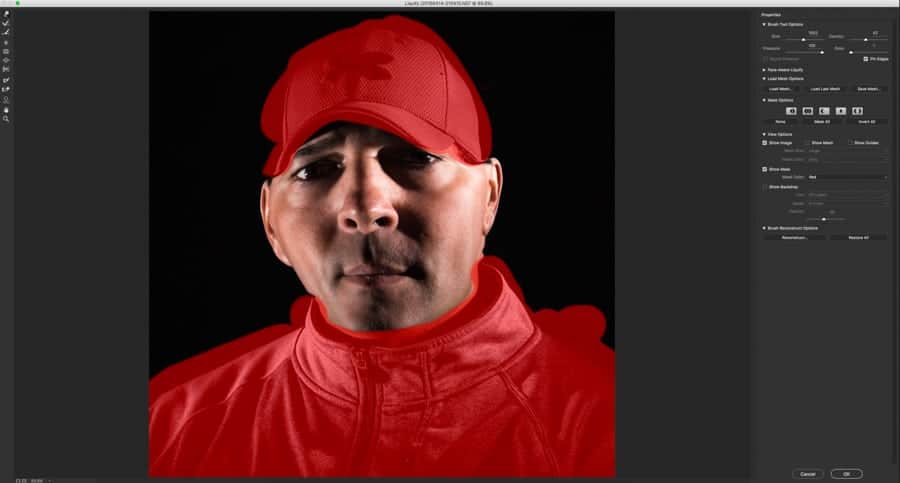
(D) Thaw Mask Tool does exactly what it sounds like it would do; it will undo the FREEZE mask tool. You simply brush away the RED overlay left by the FREEZE tool. And here again – Holding ALT/OPT will activate the opposite tool.
(A) FACE TOOL SEE BELOW – This section needs its own section.
(H) Hand Tool is just like the HAND tool in Photoshop. Accessing this tool temporarily by holding down the SPACEBAR is easier and much more practical.
(Z) Zoom Tool is the, well, ZOOM tool. Press Z and then click to zoom in. Pressing ALT/OPT while this is chosen will ZOOM out.
NEW – (A) FACE TOOL
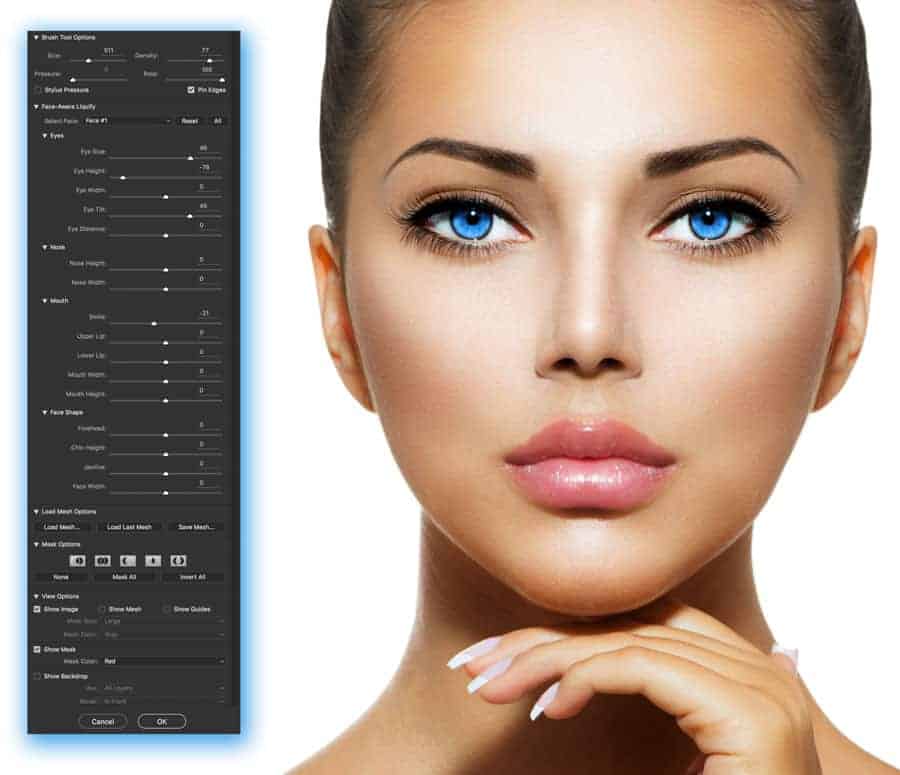
Adobe has added the FACE TOOL in the Liquify dialog box filled with lots of options to alter the look of peoples faces in Photoshop. The face detection works fairly well and it will pick up on multiple faces in an image and you can adjust them as they are automatically labeled FACE #1, FACE #2, etc. Here is a single face and a few alterations applied just to give you a feel for it:
MASK OPTIONS
The Mask Options Panel allows you to choose from Selection, Layer Mask, Transparency or Quick Mask to create masks on an image. This area allows you to edit masks you already have created with options such as REPLACE, ADD, SUBTRACT, INTERSECT or INVERT which are the same options you are afforded in the regular Photoshop work area.
MESH OPTIONS
A mesh in Liquify is simply the GRID that you created by bending and dragging pixels around in the image. You can see on the right that you can load and save meshes as well as use the last mesh used. Here is what a mesh looks like below:
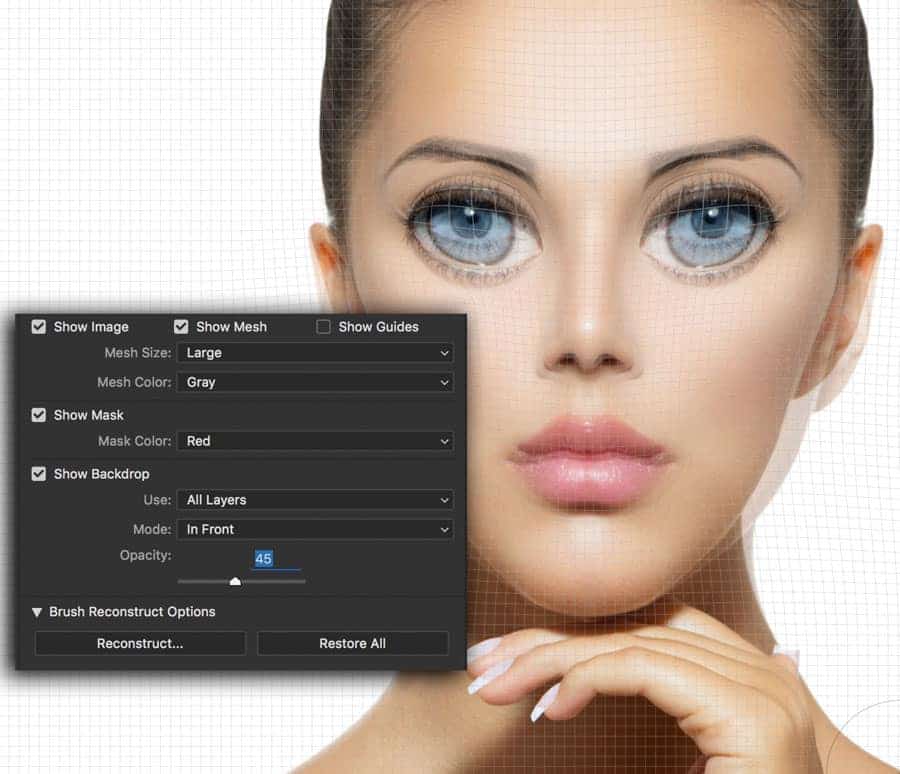
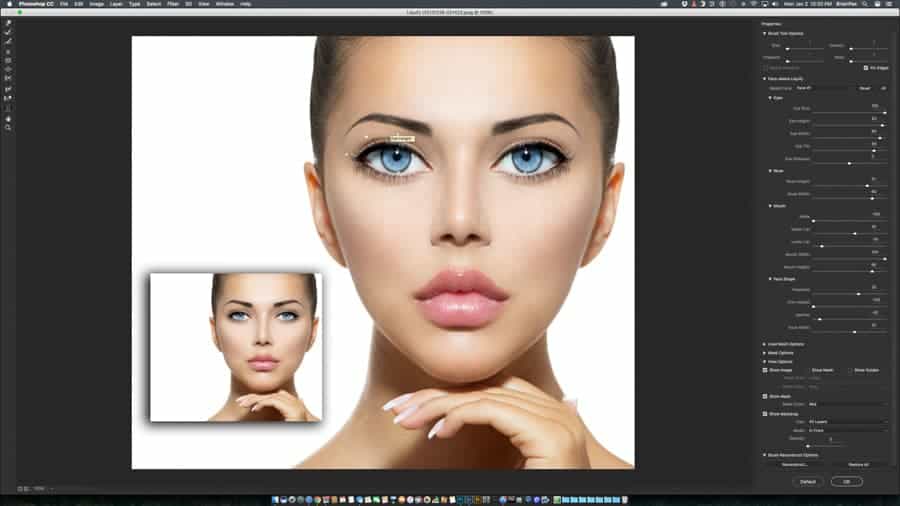
The mesh shows you clearly where the image was distorted. It also shows the SHOW BACKDROP option which allows you to see the original image as an overly and you can adjust the opacity of this as well. This can be very useful when making fine adjustments and that is what you will most likely be doing when using this tool for serious purposes. This can, however, also be a very fun tool to play with as you can come up with some very bizarre and wacky results.
BRUSH RECONSTRUCT and RESTORE ALL
While we are here and you can see the Reconstruct.. and Restore All options, I will quickly go over this. When you choose Reconstruct, a slider will appear:
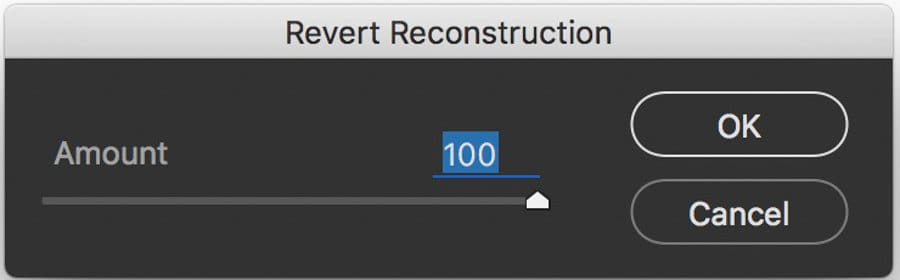
Sliding this back to ZERO (0) will undo all the edits that you have made thus far PROVIDED that you only enter Liquify as a SMART OBJECT and when going back to make further Liquify adjustments you are double clicking on the LIQUIFY filter in the layers panel under the thumbnail. This is the power of Smart Objects. You can always go right back to where you had left off. If you don't work this way and just go into the Liquify tool via the Filters menu, you will have a Liquify on top of a Liquify and that is NOT what we want. Remember, a non destructive and easily recoverable workflow is what we are looking for.
TIPS & TRICKS
As with everything in post processing, practice is they key. Working on many files is the best way to become comfortable and fluent at using these tools. One thing not mentioned but I will make sure to mention now is the little option at the top right that reads “PIN EDGES” check box. You may want to check this so that when you are pulling near the edges of an image the pixels don't pull so far in and without this checked, transrarency is shows in the form of grey and white checkered display like a blank layer in PS.
If you know you will be using the liquify tool in your post work for a particular image, it may be a great idea to have camera on tripod and take an image of the background scene. Now when somoone (or something) is in the scene and the image is taken, you have their image aligned perfectly with the background and you can then always use a layer mask on your altered layer (stacked above the background layer you took first) and simply mask away any areas that may not look just right after the liquify tool was used.
Please feel free to make any comments or ask any questions below.
HAPPY NEW YEAR AND THE BEST TO YOU AND YOURS IN 2017!
Impressive as always!
My in- box questions are answered all the time by Brian.
He is great!!!
Just what I was looking for thank you very much 🙂
Liquify tools… > properties > brush tool options > pin edges not responding(the option is faded)