

There are many different ways to skin a cat in Photoshop and it's always good to learn new ways do get stuff done. Who knows, you might find one way of doing things which works better for you which you haven't seen before. Here are 7 Photoshop tips that should make your workflow better.
1. Silhouette Better – Refine your edges:
Sure you’ve messed around and even gotten pretty good using the magic wand, quick selection and lasso tool to take out a background or two in your day, but have you really used these tools to their full potential? Here’s a few ways you can take it to the next level. Since you probably already know the basics of these three tools, let’s just concentrate on what to do once you have a basic selection. After you have a selection going and while that tool is still selected, take a look at the top bar. You will notice a “Refine Edge” button. The “Refine Edge” button opens a dialogue that allows you to, well, refine your selection to get it just right. Usually, when you make a selection via the magic wand, it does it’s best to calculate where the edge of the shape you want to select is located. Even the sharpest image has one or two, or more pixels of antialiasing that make up the edges of an image. By tweaking the selection “in” you eliminate these unwanted “halo” pixels that make your selection look “photoshopped” or “cut out” as they say. Tweak the “shift edge” slider to shrink or expand your selection until you stop seeing those edge pixels. You can also move the “Smooth”, “Feather”, and “Contrast” sliders for best results. The “Smooth” slider will smooth out your selection to eliminate edge pixilation and uneven lines, but be careful not to overdo it. The Smooth slider doesn’t do very well with very tight acute angles. To visualize what you are doing better, you can select whichever “view mode” best helps you see your masking edits. Once you have the mask as tight at possible, hit OK and you’re selection should be nice and clean.
What’s your Vector Victor!
Another way to get tack sharp and perfectly smooth selections for silhouetting is to use the vector path tool. The great thing about this is that since paths are vector curves (traditionally called Bézier Curves), you can very precisely control their points positions and curves to get the shape exactly how you want it. I like to get the path to be a couple of pixels inside the object being silhouetted to avoid any “halo” I mentioned previously. After you have your path where you want it, you can turn that path into a selection by right clicking on the path in the path pallet and selecting “make selection”, OR you can go to the pallet options drop down and selecting “make selection” doing so in the drop down will give you more options such as feathering. The path method is excellent for product photography or architecture where there are lots of straight lines and perfect geometric shapes, not to say that you can’t use it for anything else. You can also use vector paths as masks on layers and layer groups.
Defringe it Away.
Once you have your object silhouetted; if you still have any lingering halo pixels, you can remedy that by going to “Layers / Matting” on the main menu and selecting “Defringe” use one or two pixels and see the results. If you cut out an image with a white background, and still see that annoying white tiny pixels around your image, you can try “remove white matting” or if black “remove black matting”. These are meant to give you quick and easy ways to fix any silhouetting issues you might still have.
Quick Mask Mode is Your Best Friend in the World!
Ok so you’ve done all the quick and easy tricks to make a really tight selection for cutting out your image, but this particular time, the thing you want to cut is so intricate that it still needs some further refinement or detail. Enter Quick Mask Mode to the rescue. With your selection active, hit “Q” on your keyboard and suddenly, you are transported to the alternate universe of the QUICK MASK MODE! You should be able to see your selection as a colored mask overlay. Whatever is masked out is represented by the color of the overlay, and whatever is exposed is not. A red overlay is the default, but you can change that at your leisure. The gloriousness of the quick mask mode is you can literally paint in with your slew of tools any mask you wish with complete accuracy. Quick Mask works in a sort of grayscale kind of way. That is to say, whatever you paint with 100% black is 100% masked out, and whatever you paint with white is 0% masked, or fully exposed. This allows you to paint in extremely intricate masks down to the pixel level and have a clear visualization of what you are doing. This feature is essential for masking hair, blades of grass, palm fronds, etc. Hit Q again to exit this mode and see your “crawling ants” selection in the classical way.
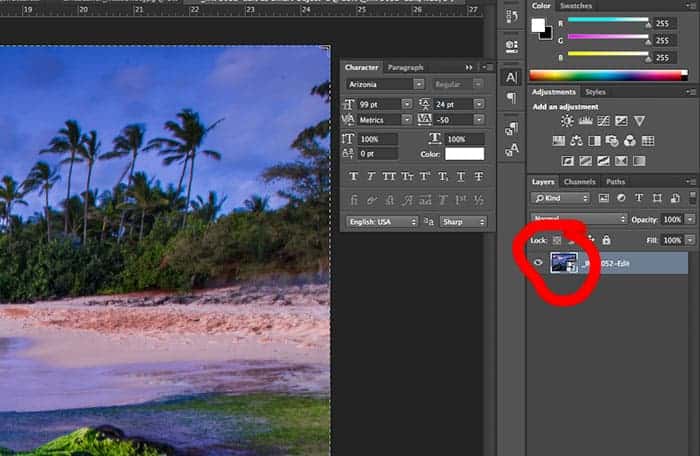
2. Masks on Layer Groups
Perhaps you have used masks on a layer, but have you used them on layer groups? They work exactly the same way, except with the added bonus that you can affect and mask out multiple layers within that group simultaneously. Using them is exactly the same as in individual Layers, Simply make a selection then select the layer group and then click on the “add layer mask” icon on the layer’s palette.
3. Smart Objects Are Not Only Smart, They Are Brilliant
Using Smart Objects has many advantages. I think they call them smart objects because using them is a smart way to work. What is a smart object you ask? We'll it is essentially an embedded element which you can either create in the photoshop document itself or import it. Like in the movie Inception, Smart Objects are like dreams within dreams. Smart Objects can be made of other photoshop documents, or imported vector images, such as an illustrator file. You can apply certain filters to Smart Objects which are editable and non destructive. This is key to a better workflow and better results. You need to be able to have total control of what you do and be able to easily make tweaks later down the line. Raster type smart objects also retain resolution so you can resize them as many times as you want as long as you don't enlarge the object past its original size. Sizing a vector Smart Object, however, always retains its resolution no matter what size you expand it. Have you ever had that moment when you cut out an image or import it, shrink it and placed it just in the right spot, only to realize later that it should be a bit bigger and doing so destroys its image quality? Well, this makes that problem go away, with the caveat I just mentioned for raster smart objects. Double Clicking a smart object in the layers palette opens it in a new window for editing and saving that automatically updates the photoshop file in which it is embedded. One very cool thing about this is that smart objects can be duplicated within a document and making and edit on one will update all instances of it in your file. So lets say you want to add a bunch of yellow butterflies to that photo of a meadow, you could create one butterfly. Then, you would duplicate that butterfly several times, with different distortions, flips and rotations applied to it to give it character and dimension. Then you suddenly make an artistic decision that maaaaaybe RED butterflies would be nicer. All you would have to do is open that one butterfly file, make your edits there, save it, and all the butterflies would magically update on your master document. VIOLA! You are welcome fellow photographer! Smart Objects can also be saved out as their own PS document as .PSB files and updated or replaced with new versions down he line via right click > “Replace Contents”.
How to use Smart Objects:
You can create Smart Objects in two ways. The first one is converting any layer into a Smart Object. Select any photoshop layer and right click on the Layer’s name, NOT on the layer icon. Select “Convert to Smart Object”. The second way is as simple as dragging in another graphics file into your Photoshop Document. Doing so will present you with a dialogue asking you if you want to bring the file in as a Smart Object.
4. Editable Filters with Smart Objects
There are some effects and filters in photoshop that are, what we call “destructive”. That is to say, they effect the layer directly and applies the filter and cannot be modified in the future. If you apply a filter on a smart object, however, this is remedied. Take for example the Shadows / Highlights adjustment filter. I don’t comprehend why Adobe chose to make this very useful adjustment effect not part of it’s layer effects, but I digress. Using Shadows / Highlights on any layer applies the adjustment directly and cannot be tweaked later if you want… but if you turn that layer into a Smart Object and THEN apply that same exact adjustment layer, it creates an editable adjustment that you can now tweak to your heart’s content. This applies to other effects as well, such as Blur and most of the Main Menu > Filter effects.
5. Take Precise Control Of Color With Gradient Maps
Get ready to have a bunch of fun with color in your photos. Gradient Maps give you precise control as well as artistic freedom to stylize and/or fix colors in your images. Think of a Gradient map as re-assigning colors along the luminosity spectrum. Imagine your color photo as a black and white image. Now imagine assigning the white point to a particular color, let's say yellow, and the black point, we will assign dark red. The resulting effect is an image that looks duotone with the yellow representing the whitest point and the dark red representing the black point. All the colors in the middle are now a gradient of those two extremes. The most basic gradient map is made up of two colors, but that's usually boring, you can add more colors along this gradient in order to create some wonderful effects and even fix color issues. This feature is great for controlling product photography where you might want to shoot just one product and then change the colors for the other color variants, like a car, or shoes, or a gadget. Having to shoot three of the same car in exactly the same spot just to get the other colors is not necessary or practical. Another use for gradient maps is to quickly ad styling and mood to your image. You can create your very own custom “Instagram” style retro filters in your high-res photos.
To use a gradient map, right click on the layer you want to create the effect on, then in the layer effects menu, pick gradient map. Click on the white point and pick a light color, such as light yellow, then click on the black point and select a dark color, like deep dark red. That's all fine and dandy, but you'll notice the gradient is kind of dull, not a lot of life to it. What this needs is a third or even a fourth color to make it pop. Click on the gradient towards the dark end of the spectrum and pick a rich punchy red, now your gradient has some pop. Drag the position of the colors left and right to see how it interacts with your image. You can now give this effect layer another level of control by choosing a layer blend mode and tweak its opacity.
(get a picture of a product for a demo with effect applied)
6. Casting Shadows with a Simple Brush
A simple round brush can take on a completely new dimension if you use it in clever ways. Take for example, a typical round brush. A super easy way to add a shadow on an object, say a person, or a product, is to take that round brush and change it’s shape to an ellipse, and then paint in the shadow. Go to the brush palette and then to “Brush Tip Shape” You will see a circle representing the brush’s roundness and an arrow representing it’s direction. Drag the top or bottom dot on that circle towards the middle to squeeze the circle into an ellipse. Modify it’s hardness to 0%, it’s softest setting, and make the size of the brush appropriate to the shadow you are about to create. Now, using a dark shadow color and a low opacity on the brush, paint in a cast shadow on a new layer. You will notice a world of difference this will make compared to a boring round brush for this application. Sometimes all it takes is a tap with the brush a few times to get a very dynamic cast shadow. This tip is absolutely the fastest way to create drop shadows on products, like a wine bottle or any cylindrical object face-on. One or two taps of the brush and you’re done.
Thank you for sharing the tips
Attention to detail is absolutely important.