
 Who doesn’t love parade? Here in the U.S., it seems like we will use any excuse for a parade. Just in my area alone, we have parades for Mardi Gras, St. Patrick’s Day, Independence Day, Halloween, Christmas, and certain sporting events.
Parades are colorful, festive, and full of activity. In other words, they are great opportunities for photography! Here are some tips I have used to get some good photographs of parades.
1. Know the parade route
Obviously, you need to know the route of the parade. You don’t want to just go to some random street and stand there hoping the parade comes by. But that’s not what I mean by knowing the parade route.
If at all possible, scout the route a day or two before the parade as close to the same time of day as possible. That way, you can see how sunlight falls on the route (assuming it’s a daytime parade). This allows you to figure the best spot to set up to take your photos. If you’re in a town or small city like I am, the parade route is likely the same for many, if not all, parades, so once you do this once, you are set from that point forward.
Which side of the street?
I recommend you choose a side of the street on which the sun will be behind the parade from you. This has two main benefits. First, the sun will provide some backlight on the subjects, separating them from the background. Second, people in the parade will naturally look more away from the sun than into the sun. I’m not saying that they won’t look your way if the sun is behind you, but it can be painful for them to do that, depending on the sun’s angle.
The ideal spot will be at a corner in the route. You want to be on the inside corner (the one around which the parade turns). You will have a slightly longer time to photograph parade units than if you are standing on the side of a straight part of the route. What’s more, this will give you a change in lighting angles as the unit moves around you, giving you chances for more than one “look” for a subject.
Where are they?
I have one more tip related to the parade route. If you have someone in the parade that you want to photograph, ask that person where he or she will be. To use a personal example, the first year I marched in a parade as a member of my high school band, my parents were on the wrong side of the street to get a photograph of me. After that year, they learned to ask which side would be easier for them to see me.
2. Get there early
By getting to the parade route early, you can stake your claim to your chosen spot before other people get there. It’s kind of hard to take photos of the parade if you are standing two or three people deep, trying to photograph between people’s heads. Obviously how early is going to depend on the city and how big the parade is. There are supposedly people who line up days ahead of time for the Macy’s Thanksgiving Parade in New York. At the complete opposite end of the spectrum, you can probably get a good spot at a small town parade if you get there 30 minutes early.
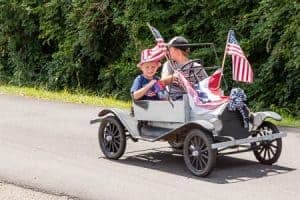
You may also want to take photos of the parade units setting up. For small local parades, you will often see the units getting the final touches applied right up until the parade starts. You’ll usually get some really cute photos during this time, especially if there are little children in the parade.
Photographing the parade lineup also helps your photos tell a story. You get the setup, the actual parade, and, depending on the route, the “disassembly.”
Admittedly, getting to the parade route early and photographing the set up can be mutually exclusive depending on timing and the route. This is just something that you will have to decide on a case-by-case basis if it can be done or not.
3. Research: Obtain a list of parade units
It helps to know who and what organizations are in the parade and in what order will they pass you. When you have this information, you can make a “shot list”—either a physical list or a mental one—and better plan your photos. With your shot list, you won’t spend too much time photographing the grand marshal and then miss the Shriners in their tiny cars (or vice-versa).
The shot list also helps you plan with the next tip…
4. Use different perspectives
The perspective you use on a photograph can totally change its meaning. For example, a close-up of a person standing to the side of the parade route can place emphasis on that person. Go wide, however, and that person becomes lost in the crowd.
Eye level
In general, there are three main perspectives used in photographing parades. The first one is simply at eye level. It is the view that you and everyone else have during the parade. This is a good perspective for taking detail shots of the parade floats or persons in the parade.
A slight variation on the eye level perspective can be a good way to illustrate the size of the crowd at the parade. To do this, you need to be toward the rear of the crowd along the route. Hold your camera slightly above the heads of the people in front of you, and use live view to compose the shot.
From above
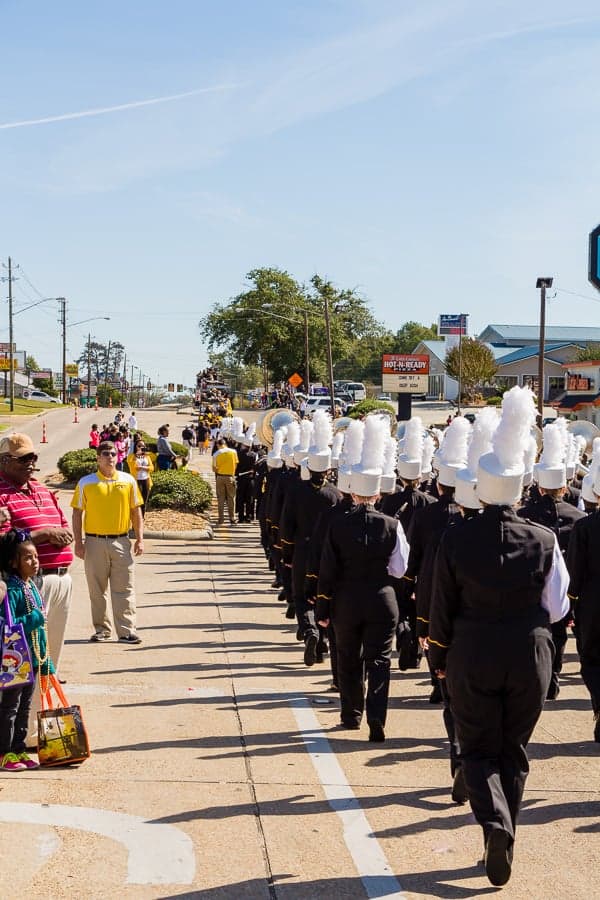
The second commonly used perspective is from above. This is good for getting an overall view of the parade. If you can get high enough, you can get a shot picturing a large part of the parade route. With the emphasis on safety in today’s world, though, do not expect to get access to any tall structures along a parade route in a major city without either renting a hotel room along the route or getting some sort of press credentials.
While writing this post, it dawned on me that using Jim Harmer’s painter pole idea might be a good method of getting a shot from this perspective without having to leave your spot along the route. I’ll have to try that at the next parade!
Street level
The third perspective I will mention is street level. And by this, I do mean level with the street, or as low as you can get. Some of you that are my age or older may be like me and not be able to get back up as easily as you used to. This is where live view and actuating screens come in handy!
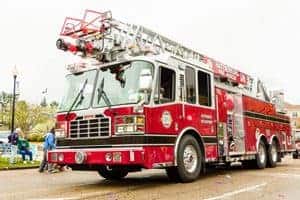
Photos from a low perspective make people and objects feel larger and more grandiose. I particularly like to use this perspective for fire trucks and other emergency vehicles. Their size, lights, and paint jobs already make them feel impressive, and a low-to-the-ground perspective just emphasizes that feeling.
You can also use these perspectives humorously. With hindsight being 20–20, I realized after the parade was over that the photo of the two children in the small car (pictured near “Get there early,”) could have had an ironic perspective if shot right at ground level. Similarly, if from a high enough perspective, a photo could have tilt-shift effects applied and change a photo of a long parade route into a photo of a miniature parade. (“What is this? A parade for ants?” [Said in my best Derek Zoolander voice.])
5. Use different shutter speeds
Just as using different perspectives can change the story told by a photograph, so can using different shutter speeds. As you likely know, changing the shutter speed of the camera is often used as a way of depicting speed of an object (or a lack thereof). Using a fast shutter speed will freeze action, while using a slow shutter speed can blur your subject due to its motion.
Parades typically don’t move that fast, so you are not likely to use the shutter speed to depict a high velocity of your subject. However, you can still creatively use your shutter speed during a parade.
Drag the shutter
By dragging the shutter (as using a slower shutter speed is sometimes called) and panning the camera with your subject, you blur the background, thus emphasizing the subject. While this traditionally does give a feeling of speed, in the context of a parade, the blur won’t be “seen” as caused by speed.
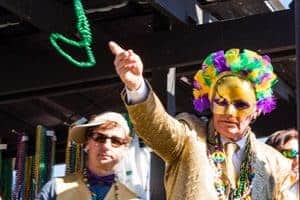
Similarly, you can drag the shutter to emphasize the motion, but not necessarily the speed, of your subject. What do I mean by this? In my area, Mardi Gras beads or candy are thrown at every parade. A slow shutter will blur the motion of the throw (or just the thrown object) while the body of the subject remains in focus. Using this technique also emphasizes the festiveness of dancers or revelers in the parade.
I think dragging the shutter is a must at a night parade, especially if the floats are creatively lit. To me, light trails (as you will get in these situations) just emphasize the festivity of a parade.
6. The spectators are part of the parade experience
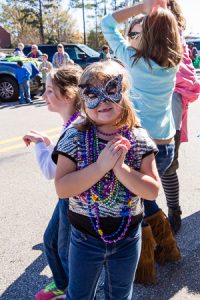
Don’t forget to photograph the other people along the parade route. They are an important part of the story. The happiness of a child upon seeing Santa in a Christmas parade; the crazy makeup worn by a hardcore sports fan during a homecoming parade; the surprise upon catching a cabbage in a St. Patrick’s Day parade—These are just some of the great reactions you can see during a parade.
If the parade is at night, you may not be able to see the reactions of spectators, but there will often be vendors selling glow sticks, light spinners, or similar toys. They usually have these objects illuminated to lure children into bugging their parents until the parents give in and by them. The same qualities that attract children—the light and motion—make for a good photo.
7. Camera Settings
I wish there was a one-size-fits-all formula of settings I could give you, but there isn’t. There are just too many variables at play—lighting intensity, source of lighting, parade speed, etc.
Shutter speed
That said, there are some good rules of thumb. Because parades are in motion (most of the time), you have to use a relatively fast shutter speed if you are trying to get a sharp photo. 1/100 is too slow, and 1/1000 is overkill. I think a shutter speed somewhere between 1/250 and 1/500 is good for freezing most action.
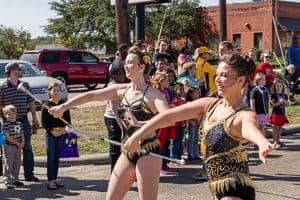
Of course, there are going to be exceptions. If you want to freeze the action of baton twirlers, for example, you will probably need to use a shutter speed around 1/1000.
Aperture
What about aperture? What are you trying to depict? If you want the entire scene to be sharp, you will need a smaller aperture so you get a larger depth of field. To emphasize your subject that is in the parade, you want a larger aperture so the result will be a more shallow depth of field.
If the parade is in bright daylight, the latter may be hard to do with a shutter speed of 1/250 or less. In that case, you will probably need to invest in a good ND filter. Fortunately, Improve Photography has you covered with a review of 30 ND filters.
Exposure modes
When it comes to exposure modes, I either go with shutter priority or manual, depending on how creative I want to be. Most of the parades I attend are during the day, and the exposure settings can change wildly depending on the color of the subject’s clothing, the color of the float, cloud conditions, etc. On top of that, many of the floats are covered in order to provide shade. A rider on a float can stand on the edge and be in bright sunlight, and take a step back and be in deep shadow.
So what are you to do in situations like that if you want to shoot in manual and the lighting can change literally from one split-second to the next? I use auto ISO. Parades are actually one of the only times I use that setting on my camera. You simply don’t have time to constantly change your settings. So I decide the look I want, pick my shutter speed and aperture to achieve that look, and then let the camera worry about ISO.
Yes, I will get some shots that are blown out and some that are too dark. But I’d rather have a photo I may be able to save with post-processing (just another reason to shoot in raw) rather than miss a photo because I was trying to change my settings.
Autofocus
Regarding the autofocus mode, parades are moving almost all the time. This is the situation for which AI-Servo (AF-C in the Nikon) was designed. Try to remember to check this setting or you will invariably get more out-of-focus photos than you wanted. Then you have to come up with some story of why this was a creative choice.
8. Don’t use a tripod
Don’t. Just don’t.
This should go without saying. You will likely be using a shutter speed where you should be able to hand hold your camera without worrying about camera shake, so a tripod isn’t needed for stability. It’s just going to get in the way with the crowd. Just don’t be that guy.
If you want some extra stability, get a monopod. It takes up almost no extra room, and your neighbors along the parade route will thank you.
9. Take some detail shots

This is another example of where it pays to get to the parade route early or to photograph the parade lineup. If you do either of those, you can get detail shots of the floats much easier than while they are moving. Likewise, it is easier to photograph any decorations that may appear along the parade route before people stand in front of those decorations.
It doesn't just have to be detail shots of the parade units. You can capture the details of any swag you get from the parade (I can't believe I just used the word “swag”).
10. Keep both eyes open.
Don’t take this literal, because although it can be done, it is difficult for most people to keep both eyes open when looking through a camera’s viewfinder. Still, with enough practice, it can be done.
What I really mean by “keep both eyes open” is to be aware of what’s going on in the parade. Don’t get “tunnel vision” and focus on just one thing (no pun intended) at the expense of missing out on something else.
Along those same lines, “chimping”—reviewing each photo after it’s taken—is to be discouraged. This takes your attention off the parade. I think some chimping is needed at the start to make sure you have your settings where you want them, but after that, trust yourself and your gear.
Don’t obsess over photographing the parade
It may seem ironic to read this at a photography blog, but don’t get too consumed with taking photos of the parade. You are likely there with friends or family. Take time to be part of that group and not just the photographer off to the side. Sometimes we photographers spend too much time recording memories and not enough time making memories.