
In part 2 of this photography basics series, we learned about aperture, ISO, and shutter speed. Now, you need to learn how to apply these settings on your camera to take advantage of your new-found knowledge.
The Great Flaw of Shooting “Icon Modes” on Your Camera
Whenever I teach shooting modes, I always get the same question from members of my class. “Why do I need to learn how to set my camera’s settings manually when my camera already has built-in modes for sports, portraits, landscapes, etc?” By the way, these are referred to by photographers as the icon modes because they have icons of the shooting situation on the mode dial.
This example will help to explain why these icon modes won’t work for those who want to become a “real” photographer.
With your new photography skills and your new fancy camera, your family members nominate you the official photographer at your family reunion. It comes time to take the giant group picture with over 60 people in it. What mode do you set the camera to? The little portrait icon, because it’s a portrait, right?
There is a problem with that; a really big problem. The portrait mode on your camera automatically makes the aperture really low, because it thinks you want shallow depth-of-field in your portrait. But in this instance, it’s such a large group of people that you need full depth-of-field so that the people in the back aren’t out of focus. The camera doesn’t know your intentions with this portrait, so half of the group looks blurry.
And thus we see why the little automatic icon modes (the landscape, portrait, sports modes, etc), simply will not work for photographers who want to learn to take professional-quality photos.
What are Creative Modes?
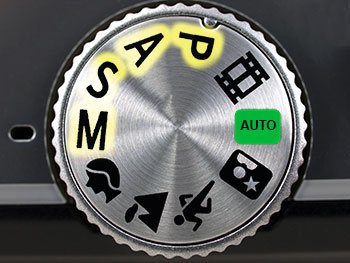
The Creative Modes on your camera are Program, Aperture Priority, Shutter Priority, and Manual Mode. On most cameras, they are marked “P, A, S, M.” These stand for “Program Mode, Aperture priority, Shutter Priority, and Manual Mode.”
If you use a Canon DSLR, then you’ll see that your camera company likes to feel “special” by changing up those names. Canon cameras will show “P, Av, Tv, M” for the same exact modes. “Av” is Canon’s version of Aperture Priority, and “Tv” is Canon’s version of Shutter Priority.
It may feel a little bit intimidating to move to these creative modes on your camera, but I’ll walk you step-by-step through each of the creative modes, how to use them, and what they do.
Program Mode (P)
Just trust me on this one–you don’t want to use it–ever.
But just in case you’re curious, program mode usually (it is slightly different on each camera model) sets the aperture and the shutter speed for you, and allows the photographer to set the white balance, ISO, and flash.
This mode is not a great choice for serious photographers because you can’t set the shutter speed to make sure the picture isn’t blurry. Also, you can’t set the aperture to control the depth-of-field.
Aperture Priority Mode
(“A” on most cameras, “Av” on Canon)
I’d love to see you use aperture priority for 95% of your shooting for the next several months. It is the mode that most hobbyist photographers and even many pro photographers shoot in most of the time.
When you shoot aperture priority mode, you set the aperture (the f-stop) and also the ISO. The camera will then set a shutter speed for you so that the picture is properly exposed.
Aperture priority mode is powerful because it is amazingly simple to use, and still allows the photographer a lot of creative choice. In fact, most competent photographers use aperture priority mode every single day.
Suppose you’re shooting friends and family at a party. The background is really busy with people and things around the house, so you decide you want a blurry background in the photo (shallow depth-of-field). To achieve this, you set the camera to f/3.5 which is a low aperture and which will blur out the background.
The first picture you take is of a person sitting on the couch next to a lamp. The lamp is bright, so you want a fast shutter speed to get the correct exposure since your aperture is wide open. Using aperture priority mode, the camera would automatically set that shutter speed for you. Then, you want to take a picture of someone in a darker corner of the room. You wouldn’t have to fiddle with camera settings at all, because the camera will automatically see that it is dark and choose a slower shutter speed. All the while, you’re able to keep the aperture set to use creative depth-of-field.
If I could only teach you one thing in this photography basics series, it would be to set your camera in aperture priority for the next six months.
When you want full depth-of-field, choose a high f-stop (aperture). When you want shallow depth of field, choose a lower f-stop. Your pictures will DRAMATICALLY improve when you learn to control the depth-of-field.
Shutter Priority Mode
(“S” on most cameras, or “Tv” on Canon cameras)
Shutter priority mode sounds very useful, but the truth is that I have never found a professional photographer who uses it. It is a bit difficult to explain why that is.
At first blush, it sounds convenient to have a mode where you could choose the shutter speed and ISO and let the camera choose the aperture for you. For example, when shooting a school basketball game, you might think you’d want shutter priority mode because you could set the shutter speed fast enough for the quick-moving sports situation.
However, you might be surprised to learn that nearly all professional sports photographers I’ve worked with shoot in aperture priority mode. Why? Because the depth-of-field is key. We want to control depth-of-field in our sports pictures and we just keep an eye on the shutter speed to make sure the camera isn’t picking one that is too low. If it does, then we boost the ISO so that the camera will choose a faster shutter speed.
Manual Mode (“M”)
When I was 16 and drove a car for the first time, my teacher took me to a large parking lot. He asked me to floor it as fast as I possibly could across the parking lot. This was my first time driving! So, I went for it. I felt like I was FLYING! Then, he told me half way across the parking lot to look at the speedometer. I was only going 10 miles per hour (16 kilometers)! The point is, the first time you try anything, it feels intimidating and like you’re out of control.
The first time any of my students use a camera in manual mode, I can see them terrified to try it out. However, shooting in manual mode really isn’t as difficult as it may seem.
To understand manual mode, the example below will be helpful.
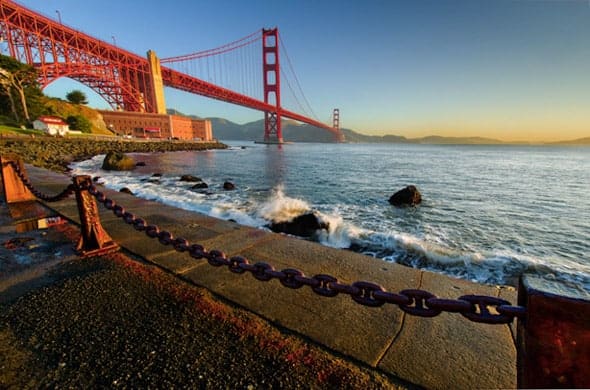
I took the picture above while at a photography conference in San Francisco. In a situation like this, the bridge isn’t going anywhere, the bay isn’t going anywhere, the chain in front of me wasn’t going anywhere. I had a captive audience to say the least.
In situations like this, I always use manual mode. I then set my shutter speed to 1/100. I set my ISO to 100 because I wanted no noise in the picture and I knew if I needed more light, I could just slow down the shutter speed.
After taking the picture with the settings above, I realized that the picture came out a bit too dark with 1/100 shutter speed. So, I slowed it down to 1/60 and it looked just how I wanted.
The point is that, eventually, you’ll find yourself wanting to shoot in manual mode for situations where you aren’t rushed to get the shot. If you’re shooting sports, outdoor portraits, or other things, then aperture priority is simpler and faster than shooting in manual mode.
But since you’re still learning, the best option for the next few months is to get comfortable shooting in aperture priority mode 100% of the time.
In the next lesson in this series, you’re going to learn how you can dramatically improve your pictures by using creative compositions. We’re past most of the technical stuff for now.
Next, I’m going to teach you how to develop strong compositions in your photos.
What settings would you need to apply to a camera (DSLR) when on manual mode in order to get a crisp picture of a fast sports car with no noise?
Also, just so you know this is school work, what settings would you need to apply to get a lovely portrait in manual mode and a silhouette in manual mode as well. When I say silhouette, I mean like this: (copy, paste and search)
http://www.photographymad.com/files/images/playing-sunset.jpg
Thank You very much
shutter needs to be 1/500 of a sec or faster, aperture F/6.3 or higher and ISO 800 or lower depending on the camera
Great read- just getting into photography and this has helped tremendously.
One section – you mentioned the following- I’m assuming you mean – a low f-stop/ high aperture right?
” To achieve this, you set the camera to f/3.5 which is a low aperture and which will blur out the background. ”
Thanks again
-Ben
Where can I send you a copy of a picture so you can tell me what I did wrong in the photo, and what I should have done to get better photo?
Why can’t I shoot in creative mode? I get a little notice indicating that subject is too dark. How do I fix this in the creative mode where in Manual, Program, Shutter Priority, or Aperture Priority? Please help? Thank you
This was a very helpful photography tutorial. Thank you very much posting!
I have been so baffled by manual settings, literally for years I have shot in the “icon”modes. I have realized over time that my photos are lacking what I want them to have. I knew that while some settings worked well for one situation or scene, they were terrible for another. Recently, I have been trying to copy the settings from other people to achieve better photos, but then I didn’t know how to adjust them when needed, so I would just go back to the icon modes. I asked for help learning and someone shared this site with me. Already in just the time it took me to read this and go take a few practice shots, I feel like I finally am getting it! You have explained this simply enough that it clarified many things for me and I have a much better understanding. I know I still have lots of work and practice to do, but I feel so much better now that I have a basic understanding of what the different manual modes mean and how to adjust them!
Thank you so for this! I have known – in theory – what the different modes do. But the best way to use them has baffled me.
New camera and I’m going to do as you suggest and shoot in Aperture Priority Mode!
Thank you so much for sharing this information, I always wondered the difference between Manual and Aperture and had done more of Manual shots. But the point taken regarding the difference you specified between the two.
Heya… I just bought this camera canon eos d1200d as I am going on a trip to an exotic mountain called leh in india and had no clue how to use it…. This blog has helped me so much I already feel like a pro in photography… I learned everything about photography from scratch here!! Thank you so much 🙂
Thank you so much for sharing this. It is very useful.
Thanks a lot Sir, the only thing I want to confirm is, which mode is better for wildlife photography. Manual or aperture priority. It’s AV mode right? Before reading this article, I always used manual mode and have lost several fabulous tiger faces to a blurr. Now after reading you, am thinking of using the AV mode next time. Pls suggest if am wrong.
Hi,
Thanks for the article. I am an amateur photographer. I have a basic and silly doubt. The Aperture setting is a Camera characteristic, or of the lens. I got this doubt because I was reading up to buy my next lens (as of now I have only a 18 x 55 lens). I planned to buy a 70-300 lens. My camera is a Nikon D3200. Now, the camera has aperture settings. When I connect the lens, does the camera restrict me to use only those Aperture settings, OR anything out of range has no effect? Kindly clarify.
Amar,
Your lens controls the aperture range and the camera can select any aperture within that range. Most Zooms are variable apertures. That means that are you change your focal length the maximum aperture changes also. Using your 18-55 mm lens as a example. At 18mm the maximum aperture is f/3.5 but as you zoom to 55mm it changes to f/5.6.
Hope that helps
I bought a DSLR and was convinced by so many that if I didn’t use it in M, then I might as well have a point & shoot. This article was fabulously written and packed with info I needed. I was about to return my DSLR but now I’ll keep it.
this is excellent advice, thank you for the time and effort you put into this.
I think if one is using P mode, one can still change the camera indicated shutter speed to one’s choice and the aperture will be automatically adjusted proportionately.
Hi great article and very well explained
I have a Nikon D3200 and I plan to start using aperture for the next 6 months as suggested.
The question i have is
What settings do I set for Mettering (centre weighted or single point)?
Secondly do I leave the autofocus on or do I switch to manual focus? I don’t think I am ready to switch to manual focus yet.
I have played arouns with stationary subjects in different lighting and I can see how different Aperture setting affect depth of field. ( i particularly notice how the shadow intensity changes in one example).
Currently I plan to use the camera with the following settings in the next few months
Aperture priority mode
Auto focus (Auto Servo)
Centre weighted metering
White balance Auto
Active D-Lighting ON
Auto distortion control ON
Noise Reduction ON
I may be jumping the gun or even over thinking this.
Any feedback will be appreciated
Thanks Ramon
Either I was too dumb or I was too overwhelmed with all the explanations I could find on Youtube and other photography tutorials. You just helped me regain my confidence and find back the pleasure playing with my DLSR. So, thank you very much, Jim. Please, keep up the good work.
You explain so directly and simply. Well done!
Just beautiful, thanks