
This article is the ninth installment of my Flash Photography Basics Series–a crash course in using flash. To start at the beginning of the tutorial, click here.
Now that you have seen what each of the light modifiers do, you can begin working with the flashes to create lighting setups. To help you get started, I'll show you four common light setups.
At this point, you are ready to actually get shooting and learn your flash. I'll get you started here, but if you would like to watch video tutorials of exactly how I set up my lighting for portrait photography, you should really consider my online flash photography class.
Whether you are in the studio or on location, you can achieve different lighting styles to complement your model. It is important to remember that different lighting styles will look better depending on the shape of your model's head. Go ahead and start with your go-to lighting setup and see how that looks on the model. If it is a winner, then keep working with it. If you aren't completely satisfied and believe something could be better, it's probably the light.
4 basic, easy-to-remember lighting setups to get you started:
One Light Portrait
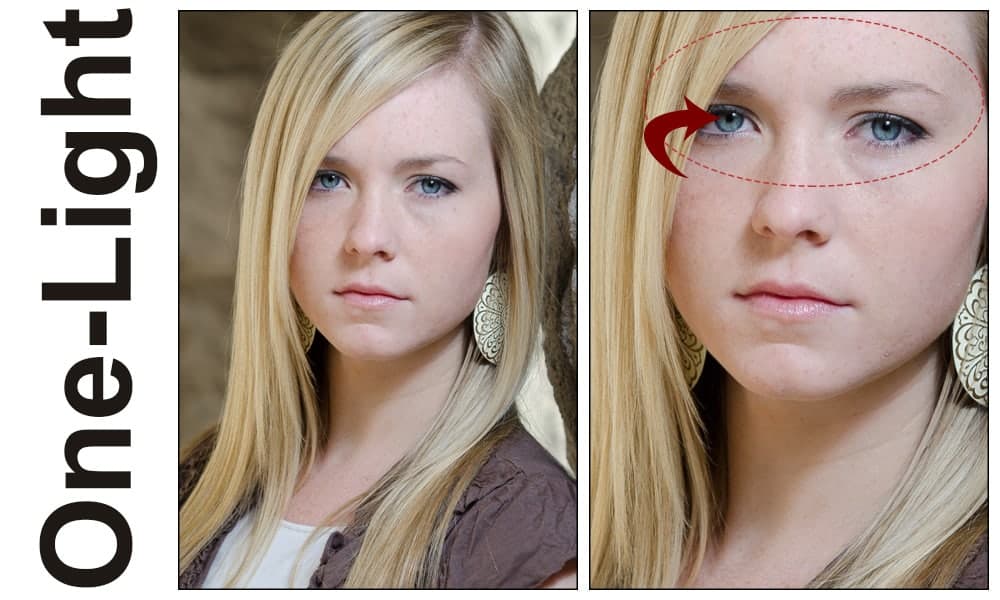
What to Look For
One Light portraits can be difficult to detect, unless you were the one taking the photo. One way to know if there was light involved is to look at the catch lights in the model's eyes. Seeing the catch lights gives you an idea of where the light was placed and if there was more than one light.
Using one light will work best when you have other ambient light in the photo. Your flash becomes the key light. It is easier to expose for the background when you are adding the light to your model.
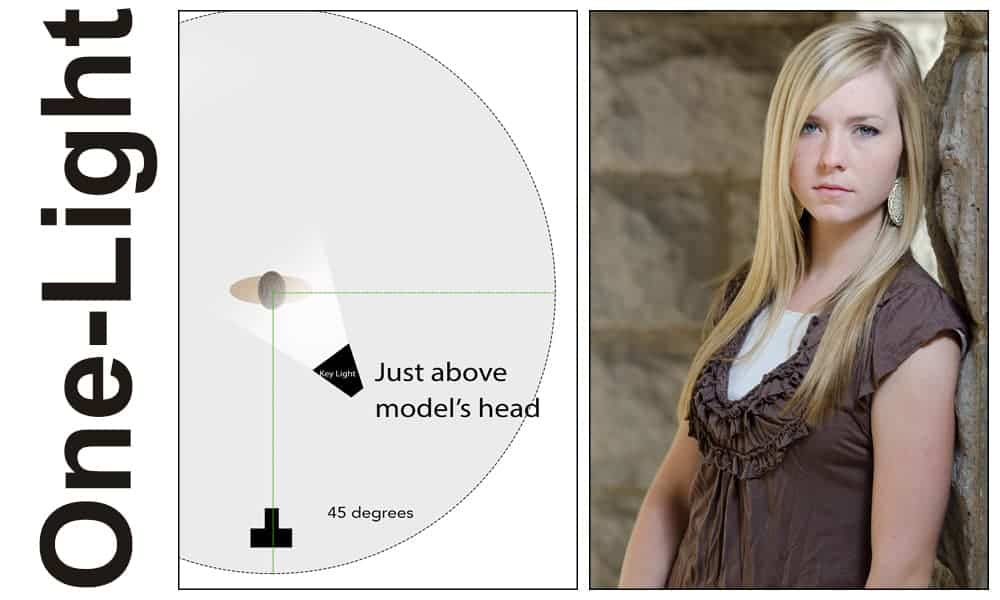
The Setup
|
Some Tips
|
Butterfly Lighting

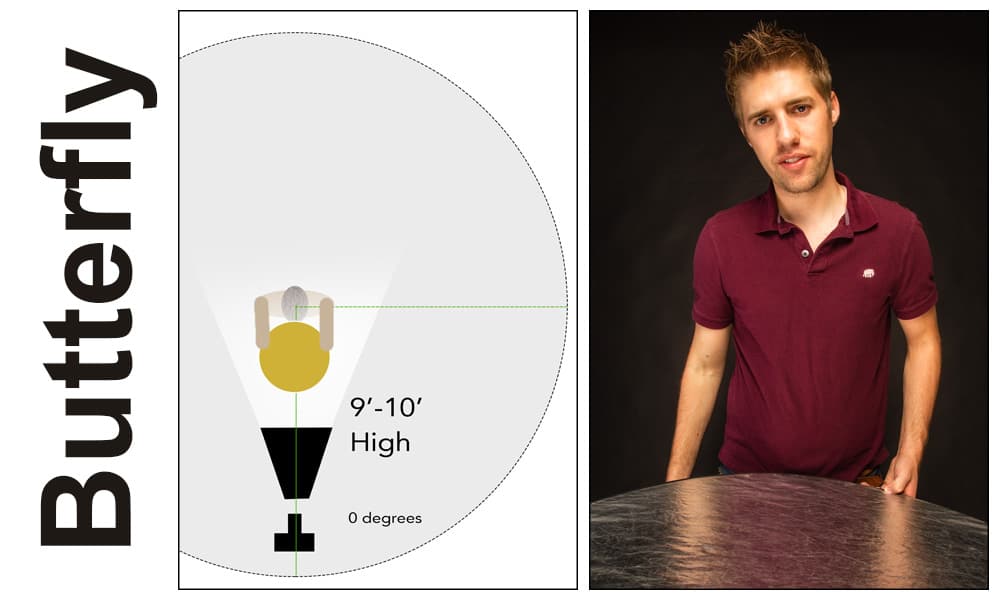
What to Look For
You can easily identify butterfly lighting by the small shadow that appears under the model's nose. To fill in the shadows a little, you will most likely need a reflector or second flash pointed up. This makes it so the shadows aren't so long on the face.
The Setup
|
Some Tips
|
Rembrandt Lighting

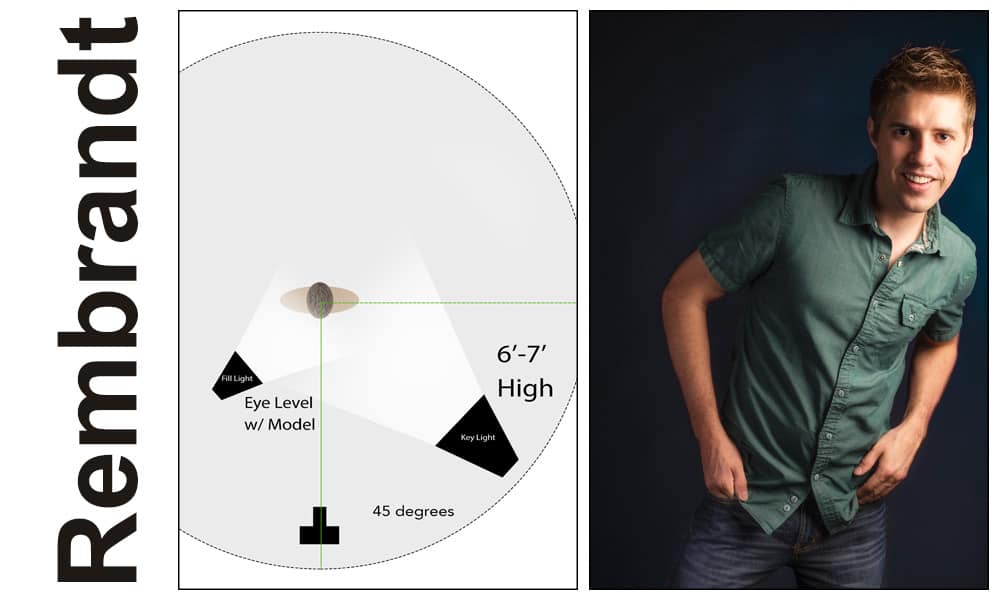
What to Look For
In Rembrandt Lighting, you're looking for a small triangle of light that appears on the opposite cheek from where the flash is placed. This is a very common lighting style and will look flattering on almost anyone you try it on. A good rule of thumb when placing lights is to always place the light on the side where the model parts their hair — particularly with female models. Otherwise, the model's hair will cast a big shadow across their face.
The Setup
|
Some Tips
|
Headshot Lighting

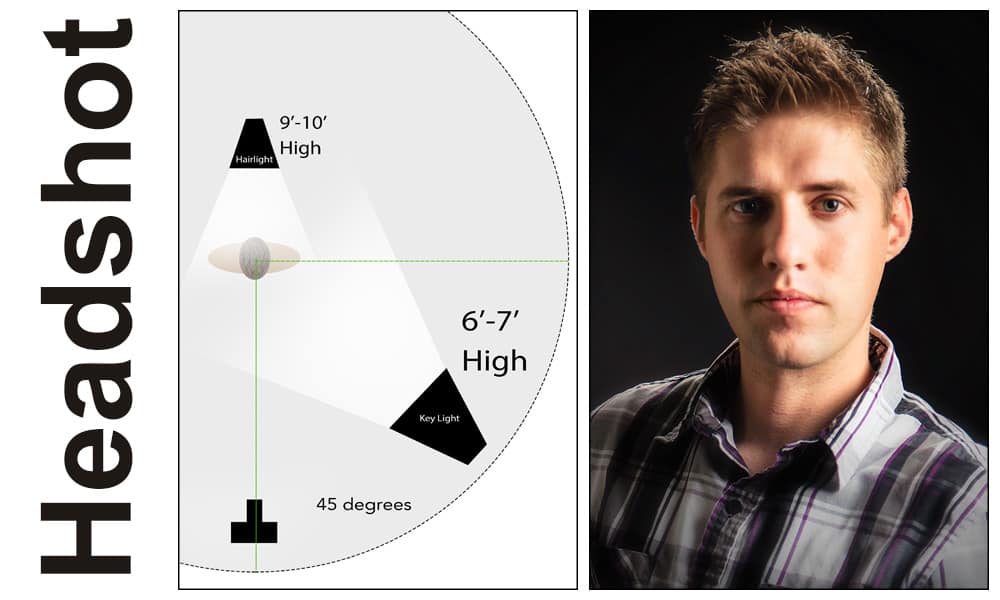
What to Look For
Headshot lighting is important when shooting on darker backgrounds. Sometimes, the color of the model's hair will blend right in with the shadows and the color of the background. Use a hair light to create an outline around their head and pull them off the background. The way you can recognize this lighting style is when there are visible highlights on the person's hair. This can be overdone, so be careful and only apply enough light to create the outline.
The Setup
|
Some Tips
|
Continue to the next article in this flash photography basics series by clicking the red button below.
certified canadian pharmacy usa [url=https://certifiedmaplerx.shop/#]CertifiedMaple RX[/url] certified canadian pharmacy usa
Hi, after reading this awesome article i am as well cheerful to
share my knowledge here with mates.
What’s up to every single one, it’s really a fastidious for me to pay a quick visit this web page, it includes valuable Information.
I found cleaner picks on PfpUniverse when I was changing my avatar, and the cool pfp section had a few strong picks.
Thanks for your thoughts. One thing I’ve got noticed is the fact that banks along with financial institutions know the spending routines of consumers and as well understand that plenty of people max away their real credit cards around the holiday seasons. They prudently take advantage of that fact and start flooding your current inbox in addition to snail-mail box together with hundreds of Zero APR credit cards offers soon after the holiday season finishes. Knowing that if you are like 98 of the American general public, you’ll hop at the possiblity to consolidate card debt and shift balances to 0 interest rate credit cards.
It?s really a nice and helpful piece of info. I?m glad that you shared this useful information with us. Please keep us up to date like this. Thanks for sharing.
One thing is that one of the most widespread incentives for using your cards is a cash-back or perhaps rebate present. Generally, you’ll have access to 1-5 back with various purchases. Depending on the card, you may get 1 in return on most acquisitions, and 5 again on expenses made in convenience stores, filling stations, grocery stores as well as ‘member merchants’.
Thanks for the tips about credit repair on your web-site. What I would advice people would be to give up a mentality that they may buy at this moment and fork out later. Being a society all of us tend to do this for many things. This includes vacations, furniture, as well as items we want. However, you need to separate your current wants from all the needs. When you’re working to improve your credit rating score make some trade-offs. For example you may shop online to save cash or you can go to second hand shops instead of costly department stores intended for clothing.
cheap pharmacy no prescription [url=https://civicmeds.shop/#]us pharmacy no prescription[/url] legitimate canadian pharmacy online
Cialis 20mg price [url=https://veritascarepharm.com/#]cheapest cialis[/url] VeritasCare
We are a group of volunteers and opening a brand new scheme in our community. Your site provided us with helpful info to work on. You’ve performed a formidable task and our whole group shall be thankful to you.
Wonderful goods from you, man. I have understand your stuff previous to and you are just too great. I actually like what you have acquired here, certainly like what you are saying and the way in which you say it. You make it enjoyable and you still take care of to keep it sensible. I can not wait to read far more from you. This is really a wonderful site.
I have realized that over the course of building a relationship with real estate owners, you’ll be able to come to understand that, in every real estate contract, a commission rate is paid. Eventually, FSBO sellers do not “save” the payment. Rather, they struggle to earn the commission by way of doing a great agent’s occupation. In completing this task, they devote their money plus time to carry out, as best they’re able to, the assignments of an broker. Those jobs include displaying the home through marketing, presenting the home to all buyers, creating a sense of buyer emergency in order to prompt an offer, organizing home inspections, taking on qualification check ups with the loan provider, supervising maintenance tasks, and facilitating the closing of the deal.
india pharmacy mail order [url=https://civicmeds.com/#]canadian pharmacy levitra[/url] canadian online pharmacy no prescription
canadian pharmacies not requiring prescription [url=https://civicmeds.shop/#]CivicMeds[/url] canadian pharmacy india
VeritasCare [url=https://veritascarepharm.shop/#]VeritasCare[/url] cialis for sale
online pharmacy delivery usa [url=https://civicmeds.com/#]CivicMeds[/url] cialis online pharmacy
best canadian online pharmacy reviews [url=http://civicmeds.com/#]reddit canadian pharmacy[/url] canadian drugs pharmacy
good online mexican pharmacy [url=https://civicmeds.com/#]CivicMeds[/url] canadian pharmacy cheap
Tadalafil price [url=https://veritascarepharm.com/#]Buy Cialis online[/url] Cialis over the counter