
This article is the ninth installment of my Flash Photography Basics Series–a crash course in using flash. To start at the beginning of the tutorial, click here.
Now that you have seen what each of the light modifiers do, you can begin working with the flashes to create lighting setups. To help you get started, I’ll show you four common light setups.
At this point, you are ready to actually get shooting and learn your flash. I’ll get you started here, but if you would like to watch video tutorials of exactly how I set up my lighting for portrait photography, you should really consider my online flash photography class.
Whether you are in the studio or on location, you can achieve different lighting styles to complement your model. It is important to remember that different lighting styles will look better depending on the shape of your model’s head. Go ahead and start with your go-to lighting setup and see how that looks on the model. If it is a winner, then keep working with it. If you aren’t completely satisfied and believe something could be better, it’s probably the light.
4 basic, easy-to-remember lighting setups to get you started:
One Light Portrait
What to Look For
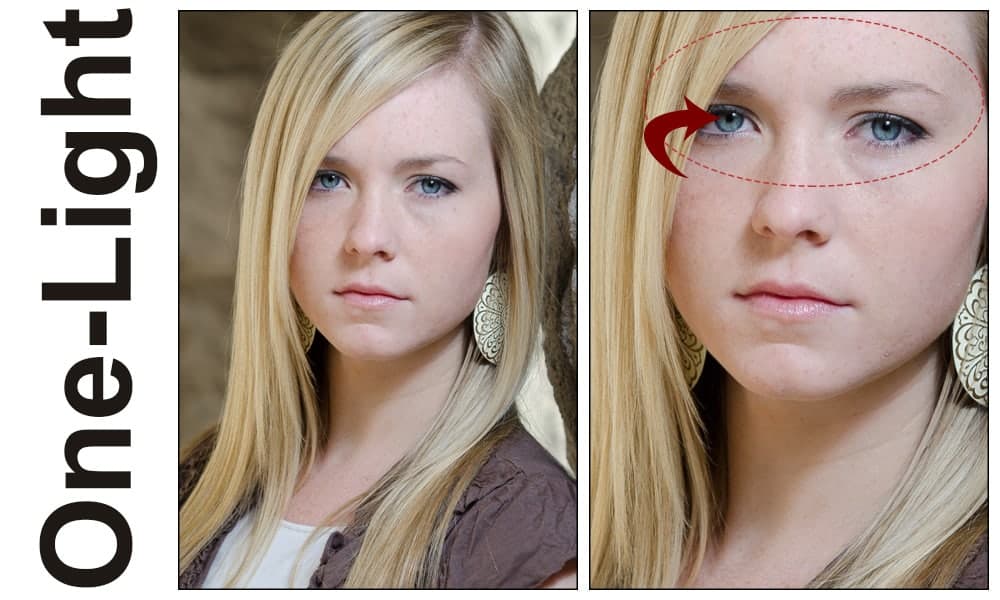
One Light portraits can be difficult to detect, unless you were the one taking the photo. One way to know if there was light involved is to look at the catch lights in the model’s eyes. Seeing the catch lights gives you an idea of where the light was placed and if there was more than one light.
Using one light will work best when you have other ambient light in the photo. Your flash becomes the key light. It is easier to expose for the background when you are adding the light to your model.
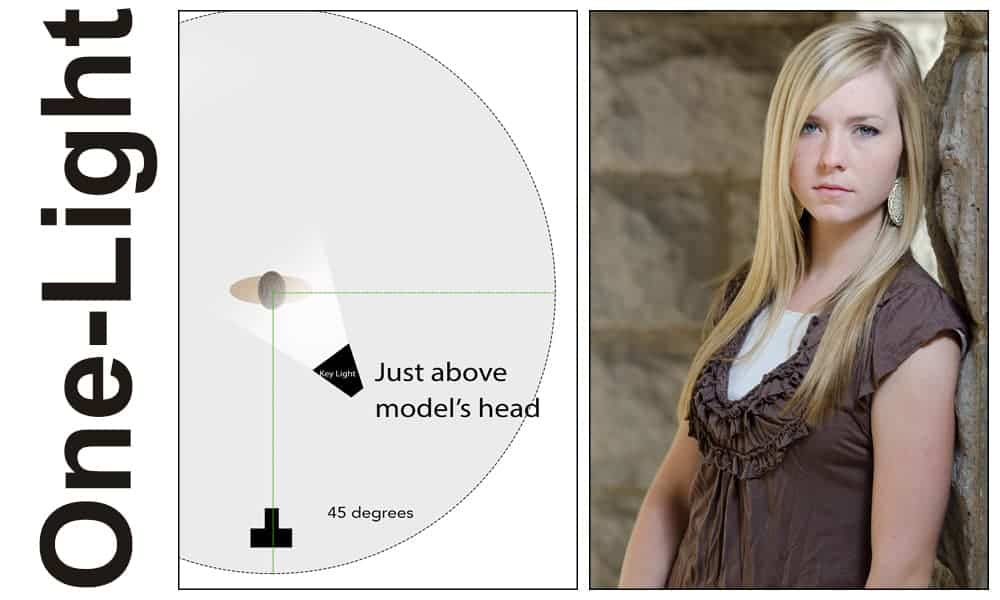
The Setup
|
Some Tips
|
Butterfly Lighting
What to Look For
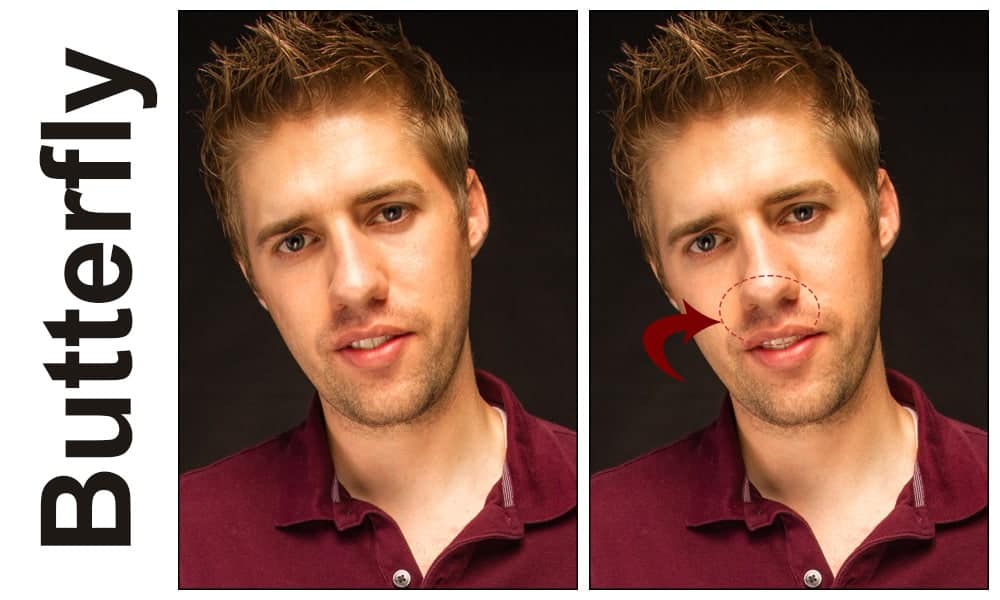
You can easily identify butterfly lighting by the small shadow that appears under the model’s nose. To fill in the shadows a little, you will most likely need a reflector or second flash pointed up. This makes it so the shadows aren’t so long on the face.
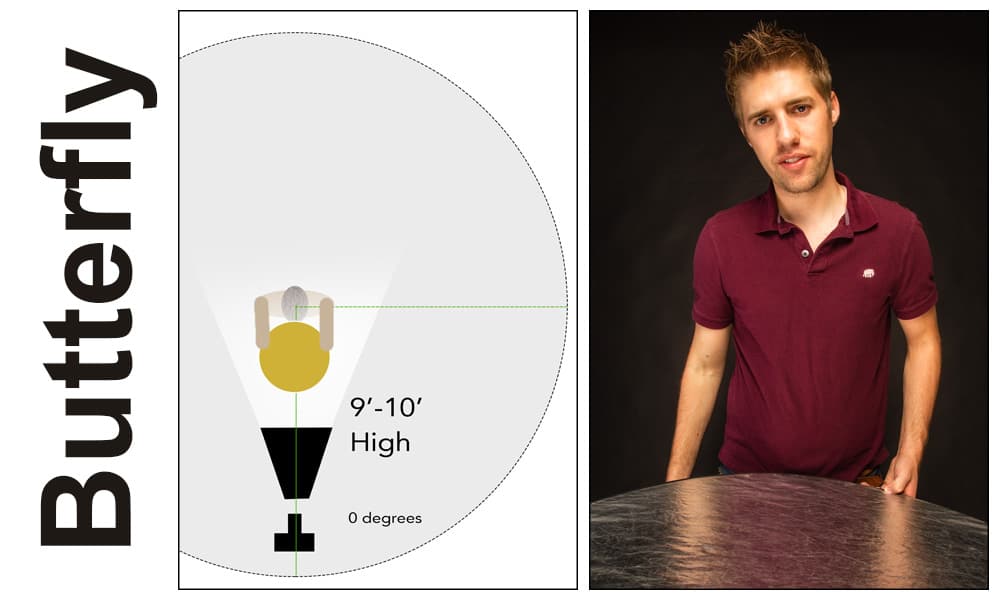
The Setup
|
Some Tips
|
Rembrandt Lighting
What to Look For
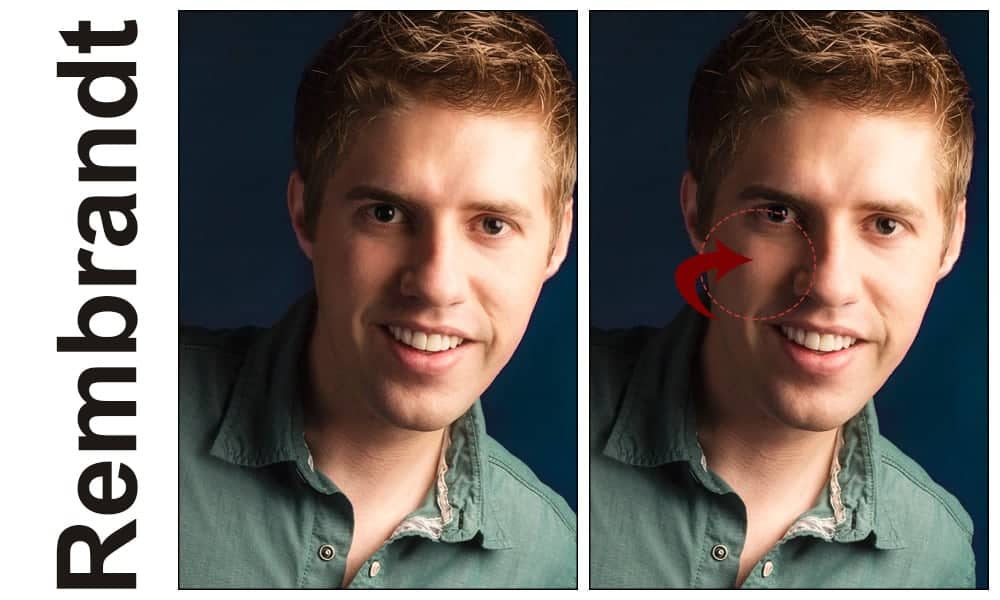
In Rembrandt Lighting, you’re looking for a small triangle of light that appears on the opposite cheek from where the flash is placed. This is a very common lighting style and will look flattering on almost anyone you try it on. A good rule of thumb when placing lights is to always place the light on the side where the model parts their hair — particularly with female models. Otherwise, the model’s hair will cast a big shadow across their face.
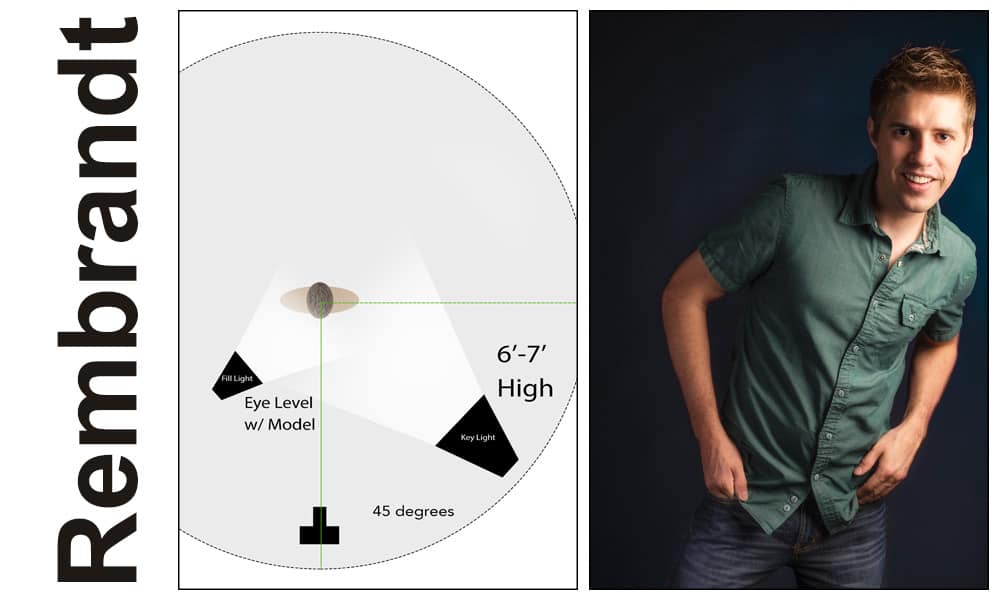
The Setup
|
Some Tips
|
Headshot Lighting
What to Look For
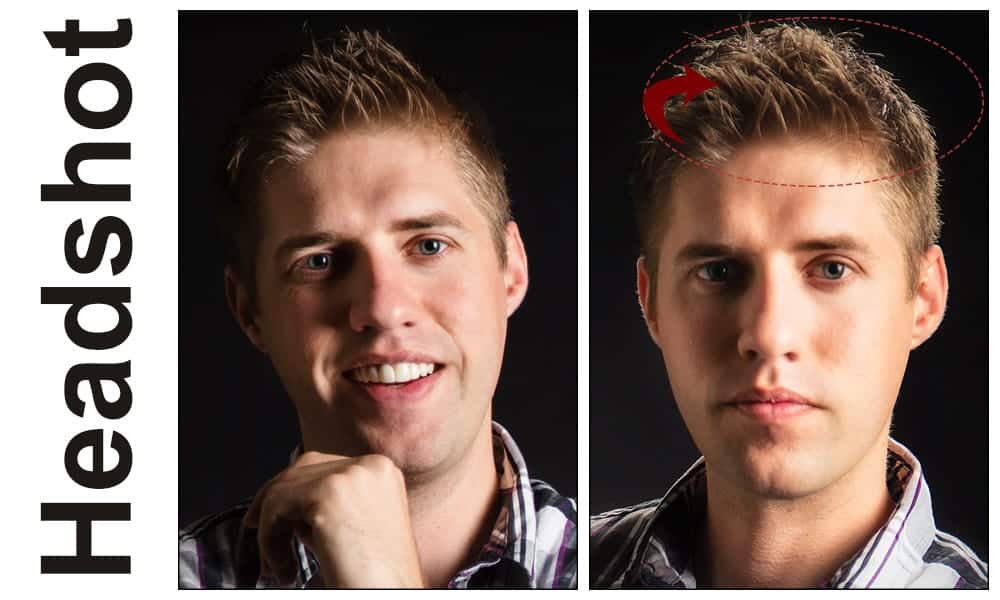
Headshot lighting is important when shooting on darker backgrounds. Sometimes, the color of the model’s hair will blend right in with the shadows and the color of the background. Use a hair light to create an outline around their head and pull them off the background. The way you can recognize this lighting style is when there are visible highlights on the person’s hair. This can be overdone, so be careful and only apply enough light to create the outline.
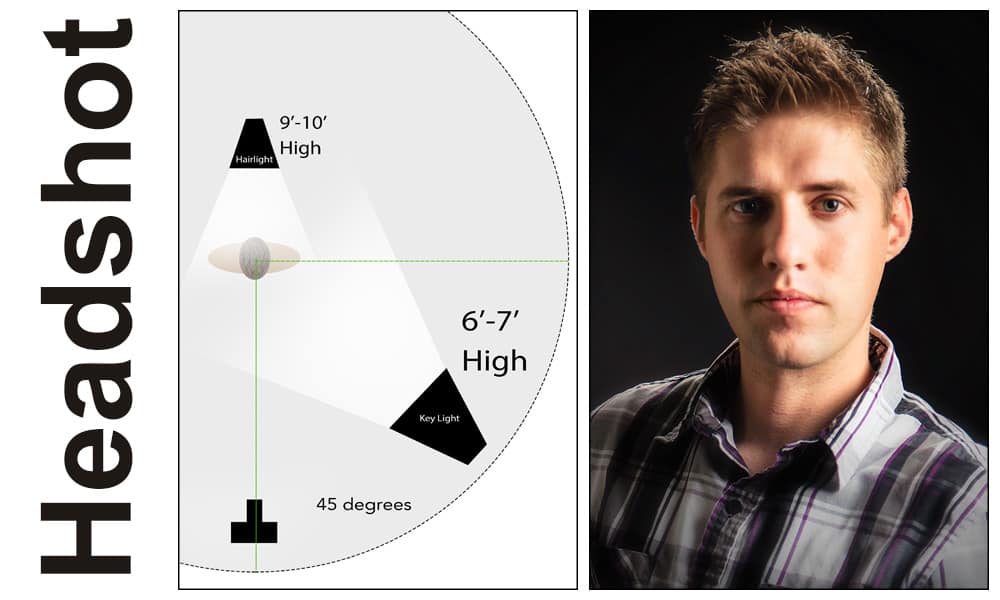
The Setup
|
Some Tips
|
Continue to the next article in this flash photography basics series by clicking the red button below.
Nice article!!!!
This is some really helpful stuff! the diagram examples are awesome. thank you for sharing!
eMerchantPro has been casted a ballot as the main and most proficient installment specialist organization for online business sites because of the reconciliation of the most recent innovation in the framework
Vi er bare nemmest og bedst til forrude udskiftning
Talk to astrologer on a call or chat with astrologer online to get solutions to your problems in life. Astrologykart connects you with the best astrologers in the India. First consultation for Rs. 1.
hi thanks for this article learn a lot of it, me my self i’m using godox speed light
it’s so beautiful!
Thanks for sharing informative article.
very clear and good article easy to understand. Thank you
I was captured when you discussed that one light is ideal if you have other ambient light in the photo. My friend wants a portrait for his business. I should advise him to have his photos taken in a portrait studio with the right equipment for the job.
Thank you so much for this useful article the way you explain is just amazing. Keep sharing such pieces of stuff
I am so glad you shared this information. It is very helpful for me.
Thanks for the advice and sharing the information.
It’s remarkable in favor of me to have a web site, which is valuable designed for my knowledge. thanks admin
Its one of the very great and wonderful explanations of photograph Go-to Lighting Setups. keepit up
This guide explores the best options for “tile stores near you”, provides insights on kitchen tiles design, and highlights tile design collections by BRCeramics.
This guide made the different lighting setups so much easier to understand! I really appreciate how you broke down each style with both diagrams and tips — it’s so helpful for visual learners. The advice about matching lighting styles to face shapes was something I hadn’t thought much about before. I can’t wait to try out these setups on my next shoot. Thank you for putting this together!
generic cialis available in canada [url=https://tadalaccess.com/#]TadalAccess[/url] where to buy cialis over the counter
авто [url=https://mailsco.online/]mailsco.online[/url] играют существенную роль в ежедневной реальности населения, гарантируя комфортные условия и мобильность. Современные автомобили предоставляют инновации и охрану, совершенствуя уровень жизни.
My favorite and most The reasonable way to select an account account [url=https://onlyfinder.co/emo]emo onlyfans girls[/url] engine is via Instagram. I use their account that I found it on instagram.