
It used to be simple and brutal: you shot in 720p, you delivered in 720p. No miracle fix. So when a client demanded 4K and half your assets were old phone videos and low-res archives, you had two bad options: crop it and make it look worse, or tell them it can’t be done.
You don’t have to say that anymore.
AI upscaling has changed the way editors handle these situations. If you’re a designer, editor, or part of a content team, the question now isn’t if you should use AI enhancement. It’s where you should put it in your workflow so it doesn’t mess up your color, timing, or budget.
Why Standard Upscaling Fails for Creative Work
Here is the old way of upscaling a video: drop it into a 4K timeline. It fits perfectly in the frame and looks okay for about two seconds, until you actually watch it.
It’s blurry with zero sharpness and no actual detail. That’s just what basic interpolation does – the NLE smudges pixels together to fill space. No detail is actually created, so put it next to native 4K and it looks mushy. On a large monitor, clients notice immediately.
AI upscaling works differently. It’s not stretching the old pixels – it’s figuring out what SHOULD be there. These models are trained on thousands of hours of footage. They analyze patterns across frames. They understand what human skin is supposed to look like versus a brick wall versus text.
So, they rebuild the lost detail instead of faking it. And the huge thing – they keep it consistent, so it doesn’t flicker. That’s why AI upscaling has become a preferred method for enhancing video quality.
Where Enhancement Belongs in the Timeline
Don’t treat upscaling like some filter you add at export. That’s how you waste hours of renders and end up with inconsistent quality. Efficient teams don’t work like that – they slot it right in the middle, after prep and before the grade.
Phase 1: Audit and Tag
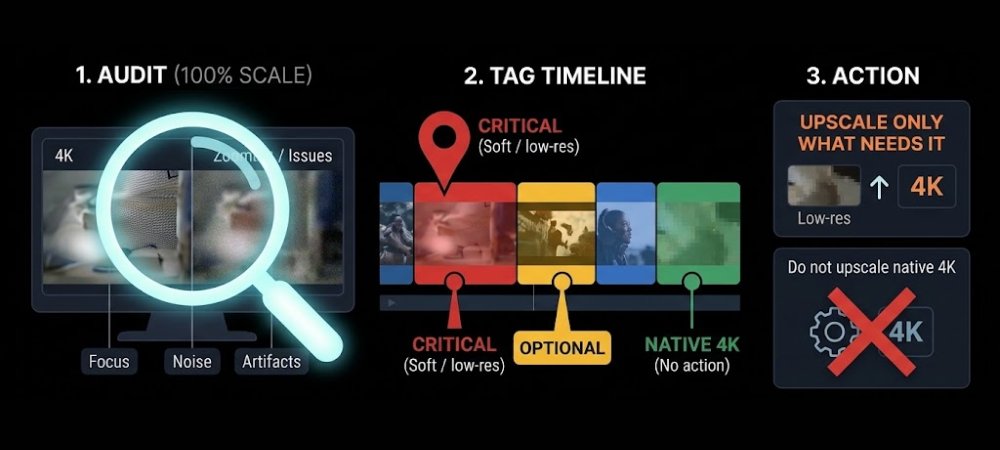
Once the rough cut is done, view the timeline at 100% on a proper reference monitor. Go through and tag anything that isn’t holding up. If a clip is below delivery resolution, looks soft, noisy, or shows that blocky macro-blocking – mark it. Simple system works best: red for critical fixes, yellow for optional. And only upscale what actually needs it. No point putting clean, native 4K A-cam through the process. Just burns time and adds unnecessary processing.
Phase 2: Prep for Processing
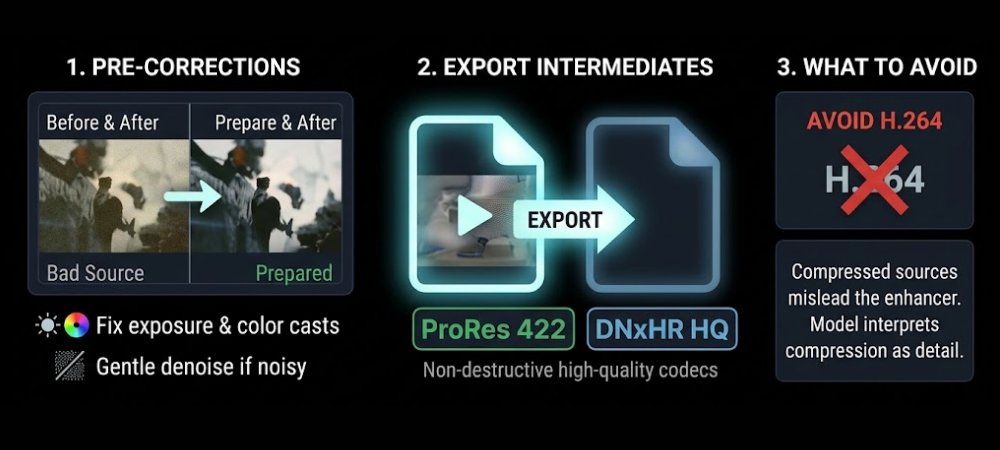
This step decides the final result. The input quality is everything. Before any enhancement, do some light, non-destructive cleanup. Fix obvious color casts, correct the exposure, maybe a very gentle denoise if the source is noisy. Nothing heavy. Then export properly. Selected clips should go out as ProRes 422 or DNxHR HQ. Avoid H.264 going straight into the enhancer at all costs. That compression is not detail – but the model will think it is and will make it worse.
Phase 3: Dedicated Enhancement
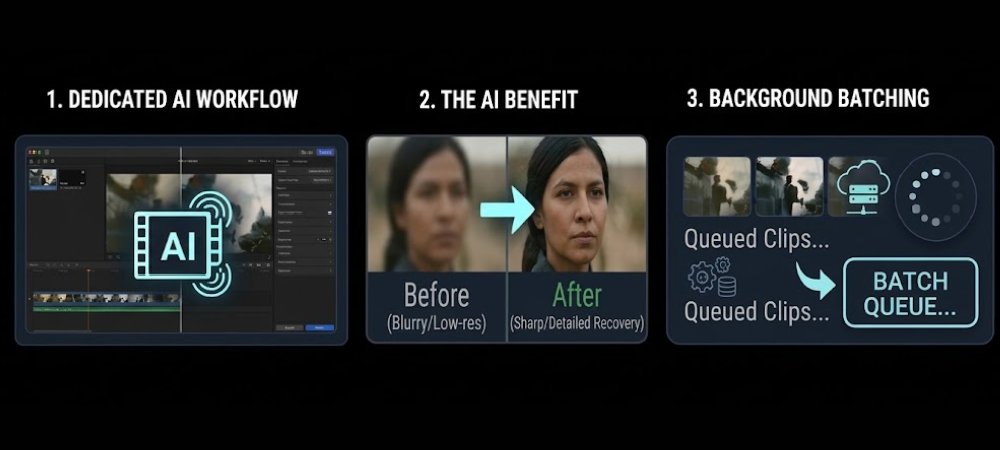
Built-in sharpening tools just aren’t made for this. They have zero temporal consistency. A dedicated HD Video Converter is needed here. That’s where control over face recovery, texture preservation, and real artifact removal comes from. For heavy batch work, platforms like Wink make sense. Queue dozens of clips, set the target resolution, and let it process in the background. Keeps the main editing machine free to keep working.
Phase 4: Conform and Finish
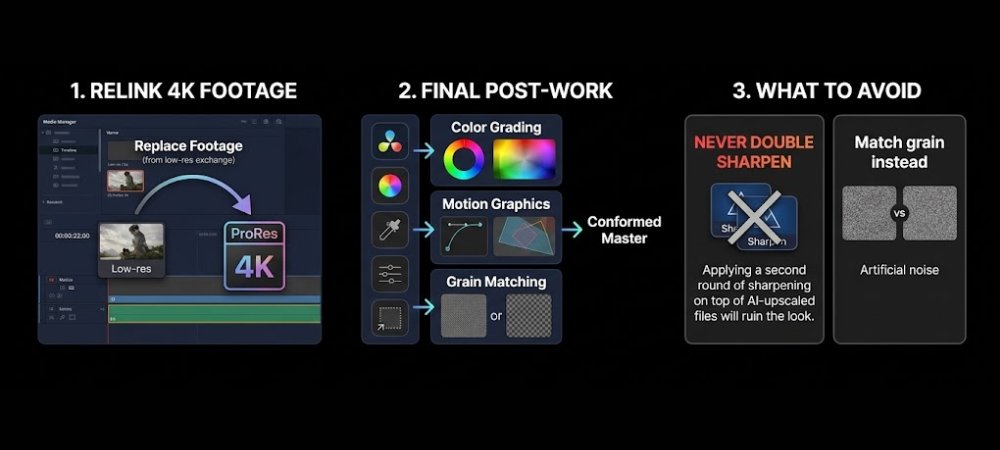
Once enhanced files return as 4K ProRes, relink them in the project using replace footage. All final work – color grading, motion graphics, final sharpening, grain matching – happens after relinking. Never apply a second round of sharpening on top of an AI-upscaled file unless intentionally matching another source.
What to Look For in a Tool
There are a lot of upscalers out there, and most of them fail in the same obvious ways: they melt faces, turn textures into plastic and make any text look like a blurry mess.
For real work, look for this in an AI tool:
- Does it handle faces without warping them?
- Can you control how much denoising it does? Sometimes you want to keep grain.
- Does it support your actual codecs? ProRes, H. 264, HEVC, variable frame rate phone footage.
- How long does it take? If you have 40 clips, you can’t wait 40 hours.
That’s why a lot of creators keep something flexible in their dock. Wink, for example, isn’t just one online converter. It offers an app for quick fixes and browser-based tools for fast client files without installation. It also has full desktop software for heavy editing that covers the whole messy workflow from start to finish.
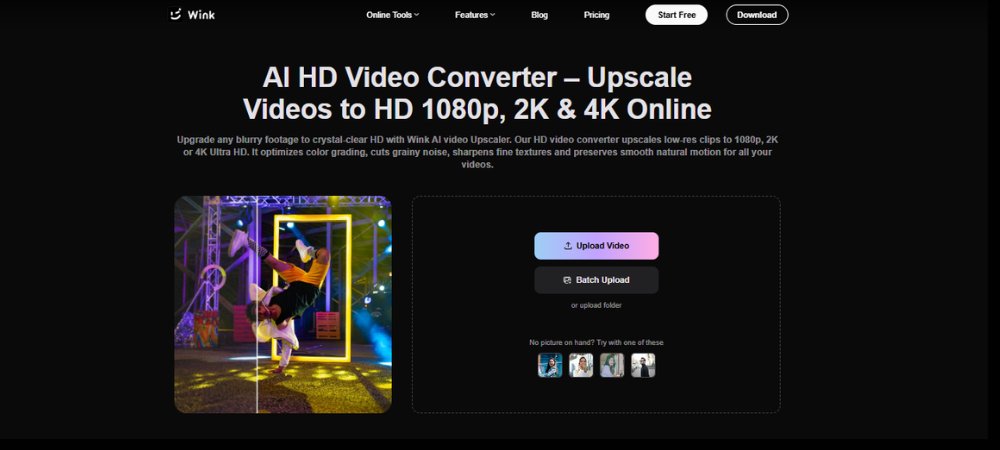
A Practical Workflow: From Low-Res to Edit-Ready 4K
For most teams, this is how it actually looks in practice. For this test, let’s just use Wink.
Don’t run everything at once. Take a short test clip first – like 5-10 seconds with some motion, a face, a bit of texture. Upload it to Wink, choose the enhancement level. You have options like as 1080p, 2K, or full 4K.
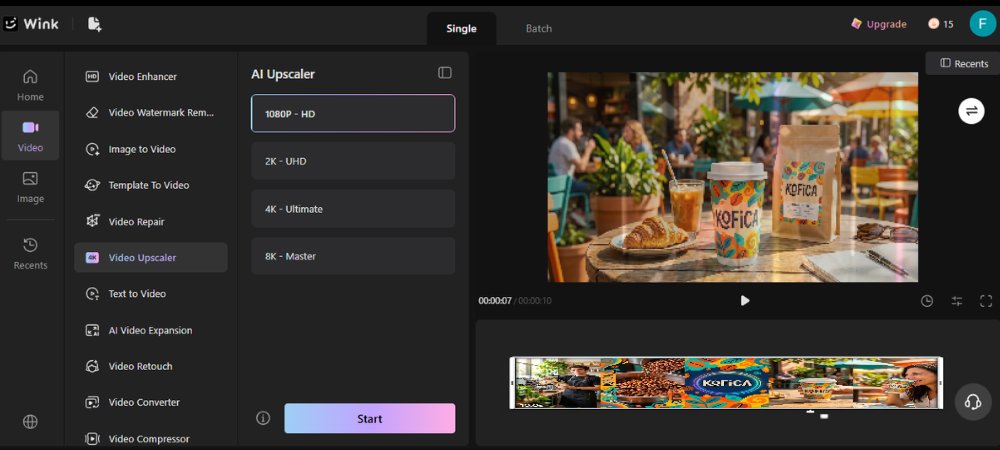
When the result looks right – skin looks real, no waxy feel, edges are sharp without being harsh – you can batch the rest. Just switch to Batch at the top, add all your tagged clips with the same setting, and let it run behind your edit.

Pro tip: keep a little bit of grain. Completely clean, noise-free upscaled footage looks artificial when cut against native 4K. A subtle film grain overlay over the entire sequence often makes everything match and look unified.
The Creative Upside
The biggest shift is not technical. It is creative freedom. When resolution is no longer a hard filter, more stories become tellable. A filmmaker can use that perfect but low-res moment. A designer can animate over footage that was previously unusable. A small studio can compete on visual quality without a massive stock budget.
AI enhancement isn’t a replacement for shooting well. Good lighting, solid composition, and a good performance are still what matters most. Always will.
What it does is give footage a second life. It removes that technical wall that used to dictate what you could or couldn’t use. A shot that was too soft for 4K before is totally usable now.
For any team delivering in 4K as standard, adding an enhancement step to ingest is just becoming normal. It’s not some emergency fix anymore – it’s just part of the modern workflow.