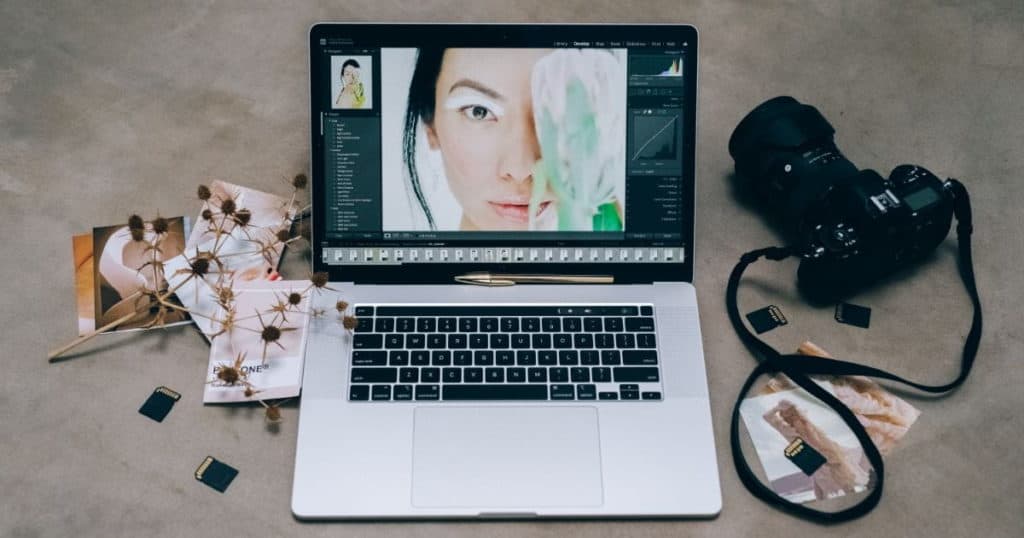
Adobe Lightroom is a great tool for giving your images a vibrant and professional-looking touch. With Lightroom, you can tweak aspects of your photos, such as brightness, colors, and tone curves, or get creative with selective edits and lens distortion correction. Lightroom also offers a range of organizational tools to help you keep your photos in order.
This article explores how to use Adobe Lightroom. Read on to learn how to adjust brightness, colors, and tone curves to give your photos a vibrant look.
Is Lightroom or Photoshop Better for Beginners?
Lightroom and Photoshop are excellent tools for photo editing, but they serve different purposes and cater to different skill levels. Lightroom is generally the better choice for beginners, as it provides a more user-friendly interface and focuses on essential photo editing tasks.
Lightroom is primarily designed for organizing and enhancing photos. It offers a streamlined workflow for adjusting an image's exposure, color, and other essential aspects. Lightroom's non-destructive editing approach allows you to make changes without altering the original image, making it easier to experiment and learn.
Photoshop is more advanced and versatile and excels in detailed photo manipulation, compositing, and graphic design. It has a steeper learning curve and may be overwhelming for beginners.
We recommend starting with Lightroom to familiarize yourself with basic editing techniques and workflow. As you become more proficient and require advanced editing capabilities, explore Photoshop and learn how to use its powerful tools to further enhance your images.
How to Use Adobe Lightroom? A Beginner-Friendly Overview

Want to enhance your images by learning photo editing? This easy-to-follow guide will teach you how to use Adobe Lightroom and introduce you to key features.
Importing Images
Lightroom supports various image formats, including raw files, JPEGs, and TIFFs. Here's a step-by-step guide to help you import photos into Lightroom:
1. Click on the “Import” button located at the bottom-left corner of the screen, or go to “File” > “Import Photos and Video” in the menu bar.
2. In the Import window, navigate to the folder containing the photos you want to import. This can be on your computer, an external hard drive, or a connected camera or memory card. Once you've located the folder, click on it to select it.
3. Lightroom will display thumbnail previews of the images in the selected folder – click on thumbnails to view larger previews and deselect any photos you don't want to import.
4. On the right side of the Import window, you'll find several options to customize the import process.
- File Handling: Add imported images to the catalog without moving them, copy them to a new location, or move them to a new location.
- File Renaming: Rename your files using custom naming conventions or templates during import.
- Apply During Import: Apply metadata (such as copyright information) and develop settings (presets) to your photos during the import process.
- Destination: Choose where you want Lightroom to store the imported files if you've chosen to copy or move them.
5. After configuring your import settings, click the “Import” button in the window's bottom-right corner. Lightroom will start importing your selected photos into the catalog.
Using Lightroom's Library Module for Efficient File Management
An important part of knowing how to use Adobe Lightroom is understanding the Library Module – your command center for organizing and managing your photos.
Here are some tips to help you stay on top of your image collection:
Folders and collections: In the Folders panel, you can see the structure of your photos on your computer. Collections are virtual photo groups that exist only within Lightroom to group related images, like specific events or projects, without moving the actual files on your computer.
Ratings and flags: Assign star ratings (1-5) or color labels to quickly sort and filter your images or flag favorite photos or those that need further attention.
Keywords: Add descriptive keywords to your images so it’s easier to find them later using the Filter Bar or search function.
Metadata: View and edit information about your photos, such as camera settings, location, and date. You can also add copyright information and contact details to protect your work.
Editing Pictures in the Develop Module

In the Develop Module, there are tools and panels designed to help you perfect your images. The Basic Panel offers essential adjustments like exposure, contrast, and color balance.
Select an image in the Library Module and click “Develop” at the top right corner. You'll be taken to the Develop Module, where your image and the Basic Panel will be ready for adjustments.
Adjusting White Balance, Exposure, and Color Tone
White balance is crucial for producing accurate colors in your photos. Lightroom makes it easy to correct any color casts caused by different light sources. You can also use the eyedropper tool to sample a neutral gray area in your image.
Fine-tune your image's exposure by adjusting the sliders for Exposure, Contrast, Highlights, Shadows, Whites, and Blacks, which allow you to control overall brightness, contrast, and dynamic range. Start with small adjustments and gradually refine the settings to achieve your desired look.
Adjust the color tone to manage the mood and feel of your photos. The Vibrance and Saturation sliders enhance or mute colors in your image. Vibrance affects less-saturated colors, while Saturation affects all colors equally.
Healing Brush
The Healing Brush removes unwanted blemishes, spots, or small distractions in your images by sampling a clean area of your photo and using it to replace the defective area, blending the texture, color, and lighting for a natural result.
Choose Heal mode (to blend the surrounding pixels) or Clone mode (to copy pixels exactly).
Gradient Tools or Masking Tools for Advanced Techniques
Gradient Tools, including the Graduated Filter and the Radial Filter, let you apply adjustments to specific areas of your image with a smooth transition. These tools are perfect for editing landscapes, where you may want to darken the sky or add a vignette effect.
The Graduated Filter creates a linear gradient, ideal for horizon lines or straight boundaries. The Radial Filter creates a circular gradient, perfect for highlighting subjects or creating a spotlight effect.
Masking Tools, like the Depth Range Mask and Color Range Mask, allow you to refine your localized adjustments even further. Use these tools to limit your edits based on the luminance or color values, ensuring your adjustments blend with the rest of the image.
Presets
Presets are predefined settings that can be applied to your photos with a single click, allowing you to quickly and consistently apply specific adjustments, such as color grading, contrast, or exposure.
They can help streamline your editing workflow, create a consistent look across a series of images, or serve as a starting point for further edits.
Can You Use Adobe Lightroom for Free?
Adobe Lightroom is not available as a standalone free application for desktop users. You need to subscribe to one of Adobe's plans to access Lightroom and get a 7-day free trial. Remember to cancel the subscription within the trial period if you decide not to continue, as it will automatically renew, and you'll be billed at the end of the month.
Adobe offers a free mobile app for Lightroom, which provides basic photo editing features without requiring a subscription. While you can use the app for free, some premium features are only available to subscribers.
Final Words
Learning how to use Adobe Lightroom can significantly elevate your photography skills and streamline your editing process. By following the basic tips we've covered, you can start using Lightroom as a beginner and unlock its full potential.
