
The phrase camera hacks is starting to get a little over used.
So I'll be upfront, only one of these tips actually involves “hacking” the software in your camera.
The rest are just really cool and inexpensive camera tricks that I use to get the shot I want without using big or expensive gear.
1. Use Your Phone As A Light Source

Sometimes you just need something to glow.
Try using your phone.
Your smartphone is a great subtle source of light. You can even use the screen to create different color light if you aren't in a very bright environment. I use an app on my iPhone called ColorLumina. I like that one because it's simple and lets you choose any color or brightness for the screen. But there are lots of other options out there.
You can place the phone in various places where you want to light to emanate from. Try it in a present during the holidays, coming from a briefcase, or even a kid's toy chest. Basically anywhere that you want to create kind of a magic feel.
You can also hide it in inconspicuous places to get a little extra light on your subject. It works great if they are looking down and you don't want their face to be in complete shadow. It can almost be like a tiny reflector to create fill light. Be subtle with that, though. Too much and its really obvious you added an artificial light source.
2. Use Forced Perspective
Forced perspective is when you put something small in the foreground of the image and something larger further back to give the impression that they aren't the size they really are.
This technique can be very useful in a lot of different type of photography.
It is very common, to varying degrees, in landscape photography. Anytime you see a bunch of flowers featured prominently in the foreground of an image with a huge mountain in the background, you are seeing forced perspective. The photographer is featuring the flowers as a subject in the image, typically by getting close and low to the flowers. Although the mountain is much bigger, it is further back and ends up being the same size or smaller in the frame as the flowers.
In this way, a photographer can choose to feature the flowers equally as prominently to the mountain or even have the flowers dominate the mountain in the frame. That's a choice the photographer has to make and it can change the image dramatically.
You can also use forced perspective in portraits. I've used this in two ways in my portrait photography.
First, you can do some fun things with kids and parents. Put the kids in the foreground and the parents in the background. Second, you can use objects from the enviornment the same way that landscape photographers do. I do a lot of shooting on the beach, so if there is an interesting shell or starfish up on the sand, I may put on a wide angle lens and focus on that with my clients in the background. It may not be the photo that ends up hanging over their fireplace (because they are most likely out of focus) but it is a cool ancillary image that works well in a cluster of photos on their wall or in a small album. It adds a little artistic touch to the shoot in case they want to make a larger wall art display from multiple images.
3. Use A Piece Of Paper As A Video Slider
Video sliders are expensive!
If you aren't making money with your video work, then buying a real deal video slider is probably not in your budget…but a piece of paper (or even a towel) probably is.
Find a flat, relatively smooth surface and lay the paper or towel down where you want to the shot to start. Then put your camera on one half of the paper. Then you can pull the paper along the table and the camera will remain relatively shake free as it slides in the direction you are pulling it. This is not as precise as using a slider so you may have to try a few attempts at the shot but it can be very effective if you are just getting into video and want to start experimenting with basic camera movements.
One good way to utilize this technique is with an opening shot reveal. You start with the camera behind some object in the foreground and slide it out from behind that object until you have completely revealed your scene or subject. Don't forget to pre-focus on the subject from the position where you want the shot to end. If you are trying to tell a story with your video, this is a great way to introduce a character or setting.
4. Use Your Tablet For Product Photos
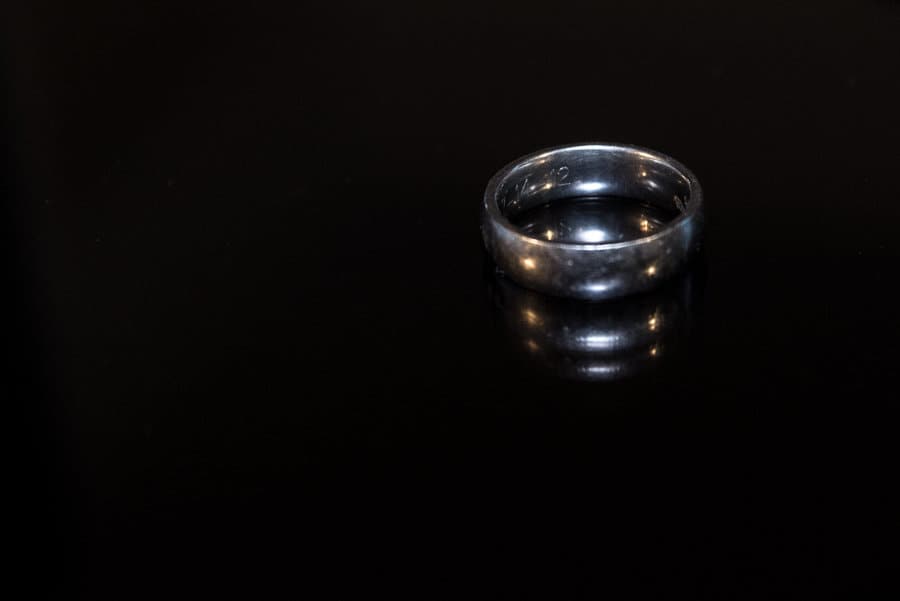
If you have an iPad or other tablet, you can use that as a really sleek place to set small objects for photos. The reflective surface gives your tiny subject a lot of dimension and a cool mirror effect.
One of the hardest parts about product photography, at least for me, is finding a way to isolate the product free from distractions but also create a unique or artistic look when necessary. That's where these next two “hacks” came from.
For smaller products, sometimes all you need is a good platform to place them on. For my first attempt at product shooting a few years back when I was trying to sell a few old lenses, I just placed the item on my desk. Well it turns out my desk is really really ugly in a close up high res photo! There were all kinds of nicks and scratches and dust that I had no idea was there. So i decided two things: 1) I needed to clean my desk, and 2) I needed something smooth and clean to take photos on.
So if you are having this same issue for smaller items, try your iPad or other tablet.
I think it works great for rings or other jewelry especially.
5. Make A Product Studio With Foam Board
So what if your item is too large for the iPad?
Go with some foam board.
You can get it really cheap at any local craft supply store. Use either clear tape or some gaffers tape on the back and you can create a lightbox (fancy word for a white square with the top and one side missing OR you can make it even simpler and just tape two of them together.
One issue you may run into is that the seams show up in your photos. You could just remove that in post-processing. But another easier way is to add some poster board. Poster board may not be stable enough to use alone but if you tape it to the top and bottom and let it gradually curve at the seam, you can create a miniature version of the seamless paper look that is used frequently by portrait photographers.
BONUS TIP: Get black foam board and try it in different places to have total control over the shadows.
6. Canned Atmosphere
Full disclosure, I have not gotten to use this yet but I know a lot of other photographers, including many of the writers here on Improve Photography, that have used it with tremendous success.
Atmosphere aerosol is basically smoke in a can. It does what a smoke machine does but without the need for an expensive and heavy machine. That makes it great for on location shoots or a one off type shoot for someone that doesn't plan to use smoke or haze very often.
Use this stuff with some back lighting and you have a dramatic fog filled shot.
7. Use A Homemade Bean Bag
Have some old jeans and a big of uncooked beans?
I mean who doesn't, right?
This one takes a little sewing skill. Take the denim material (or any larger piece of strong material and make a large rectangle. Fold it over evenly, then sew up about 80% around the open ends. If you're not sure how to sew, check out YouTube, you can learn anything there. We're going to stick to the photography stuff here. Before you completely sew it up, fill it with beans or corn or even small pebbles if you want it to be real heavy. Personally, I am a fan of uncooked popcorn. It's a great size to make the bag easily formed to the object it's resting on and if you have extra, it's delicious.
Ok, you have a large bean bag…now what?
You can use this to stabilize your camera on just about any uneven surface. You'll see a lot of these being used by nature and wildlife shooters from their car. They rest the bean bag on the car door with the window rolled down and it helps them use a large long focal length lens without a tripod. You don't have as much aiming flexibility as you would with a ballhead mounted on a tripod, but it works for those situations where a tripod isn't practical (like inside a car) or not allowed.
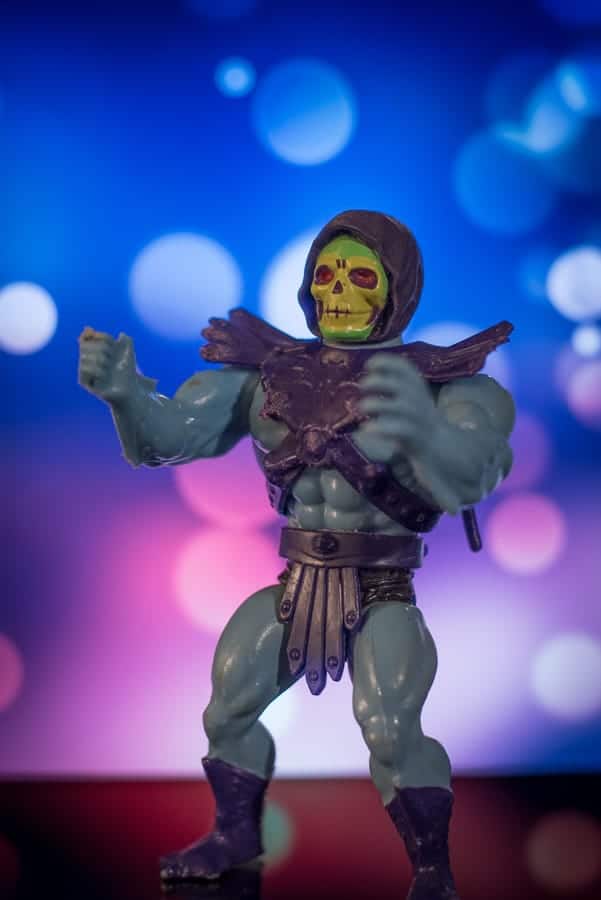
8. Use Your Computer Screen For Macro Backgrounds
This one is kinda fun.
Just search online for bokeh, or some other kind of background. You can find just about anything.
So why is this just for macro? Well, it's really difficult to find a computer screen as large as a person.
Once you find a background you like, make it full screen and set your macro subject up in front of the screen. You can see on the right I used an old (like 1984 old) action figure and put him into a dreamy bokeh filled background with a little bit of a space/magic feel to it. But you can use this for anything.
The tricky part is the light. With the computer screen behind the subject you will have a lot of backlighting so you need to do two things. First, turn the brightness down on the screen. Second, you will need some light on the front of your subject. This can be tricky because you do not want it to reflect off of the computer screen.
I would suggest using a light off to the side as much as you can and angling the subject towards the light a little, like I've done here. You will have to play around with this a little and keep a close eye on the histogram on your camera to make sure you aren't blowing out the screen or losing detail on the subject. Choosing a darker background to begin with will make this easier.
Now you have whatever environment you want to shoot your macro subjects.
Pair this up with #4 above and you have a reflective floor that will pick up the colors and shapes from the background on the screen.
9. Shower Curtain Softbox
Giant softboxes give incredible soft light. But they are expensive, bulky, and a pain to set up.
But a white shower curtain can fit easily in your bag.
There are a few ways you can use this extremely versatile piece of kit.
First, if you are shooting outside (and have a few extra hands to help) it works great as a scrim. A scrim is a fancy photographer word for a big translucent piece of fabric that you can put between your subject and the light source. If you find yourself shooting in direct sunlight, a scrim is essential to avoid harsh shadows and hot spots on your subject.
You can also use a shower curtain in a more controlled shoot with flashes. Hand the curtain by whatever means necessary, whether that be with clamps, gaffers tape, or two people with good arm stamina. You can then set up a flash (or multiple flashes) behind the curtain. Start with the flash at it's widest setting. You will have to experiment with the settings and the distance from the curtain to get the best results, but you should end up with a very soft light that can cover most of the subject's body.
10. Make Your Own Snoot
This is basically the direct opposite of the last one.
- Find some matte black poster board at a craft store.
- Form a roll that fits around the head of your speedlight.
- Tape it closed with gaffers tape.
And there you have a snoot. A snoot can help you direct light to a very specific spot on your subject. This works well if you want to light someone's face but not the rest of their body or the background.
11. Turn That Snoot Into A Grid
Adding a grid can prevent light spill even more than a snoot.
Get a bunch of black straws. The kind that some food chains use. You can find them really cheap online (a lot cheaper than a MagMod Grid for sure).
Lay out a piece of gaffers tape and line the straws side by side onto the sticky side of the tape. Now just roll up the tape and trim the straws to equal length.
With a little trial and error, you'll have a grid just the right size to fit into one of the snoots that you just made. Experiment with different size snoots and grids to see what effects each of them has.
BONUS TIP: If you find yourself using one size over and over again, then maybe consider buying a high quality grid or snoot when the homemade one wears out. Now instead of wasting money, you were able to identify exactly the type of modifier you like without dropping a small fortune.
12. Find Out If Your Camera Has Better Firmware Available (the only real “hack” on this list)
Use a little caution with this one. There is always a chance that you can “brick” your camera, which means making it completely useless and probably voiding the warranty in the process.
If you have a Canon camera, just look for Magic Lantern. That is open source firmware that has been around for years and is frequently used by video shooters to unlock a lot of useful video features on the Canon camera.
It's a little more difficult for Nikon users but if you search for Nikon Hacker, there are certain older models that can really benefit from third party firmware.
Other brands are more difficult to find but try searching the web for open source or third party firmware for your camera. It's risky but might open up some features on an old camera that you never thought you would use again.
Some really creative tips in there. I especially like the idea of using a piece of paper as a video slider! The homemade beanbag is something I’ve done for a long time too – Much better than spending £40 on a branded beanbag that does exactly the same job.