
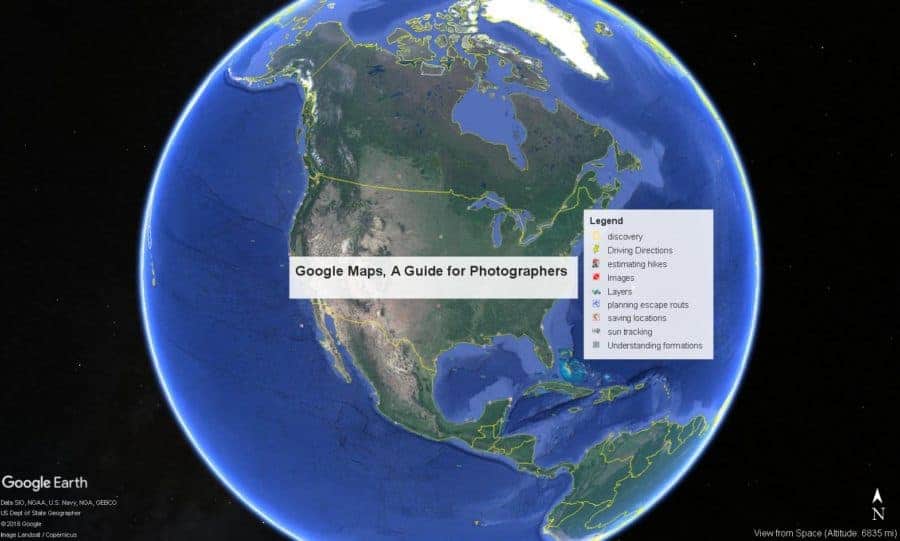
Google Earth is frequently mentioned by photographers, but I don't think I have seen an article that really dives into it and explains why you should be using it. So in order to change this, I have come up with a few things that should be understood.
So let's talk some cartography
Google Maps was first introduced to the world in 2005 where it has subsequently changed the way in which photographers scout out locations. It provided for the first time aerial view of the earth to the masses. As the database expanded it became more advanced. Around 2013 the desktop application was launched called Google Earth which introduced a series of applications that are even more useful for photographers. In due time, Google advanced some technology that created 3D viewing of the earth and it has only been getting better.
With that in mind, let us dive into the important aspects for photographers.
Key Features
3D
As mentioned Google Maps started as just images of the earth from either satellites or planes flying close to earth. But in due time, I assume, radar was used to measure distances and 3D maps were combined together to create 3D renditions of the earth surface. For the first time ever you could fly to a perspective place on your computer and then zoom in and see what it might look like from the ground. Mind you it is not perfect. The more popular the location, the better the 3D maps. Less popular locations or small object no bigger than 30 feet often are still rendered flat. But the ability to still see areas topography has been a game changer.
Arial Images
As mentioned this is built off of aerial images. These aerial images combined with a bit of human brain power is extremely powerful for navigating. When GPS is thrown into the fray, it is becoming increasingly more difficult to get lost and becoming easier to discover locations.
Ground View or Car View
When ground view was introduced I think in 2008 or 2009. I remember the controversy that was created from it really quickly. But for trip planning, it has become an essential tool. Ever wanted to know if you could see the Eiffel Tower from some location within Paris, drop your little guy icon into a portion of your map and boom you are seeing in real time if you can take a shot from a location.
For Photographers
Before I go any further I wanted to step back and make sure everyone just grasped how important all these things are. You can now see from above, and from the ground what a location might look like without ever going there. You can navigate to it easily and even use some additional tools to see if that area will line up with the sun or the milky way.
From this point on though I am going to talk about the desktop applications, Google Earth. The online version of Google Maps, it is nice, but the desktop version has so much more. If you are wondering, I do use the online version, but mostly for easily seeing navigational routes and national park boundaries. If you don't have the desktop application go here to get it and the rest will make more sense: Google Earth.
Understanding Layers
Ther is a professional application called ArcGIS. It is a map builder and can do a lot of powerful things. One thing that it has is layers. When Google created their program they used the same logic and created a program with layers. If you look at the left side of your Google Earth program you will see a list of layers. You can turn these layers on and off to provide more or less information. There are many layers on here that are not for photographers, but there is a lot here that can be very useful. I am going to point out a few.
Photo Layers
This one use to be a lot better. Google allows users to upload images through a program called Panoramio. Within the past two weeks though they shuttered this program and all the photos went with it. This, in turn, has made finding random interesting things way more difficult. One of the things about this photo layer is that it had images from everywhere. Random points in the wilderness, waterfalls and just about anything interesting floating around. But the title to these images is still present. So you can still look up the names of the locations and get an idea of what is there. The new photo layer is nice, but essentially useless.
Anyways enough with my complaining. This layer is essential for discovering.
The is one of the most important layer for basic scouting. Use it.
Park Outline Layers
One nice thing with this, you can get ideas for park outlines. This goes for National Parks, Monument, State and local parks. This allows you to figure out if there is going to be information on it. The more obscure it is the less likely you will be able to look up information on it. This outline also introduces interesting things to see in the parks as well. I would suggest playing around with these layers to find out what might be in your local national park.
Map Plugin Layers
This is the second most important aspect of Google Earth besides simply the aspect that you can see what area you are going to. There are plenty of maps floating around that you can download. Currently, I have a list of slot canyons and just added a list of waterfalls for the state of Utah. Talk about an easy planning technique if you can go to google earth, click on waterfalls and see what pops up near you. Mind you it won't have everything, but it will have most. You can always add things if you desire.
If you are planning a trip to the northwest. Load up a waterfall layer and bam you have ideas of things you want to see. Mind you I just did that and Washington alone probably has 1000+ waterfalls. No joke. Other fun fact, North Dakota only has one.
Important buttons
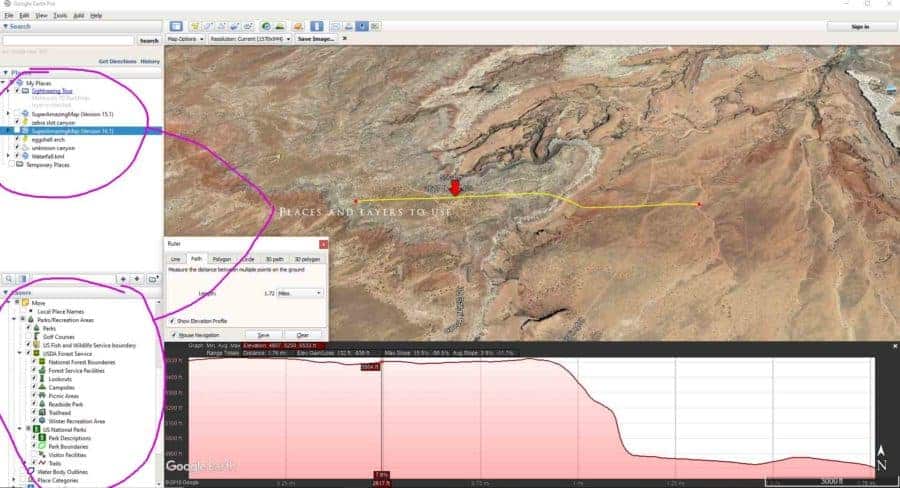
There are certain buttons found on Google Earth that are really useful for planning trips. If you look at the top left section of your viewing area, you will see a series of tiles that you can choose from. These include things like add place-marker, ruler, path, and so on. These tools can be very very useful to find out what you are getting yourself into or for adding interesting things that you found. Lets look at a few.
Add Place-Marker– Have you ever been out somewhere and found something cool? Go to Google Earth and put a pin on it and save it. This allows you to go back and find it or plan another trip around it. This also gives you GPS coordinates for a location so you can share it or save it for later on your phone. This place marker will also give elevation which is nice.
Ruler– You can use the path tool for this as well, but the ruler is really nice for measuring hiking distances, distances to points of interest and so on. I use it if I am going to do a long hike and need to see exactly how far I am going to have to hike to get somewhere. It will also show elevation change if you click the box in the bottom left part of the ruler pop up menu. Very useful things indeed.

Light Simulator– There is an arch out on Navajo land that only has proper sun alignment a couple times a year. I can use this app to see exactly when this will happen. Light simulation is useful for finding out what part of a mountain will get light first or last. It can help find out if the area you are going to will ever get light on it at all at the right time of day.
Street View– Mostly useful for architectural photographers, but landscape photographers can occasionally take advantage of this. I do on occasion to see how something looks from the road if that is the best shot. Street view does not have everywhere, but it does have a lot.
Combining Tools
After playing around on Google Earth you will realize you will need more tools. It can help with milky way planning, sunrises and sunsets, but apps like TPE and Photo Pills are still a necessity as it will give specific information on the movement of the celestial objects.
Make sure that you still look up trail guides and figure out what you are getting into. Just because you saw it on the map don't assume all miles are created equal. There are 3 miles hikes that are harder than 10 miles hikes. Do your research beyond looking at a map. Use all the information at hand to find out what you need to get the shot.
Let me know what you think. If you have any cool maps you want to share, post below in a comment and let me know if this was useful.
I use Google Earth all the time to mark interesting locations along with their coordinates. Tool like the ruler and path tool are great for getting an idea of how the hike from parking to photographing will be. Thanks for the article, I’ll check out some of the other features available.
So it could help us a lot to get what we can get here.
If you are using a windows operating system then it could be easier than Google Earth for Landscape Photograph operated functions by help of windows OS. so if you lean how to easy then i recommended this web page so go and enjoy it.