
I grew up loving photography.
I started with film and have evolved with the technology.
But a lot of the “rules” of photography have not evolved. Over the years I have heard a lot of instruction. Some good, some bad. But there are certain rules that I heard over and over again. Some of them are still helpful. But many of them need some updating, some refinement, or just need to be ignored.

Rule #1: Rule Of Thirds
This is absolutely a rule that you should learn. The rule of thirds is a great way to get photographers, especially newer photographers, thinking beyond the simple snapshot.
But once you get past the snapshot level…it just holds you back.
Don't just follow the rule of thirds. Look for interesting shapes in your compositions. Whether you are photographing a mountain at sunset or a child at dawn, a photo is made up of a series of shapes and lines. Arrange them to create something…symmetry, leading lines, triangles. Try balancing your composition, then try unbalancing it. This is what an experienced photographer means when they say work the shot.
Very few show up to a scene or a portrait shoot and say, “I know exactly what composition I'll use,” then snap one shot and leave. The rule of thirds is not always the answer. in fact no rule is always the answer (that's kind of the theme of this article).
Rule #2: Never Put Your Subject In The Middle
This one kind of goes along with the rule of thirds. It's a great way to explain to someone how to avoid taking the typical, point at your subject, tell them to smile, and take a picture, kind of snapshot. Telling someone inexperienced with composition to get their subject out of the middle of the frame is a shortcut to teaching them actual good composition techniques.
But you should never go into a shot automatically thinking, “Can't put the subject in the middle.” You should go into every shot trying to determine what the most interesting, creative, pleasing, or just coolest way to compose the shot is. in many instances, putting your subject right in the center of the frame is great. Other times it is not.
Rule #3: Don't Place The Horizon In The Middle Of The Frame
This rule is the landscape photographer's version of Rule #2. There are plenty of times when the horizon looks great right in the middle of the frame. It adds a symmetrical look to the image.
Of course, you better make sure the sky and the ground are equally interesting. If not, then you should certainly favor one or the other. But let the scene dictate your composition, not some rule.

Rule #4: Fill The Frame
This one really burned me when I started shooting portraits for other people. I always heard things like “fill the frame” and “get closer to your subject.” That's all well and good, right up until the point when my client orders an 8×10 or an 11×14 and I've got to figure out how to crop the top and/or bottom of the frame that I just filled!
I've heard a lot of portrait photographers learn this lesson the hard way. But it's not just an issue when you are selling prints to clients. It can also make the difference between getting or missing the shot. If you are shooting anything that moves…wildlife, kids, sports…then trying to fill the frame is just asking to miss the shot.
Most current cameras have all the megapixels you need to allow for some cropping. In fact, most cameras from 5 years ago do too! Go ahead and shoot a little loose. Make sure you get all the important limbs or feathers or whatever your subject has in the frame. Then when you sit down at the computer to edit, you can fill the frame with precision to get exactly the crop you want. If you tried to crop tight in camera and missed it just slightly, you'd be stuck.
Rule #5: Rule Of Odds
“No sorry, I don't do portrait sessions of twins…only triplets, they are more pleasing to the eye.”
See how ridiculous that sounds?
The rule I am talking about is the rule of odds. The notion that odd numbered subjects are aesthetically more pleasing than even numbers. This is another rule that was born out of a shortcut for good understanding of composition. Generally speaking, it is easier to arrange three things to balance a frame than two. So somewhere along the way, this rule was created by someone that didn't want to work harder for the two-fer.

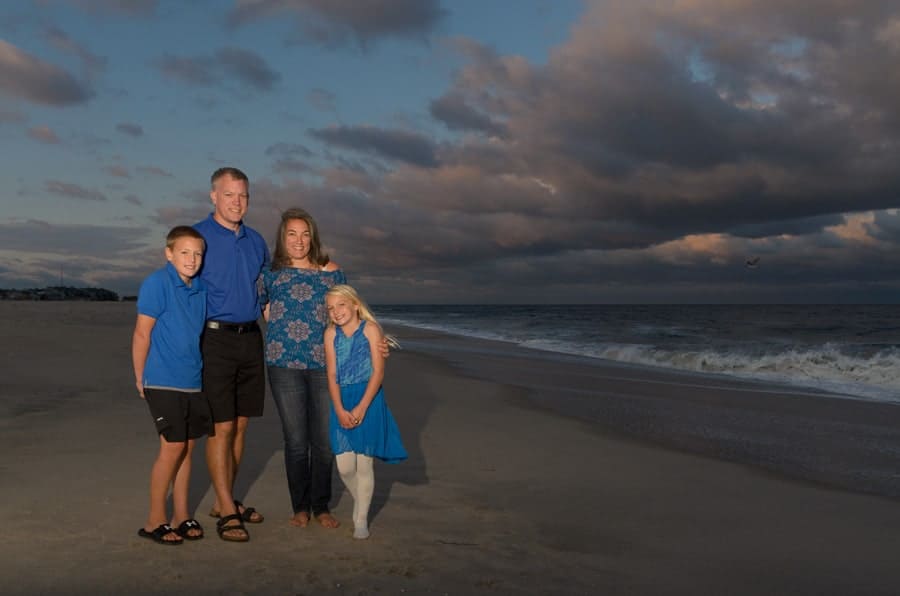
There are many ways to compose two subjects well. The obvious is symmetry, but that is not always the desired effect. You can try placing the subjects at differing depths. You can look to create a juxtaposition but taking the shot in a way that highlights their differences and distinctions.
You can also use different angles or move the subjects if you can (no landscape photographers, you can't move that tree) to use the two subjects to form one shape. This is most common when shooting a couple, especially an engagement shoot. You don't always want 2 distinct subjects. You can pose them so that they form 1 shape. This can be done in landscape photography through camera positioning and angles as well.
Rule #6:Leave Space In The Direction Your Subject Is Facing Or Moving
We are going to get all the composition rules out of the way early here. The rule says that whenever your subject is looking or traveling across the frame, you should leave space ahead of them within the frame. It let's you show where they are going and you are giving them room to move or look. For example, if your subject is walking left to right, then put them on the left side of the frame so they have all that room to the right.
New rule, use direction and space to create the feeling you want. Want to make the photo look normal and conventional, then follow the rule. I don't mean this in a bad way either. A family photo shoot should have that “normal” comfortable feeling. But don't do it because the rule says so, do it because that is the feeling you want.
Want to create tension in a photo? Take a frame with the subject on the right and looking right. Even better, have them on the left and looking left. Since we read left to right, having the action in the photo flowing against that convention creates even more discord or tension.
Rule #7:Blur The Background For Portraits
This Background blur is great for isolating your subject from the environment. I love a good shallow depth of field portrait.
But it is not a rule.
It's a technique that you can use or not use depending on the situation. Shooting an environmental portrait? All that bokeh won't help you convey the feeling of the location.
Environmental portraits are some of my favorites. They allow you to convey more about your subject than just what they look like in front of a blurry background. They also let me do landscape and portrait photography (my two favorite genres) at the same time. If you haven't tried shooting some wider angle portraits with more depth of field then you need to get out there and try it.
It take a little more work (which is probably why so many people just go bokeh crazy for portraits). You need to make sure there is nothing in the background that is distracting from the subject. If you are using a wide lens, you also need to be careful not to get the person too close to the edge of the frame where the wide angle distortion is at its greatest.
Probably the trickiest part of a wide angle portrait is balancing the light between the subject and background. Flash helps here as does a little bit of Photoshop skill.
You should also attempt to compose the image similar to how you would for a landscape shot.
Helpful Tip: Your foreground interest is the person.
Rule #8: Expose To The Right
Ok so this is less a rule you should break and more a rule that needs a better definition.
Exposing to the right is generally explained in terms of the histogram. Conventional wisdom says to get as much of the histogram to the right (the brighter side) as you can without blowing highlights in order to capture the most data.
This is changing with the evolution of cameras. Many recent cameras are really good at shadow recovery. At the same time, they may blow highlights even when the histogram doesn't show any pixels touching the right side.
The new rule should be: Learn your camera's sweet spot.
This is especially important when you are in a situation where you better get the shot. It can be better to err on the side of under exposing rather than over exposing. You'll get more to work with. When photographing people, you may also avoid those hot spots of light reflection on the skin that can ruin an otherwise good photo. Many sensors will even give you deeper richer colors and even better skin tones if you under expose a little.
Rule #9: Get It Right In Camera
This one goes hand in hand with the last one. It isn't wrong necessarily, but just needs clarification. “Getting it right in camera” does NOT mean that the photo looks perfect without any adjustments.
To begin with, the image you see on the back of your camera after a shot can be quite different than what the actual RAW file looks like. This is dependent on the camera brand and model as well as what settings you might have selected. So even if you look at your LCD screen and think, “Yep, nailed it!” You might get home and wonder what happened to that great shot your saw on your LCD.
Getting it right in camera really means capturing the scene with an exposure that will allow you to get the best result out of the file. Experienced landscape photographers and video shooters know this. The RAW file might look under-exposed and flat, but it has all the data you need to create a well exposed, great looking final result.
Like I said in Rule #10, you need to know your camera. Know its limits, know its strengths. Shoot your images to take advantage of those strengths.
Rule #10: Don't Cut Off Limbs
It's ok, they'll grow back.
But seriously, there's nothing wrong with cropping at someone's limbs. You just need to know the best way to do it. Generally speaking, it is less unsettling for someone viewing the photo if you crop the limbs between joints rather than at the joints. I don't know the actual psychology behind this but it might have something to do with cutting off at the joints making it look more like a limb is missing while cutting between the joint reassures the viewer that the limb does continue past the frame.
Yeah, kind of a odd thing to have to consider, but if it makes my client want to buy more prints, I'll go with it.
Rule #11: Don't Shoot Portraits At Midday
Well first, you may not have a choice.
In which case you'll be happy to know this rule can certainly be broken.
It just takes a little work. First, get out of the direct sunlight in any way possible. Find a big tree, go behind a building, or just buy a giant umbrella. Getting your subject into open shade is basically the same as having a giant softbox. In this case the sun is reflecting light off of everything and you get a really soft light.
Next, get comfortable with light modifiers. The really soft light is great, except that it's kind of boring. Start off with a simple reflector which will add a pop of light to the subject's face. Then try experimenting with flash. It can take a lot of power to compete with midday light, but if you found some good open shade then you aren't trying to overpower the sun, you are just looking to add a little direction to the existing light. This will add interest and character to your subject.
So there it is, 11 Rules that you should be breaking. It all comes down to not letting any instruction you hear stifle your creativity. If you want to try something, then try it. See if it works. It may not but that's ok. Failure is a great teacher.
I never liked rules anyway.
love what you are saying it all helps
Thanks Rosie!
Great article. I never liked rules either.
Yep! Don’t let anything hold back your creativity. Better to try something cool and have it not work out than to just make textbook photos all the time.
Important and single tips. I am not a photographer, but for my important takes I use to play with speed, apertures, focus, and then I go to my computer, and continue playing, hearing my beloved Pavarotti
Thanks Luis!