
Here are 20 things to think about that will hopefully help you in your quest for to make better photographs.
If we put all the complicated stuff to one side, photography is after all about producing photographs that we as photographers like, and more importantly that other people like.
And the better we all are at taking photographs the better the photographs are that we take.
If that makes any sense.
Anyway, I hope that there is something within these 20 thoughts that you can take away and use to develop your photography skills.
1 – Go out and take photographs.
This really is important. Just get out there with your camera, whatever it may be, and take photographs. This is the single biggest tip I can give to anyone who wants to improve their photography. And in include myself in that.
Taking photographs.
Photography is not gear, photography is taking pictures. Well actually photography is defined as “The art or practice of taking and processing photographs.”
Art or practise.
Taking and processing.
Photographs.
This is the definition I found in the Oxford Living Dictionaries
That is authoritative enough for me then!
Taking and processing.
That is all.
Simple really?
2 – Think about what you are taking photographs of
What are you trying to photograph? What do you want to see when you have finished taking and processing all these photographs?
If you go out with intent, you will probably produce better photographs. If you go out without a clue what you want to photograph you might get a great shot, but in my opinion it is less likely than if you know what you are trying to achieve.
3 – Look at the scene before taking photographs
When you arrive at your location, don’t just start shooting straight away. Look around. Take in the view, the sights, the sounds, the smells.
Get the feeling of a location.
Now if this all sounds like arty farty nonsense just trust me and try it once. What have you got to lose after all?
It has been said that you should not place your tripod on the ground when you get to a location, as this can restrict your movement. This is a fair point, until you have disciplined yourself that is. I like to get to a location, plonk my tripod down and have a good look around. If I need to move I move. I just put my tripod on my shoulder and move wherever I want.
I can often be seen out and about with my camera on my tripod slung over my shoulder – ready to shoot but not restricted by my camera being on my tripod.
4 – Use a tripod
Talking of tripods, use a tripod. Put your camera on a tripod and it does one thing immediately. It makes taking a photograph a more considered thing. And it slows you down. And when you have to go to the effort of picking up your tripod and moving it this becomes an act involving more time and effort. Trust me on this one – use a tripod and you will take better pictures, and as importantly less rubbish ones.

I much prefer taking photos with my tripod.
5 – Think about composition more than anything else
At the end of the day, the most important thing in a photograph is just that – the content. Get the composition wrong and you can spend forever in Lightroom and Photoshop and what will you have?
An image that might be perfectly processed but one that has a poor composition.
Or as I would call it. Technically perfect but still boring. And will a non-photographer like a photo like this?
Probably not.
Start with the composition, work on this aspect if nothing else and your photographs will improve.
6 – Check the edges of the scene in your viewfinder/ screen.
I do this to see if there is anything in there that I do not want. This is much easier to do if you mount your camera on a tripod. In fact, thinking about this how many people shooting handheld do this properly?
I know that I don’t when shooting hand held.
I rely on the amazing abilities of Photoshop that allow me to remove virtually anything, but try not to rely on this in the image capture process.
Of course I still do remove things in Photoshop, and do still include things consciously in pictures that I know I will remove later in Photoshop, but I still try to stick by the fundamental principle that I do believe in
Get it right in camera
7 – Try different angles and viewpoints
Don’t restrict yourself to just standing and taking photos from eye level. Get your camera up high, and down to the ground. Move to the left, move to the right. Hmmm sounds like a song!
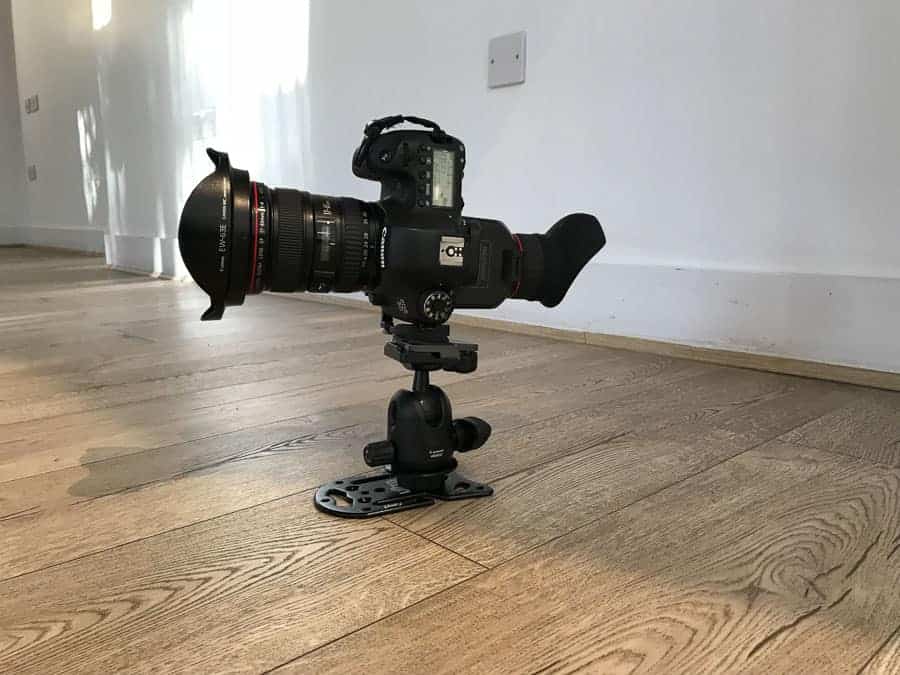
You can get higher by simply holding your camera above your head – yes there is the focussing to contend with but with a bit of thought this perfectly doable. And then you can put your camera on the end of a monopod and hold it high, or go even higher and get a painter’s pole and remotely set your camera off.
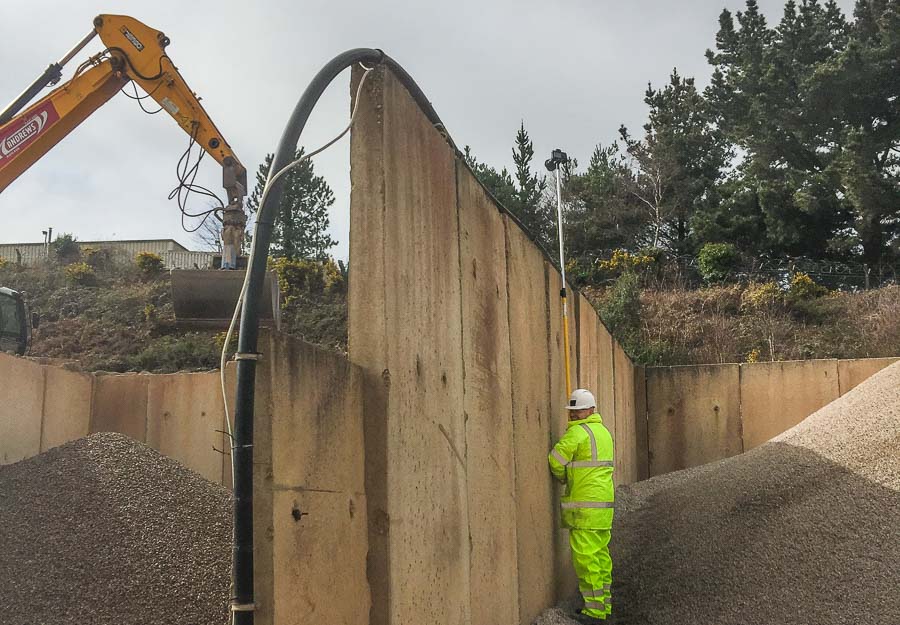
Sure this takes some kind of wireless release, but I got a painters pole and camera mount for less than £50, and using the wi-fi on my Canon 6D have taken some great shots from on high. I have used my painters pole to photograph an excavator on top of a pile of gravel – this is me doing just that.
I also hold my camera just above the floor and either have lots of foreground in or point the camera up to get a different viewpoint. Top tip here, which is very useful in England, – I have a groundsheet in my car so I can lie down on the ground no matter how wet the floor is.
I have probably taken shots from ground or floor level on every commercial shoot I have carried out, and always use these images.
Moving to the left and to the right gives different angles.
You can of course just change the position from where you are shooting to get a different view – try all these things and see what you get.
8 – Don’t worry about photography gear, but know learn everything about what you have. And use it.
Buy the best gear you can that suits your needs. Buy the accessories that will help you take the photographs you want to take. You can find out all about gear on the Improve Photography website. I won’t go on about that here.
But I will say this.
Once you have got the base set of gear that you need learn how to use each and every piece of kit.
Read the instruction manuals. OK confession time here. I have just found out something in valuable about my Canon 6D that I should have known three year ago.
Learn how to use all the features on your camera. You should aim to be able to change lenses and settings in complete darkness – if you can do that you have cracked it.
You should also know how to quickly react to changing situations.
And once you have done all this stop looking at gear and just use what you have.
9 – Don’t spend forever processing images.
Know when you are done. Lets face it, we could all spend forever working on images in Lightroom, Photoshop, Luminar, Aurora HDR, Nik Collection etc etc etc. But there comes a point where an image is done. Recognise that point and move on.
I have been guilty of this in the past, but now love cracking through images as I never know what I am going to end up with from a shoot, but know that I will not get much if I spend forever faffing around in Lightroom.
I follow my own workflow, meaning that most of the time when I have made an adjustment then that is that. I rarely go back to a slider unless a change elsewhere has affected the image so it needs to be corrected.
Commercial architectural photography images can take me a while to process, 10 – 20 minutes per image is not unusual, as they have to be technically spot on. Travel and landscape photography images I produce in much less time – 5 minutes is normally plenty of time.
10 – Take landscape and portrait photos
Don’t take every photograph in landscape format. Turn your camera through 90 degrees and get a different angle on things.
Portrait format can work great on landscape images, and landscape format can work great on portrait images.
How do you do this when shooting on a tripod? Simple.
Get an L bracket. This attaches to your camera though the tripod mount screw, and has two tripod mount attachments, one on the bottom of your camera, one on the side.
You can buy a universal L bracket, or one designed for your camera. You can get a good universal L bracket for £50.
Once the L bracket is on your camera you can quickly swap from landscape to portrait even when working on a tripod. Don’t forget to refocus and check the exposure, but doing this gives you an alternative for any image you want.
11 – Print your photos
I am going to do this more in 2018. When I say more I am going to do this in 2018. I have half a dozen postcard sized prints on the wall above my desk, but that is all.
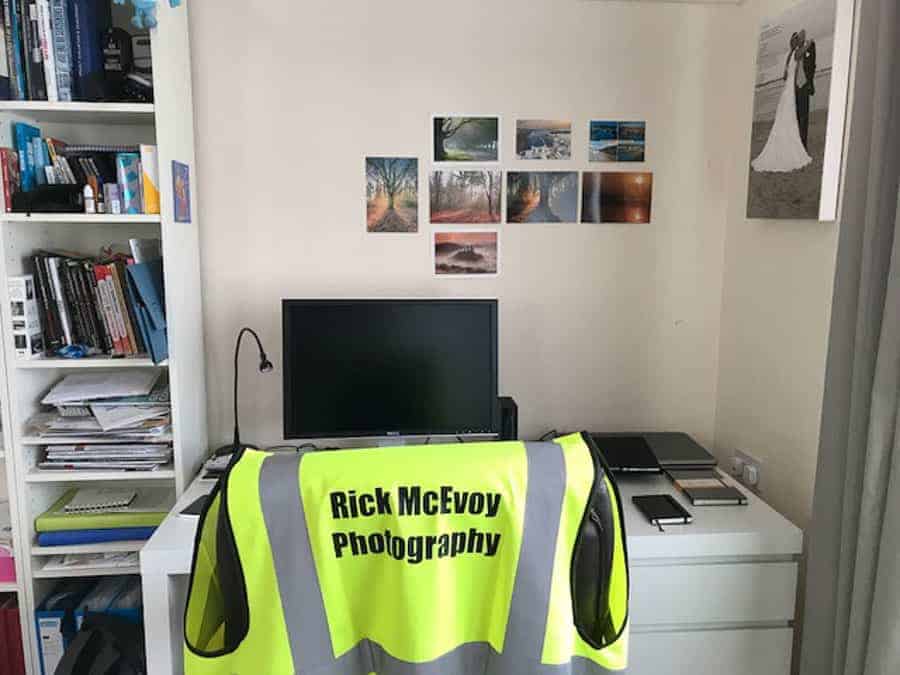
I am looking forward to getting some prints in my hands, and also into a portfolio folder.
As great as an iPad is for showing my portfolio to potential clients, having a set of 20 prints will hopefully have more impact.
If you only ever get your prints done at Asda/ Walmart (depending where you are in the world) then that is better than not getting any prints.
Get 5 prints done and see what they do for you. And get one really big print. That is what I am going to do first – get a really big print. Large prints have real impact.
12 – Get your settings right
Now this sounds obvious, but this is a basic thing that you need to do. Get the settings on your camera right for the situation you are in, and for the subject you are photographing.
This will be much easier if you know how your camera works, and what all the different settings are.
And don’t forget to change your settings whenever the situation demands, or if you are taking a photograph in a specific way.
I have a default set of settings that I set my camera to at the beginning of every shoot which work for me.
13 – Crop images
A post processing tip. Crop an image you have edited to get something different. Pick out one thing in an image and make this the subject matter. This is an interesting exercise, and you might be surprised what you get.
And once you have done this apply the results next time you go out and shoot. Rather than cropping in camera crop with your camera by changing to a longer focal length or getting closer.
In doing this you will be thinking more and more about composition, and making the move from photographing everything into a scene to photographing part of a scene.
Do this as well as taking the photograph you would normally have taken – you have nothing to lose and everything to gain.
14 – Shoot at noon
Why do I say this?
Simple. You will read everywhere about capturing stunning images at sunrise and sunset. Waiting for the lovely golden directional light, blue hour, all those lovely things.
The reality of professional photography is this.
I never photograph a building at sunrise. I sometimes am still there for sunset.
But most of the photographs I take are between the hours of 10 and 2. At noon I just carry on working. I don’t stop because the light is not perfect.
People are not prepared to pay me to sit for two hours waiting for that stunning sunrise.
This being the reality of things, if you have never shot in the worst light possible do so. If I had not done this I would have struggled with my day to day work. I have had to work out how to get the best images I can even at noon.
Try this. Don’t worry, bad things won’t happen. Just don’t tell any photographers that you have done this!
15 – Try the same location at different times of the day
If you can, photograph the same scene in the morning and the evening. At noon. When it is dark. At sunrise and sunset, and the wonderful times before and after.
And look at what has happened. You will see how the light interacts within the scene at different times of the day, and from this you will learn the best time to photograph a scene. I am not forgetting the noon thing – be prepared for both situations – great light and rubbish light.
One day you will be taking photographs in rubbish light, but you should also know when the best time is.
Be prepared for all situations.
16 – Try the same location at different times of the year
Seasons give lots of variety. Colours. Direction of light. Short days. Long days.
You can use the winter months to get out and catch sunrise much later than in the summer (in the UK that is).
And the seasons offer a fantastic range of natural colours and moods and textures to photograph.
It is always interesting to view the same scene at different times of the year, and in returning and photographing the same location you will find more interesting pictures each time you go out. Well I can’t guarantee that of course but you will find that getting to know a location you will know which locations work, and will hopefully explore new parts of a location.
Check out this picture of some water I did not know existed just by some woods I was photographing.
17 – Photograph interesting things
A simple one. Photograph boring things and what will you get?
Photograph interesting things and you have a chance of producing a more interesting photo.
There is the challenge of making an interesting picture from a boring scene to try, but give yourself and chance and photograph interesting things.
Do this and you are going to more interesting places, which has to be a good thing!
18 – Photograph new things
Do you only photograph landscapes?
Go and photograph
- Buildings.
- Dogs.
- Bus shelters.
- Sheep.
- People.
- Motor bikes.
- Chocolate.
- Gravel.
- Cheese.
- Tarmac.
(This is a worrying insight into how my mind works!).
Just do something different – you never know something might work for you that you wold never have imagined photographing.
I will ignore this one if I am being completely honest with you.
19 – Enjoy taking photographs
Photography is a wonderful thing. Enjoy it. Photography should not be a chore. And if you enjoy something you will probably do it better.
20 – Practise, practise, practise
Keep on working on every aspect of your photography. The more you practise the better you will get. And the more you get out there taking photos the more photos you will have.
Summary
I hope that you have enjoyed reading my thoughts – please get back to me with any questions using the comments box.
Now I am off to photograph some cheese.
As a beginner, I was placed in the notion that the more photograph I take, the more I reduce the life of my camera. With that, I seldom go out often to photograph things and people. So any advice?
Hi Mayor
Thank you for your question. What camera do you have? Cameras have a defined shutter life, but I have never had a shutter fail on me.
My advice is to not worry about the life of your camera, just go out and take photos and enjoy it.
Thanks again for the question.
Regards from England
Rick
I wouldn’t say shutters have a ‘defined life,’ but rather they are tested, and the components are likley to last a specific number of cycles. The D7000 is tested to 150,000. This does not mean that once you hit 150,000, the shutter stops working, but rather that most D7000 shutters will last at least 150,000 cycles (most will last longer). I would imagine camera companies test the shutter mechanisms at various shutter speeds, just as the owner will shoot at various speeds. The higher end Nikon cameras D4, D5, D810) are tested to 400,000 cycles.The lower end cameras (D3000 series, D5000 series) are tested to 100,000. Effectively, higher priced cameras have higher quality components that last longer than the mid range and lower priced options.
Hi Mike
Thank you very much for the info on Nikon shutters life. My point was that the primary physical aspect of a DSLR directly impacted by use really is the shutter. I have never worn a shutter out myself though!
Thank you for taking the time to provide this detailed knowledge, which I greatly appreciate.
With regards from England
Rick
My advice is to shoot as much as you can. The fastest way to improve is to practice. As a hobbyist shooter, I have yet to wear out a camera (or even come close to the tested shutter cycles) before the advances in sensor technology pushed me to a new body. Bought a D50 in 2005, a D7000 in 2011, and a used D4 in 2014. It was the ISO performance/low light capabilities and frames per second that propelled me to the next purchase.)
I agree completely. Get out and shoot. I have not worn out a shutter, nor had a shutter fail on me.
The only camera failures I have had have been through dropping my camea from height onto hard paving.
Taking photographs is the whole point – just get out and do it!
With regards from England
Rick
Really very good tips to improve the general photography. Worth Reading and learning
Hi Dhruva
Thank you very much for taking the time to read my article and I am glad that you found it informative.
With regards from England
Rick
I use a Nikon D7000!
Hi Mayor
I have been a Canon user since I was a young man – no idea why I chose Canon when I was 14!
With regards from England
Rick
Great tips, nothing beats experience. Shoot more and think about it while you do.
Number 20. “Practise” is spelled with a “c”. I’m 9 and I know better grammar than you.