
With all the incredible tools available to photographers, it has become easier than ever to create stunning HDR images. Aurora HDR – by software company Macphun – is one of the newer kids on the block to offer HDR editing software. It's nice to have so many options for the post-processing toolbox. It's even better that the options are more powerful, provide better results, and are easier to use with each iteration. How does Aurora HDR stack up? Could it be the key to unlock the potential of your images? Read on to find out.
In short, Aurora HDR (2018 version) is one of the most powerful HDR editors on the market today. It boasts a wide array of tools and features; an intuitive user interface that looks great and is fun to use; and a workflow that can be used efficiently and effectively to create amazing and realistic HDR images. If you regularly use Lightroom or other software to merge bracketed photos, and are either a Mac or PC user, then Aurora HDR 2018 is worth checking out. If you are a current Aurora HDR user, then I say it is worth the upgrade.
To download the free trial of Aurora HDR, click here.
About Macphun
Macphun has a relatively short timeline. According to the Macphun website, the company was founded in 2008 by two college friends who decided to leave the game development business to focus on photography applications. They have been creating award-winning photography editing and digital image manipulation software for the Mac operating system and iPhone ever since. Their wide array of photography apps have traditionally been for Mac users only, and many still are Mac-only. However, the newest iterations of Luminar and Aurora HDR have been developed for both Mac and Windows users. With continued improvements and introduction of new photo editing software, Macphun has become a major player in the market and a competitor to Adobe and OnOne. That competition is good for us.
What is Aurora HDR
Aurora is Macphun's version of HDR photo editing software. To develop the software, Macphun teamed up with well-known HDR photographer Trey Ratcliff. It was first introduced in late 2015 and has gone through a number of iterations since that time. Aurora HDR not only merges bracketed images, but also has a lot of tools and features for editing the final image. It can be utilized as a stand-alone product or as a plug-in for Lightroom and/or Photoshop on Windows and Mac computers. Users of Apple's Aperture or Photos can use it as an extension to those programs. Compatibility with both Mac and PC is a new feature for the 2018 release, although there is some feature disparity between the two versions as of the writing of this article.
First Impressions
For the purposes of this review, I downloaded the 14-day trial version of Aurora HDR 2018 on a newer Windows laptop and my 2011 iMac. In case you're wondering, Macphun allows the installation of the software on up to 5 devices (both Mac and PC). After spending several hours on both machines, editing new images as well as images from the archives, merging multiple image brackets as well as tone mapping single photos, and using the software as a plugin to Lightroom as well as a stand-alone, here are my first impressions of Aurora HDR 2018:
- The user interface looks good and has a familiar feel. In some ways, it is not unlike Lightroom's Develop Module, minus the organizational panel on the left side.
- Most of the editing action takes place with the use of sliders in the right-side panel, similar to the Develop Module in Lightroom.
- There are tons of image adjustment tools – called Filters – in Aurora HDR 2018, which can be intimidating at first glance.
- A number of presets are available and built-in to the software. These can be a good starting point for editing an image.
- Although there are so many tools and features, everything is smartly laid out and intuitive to use. Icons have hints to let you know what they are for.
- Filters are very responsive, giving instant feedback when the sliders are moved.
- The ability to use layers is a nice touch to give you more control over image editing.
- User experience is good whether using the software as a stand-alone or a plug-in to Lightroom. My preference is to use the plug-in to keep everything nicely organized in my Lightroom catalog.
- Aurora HDR 2018 is easy to use. Image editing can range from very simple – with one-click processing using a preset – to much more in-depth using any combination of the filter controls.
- The $99 price tag (for new users) seems a bit steep for yet another piece of software.
Multiple Image Merging
Merging multiple images of the same scene at different exposures is how you really expand the dynamic range. That's the real power of Aurora HDR. When you load bracketed images into Aurora HDR, there are a few options to consider before making the merge. First off, if you were hand-holding the camera, you will want to select Alignment to make sure all the images are lined up. This wouldn't be necessary if the camera is on a stable tripod. Clicking on the little gear wheel dropdown menu reveals three additional options. Ghost Reduction should be selected if there were objects that may have moved between frames, such as people or wind-blown vegetation. Selecting Color Denoise will reduce the amount of color noise created in the dark shadows during the merging process. Selecting Chromatic Aberration Removal will help to remove the green and purple fringing that sometimes occurs around edges between high contrast areas. Once all the options are the way you want, just clicking on Create HDR will merge the photos so you can get to work.
Single Image Tone Mapping
Although merging multiple images is typically what you will do, there is also the option to load a single photo into Aurora HDR. With a single image loaded, there is no need for the Alignment setting. In its place is the option to select Tone Mapping. Choosing this option means that the software will apply its algorithms to best adjust the tones in the image for a more balanced look. This provides a good starting point and the great selection of tools will help to create the final image. Within the gear wheel dropdown are the same Color Denoise and Chromatic Aberration Removal settings as found in the multiple image merge preview.
Tools and Features
As previously mentioned, Aurora HDR has tons of tools of features. If you're the type who likes to torture pixels and tweak images to their fullest, you will love all the options. On the other hand, if you prefer to keep things simple, great results can be had with just a few mouse clicks and slider adjustments. There is something for everyone.
Rather than try to cover every single feature and tool in Aurora HDR (that would be a long article!), I figured it would make more sense to share some of my favorites. Besides the typical image adjustments, these are some of the tools I found most compelling and enjoyed using them to create images that pop off the screen. These are in no particular order.
HDR Enhancer
 This is a new filter in the 2018 version of Aurora HDR, and is kind of like a clarity slider on steroids. Not only does it add detail to the image, but also enhances color and contrast. It's a slider adjustment, so a quick move to the right can really liven up an image in a hurry. What's nice is that it does this without introducing the dreaded halos or other nasty artifacts.
Before & After Comparison
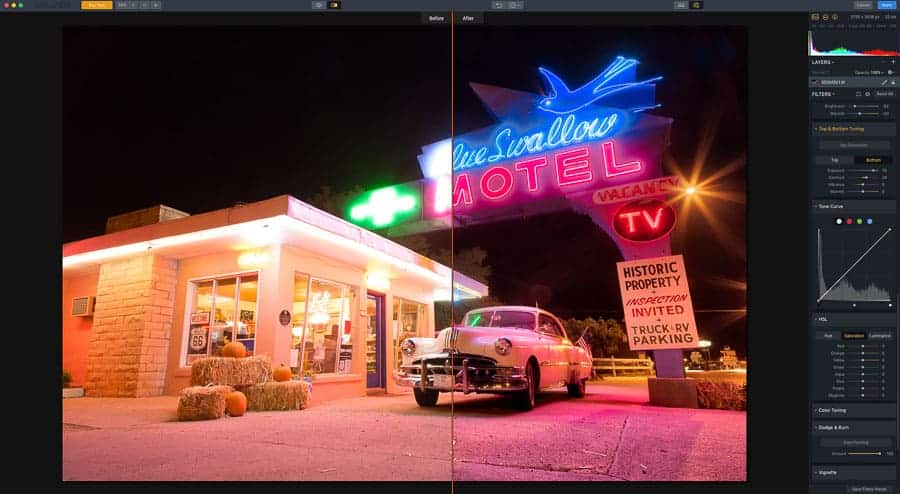
While working on an image, I like to see where things started and how the editing process has changed the photo. Clicking on the little eyeball icon above the image will switch between before and after views, but the one I really like is the side by side comparison.
With this feature selected, the ‘before' is displayed on the left and the ‘after' on the right. Sliding the split to the left reveals exactly how the image has been changed. This tool is great for checking your work.
Dodge & Burn Filter
This is also new to Aurora HDR 2018. There's not really anything revolutionary about this – it is simply a tool to selectively lighten or darken areas of an image. I like doing this to direct a viewer through an image, draw particular attention to a subject in an image, or tone down areas that could be distracting. There are plenty of other programs that do this, not the least of which is Photoshop and even Lightroom. It's just nice to have
all the tools in one application sometimes. There are a few things that could be improved. For instance, changing the Amount slider seems to affect all the brush strokes you've made in the image. It would be nice to have a “New” button, or something similar, to let the software know you want to make separate adjustments that can be controlled independently. This is the first time for this tool, however, so I suspect there will be improvements down the road.
Layers & Masking
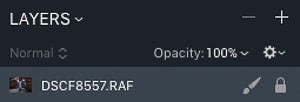 Layers have been in Photoshop since the mid-90s, so they are certainly nothing new. They are also incorporated in other photo editing applications, such as OnOne. Adobe is still holding out on putting layers into Lightroom. Using layers in Aurora HDR is very useful for applying certain image adjustments, or even presets, only to specific parts of a photo. For example, you could open a new adjustment layer for dodging and burning, then use a layer mask to brush in (or out) the adjustment to fine tune the image. It is also possible to add an image layer for creating composites. Complex compositing would likely be better handled in Photoshop, but it's nice to have these tools in Aurora HDR as well.
Image Radiance Filter
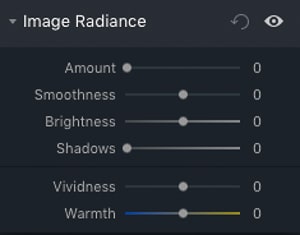 The Image Radiance Filter gives an image sort of an ethereal glow by darkening the shadow and mid-tone areas and mostly leaving the highlight areas alone. This filter consist of Amount, Smoothness, Brightness, Shadows, Warmth, and Vividness sliders. There is a seemingly infinite number of combinations to get just the look you want. For a more glow-y (is that a word?) look, crank up the Amount and Smoothness sliders. If the shadow areas are a bit too dark, increase the Shadows slider. This is certainly not a filter to use on every image, but it is fun to experiment with the different looks in certain situations.
Glow Effect Filter
The Glow Filter sort of works opposite of how Image Radiance works. When moving the Amount slider, the effect is primarily on the highlight areas of the image. It can be a subtle change, depending on the image, but it creates glow (hence the name) in the brighter areas. There are also other sliders as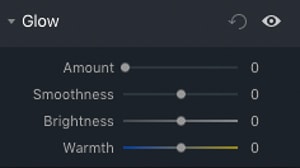 sociated with this filter, such as Smoothness, Brightness, and Warmth. These additional adjustments allow you to fine-tune the filter to taste. Once again, this isn't something to use on every image, and works best to place the adjustments on a separate layer to allow for application of a mask.
Smart Tone Filter
This is an interesting filter, consisting of only a single slider. When the slider is moved to the right, darker areas of an image are brightened and the highlight areas are mostly untouched. When moved to the left, the highlight areas are darkened, with little effect on the darker areas of the image. It's kind of like having a highlights and shadows recovery slider all in one. I did notice that the Smart Tone slider has a greater effect when brightening shadow areas than the Shadows slider and has less of an effect on darkening highlight areas than the Highlights slider. I'm not exactly sure how this magic works, but I like to use it to achieve just the right balance of tones in my images.
A Plethora of Presets
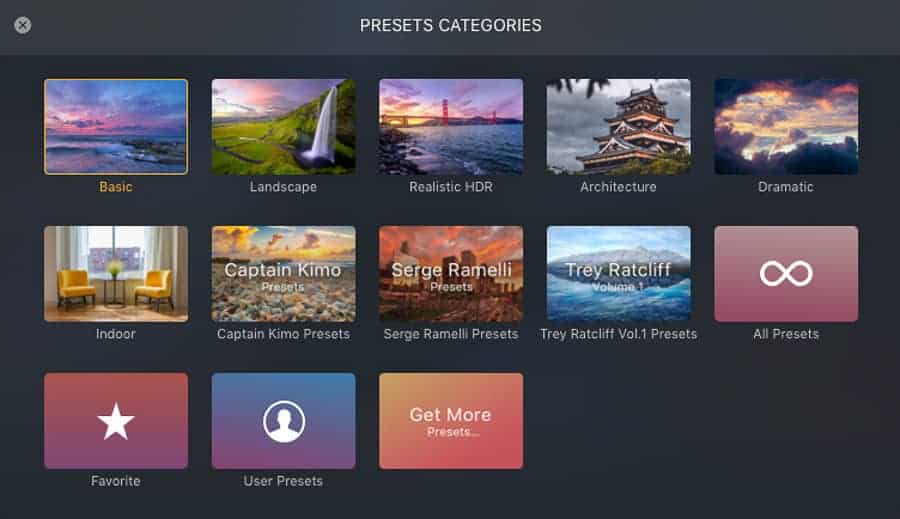
Just like with Lightroom and about all other image editing software, there are presets. There are lots of presets. The trial version – and I assume this would be the same if purchasing the software – comes with 99 presets in 9 different categories. Some of the categories – such as Landscape, Architecture, and Indoors – give some clue as to what type of images on which they might work best. There are also categories with presets developed by famous HDR photographers – like Trey Ratcliff, Serge Ramelli, and Captain Kimo (ok, admittedly I wasn't sure who that last one was, but did look him up). Tons of additional presets are available for download, some free and some not. There is the option of creating your own presets as well.
I enjoyed clicking through the presets to see what they would do to certain images. Most of the time, however, they are not one-click wonders to make your images just how you want. They can be a great starting point, though.
A Few More Things About Filters
The filters are where the manual adjustments are made and are fun to use. This is where you can push your creativity – and your images – to the limit. This article does not discuss each filter in detail, but there are a few additional points that I thought are important to cover here.
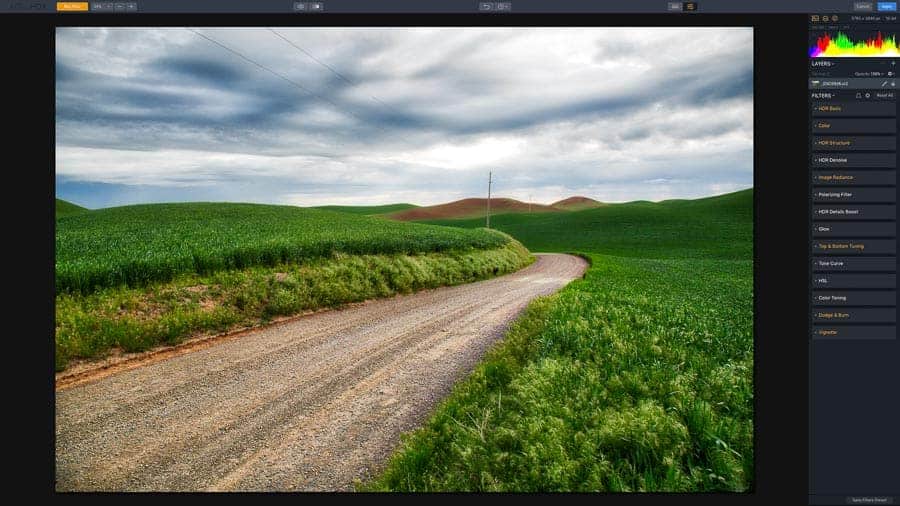
- There are 14 filter categories in the right side panel in the Aurora HDR interface – HDR Basic, Color, HDR Structure, HDR Denoise, Image Radiance, Polarizing Filter, HDR Details Boost, Glow, Top & Bottom Tuning, Tone Curve, HSL, Color Toning, Dodge & Burn, and Vignette. Many of these are familiar and share the same name and many characteristics as their Lightroom counterparts.
- Each filter consists of one or more sliders that are used to make the filter adjustments.
- The general workflow in Aurora HDR – which is similar to how I do things in Lightroom – is to start at the top of the filter stack and work my way down.
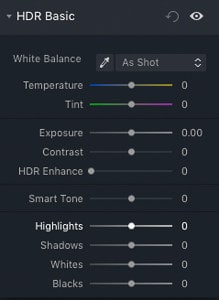
- I used the HDR Basic filter for every image. Whether or not other filters were used was on a case-by-case basis. You could use all of the filters for an image if you want, but you don't have to (I never did).
- Any time you make an adjustment with one of the sliders – or if a preset makes an adjustment – the filter name is highlighted to indicate a change.
- In the top right corner of each filter panel, there are two icons. One will reset all the sliders within the filter. The other (which looks like an eyeball) will turn off the slider adjustments so you can see how things changed in the image.
- Having all the filter panels open at once is overwhelming. Go to the Filter menu and select Single View Mode. With this option turned on, only one panel will open at a time, and automatically close when another panel is opened. Note that I only found this option in the Mac version. Perhaps I was looking in the wrong place or this setting hasn't made it into the Windows version yet.
The Bottom Line
Let me start by saying that I found Aurora HDR 2018 a joy to use. It is responsive, very powerful, and offers tons of tools for image editing. It is also very intuitive, as it didn't take much time poking around to figure out how things work. I will say that this is the only version of Aurora HDR that I've used. From what I understand, the 2018 version is a total re-write and a dramatic improvement over previous releases. If you currently use an earlier version of Aurora HDR, I would say it is worth the $59 price tag to upgrade to this version.
To download the free trial of Aurora HDR, click here.
New users will pay $99 for a licensed version of Aurora HDR 2018 to use on up to 5 devices. That's not horrible for a piece of software that you own, but I presume that Macphun will continue with yearly updates, which will be additional cost. Is it worth it? I don't like this answer, but have to say, “It depends.” If you do a lot of HDR shooting, and are not totally satisfied with your current workflow or results, I would say yes. I personally use Lightroom for HDR merges for now. However, I'll be watching for Aurora HDR 2018 to go on sale and snag a copy then to save some money. If you're on the fence, I would highly suggest taking it for a 14-day trial run. I think you'll be impressed.
Thanks for such informative article if you are the user of windows 10 operating system if you face any type of issue then you can fix the trouble using your control panel in windows 10 operating system just visit here and get that how to access control panel in windows 10 operating system in easy steps.