

Put all those ideas for sweet, enchanting portraits away for a minute. Pull your fears out from the deepest recesses of your mind. We’re going to carefully peak into the world of spooky Halloween portrait ideas! Put on your bravest face, here we go.
When I decided to write this article, I had to really force myself into it. Not because it is scary, though my wife would have her doubts since I can’t even sit through a run-of-the-mill scary movie, but because it’s something I have never done before.
Forcing yourself to push your own boundaries and get outside your comfort zone is one of the fastest ways to improve your photography. Plus, it’s a whole lot of fun! I know that the images I created in the following sessions could be improved in a lot of ways, and I know that I can work on that.
#1: The Ghost
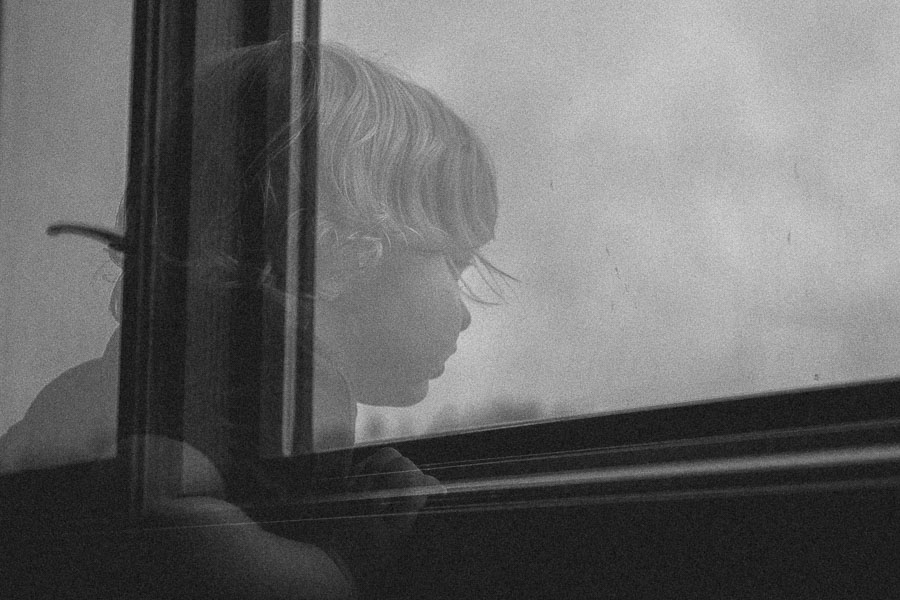
For this kind of shot the concept is simple. Quality execution can be more difficult. This is a very simple composite photographic technique where one shot is taken with the subject in the scene and another is taken without the subject. By layering the two shots in Photoshop with the photo containing the subject on top and dropping the opacity of that layer they become transparent.
There are seemingly limitless applications of this technique. Ghosts can be placed anywhere and in a wide variety of images. Old graveyards (discussed later) would be a great location to shoot ghost images. False tombstones can be purchased as props as well. Wooded areas would also provide a great backdrop to your ghost image.
- Black and White tends to work well
- Adding grain in Photoshop also had a tendency to create an image with better feel
- There needs to be mystery in the image-Looking out a window worked in this case
#2: Levitation
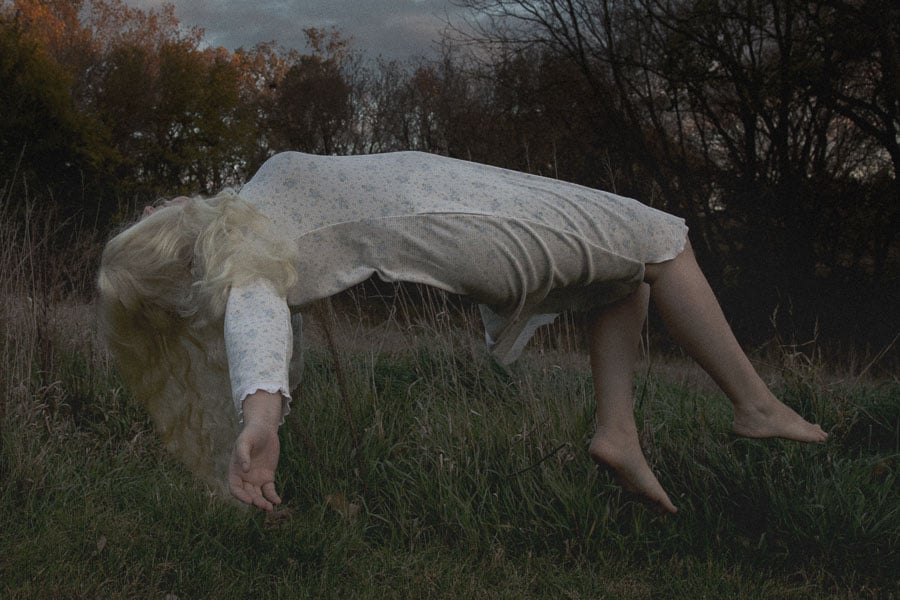
This is another Photoshop trick. This can be used in creepy ways suited to Halloween or any number of other ways. The idea is actually fairly simple and is very much like the ghost technique above. With your camera on a tripod and locked in place, take a shot of your scene without your subject. Then have your subject enter the scene and prop them on a stool or some other device that raises them off the ground. Experiment with a variety of poses.
In order to process the shot in Photoshop, you place the image with your subject on top of the empty scene. Using a layer mask, you simply mask out your levitation device. Boom, magical floating person. You will probably find that some of your poses are spooky while others are just silly. Have a lot of fun with this one!
Levitation was the technique used for the image at the top of the article. It is a composite of several images and for each exposure we simply held the pumpkins in various locations and masked myself and my wife out of each. I had the kids follow us around and look up at the pumpkins and left them in a couple of the images where it worked. That one was a lot of fun to shoot.
Some tips to help you with levitation photography:
- A tripod is required for successful levitation images.
- Take photos of your empty scene repeatedly during the session. This can be helpful since it can be easy to bump your tripod and due to the fact that lighting may be changing.
- Try to minimize the amount of Photoshop work you will have to do in masking out the supports for your levitating objects/people.
#3: Ghost Story Lighting
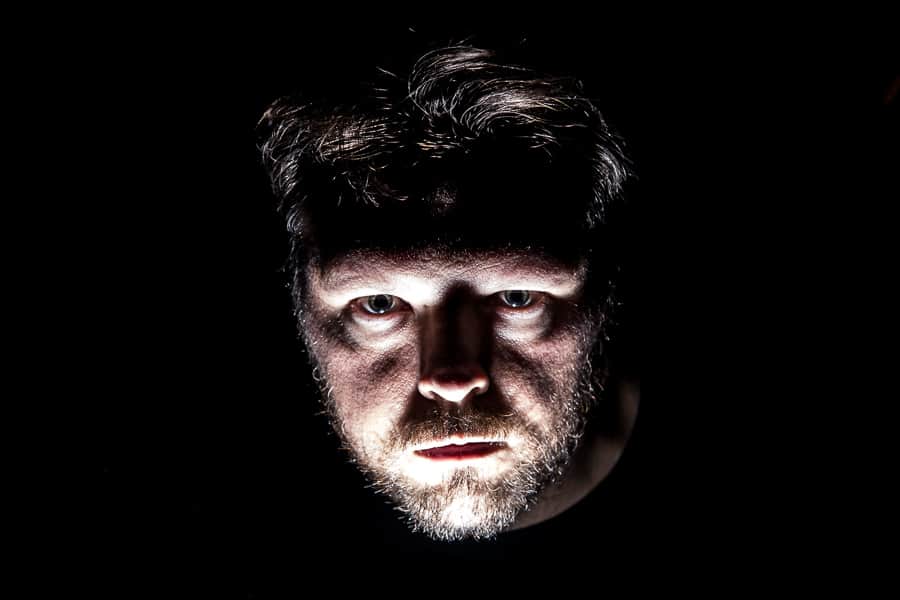
Think back to the last time you sat around with a bunch of friends telling ghost stories… You probably held a flashlight under your chin so that an odd series of shadows swept up your face. We’re very accustomed to seeing faces which are lit from above, so when they’re lit from below we know something is not right.
For my example photograph of this, I used an off-camera flash placed below my chin to create the effect. Using a flash rather than a flashlight allowed me to clip the background to black. During this shoot, I also experimented with smoke in the frame and the flash did a nice job of freezing that smoke. This could be useful in future productions.
Tips for creating good “Ghost Story” Lightning:
- Take lots of shots since the smallest change in positioning can create a drastic difference in the effect.
- Play around with many different facial expressions
- Be aware of the ceiling in the room where you are shooting. If you have a ceiling close (white or any color) the flash will bounce back down and may detract from the desired effect. I shot in a room in the basement with a very high wood ceiling.
#4: Relocate Body Parts
I got this idea when I saw a composite image showing a man and a woman photographed together. He was headless and she was holding his head in her lap. It appeared that his head was simply removed in Photoshop and placed in her lap.
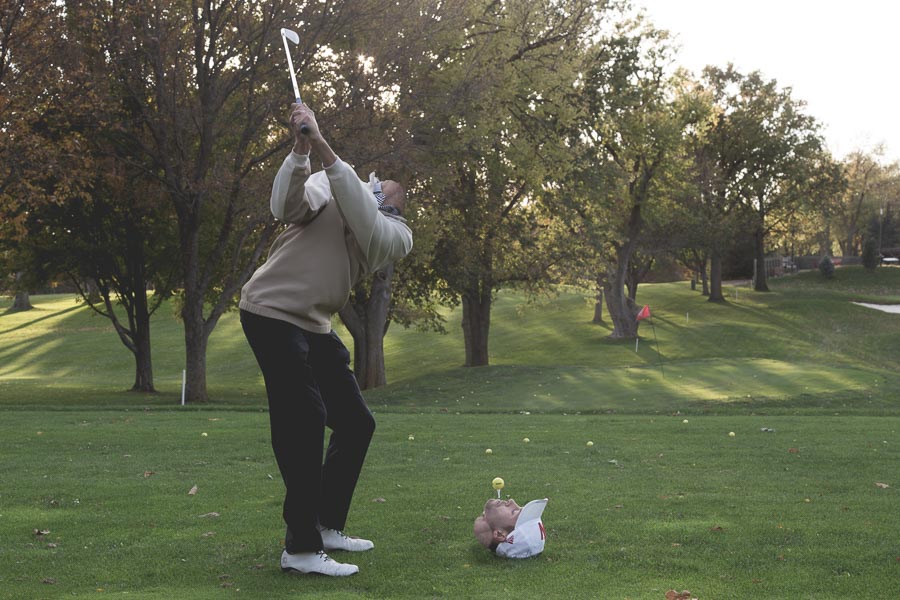
I decided to play on this idea and try to work out a way to do it well. I had a model who is one of my students. I had envisioned having a final image that depicted a headless version of himself hitting a golf ball that is teed up in his own mouth.
Three images were taken to achieve this result. I took an empty scene, one shot of him at the top of his backswing and another with him positioned carefully on the ground holding the tee in his mouth with the ball balanced on top. The most difficult part of this was balancing the golf ball long enough to get a shot.
Post-processing was a bit more difficult. Making it look somewhat “realistic” was a bigger challenge than I had anticipated. I will have to do some research on adding some elements to make it more convincing. Perhaps even applying fake blood carefully before the shot could help. Something to try!
Tips for re-locating body parts in an image:
- Think ahead to the post processing and try to anticipate what might make it difficult
- Take many shots to increase your chances of having something that will work well
- Take multiple shots of your empty scene during the shoot so that you can account for changing light, etc.
- A tripod is a must
#5: Use Juxtaposition
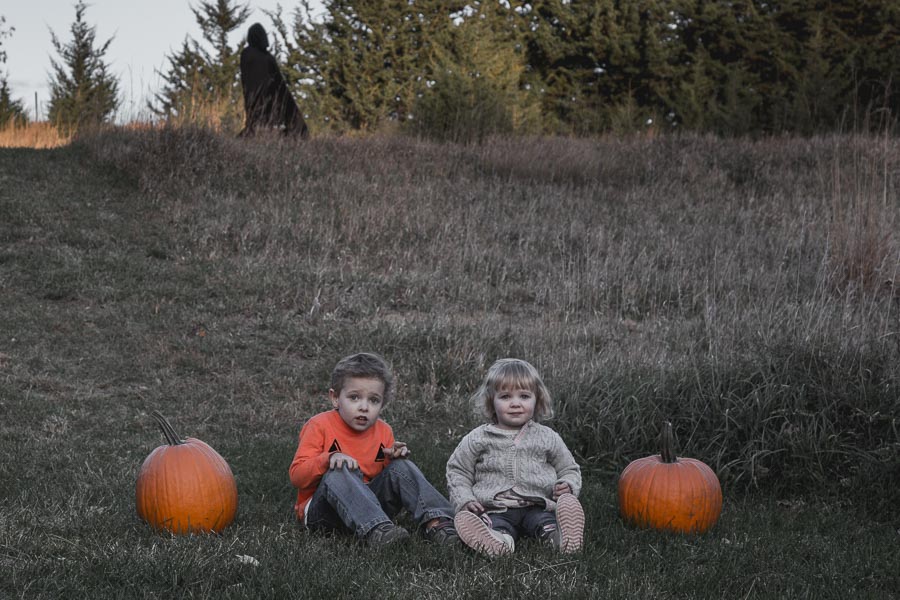
In short, this is about placing two subjects in your frame that contradict each other. In my sample image, I’ve placed the children between their pumpkins for what might be a typical snapshot Halloween portrait. In the background, we have the frightening hooded/cloaked figure standing on the hill and looking down on the kids. The figure happens to be their mother and they may or may not be aware of this fact.
I was originally set on using an image where both of the children had sweet smiles or peaceful looks on their faces but this one just seemed to work very well.
Tips for using juxtaposition:
- Try many different approaches to this (ghosts next to people who seem unaware, unexplainable shadows, etc.)
- Try to tell some sort of story with your composition
#6: Play on Natural Fear

There are some things that, for any number of reasons are just plain terrifying. It could be that they bring up some memory of a scary story that we’ve heard or perhaps they play on a real fear that we possess.
Things like being afraid of the dark is something that is natural to a large number of people, so darkness can be used in a photograph to create this mood of fear. Another common fear that a lot of people have is a fear of what might be lurking beyond what we can see. This is related to darkness but can be used differently. For example, what lies beyond the surface of the water where our eyes cannot penetrate. What lies beyond a row of trees (or a single tree), or beyond that row of bushes.
In this example photo, I am playing on the protectiveness we have for our children as well as our not knowing who it is hidden behind the tree.
Tips for playing on natural fear:
- Think about what you find frightening and try to show it in your image
- Use scenes from horror films for inspiration
#7: Shoot in an Abandoned/Creepy Location
The location in which you shoot can go a long way to creating the image you are after. This applies to all types of photography. I was able to find a couple of really good places in which to set my scene.
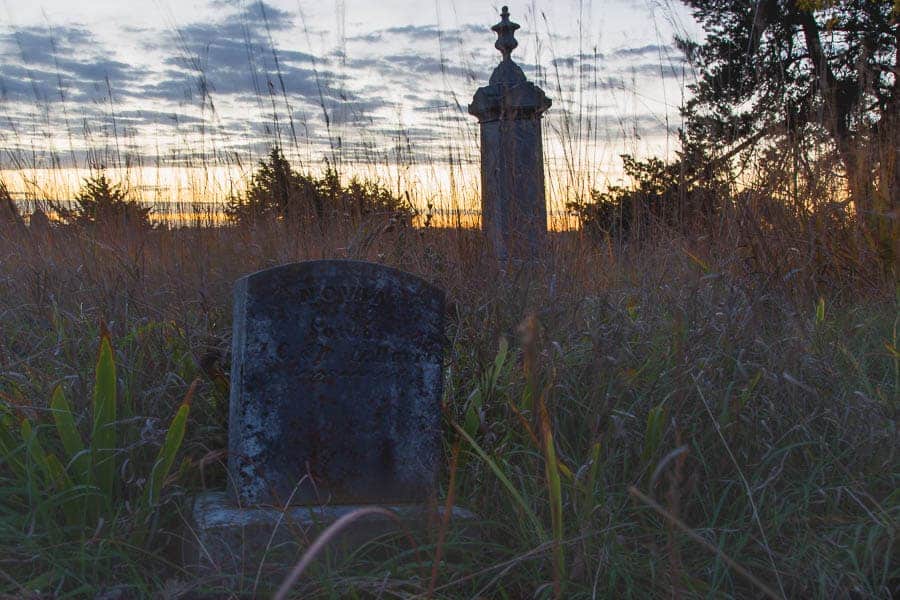
One such scene I stumbled across was an abandoned cemetery. The property has been sitting for quite some time unattended to which gave it the perfect spooky feeling. Visiting the location in broad daylight was creepy enough to keep me from doing any kind of night shoot. Plus, I am fairly certain that a skunk calls the cemetery home, so just one more reason not to go there at night.
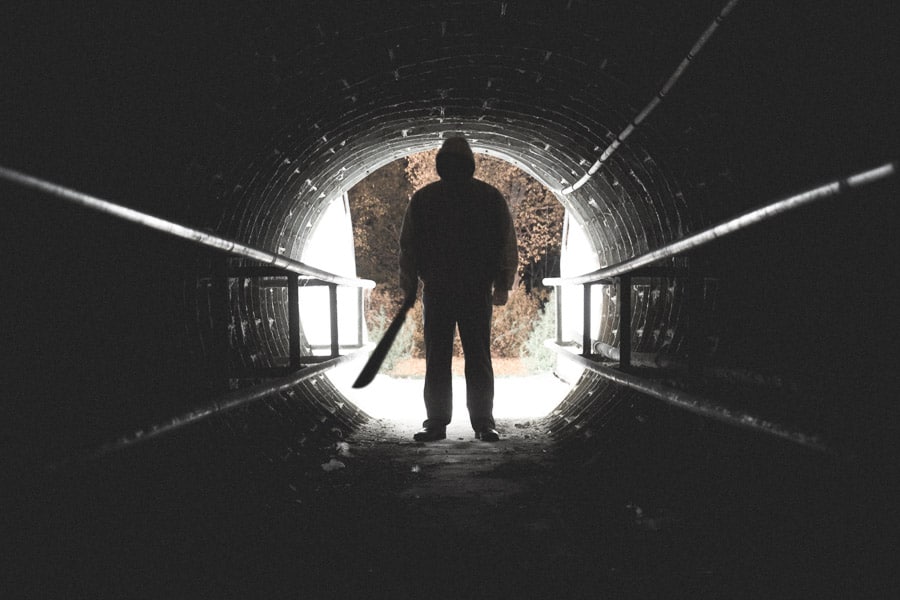
Another location that worked very well for this specific shot was a walkway tunnel under a set of train tracks. For this image, it created a sense of being trapped with no escape and really fit the “slasher” theme of the photo. This is a spot I’ve driven by hundreds of times and never noticed until I needed something like it for this shot.
Tips for finding great locations for your spooky Halloween shoot:
- Drive around and just keep looking (not unlike finding other types of photo spots)
- Old churches, farmsteads, and other abandoned buildings/properties work very well
- Make sure you have permission to be on these properties!
- Try to think about how the lighting will change at different times of the day in that spot.
- When you find an awesome spot make sure you submit it to the RGPS App and note its spooky usefulness!
General Tips
Spooky Halloween portraits are a lot of fun to create. Keep an open mind and experiment with a lot of different setups to create something awesome!
- Faces are not always required to make great spooky portraits.
- I found in editing my photos that using subdued colors, crushed blacks and a little bit of grain really helped the feel of the photo giving it that retro film look.
- Black and white processing often works well.
- Visit your local Halloween store for some great supplies to help make your images really scary.
- Harness the power of darkness- Keeping your images dark will set the spooky mood.
Most importantly, have fun with it! If you're like me and you want to push the boundaries of your photography a little, engaging in something like this and creating spooky Halloween portraits could be what you're looking for!
Please “UNSUBSCRIBE” my email “[email protected]” and my phone number “7706309541” from all email and text! Thank you!
If you are looking for the best site for the help of get help in windows 10 and the steps in this portal are workable as I have used them last night.