The f-stop, or aperture, is one of the key camera settings every photographer must master because it controls two critical things: the amount of light going through the lens and how deep the field of focus (depth of field) goes in your image.
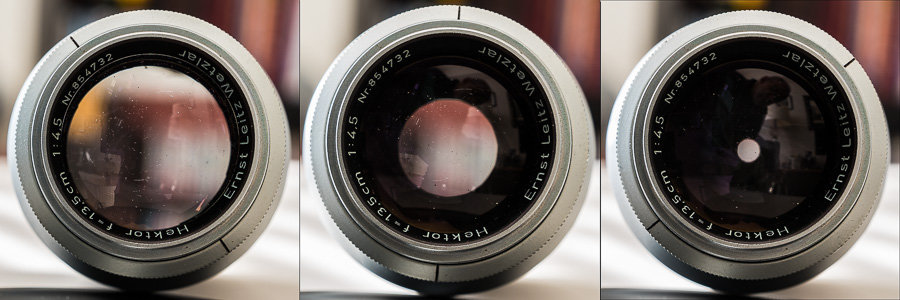
The larger the opening of the lens, the more light hits the sensor, but the shallower the depth of field. The smaller the opening of the lens, the less light hitting the sensor but the deeper the depth of field. It’s a pretty simple concept, but there are numbers involved, which leads to math, which make it seem more complicated than it really is.
Along with your shutter speed and ISO setting, your aperture is part of the “exposure triangle.” Adjusting each of these settings can give you a variety of different effects. You can learn more about the interplay between f-stops, shutter speed and ISO here.
Each lens will be sharpest at a specific aperture, usually somewhere between f-5.6 and f-11. Some landscape photographers adjust their shutter speed and ISO settings to keep the aperture as close to that ideal as possible.
Fun Fact: The term “stops” comes from the early days of photography, when metal plates with holes of different diameters, called “Waterhouse stops,” were inserted into the lens to change the aperture.
What are common f-stop settings?

If you want to jump immediately to which f-stop you should use for a given situation, here are some examples. Every situation is different and your mileage will vary, so consider these some general advice. You can find a lot more information and examples in the Camera Settings Chart.

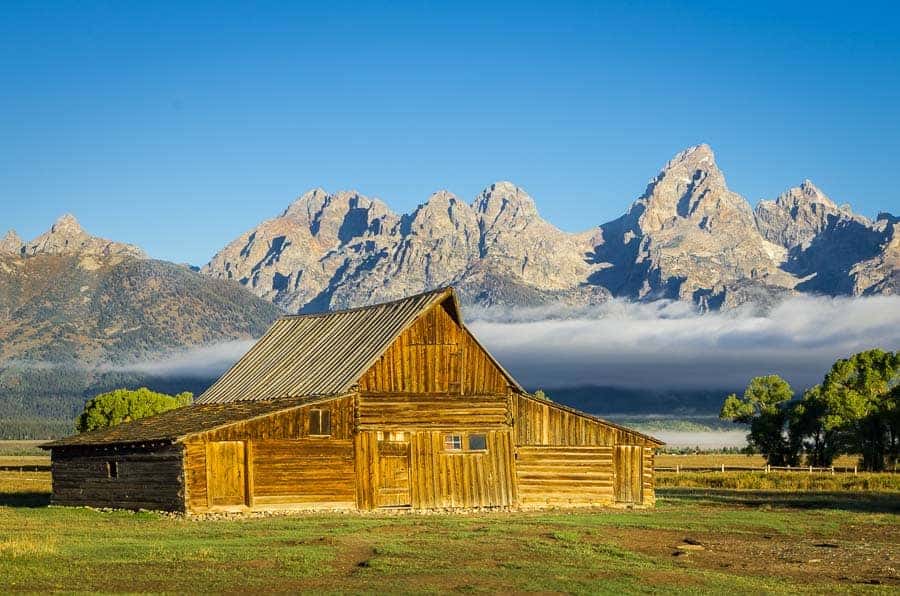
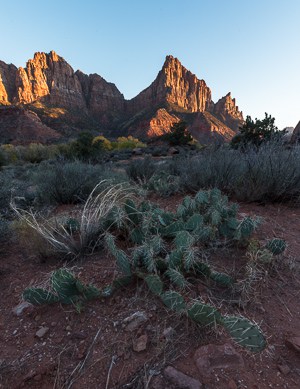
Landscape: Generally, we’re including something of interest in the foreground and in the background. Therefore, we want to maximize our depth of field and will shoot at f-11 or f-16. Why not f-22? Because of diffraction, the image quality degrades noticeably at that extreme aperture. Depending on how near and far away your subject, foreground and background are, you might even be able to shoot at f-8 or f-5.6. If everything is at infinity, any aperture—even f-2.8—will work.
Details: You typically want a detail, like a colorful leaf on a rock, a butterfly on a flower, or a dew drop on a flower petal, to be in sharp focus, but the background can go soft. Depending on the distance from your camera, a setting between f-4 and f-2.8 could work.
Portrait: We usually want to isolate the subject from the background and shoot portraits between f-4 and f-2.8, depending on the lens used and the distance from the camera.
Street Photography: Photojournalist Arthur “Weegee” Fellig was reputed to have said the secret to his success was “f-8 and be there.” F-8 gives a street photographer a good balance between decent depth of field and the ability to choose the right shutter speed for almost any situation.
Sports and wildlife: In most situations, you’re trying to freeze action, which requires a very fast shutter speed, and you’ll be shooting in difficult lighting, so you’ll often need a wide-open aperture, like f-2.8. Because you’re typically a good distance from your subjects, the smaller depth of field of a wide-open aperture might help you isolate the buffalo or the running back from a cluttered background.
Night and astrophotography: When you’re trying to capture light from distant stars, you’ll need to open up your lens to its widest aperture, f-1.4 to f-2.8.
OK, I got it. Now what, exactly, is an “f-stop”?
The f-stop refers to the diameter of the opening of the lens, expressed as a fraction of the lens’ focal length.
For example, a 200mm lens with a lens diaphragm open to a diameter of 50mm would be f-4 (200 ÷ 50 = 4). So, f-4 means the diameter is ¼ of the focal length. A 200mm lens with a diameter of 25mm would be f-8. (200 ÷ 25 = 8). So, f-8 means the diameter is 1/8 of the focal length. Not so hard, right?
One thing that trips up beginning photographers is that the larger the f-stop number, the smaller the lens opening. It seems counterintuitive. You “stop up” towards f-2.8 when you want to open up the lens diaphragm and you “stop down” towards f-22 when you want to close down the opening. It may help to remember that the numbers represent fractions, so 1/2.8 is larger than 1/22. Still with me?

In our earlier example the diameter of an f-4 lens is twice that of the same lens at f-8, but it transmits four times the amount of light! Why? Because the amount of light is proportional to the area of the diaphragm opening (which involves the square of the radius). Hang in there, we’re almost done!
F-stops are typically given as 2.8, 4, 5.6, 8, 11, 16, 22[1], but can go as low as f-1 or as high as f-64. Moving to the right, each “stop” transmits half as much light. For example, moving from f-5.6 to f-8 cuts the amount of light in half. Moving to the left, each stop transmits twice as much light, so moving to f-5.6 from f-8 doubles the amount of light.
All lenses set at f-8 will transmit the same amount of light to the sensor. An f-8 on a 15mm lens lights up your sensor just as much as a 50mm lens at f-8 or a 200mm lens at f-8! So, you can switch lenses and not have to change settings.
The term “stop” has also been used to describe a doubling or halving of the amount of light let in by the shutter speed or picked up by the sensitivity of the sensor. So, changing your shutter speed by a stop means, for example, going from 1/125 to 1/250, effectively halving the amount of light let in. Going from 1/125 to 1/60 is also a stop and doubles the amount of light. Similarly, changing ISO from 100 to 200 is one stop and doubles the sensor’s ability to record light. Going from 400 to 200 is also a stop and halves the sensitivity.
F-stop and depth of field

Remember that we said the f-stop controlled both the amount of light getting to the sensor, and the depth of field? If you double the f-number (e.g. from f-4 to f-8), you double the depth of field.
You can also increase the depth of field by going to a shorter, wide angle lens or moving back farther away from your subject. Halving the focal length (e.g. switching from a 50mm lens to a 24mm lens) yields a four-fold increase in the depth of field. If you double the distance between the subject and the camera, the depth of field increases by a factor of four. (Math again: in both cases the changes are proportional to the square of the focal length or distance.)
If the depth of field is important to the impact and success of your image, then the f-stop is your friend. Find the appropriate f-stop that will give you the depth of field you want and then adjust the other settings. If you don’t need a specific shutter speed to freeze or to blur movement, you might even consider using Aperture Priority mode on your camera.
F-2.8 lenses or f-3.5-5.6 lenses?
Lenses have a maximum aperture, which is usually included in the lens description, like Nikon’s Nikkor 70-200mm f2.8 or the Nikon 18-55mm f-3.5-5.6 kit lens. In the case of the Nikkor lens, the f-2.8 aperture is available at all focal lengths. With the kit lens example, the largest aperture varies between f3.5 and f-5.6 depending on the focal length used.
The constant aperture lenses, like the 70-200mm f2.8 in our example, are typically bigger, heavier, more expensive and sharper than variable aperture lenses like the kit lens. Many professional photographers need the constant f-2.8 aperture as they often shoot in low light. Others value the lower cost and lighter weight of variable aperture lenses. Most major manufacturers make very, very good lenses of both types and you can even take very nice photos with a kit lens.
So, there you have it. Now you can purposefully use your choice of f-stop to create the look you want in your images. And, as a bonus, you can impress people at cocktail parties with your knowledge. Now, if you can only work “Waterhouse stop” into the conversation . . .
[1] Why isn’t the f-stop number series 2, 4, 8, 16, and so on? That’d make it so much easier than things like 2.8 and 5.6. Because the area of the diaphragm opening involves squaring the diameter, doubling and halving the amount of light involves multiplying or dividing by the square root of 2, which gives you numbers like 2.8 and 5.6.

Many thanks for these lessons. They are appreciated.
Lou
Glad you liked it, Lou. The Improve Photography team puts a lot of effort into helping people learn photography. We writers have benefited from the information here in our own photographic journeys and are happy to give back some of the knowledge we’ve gained here.
When you change the shutter speed on a d3400 do you have to change the aperture and the iso, I am so confused.
When you set the shutter speed on a D3400, do you have to set the aperture and iso.
Hi Doris
It’s not easy, is it? Photography can be complicated! When you take photographs, you can let the camera do everything for you (the Auto or Program modes). You can select one thing and let the camera do the rest (aperture priority & shutter priority). Or you can choose all the settings yourself (Manual). If you are in Auto, Program, Aperture Priority or Shutter Priority and you change one setting, the camera will take care of everything else. If you are in Manual mode, you may have to change other settings. Let’s say a good exposure is 1/125 second, f-11, ISO 100. If you want a faster shutter speed to freeze a bird in flight or a child running, you’d change the shutter speed to, for example, 1/250 second. You have just cut in half the amount of light getting to the sensor. So now your exposure is going to be dark. In Manual mode, you could change the f-stop from f-11 to f-8 (doubling the amount of light) and you’re back at a good exposure. If you’re in any of the automatic modes listed above, the camera does all this for you. As photographers get more experienced, they tend to want to make all these decisions themselves, so they shoot in Manual, Aperture Priority or Shutter Priority. Check out this article for some more information about how aperture, shutter and ISO work together: https://improvephotography.com/photography-basics/aperture-shutter-speed-and-iso/
Very informative!
Thanks!
I have been an amateur photographer for 63 years and never had this explained so clearly. Thanks!
I’m so glad you found this helpful, Rod, and thanks for taking the time to comment!
“Each lens will be sharpest at a specific aperture, usually somewhere between f-5.6 and f-11.” But then there’s the f/64 club, the great landscape photographers like Ansel Adams and Edward Weston. Of course there lenses would stop all the way down to f/256 (I think) and that’s in part because of the film format they used. I wonder if f/64 with a 4×5 or 8×10 view camera is the is the equivalent of f/8 with a 35mm.
All good information Frank. To me the bottom line is that anyone serious about photography should understand how to use their camera on manual so they understand the cause and effects of changing the various settings. One of the upsides to digital photography is the ability to change ISO without changing film (because there is no film, d’oh). If a photographer loves shooting at 1/500 of a second at f/8 and the sun is popping in and out or setting (or rising) they can raise or lower the ISO they are using to accommodate those settings.
As you speculated, Jym, f-64 on an 8 x 10 view camera like Ansel Adams used is equivalent to f-8 on a 35mm camera (I looked it up). Also as you say, once people get serious about photography, most go full manual. Occasionally there are situations where shutter priority or aperture priority works but I probably shoot 95% in manual.
Hi Frank, This is a much clearer explanation than I’ve seen in any photography book. Love the suggested ideal f-stops for various kinds of shots. I rarely use my “real” SLR since cellphone camera is so much handier, so I’ve gotten very rusty and tend to fall back on “auto” a lot, which feels lazy. Dumb question: my Canon Powershot SX40HS seems to make me choose just one mode. If I want monochrome, how do I also choose Av or M??
PS Hi to Stefi!
Hi Ann. Glad you like it. Without being able to play around with your camera and seeing the user’s guide, I can’t say if it’s possible to shoot in both monochrome and manual and I don’t know the Canon system well enough to hazard a guess. This kind of information is usually buried somewhere deep inside the user’s guide or sometimes isn’t mentioned at all. Somehow, we’re just supposed to intuit it. Stef says hi back at you!
have been helped.