
I’m sure plenty of you started your photography journey back in the film days. Man, were cameras different back then. I think my first film camera maybe had a total of 3-5 knobs and buttons, and there was no such thing as a menu. Now, cameras are covered with buttons, and the menus are filled with all types of options. It can be a bit overwhelming. Truthfully, there are several options in there that I have no idea what they do. Just recently, I found something that’s going to speed up my shooting and make my life a lot easier: Photography with Custom Buttons and Modes
Custom Buttons
With most DSLRs these days, you have the ability to change what certain buttons do. The most common example of this is changing the focus button. Normally, the shutter and focus button are the same. You partially push it down to get focus and then completely push it to take a photo. This works well for most people, but sometimes focus will accidentally change as you try to take a photo. That’s why many people change the focus to a separate button, and this is called back button focusing. This way, you push one button to focus, and then you push the other to take the photo, and you don’t have to worry about focus changing.


A few other common changes are putting a focus lock or exposure lock onto a button. The idea is the same as before. You do this if you don’t want your focus or exposure changing. With these though, you hold do the button to keep things locked. I tend to use the focus lock over back button focusing. For me, I didn’t like having to use one button to focus and then hit another to take a photo. Instead, if I need to, I’ll set my focus, and then I’ll hold down the focus lock button and then take a photo. Everyone has their own preferences. The exposure lock is handy if you’re in a situation where you know the camera and meter will be tricked (Ex: backlit photo). You can aim your camera at a similarly lit subject and lock the exposure, and then when you aim at the troubled area, the exposure should be correct. Of course, this only really helps if you’re in shutter priority or aperture priority.

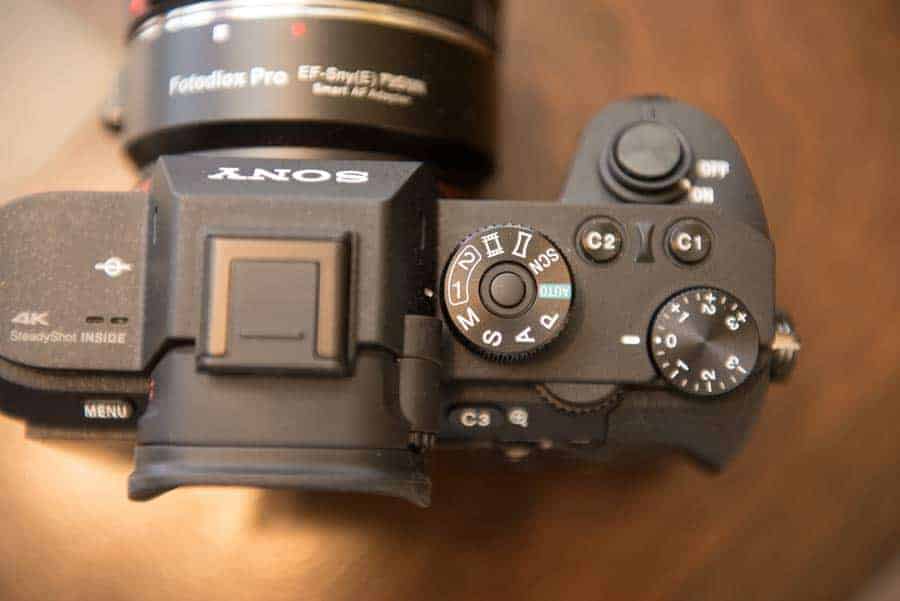
The amount of buttons and customizations will vary from camera to camera. I first really considered the potential of custom buttons when I got a Sony A7sii. I use it more for video, and there are a lot of things I need to be able to change on the fly. Lucky for me, the Sony A7sii has four custom buttons. It doesn’t have a ton of other buttons like most cameras, but still, you can program those four buttons to whatever you want, which is really nice. If I were using it for photos, I’d assign focus lock, white balance, ISO, and file type. You’ll really have to decide for yourself what you want to program. It will depend on your shooting style and what buttons are already present. My D750 already has a ton of programed buttons, so I really only need one or two.
How to Set Up Custom Buttons
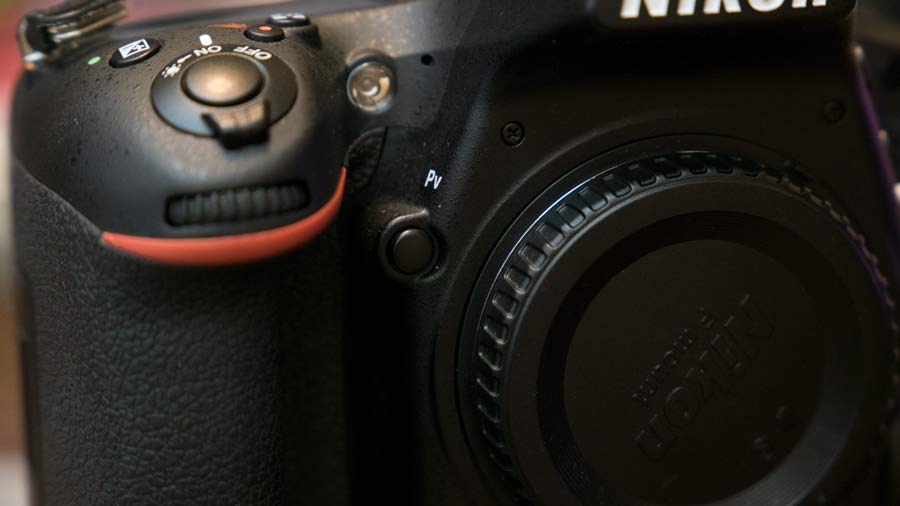
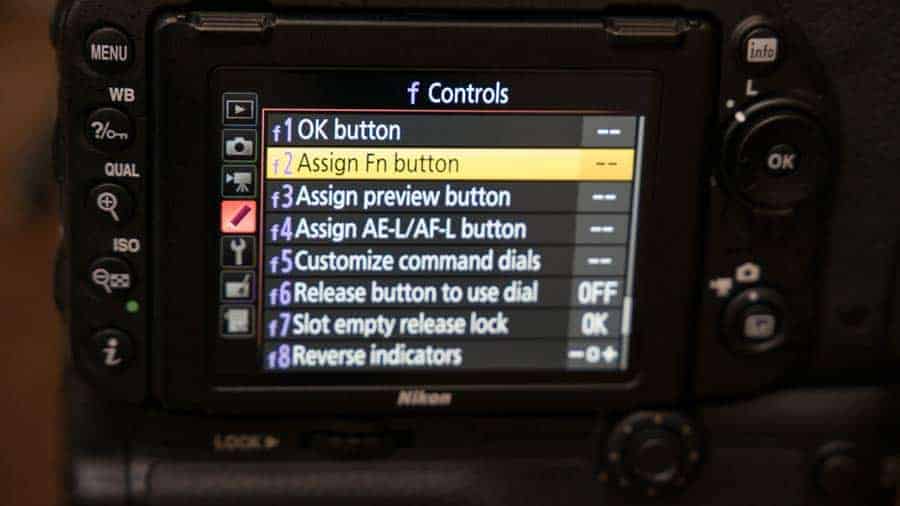
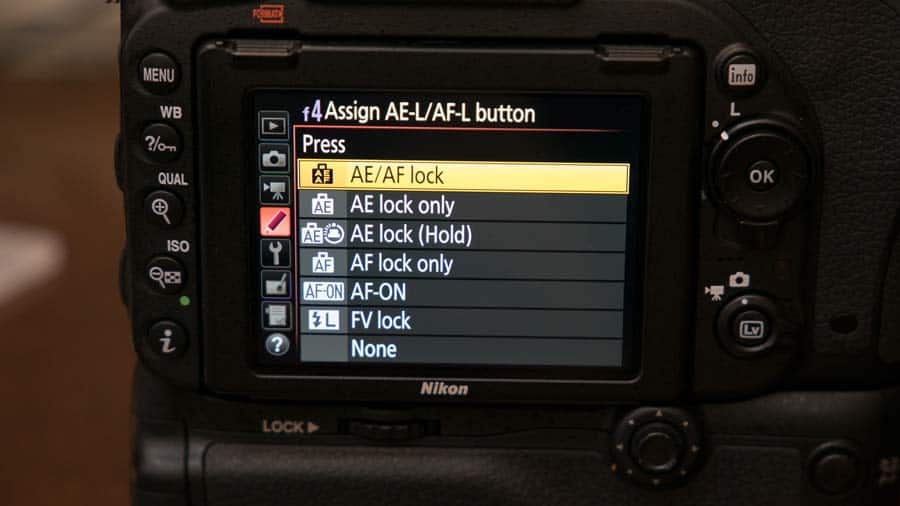
Setting up the custom buttons is pretty easy. For Nikon, go to the Custom Settings Menu (the pencil) and go down to f Controls. Here you can assign the Fn, preview, and AE-L/AF-L buttons. The Fn and preview button are on the front of the camera and kind of hard to reach, so I never worry about setting them.

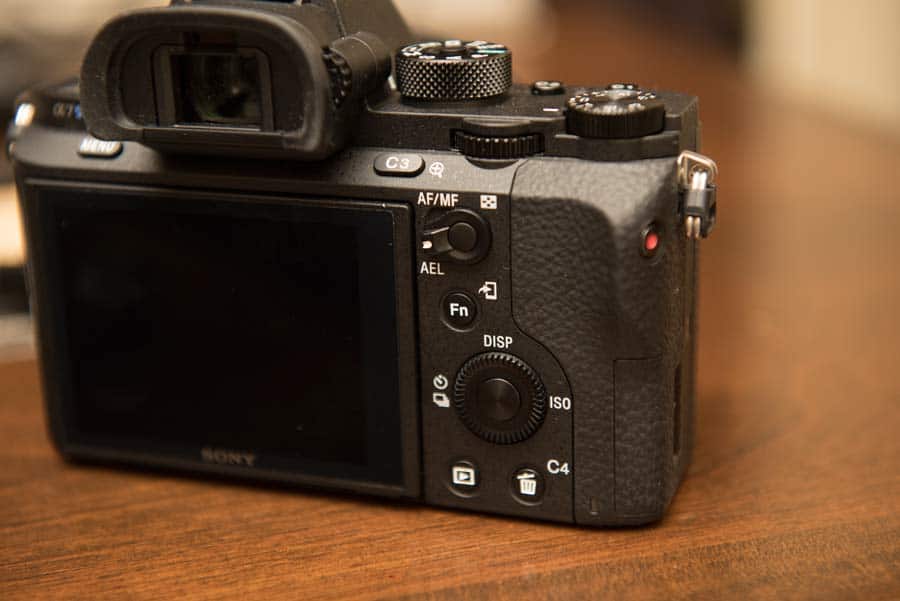
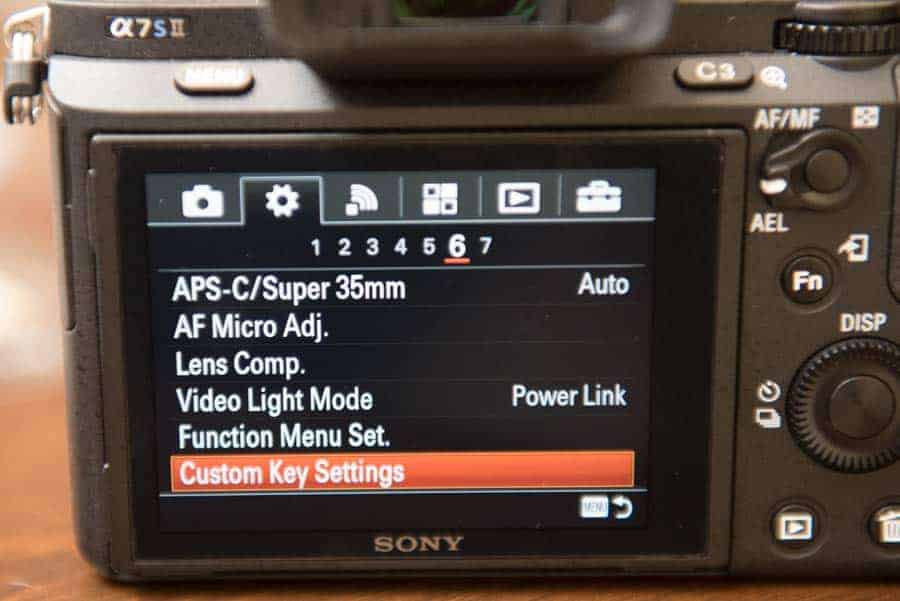
Sony is a little bit more involved because you have so many custom buttons. Go the the Gear looking menu and over to 6. Then go down to the “Custom Key Settings.” From there, you have so many options. You can basically change everything on the camera if you really want to. One you decide which button to mess with, there are so many options. If you can’t find something, just keep scrolling. It’s probably further down.

Custom Modes or User Settings
I’ve know about custom buttons for awhile now, and I’ve been using the focus lock, but what’s really new to me is custom modes (user setting modes for Nikon). Yes, I know these have been around for several years, but for some reason, I never grasped how helpful they could be until recently. Unfortunately, it seems that the custom mode buttons are only on the more expensive cameras, so not everyone will have this option.

When you’re photographing, do you find yourself switching back and forth between settings a lot? Do you have settings for one situation and then another settings for another situation? This might not happen to all photographers, but it is very common in the wedding world. During a wedding, I will constantly be going from one environment to the next. I might be inside for a few minutes and then outside and then I might move to another inside location. It becomes very annoying and wastes time switching all of my settings every time I go from one place to the next. With the custom modes, I don’t have to do that. All I have to do is set one mode for my indoor settings and one for my outdoors settings. When I go from one place to the next, I just spin the dial one notch. That’s so much easier than changing my ISO and my shutter speed and possibly my white balance. What’s really awesome is the Sony A7sii, and probably most of the Sony cameras, has four additional modes you can program in as well.
How to Set Up Custom Modes
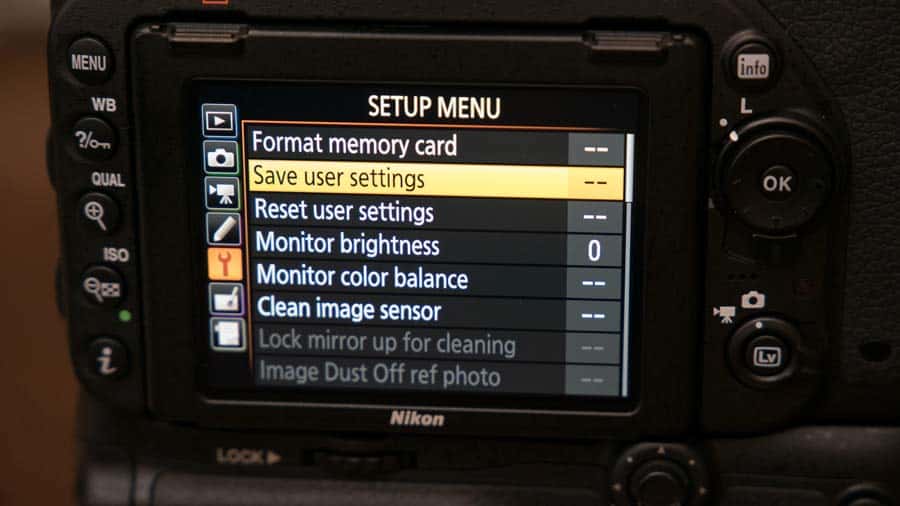
Setting up the custom modes will be different from brand to brand, but here’s how you do it for Nikon D750 and Sony A7sii. On Nikon, you need to get your camera settings exactly how you want it. This means exposure mode, shutter speed, white balance, everything. Then, go into the Setup Menu (looks like a wrench) and go to “Save user settings.” From there you pick U1 and confirm that you want to save. Go back and change your settings and then save the other settings to U2. As your shooting, you simply change the dial from U1 to U2.

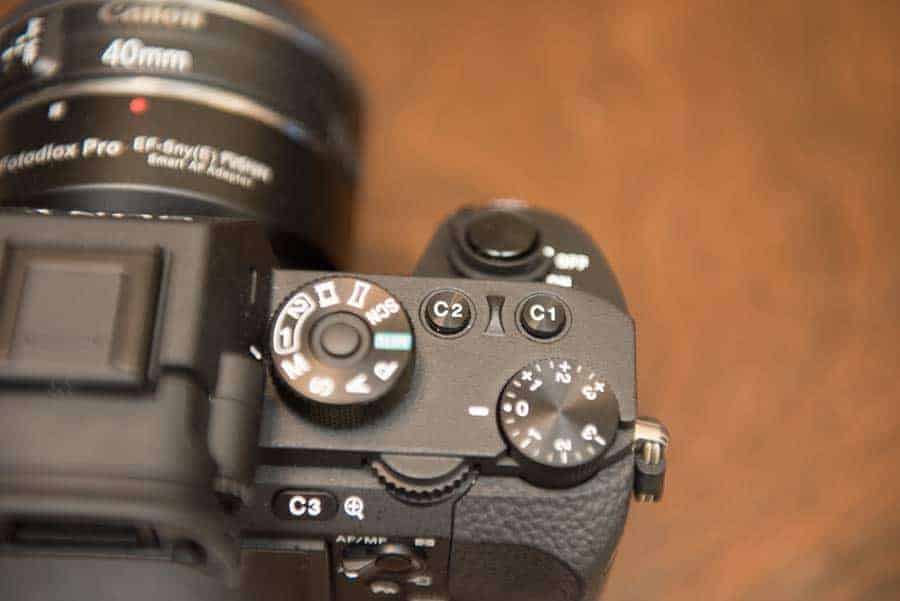
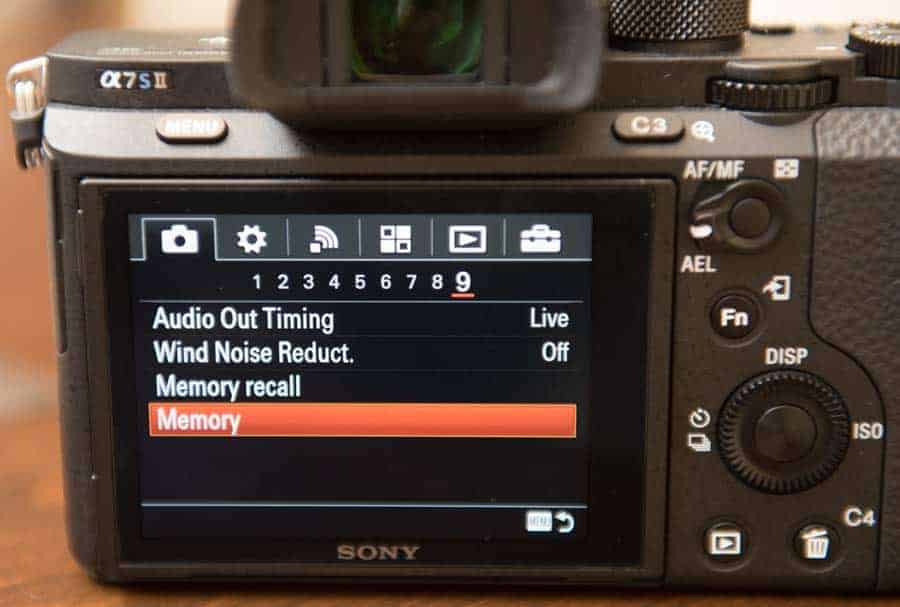
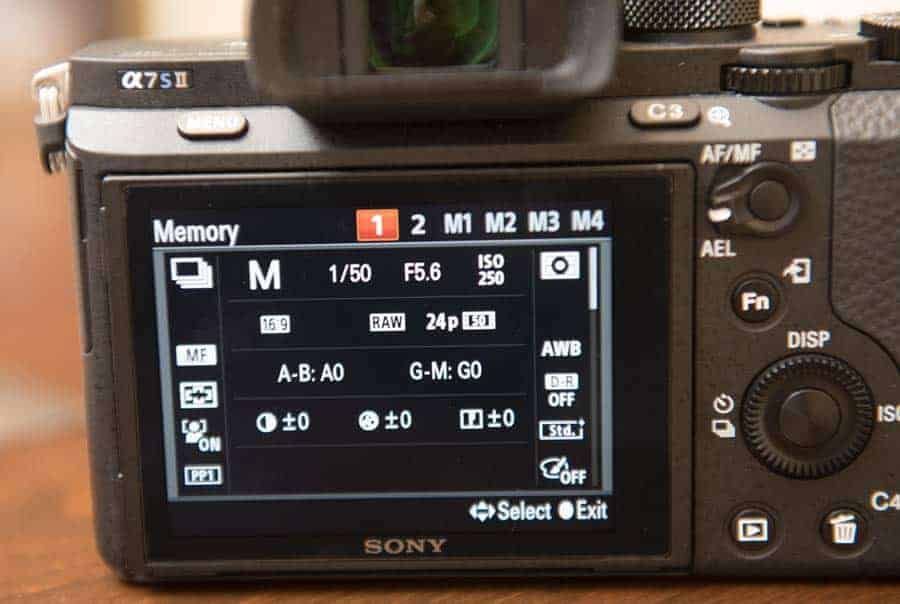
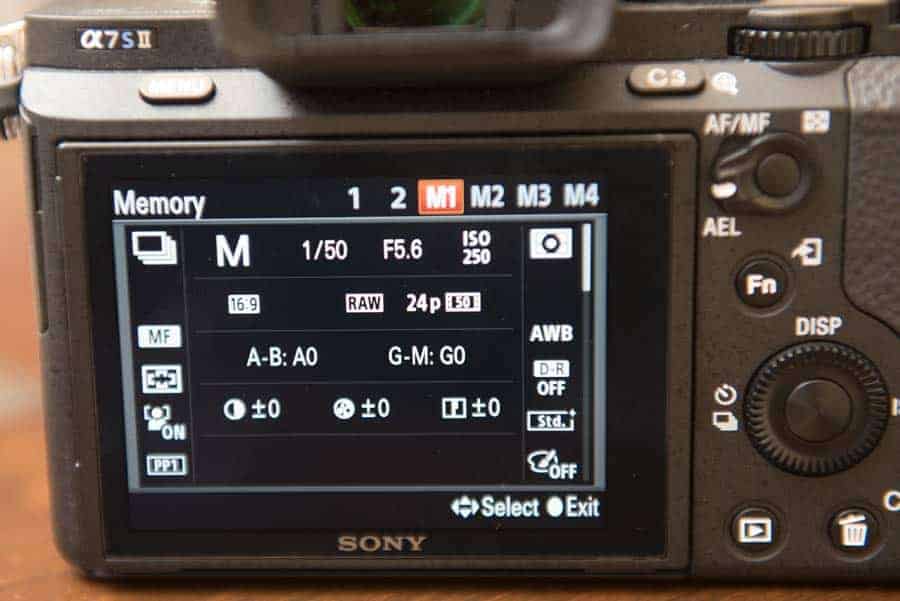
Sony is pretty similar. Set up all your settings first. Go into the menu under the camera and go to number 9. Scroll down to Memory. From there, you can pick 1, 2, M1, M2, M3, or M4. 1 and 2 are the dials, but you can easily switch to any to M1 or the others as well. When you turn the dial to 1 or 2, you will have the M options pop up on the screen. To get to them, you just scroll over and select one.
Conclusion
I know that setting all of these custom options up can take some time, and it will take time to get use to shooting in a different way, but in the end, doing your Photography with Custom Buttons and Modes should make your life easier and help you shoot faster. Think about how nice it will be to never have to scroll through a menu or constantly have to change your settings. I know I’m pumped and can’t wait to start using this, and I hope you are too!
I found it very useful. Thanks
Glad you found it useful. Like I said, there are a lot of options on cameras, so it’s always nice to learn a new way to make things easier.
I use a Nikon D7200 and found your tips very useful, thanks Bryan.
Awesome! Wasn’t sure how many models have the options. Glad it worked out for you!
Only few models provide U1 & U2 modes in Nikon cameras. “Nikon Dslr Remote & Dslr settings organizer” – tethering app in android provides similar functionality, unlimited user modes, to almost all of the Nikon cameras.
Vivek,
Thanks! I was unaware of that. I mainly work with the more professional Nikon cameras, so I wasn’t sure how many provided the U1 and U2. Good to know there is a work around.
My previous camera didn’t have much customisations but my current one has. It is definitely worth it to invest some time to set things up to the way you like.
One tip: many cameras have the option to backup the camera settings to the memory card. If you save this somewhere on your computer you don’t have to start over if have to reset your camera for whatever reason. It is also convenient to copy settings from one body to another if you have multiple bodies of the same model.
Yes, Patrick, great tip. I forgot to mention that. For the Sony, the buttons and mode 1 and 2 are saved to the camera, but the M modes are saved to the memory card. Having a copy on your computer would save a lot of time.
Thanks for sharing this great. Keep sharing more useful and conspicuous stuff like this. Thank you so much
Great information about these new custom buttons!
Thanks! It really does make life easier and shooting faster!