
My first art show was on September 9, 2015. It was in a small town in Utah where my In laws lived. They informed me to come to the event so I got prints ready and headed north. I borrowed my sisters canopy and a few easels from my in-laws to display my images. I had probably a collection of 10 keepers and a lot more average shots at best, but to me they were all stellar. I set up my booth all giddy with excitement and I sat and chatted with people all morning. People came and went and eventually I made my first sell at a Saturday art show. It was of my black and white aspen image to a young couple who were going to get in framed and put in their basement. I don't know if I was hooked but it was promising. It was so cool to finally make a buck from my photography.

Flash forward to fall of 2016 and a move to St. George, Utah. I had heard of the Saturday market at Tuachan and I decided I was going to go. The first weekend I sold one print. The second weekend I sold three 20×30 prints. I kind of got hooked on the prospect of the gamble of each show because they could be a real money maker or they could be a total waste of time. But as the shows went on I was running into a nasty dilemma. Each show I could make enough to cover costs and make a few bucks but not enough to grow the business.
After calculating the price of entering the show, subtract out the price of each print to make and dividing it out by amount of hours spent selling, I was finding myself only making about $4-$7 dollars an hour. Yeah… Want to know how long it takes to buy a new lens at $4-$7 dollars an hour. You don't. You face some random expense that comes up and it absorbs all of your extra funds and you are right back to where you started.
Broke.
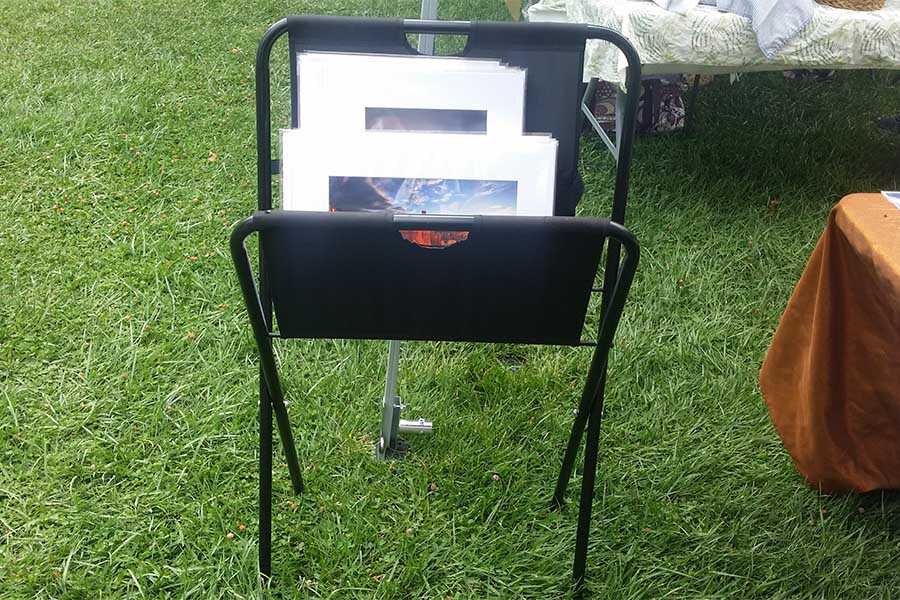
I plunked along like this for months. I didn't know what else to do and I was too broke so I couldn't upgrade to a fancy setup like the other guys at the art shows. I used an upside down table with a piece of fabric as a print display. I had my other photos displayed out on tables and I would usually have one or two prints hanging up in frames bought from Michael's or Hobby Lobby. I looked cheap and ghetto but I would sell prints still.
I finally hit a breaking point this June though. I had entered a big art show and was expecting to do really good. I had sold a few hundred dollars in the show a year before and was expecting similar results. It cost me $50 dollars to enter. I sold $55 dollars worth of prints over the course of two day. One of those buys was a pity buy too. A far cry from my original estimation of 200 dollars.
Talk about a depressing show.
I stepped back from that show and looked at my model and had to make a serious decision. Do something or die. I couldn't keep doing art shows like that. I didn't have the fincances to keep a dying business afloat. I couldn't make enough doing this to upgrade my gear. I couldn't even pay for the trips to get new photographs.
So I looked around at the other photographers at the show and learned a couple really important lessons. These lessons are what I am going to share with you today. As I have implemented them I have seen drastic differences in my sales. I am almost at the point where I can support my family alone on my print sales. That as not an underestimation. These decisions have saved my business and possibly saved my family during my strange unemployment I am going through currently.
Lets get started.
Lesson 1: Funding
After my art show in June I had about $200 dollars in photography account. Not much.
I knew I needed funding but how much? So I researched what it would take to get a walls for my booth and what it would cost for an entire new print set up. Since I knew I didn't have enough to do it all at once I broke it down to the most important things I needed.
- Display Wall
- New Fancy Prints
- Upgrade small print look (mat them)
Because I identified what I needed and what needed to happen first I knew I needed about $1500 dollars to get me started.
I reached out to my parents and they were able to give me $600. I then scrounged through my additional rainy day savings and pulled in another $600 or so plus my $200 in my photography account. So I had $1,400 in cash to redefine my business. So what I am telling you is you don't need a ton of money, but you will have to make a sacrifice. If you can bite the bullet you can turn your money into something. Discuss this with your significant other before you do this. My wife was super sportive (grateful now) and was all for this crazy decision.
A couple caveats. I have been borrowing my sisters canopy all this time. So I have not actually paid for my canopy. I was then gifted a new canopy like hers by her and my parents for my birthday. So if you don't have a Canopy yet, you will need an additional $350 dollars to this initial set up price.
In other words try to do as much as you can without having to put money onto the credit card but shoot for about $1,500 if you're broke like me
Lesson 2: Presentation is everything
During my dismal art show I watched a couple walk right past my booth and walked into another photographers booth. Didn't bother to even look at me. Why? because I didn't look fancy nor did I scream fine art. Presentation will kill you if you do it poorly like it did to me.
At that art show there was a guy who did close to $5000 dollars in sales. His presentation is what did it for him. His photos were not better than mine. He did have different things like shots from the Columbia River Gorge and the Rockies that I don't have but it was his presentation that set him apart. He has huge walls to display his prints on. He has the walls crammed with beautiful art pieces. So here is the lesson- go all out on your display. Spend as much as you possibly can, and it will pay you back in the long run. My friend uses carpet panels for his displays. His booth looks amazing (sexy might be a good use of slang here as well).
Here is a link to a display that is similar to his: Art Wall Display
As mentioned I was broke. I didn't have $1200 dollars for walls alone that I couldn't fit into my car. I sure didn't have another $10,000 dollars for a new vehicle. So I had to find a different solution. It happened that a few weeks before my dismal art show I was up in Salt Lake City area and had seen another photographer using a mesh wall canopy display. I was not sold on the look, but after doing research into options it fit my budget and my car.
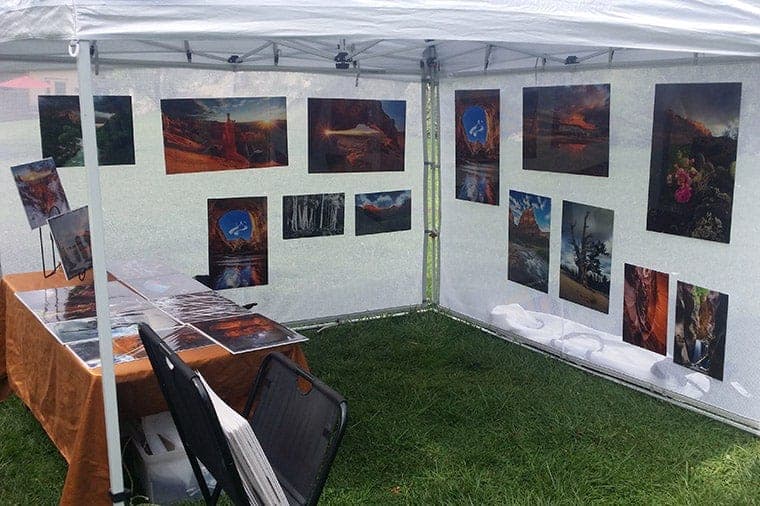
The company is called Flourish and they make this white (or black) mesh wall. They wrap around your canopy and are sturdy enough to hold metal prints with ease. If you have fear of tearing, add another hook or two and distribute the weight more. Once it is set up you look like the cats meow and every other vendor in the area comes up to you and begins asking you about your cool wall set up.
Here is the link to the display that I use now: Flourish Art Panels
I look professional now. I get more people stopping by my booth than I have ever before. Since getting people to stop is the hardest part of selling photography, it has been a huge boost to sells.
Total cost for my new wall display: $685
Lesson 3: Fancy Prints Prints are Your Friends
I make my money now on fancy prints. They also are more impressive to look at than a cart full of small 8×12 prints. The fancy prints system that I switched to were metal prints. They fit the bill and they were easy to transport and set up. Mind you this was a huge risk for my due to my past experience. I have had them before and they never sold, but now I have lots. With each new print I increase my chance of selling that one vs any other, and eventually I figure they will all sell.
With the next chunk of money I had left I purchased about $750 dollars worth of metal prints to set my plans in motion. I knew I needed more but you have to start somewhere. I chose my top selling photos and printed them in three sizes and arranged them accordingly. If you are not a metal print person, fine… go canvas. Don't waste your time on anything else. Metal prints also have a few advantages. They are super durable. They look fantastic and they carry a novelty aspect. Many people still have not seen metal prints, so they are taken aback by them.
Lesson 4: You Can't Sell Enough Small Prints To Make A Living
A few weeks ago I read this article about this photographer who makes six figures a year selling his prints. He mentioned this one key bit of detail; “It is easier to sell two $10,000 dollars prints a month than it is to sell 500 $200 dollar prints. This stuck around in my head after I read that. Before hand I had been trying to make a living off of selling my 8×12 prints from anywhere to $15-$20 dollars. At that rate it would take 10 prints for me to make my target* at Tuacahn (the show costs $20 and is my main show I attend). If I sell a single 20×30 metal print I pull in that same amount and make my target price. One sell is easier than 10.
Lesson 5: Walls and How To Display
Top to bottom side to side crammed with prints is always good. I don't have enough prints for that. I arrange my prints to match display ideas I would like to see in my own home. So I usually have a large print in the center with smaller matching prints on either side that have the same orientation (portrait or landscape). Place your top sellers in view so that people notice them and draw them in. I have had people wandering past my booth not paying attention and caught a quick glimpse and turned around to come back and see what I had. Make sure your booth does that.
With all the additional print space on your wall, cram it with as much as you can. Make sure you have different sizes of prints. I am still working on that. If I had had a smaller version of one of my prints this past weekend I would have sold it.
Lesson 6: Screw Framed Prints
Seriously DO NOT BUY ANOTHER FRAME if you are planning on selling at art festivals on weekends. They increase the price of your prints by 10 fold. They break easily and are easily damaged. They are more difficult to move around and make life way more complicated. Also when people come by my booth and I tell them that they can frame the prints they say “no I like it better without a frame.”
Listed to the market and listen to your wallet. Only buy frames for your own personal work that goes into your house or if it is going into a gallery.
Lesson 7: Reduce The Number of Selections
(you only make money off a fraction of prints)
I am still working this out myself, but the general rule of business is that you will make 90% of your money on 10% percent of your products. This is why I only have about 10 different metal prints in my booth currently. I will have more but will definitely try to keep it to my top sellers. The others move on occasion but I really only make money on like four of my prints consistently. The ultimate challenge is finding what your next best seller is going to be. You can get an idea off of social media, but that has not always been super reliable for me.
If you are a bit cautious on what print to do next, print it in a smaller format and see if it sells quickly. That might be your key indicator to say, yes that one will be a good metal print.
Lesson 8: Is My Vehicle Big Enough?
Your vehicle determines your set up. If you are dreaming of a big fancy walls and huge display prints, but don't have the ability to actually get them to the show, don't buy them until you switch vehicles.
This is something I have not heard nor have I seen this mentioned in all my scrounging around for help on how to run successful Saturday markets. I purposefully switched to a bigger vehicle about 8 months ago so I could put more into my vehicle for art shows and for traveling in the desert. If you only have a two passenger car, I would consider upgrading to something a bit bigger. 20×30 metal prints are large and can take up a lot of space. If that is not in your budget, work you magic and cram and strap things to the roof.
Lesson 9: Where should I sell?
Not all locations are created equal. Places with high amount of tourists are always a benefit. I currently sell at markets that are mostly visited by tourists. I have had some of my best days because tourists are already primed to purchase. Also try to find things besides farmers markets to be in if they are not heavily visited by tourists. Farmers markets attract the wrong type of crowds, and usually only bring in young single people who do not have much money.
Other locations that are good are big art shows. That will contribute to your success as well.
Since we sell a luxery good, the target market are those with a bit of disposable income. Choosing my markets carefully has allowed me to have successful weekends. As for how to find art markets to attend, go speak with the booth owners at these markets. They all share with each other what markets are awesome and about upcoming events for people to apply for.
There are also other resources like Zapplications that have a good list of places as well.
Lesson 10: Edit your photos
I know this seems strange to put in a list of things you should do to be successful but I have seen multiple photographers come and go with photos that were not edited or were poorly edited. The reason they are not selling or why they don't have sells is because they do not have high quality prints. Don't be those photographers. Remember the world is saturated with good and bad photographers. Most people are bad, but the good ones dominate the media. People expect excellence because they see it constantly and they know what bad looks like because they are those photographers. Be above the average.
Look into education on printing. I have a long way to go in this field, but I have watched Mark Metternich's tutorials about sharpening for printing, and I have listened to a lot of podcasts about it. I have also done a lot of printing that failed and have adjusted my system of printing based upon those results.
Lesson 11: Be a Salesman
Make it difficult for for the customer who is on the edge about buying a print to leave without it. I had a lady come back for three weeks in a row asking about a certain print. I kept telling her that it sold or that I only had it currently in the smaller size. I let he know she could order it but she kept sitting on the fence. I finally purchased the size of print she wanted and brought it to the art show. She showed up and said she finally didn't have an excuse to not get the print.
She bought it.
I even gave her a discount because she had been talking to me about it for a long time.
I often pull prints off the wall and allow the customers to hold them and look at them. It is harder to say no where you see the quality and feel it too.
I now do home delivery if the people are wanting a print but want to measure their wall. I will show up with the print they want and a few others and will show them exactly how it will look. When you do something like this, people are willing to spend money because you went out of your way to help them.
Be wiling to negotiate prices if you can to seal a deal. It is always better to sell something and make some money than make no money at all.
Final Tip
Always keep an eye out for art markets to attend. You never know when a new one comes out of the woodwork. Just joined another one on the fly for this next week. Hopefully it goes great.
Conclusion
Art markets are not an easy way to make a living. They can be a lot of fun, and a good way for you to make enough to replace and rebuild photographer gear. They require a lot of research to find the right markets, but when you do, it is amazing.
Let me know if you have any thoughts and any tips yourself. Post them in the comment below.
*-10x booth fee
Great article, Nathan. I’ve thought about selling some of my work at art shows and outdoor markets but have been hesitant because of the seemingly high cost to play. Thanks for breaking this down and your suggestions on your canopy setups.
Very helpful and a lot of it hit home, especially the part about presentation and big prints.
One question, do you sign your prints? If so, on the mat, print itself or otherwise?
I have been doing outdoor shows in the west for several years. I have never done a one day show, as I have a trimline tent and they take longer to set up. I also have the mesh walls from flourish, and really like them. It can be rewarding, and frustrating all in the same weekend. One show this year I took an order for a custom piece priced at $900. That made me feel good. It’s super competitive out there in the photography world.
I don’t sign my prints because I don’t like my hand writing.
Fantastic tips – I like how you laid out the cost of entry and why you need to spend it. I’ve been thinking about art shows but I have to think about the economics. I appreciate the time you put into this. Bookmarked for reference!
Great informative insights and tips. Thank you !!
Thank you for this informative article, I really appreciate it.
Thanks for sharing such great tips! I appreciate the wall links and the photo of your booth.
Great article, Nathan, especially for someone like me who is wondering about those “first steps” to go to the next level. And stunning prints on your website.
Thank you for the input Nathan! I am doing my first photography booth at a arts/craft fair soon. I currently have canvas and hardboard prints, but I like your idea about just having the prints and leave the framing up to the customers preference. Do you print your own photographs and how do you do the boards behind them?
I also intend to have my photographs for display and take orders and then when the photographs come in (I order them from Adoramapix), then deliver to the customer. I am torn between 1) have the customer pay 1/2 up front and 1/2 when delivered; or, 2) pay all up front? Any other advice would be greatly appreciated! Thank you
What an awesome read.
Thanks for writing that!
Any tips on keeping an inventory?
I can figure out creative and interesting ways to display my work, but what about storing it?
Like let’s say I choose my 10 best photos and make 10 prints of each to bring to a market. I guess most people just get plastic bags and slip em in there, but plastic is so wasteful. Any tips on how to keep the prints in good shape between shows?
Rock on Nathan.
You’re the bomb.
Great tips, thank you. Just getting started in the business!
Nathan, can you share a source for quality white matte’s. I’m thinking of starting with 8×10’s matte’s for 5×7 prints, but don’t know where to buy in bulk that are quality but affordable. Really appreciate the intel if you have that information. thanks!