
I shoot a lot of portraits. In all of the years that I have shot photography, I have never once owned a backdrop. A great environmental portrait is absolutely remarkable. But as someone that markets themselves as a portrait photographer, I feel that it's 100% essential that I have a decent knowledge and understanding of backdrops, and what better way to get myself educated than to do some research and share it out with everyone in the Improve Photography community.
I reached out to the folks at Savage Universal, and explained my project. My goal was to get some very basic experience with a wide variety of different backdrop materials. I wanted to figure out what I liked, what I didn't, and how the various materials behaved. I can't thank Molly Messman and the folks at Savage nearly enough for facilitating this article! The following list also includes links to B&H. They sent me the following items to work with, and experiment:
5’x7’ Pure White Vinyl Backdrop ($26.06 @ B&H)
53”x36” Smoke Gray Seamless Backdrop ($27.99 @ B&H)
5’x6’ Rustic Planks/Red Collapsible Backdrop ($189.99 @ B&H)
Port-a-Stand ($156 @ B&H)
Pure White Vinyl Backdrop
The first thing I learned about the white Vinyl backdrop is that 5′ x 7′ isn't as big as you would think it is! Obviously the backdrop size is completely dependent upon what you are photographing, but I was using it to photograph a model. It was absolutely great for a head shot, or chest and head, but to do anything that would be full-body, I would have really wanted/needed a longer backdrop. Here's the link to the 10′ x 20′ version. That would be AWESOME if you have a room that is wide enough to set up a 10′ wide vinyl. And there is the issue of transportation – you aren't going to throw that roll in the back of an average car and drive across town. Here is the 8′ x 10′ version, and that's the size I intend to purchase.
So sizing aside, the material itself was absolutely amazing to work with. Here is a photo from my first attempt at using it.
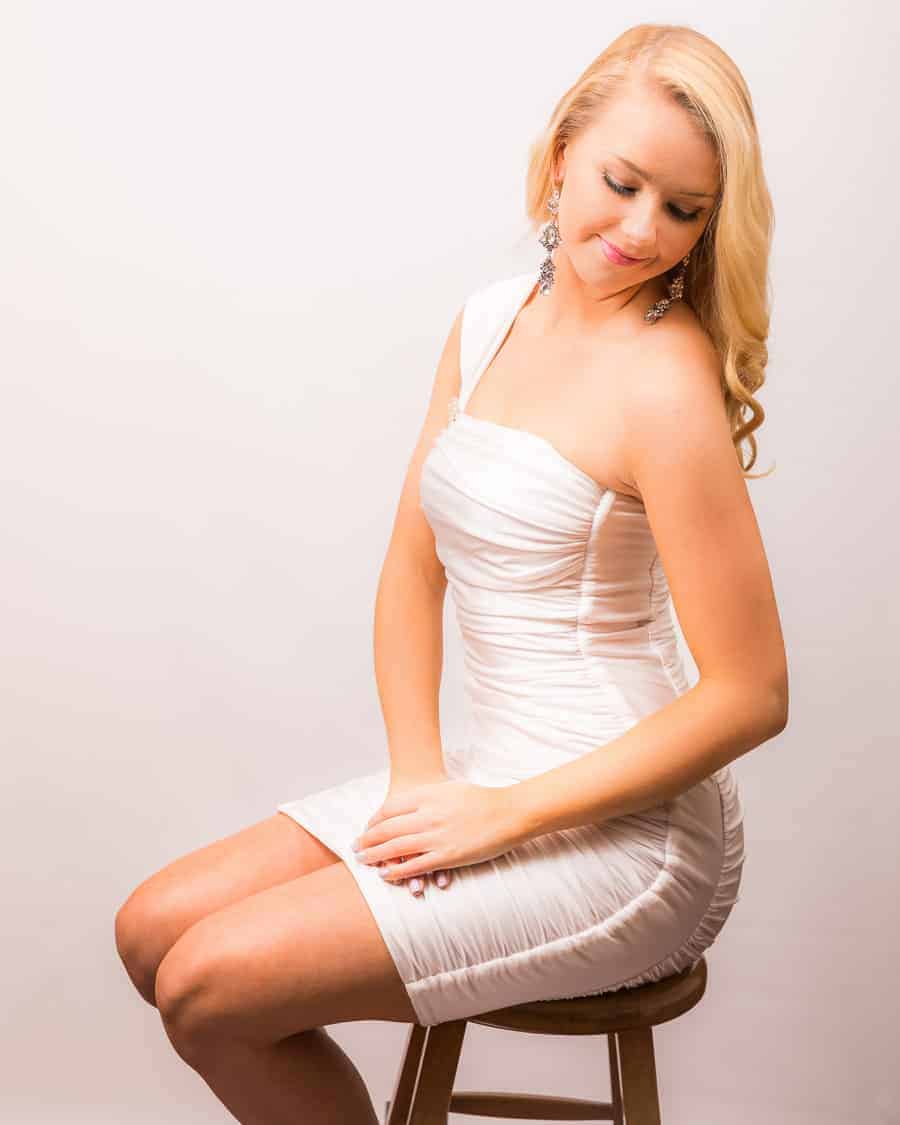
I absolutely love how the matte surface creates such a wonderful background, without extreme reflections. This was a great success. I had a softbox camera right, just barely out of frame, a second flash in a shoot-through umbrella to the left, on very low power, and then a flash on the ground behind the model, to illuminate the backdrop. I am by no means a lighting expert, but this setup worked wonderfully.
The best suggestion I can make regarding the off camera lighting is to make sure that you illuminate the backdrop. Without it, you will get an unacceptable shadow cast from your subject, onto the backdrop itself. The third flash providing a light wash on the backdrop eliminated that completely.
Smoky Gray Seamless Paper
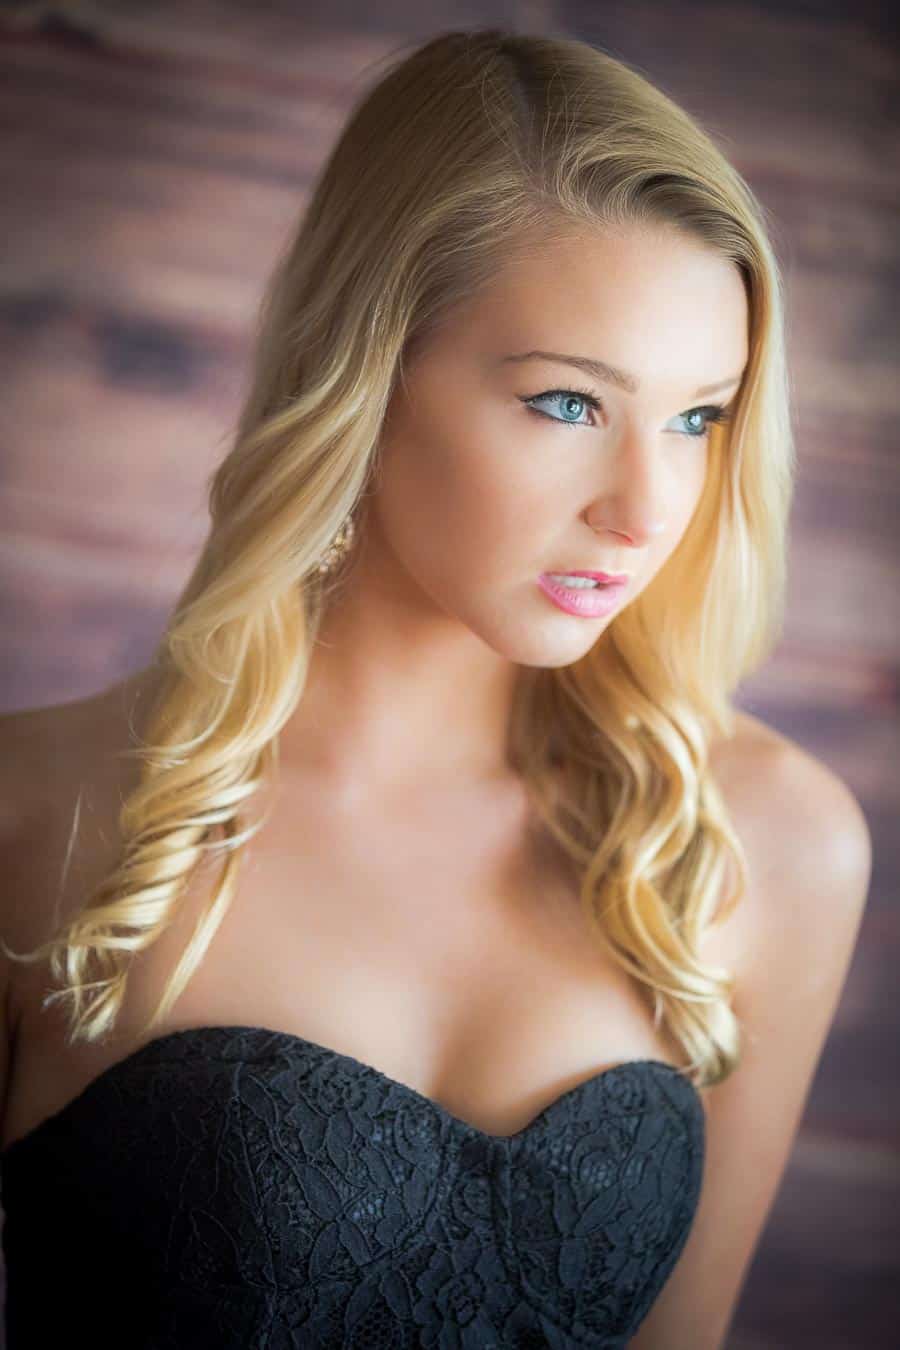
This was my first time working with seamless paper. I think the learning curve with this will be extremely fast. The first thing I bungled horrifically is the fact that it comes spooling off the roll when you raise the stand. It doesn't just gently unroll to the length you need… it dumps the whole mass of paper on the ground. It wasn't pretty! We re-rolled the paper, and I used gaffer's tape to tape it off so that it didn't unroll on us again. As a shooting surface, I found it a bit less “fun” to try to light than the white vinyl. This is 100% user shortcomings, I'm sure, but other pure beginners could certainly benefit from this experience. The light was not as forgiving when it was hitting the backdrop. Eventually I actually gave up trying to illuminate it, and I left it dark. As a dark backdrop, I assume that is what I should have done in the beginning.

 The falloff from my key light here actually worked just fine.
Another thing I learned quickly is that it is remarkably easy to edit any wrinkles or imperfections in the paper caused by accidentally unrolling it! Because the background is so simple and even, the healing brush or some content aware fill will cover those flaws instantly, every time.
Rustic Planks Collapsible Backdrop
The 5′ x 6′ Rustic Plank backdrop is was a huge incredibly easy to work with, and my model and I are both delighted with the results. The backdrop comes in a circular pouch very similar to a reflector. It's folded over on itself, and it makes it remarkably easy to carry and transport. There is a wide variety of looks with Savage's collapsible backdrops, and I plan to add a couple more of these to my arsenal over time! When you get the model a decent distance in front of the backdrop so that it is blurred into the background, it's impossible to tell that it's not a real wood wall.
 The backdrops are available in 5×6′ or 5×7′ versions. I would take the extra foot just to have a little bit more flexibility and real estate to work with. They are also available with an 8′ aluminum stand, but I did not have that stand, and was very easily able to just rig up a solution with a light stand. With the stand, the price increases to $234.95 instead of $189.95. If you don't have a lot of extra stands it might be worth having the matching stand. I would be very curious to see how the matching stand works in comparison to jury rigging a light stand, but I think for the difference of $45 I would be inclined to put that extra cash toward another backdrop. There are a number of options that are in the $145 price range – they tend to be more of a traditional background look rather than the cool ‘faux brick/wood' type backdrops, but for professional headshots, they are just what you would need.
The backdrop is reversible, so on the other side you have a completely different look. In the case of the rustic planks, the back is a rich red color. My model and I were both so happy with the results of the planks, we used up our time on that, and I actually forgot to turn it around and shoot the other side.
Suggestions For the Beginner
My number one suggestion is just jump in and do it! If you aren't inclined to take the big plunge for one of the collapsible backdrops, start with the seamless paper or vinyl. They are extremely affordable, and it gives you an entirely different/new ‘thing' to try with photography. If it's a goal to produce head shots in the typical style with a backdrop, I would highly recommend the collapsible versions. It's incredibly fast to set up, comes with a carrying bag and can be folded and zipped away in a matter of 5 seconds. The look is extremely professional.
The second suggestion I would highly recommend is a good working knowledge of off camera flash. This is somewhat of a given for anyone working with portraiture, but it seems especially appropriate when creating an image that is almost exclusively about the appearance of your model, and the way the light is landing on them.
And suggestion number three is to make sure that you have gaffer's tape available, and by all means, don't let the entire roll of seamless paper fall off the spool on you!
I have three 10’x20′ vinyl backdrops and love them. The black is a little shiny… I love the fact that some paper towels and 409 will clean them right up.
My only real complaint is they are *really* heavy. My backdrop stand crossbar sags under their weight…
Thanks for the great info!
Grey backdrop is the best idea for a beginner. You can turn it to white or black easily with the help of light/ lack of it (placing a grid).
Great article and exactly what I was looking for! Thank you.
It sure was interesting to know that you can consider using vinyl photo backdrops if you want to find affordable photo backdrops. My husband and I are planning to take our son’s photos. We need the photos before his 7th birthday party. This is to make sure that we’ll have his photos that we can use on invitation letters. We’ll do all your tips to save money.