
 Adobe Photoshop is an extremely powerful and advanced image editing and manipulation application. At the heart of Photoshop is the ability to make adjustments, complete changes (adding or taking away elements in an image), and create the image that we envision from the start.
In this article I will try to explain how some of the tools work that allow us to create selections that we desire in order to effectively edit our images. In Lightroom, many of the edits we make are GLOBAL in nature meaning that they alter the entire image. Radial filter, adjustment brush and gradients are localized tools within Lightroom which allow more specific edits. With Photoshop, we are able to make extremely targeted changes based on selected area that we have made with selection tools based on tonal differences, colors, focus areas and more. Once selections are made we can also add to those selections, subtract from them or intersect them which allows for precise selections just not possible using other software.
For example, the TONE CURVE panel in Lightroom allows you to control the brightness and contrast of your image as well as adjusting the individual color channels to create the look and feel that you want.
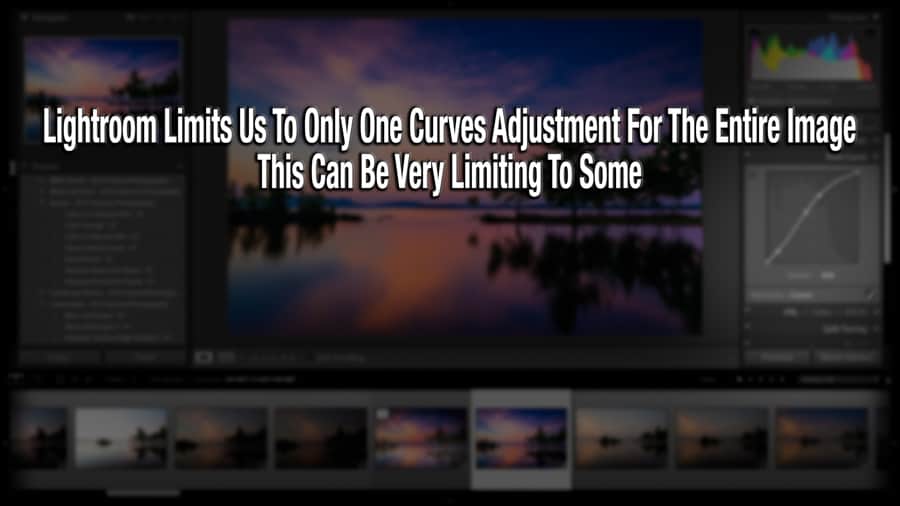
The limitation here is that this tonal adjustment affects the entire image and there is only one curves adjustment per image. In Photoshop, you can make separate adjustment layers for certain parts of an image. Having separate tonal control over various tonal ranges with curves and levels allows for fantastic control and editing flexibility. This cannot be done in applications that don't allow adjustment layers with masks. For many images, this can be very limiting.
Selections, Channels and Masks all work together to create the exact parts of an image you want to manipulate. Let’s first look at making selections.
Remember that these tools are actually very basic and seem quite crude and simple. It is applying them in creative ways that makes them powerful. For example with a marquee tool you can select an entire lower side of a mask and then fill that in with black/white in an instant. Many of these tools work together in creating CHANNELS which ultimately end up being masks since that is the whole purpose of creating CHANNELS.
SELECTIONS
Selections can be made in many different ways and with many different tools. When using any of these tools, you can select them by right clicking them in the TOOLBAR or hitting their keyboard shortcut. Also, you can hit SHIFT & The Keyboard shortcut to toggle through the various tools under that heading.
So for example you would simply hit “SHIFT & L” to toggle between the Lasso, Polygonal Lasso and the Magnetic Lasso tools. Here are a list of some of the tools you can use to make selections based on an area of the image you choose:
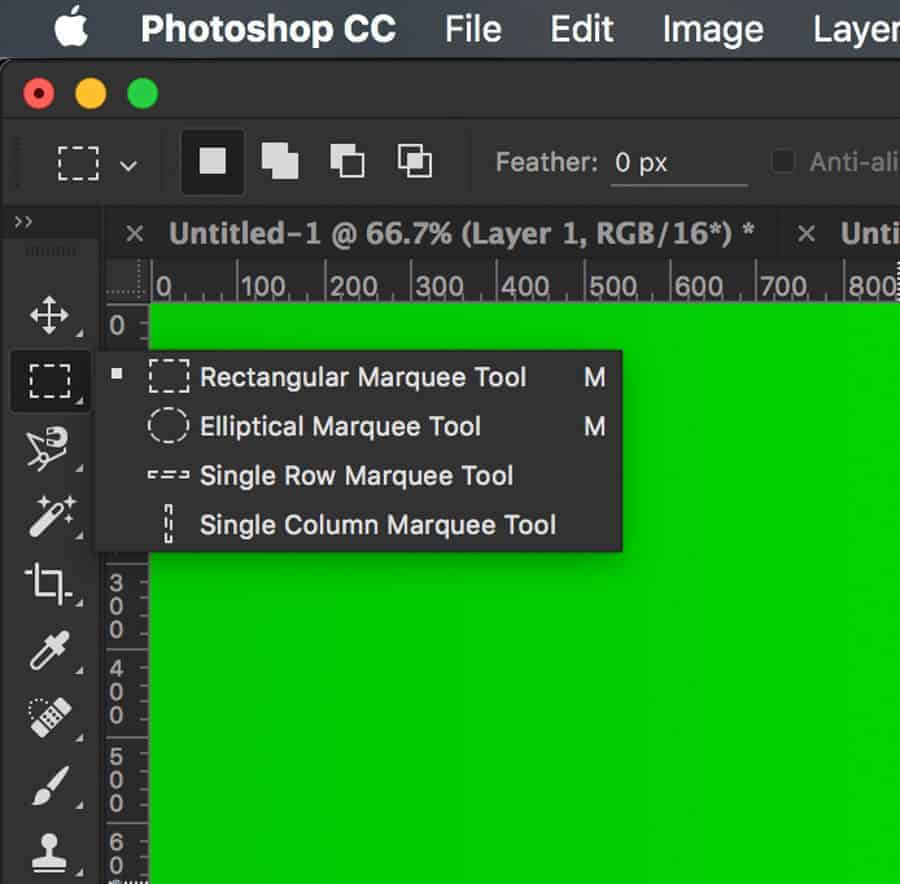
Marquee Tools ( “M” Keyboard Shortcut )
In the tools panel you have the Marquee tool in the tools lineup. When you right click the tools, a little pop out menu with the tools available within that tool box appear. In the marquee box, for example, you have the rectangular, elliptical, single row, and single column marquee selection. You can preset the FEATHER value from 0-1000 pixels.
One quick way to do this is to hit ENTER or RETURN when this tool is chosen. The value will be highlighted and you can then type in the feather value that you wish to use and then hit ENTER again. This same technique works with many tools within photoshop that have a FEATHER or TOLERANCE Setting. Alternatively, once you make a selection, you can MODIFY the selection by going to SELECT and choosing Modify. Here you can make any one of many adjustments to your current selection.
Lasso Tools ( “L” Keyboard Shortcut )
The lasso tools in photoshop allow you to create free form selections using either the free hand LASSO, Polygonal Lasso Tool and the Magnetic Lasso tool. The Lasso tool allows you to draw a selection freehand. You simply click and drag, making an outline in your Photoshop document and when done, the start and the end of the line will connect and you will have a selection. You’ll see the MARCHING ants (Photoshop speak for the displaying of a selections and they sort of look like marching ants). You can draw free hand and if you stop drawing and let go of your pointer device (mouse/tablet/pad) Photoshop will connect the lines for you by making a straight line from starting point to the point in which you stopped drawing.
The Polygonal Lasso tool creates straight lines from point to point as you click them. You can make as many points as you wish. When you’re done and want to complete the selection, simply double click and the start and end points will be connected and your selection made.
The Magnetic Lasso tool works by detecting edges as you run the cursor along the part of the image you are working on. It detects edges and sets down control points along those edges. At any time you want to set your own points, simply click and a point will be placed. Made a mistake? Keep hitting enter and it will go back, deleting each point with each keyboard stroke. “Width” value in the toolbar (1-256) determines how close to the edge your cursor needs to be before the tool knows what you’re selecting. The “Edge” value (1-100) defines the required contrast between the object you’re selecting and the background before the tool finds the edge between them. Use a higher % if you have good contrast. The Frequency simply determines how many control points are laid down.
Important to note is that when using the Lasso Tool, Polygonal Lasso, or Magnetic Lasso Tool you can hold down OPT/ALT while clicking and dragging, release your mouse button (or pointing device) and the Lasso Tool becomes the Poly Lasso tool and the Poly Lasso tool becomes the free hand Lasso tool. And lastly, the Magnetic Lasso becomes the regular Lasso tool when this is done while using it. Comes in very handy at times!
Quick Selection & Magic Wand Tools ( “W” Keyboard Shortcut )
The quick selection tool in Photoshop is about as close to magic as you can get. The tool detects differences based on contrast along edges. It does a fantastic job in many cases. The greater the contrast between the edges, the better the tool will work. It is why sometimes adding a temporary curves adjustment layer to increase contrast is a great idea in aiding with the selection. You simply click and drag along the area you wish to select and Photoshop does the rest.
The MAGIC WAND tool
The Magic Wand selects pixels in the image based on COLOR & TONAL values. This differs from the above tools in that it isn’t selecting based on area of an image. It is selecting color and tonal values within the image.The TOLERANCE value in the TOOLS menu is from 0-255. Choosing a lower value will choose less of a color & tonal range while choosing higher values will choose a greater range. I have linked to a video HERE (6MIN MARK) in this article and it shows a very good use for the magic wand tool and that is when creating CHANNELS. With the Tolerance set to “0”, only THAT color will be chosen and in the case of a CHANNEL, black or white. It assures us of the mask being PURE. This is a very important concept to grasp when creating good channels that will of course be used for layer masks.
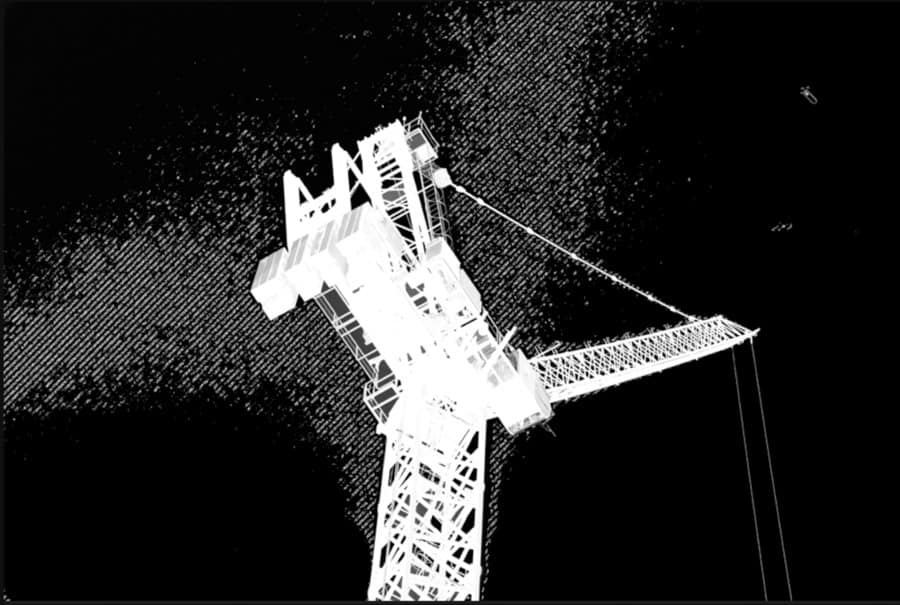
This mask looked good but the wand doesn't lie!
Anti-alias check box will help create smoother edges in your selections. In most cases you will want this to be checked since this helps with transitions on areas that are rounded in any way. The contiguous check box is to be checked when you want only colors and tones that the wand selects that are, well, contigous. Think of the 48 CONTIGUOUS states in the United States and that should help you visualize what it means! 🙂 Or if you are choosing a man wearing a green jacket and his hat is the same color but you only want to select the jacket, you would make sure to have CONTIGUOUS checked on. Here is a Gradient Example:
Color Range Tool
One of the most powerful tools in Photoshop is the COLOR RANGE tool. It selects pixels in your image based on color and tone like the Magic Wand tool but with much more powerful and PARAMETRIC control. You may hear that word being used to describe tools in Photoshop and what it basically means is the ability to make changes on the fly and you’ll see them as you make them on screen rather than having to apply them and then see the results like some features.


This tool is under the SELECT MENU inside photoshop (Or use the Shortcut). Once you choose this option, an box will pop up with various features. Fuzziness is basically like TOLERANCE is for the Magic Wand tool. You have a drop down menu that allows you to select the sampled color you’re trying to select but also all Reds, Yellows, Greens, Cyan, Blue and Magenta – the colors that make up all images. You can also select specific tonal ranges here as well as skin tones.
The DETECT Faces option works really well at detecting facial tones. Detecting Skin tones must be selected for this option to be available.
Focus Range Tool
The Focus Range tool does just what is says; It selects areas of the image that are in focus and creates a selection. It can come in very handy when trying to pick out very sharp areas of an image and manipulate them differently than the rest of the image or to take the selection and put it in a whole new environment by compositing with a new background.

The default values work very well with many images but you may experiment with the options within to get the desired selection you are after.
PEN Tool
The pen tool is a tool that is unlike the other tools in that it creates a path. Paths are vector based unlike pixel based selections. This article won’t be dealing with vector shapes and masks (another form of masking) but it is important to realize how powerful the pen tool can be.
When making fine selections in areas of an image where there is plenty of difference in color and contrast, the the tools listed above work very well. The PEN tool allows razor sharp precision when creating a path which will then become a selection. When you create and draw out your selection using the PEN tool and complete the loop, you can then hit CMD+ENTER to make it an active selection. It then becomes more marching ants – just like any other selection tool.
NOW TO THE MOST IMPORTANT PART OF PHOTOSHOP!
CHANNELS
Channels are the backbone of Photoshop. Every color image (RGB Color Mode) has at least 4 Channels – RED – GREEN – BLUE and the RGB Channel. The RGB Channel is basically a composite of the three color channels combined. The three color channels in Photoshop are, by default, shown in Greyscale. Actually, this is an option in the Preferences area where you could view in color if, for some odd reason, you wanted to. These foundation channels cannot be altered within Photoshop. These color channels can be duplicated and they are then grayscale channels that contain the luminance values from that channel. LAB and CMYK color modes work differently and are outside the scope of this article.
Here is an interesting look into how Photoshop mixes the RGB color channels. The “Geek” side in you will like this! I took this image of a duck my dad has and made three versions of the same photo with all three colors – a RED, GREEN and BLUE copy of it by filling in an empty layer on top of the image with RED, GREEN and BLUE, changed the blend mode to Multiply and merged the two layers to give me the 3 files – one of each color.
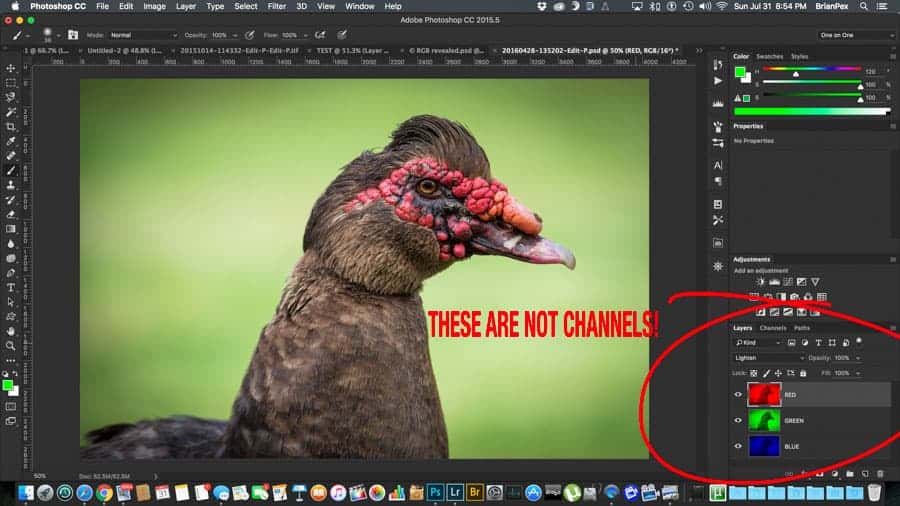
I opened them into layers in PS and changed all the layers to lighten blend mode. No matter which way you stack the layers, it will yield the RGB photo as it was originally! What’s the point? It shows you how Photoshop sees an image and blends them together. Just kinda cool and some of you may like that! 🙂
ALPHA CHANNELS
Alpha Channels are masks. Masks are Alpha Channels. Confusing? Don’t let it be. Alpha Channels are basically saved selections within the Channels panel. When you create a selection and apply an adjustment to the selection in an adjustment layer, you will see an Alpha Channel in the channels panel shown. This Alpha Channel will vanish, however, when you move off that adjustment layer. Also, if you merge layers and flatten them, your masks will be gone. Having all of your selections SAVED in the channels panel is the way to work.
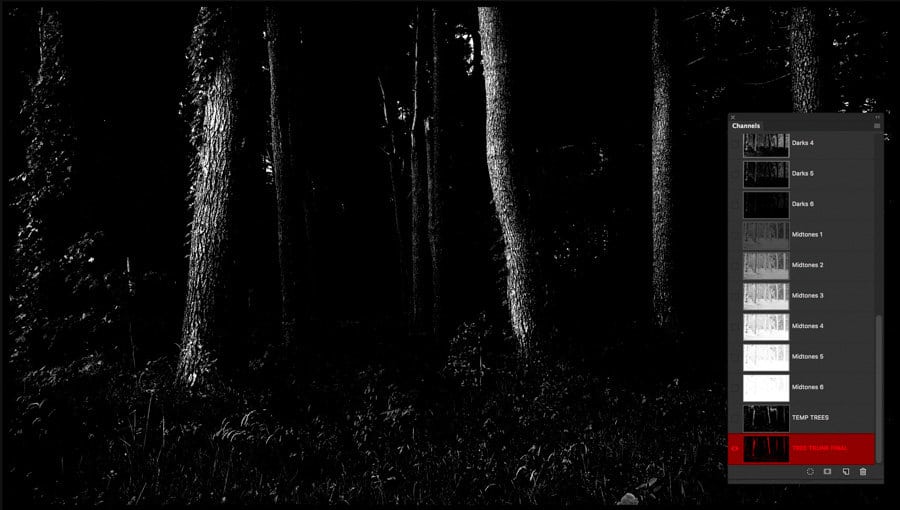
Here inside the channels panel you can create, adjust, manipulate and make just about any mask you want to. Luminosity masks are a big topic in digital photographic editing today and it is in the channels panel where all of these masks reside. There are endless ways of creating masks in photoshop.
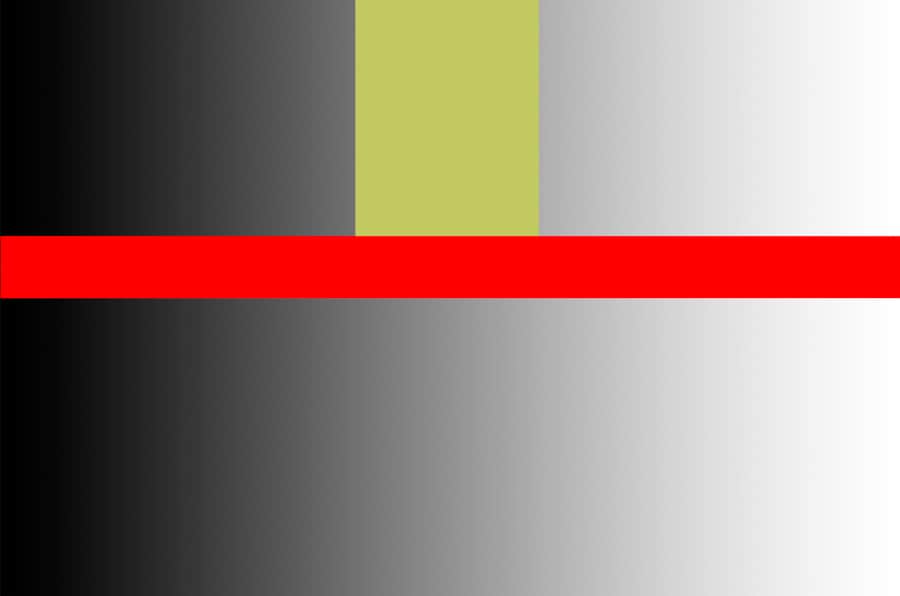
The main thing to always remember with channels is that black conceals, white reveals and the midtone grey values from 0-255 (0 = Black & 255 = White) will let varying levels of information through to be seen.
SAVING SELECTIONS
Once you have a selection in Photoshop active, you can save the selection by going to the SELECT menu option and moving down to SAVE SELECTION or just hit the save selection as a channel icon at the bottom of the Channels Panel. You can also save/load selections from other files you have open in Photoshop as long as the dimensions of the image are the same. This can be very useful with images from cameras since the image size will always be the same unless cropped.
ADDITION, SUBTRACTION, INTERSECTION
When creating selections, we are given the option of adding, subtracting and intersecting. This is so important to know when making CHANNELS in photoshop. When using any of the selection tools, you can use the little boxes on the tool bar to activate the ADD/SUBTRACT/INTERSECTION of the current selection. Those little boxes are of no use since we have shortcut keys which are absolutely needed if you’re ever going to be halfway serious in Photoshop.
With a selection tool active, clicking and dragging in the image area will begin creating a selection. If you want to add to that selection or any selection while in the image area, press SHIFT and a little “+” will appear near cursor. To subtract? Press OPT/ALT and a “-” will appear. Intersection? Press BOTH those keys at the same time and an “X” will appear near your cursor.
When you have an active selection and want to add a channel to it, simple hold down CMD/CTRL & SHIFT. Subtract from a selection? CMD/CTRL & ALT/OPT.
To Intersect that selection, again you must hold down CMD/CTRL & OPT/ALT & SHIFT. Practicing will make this become muscle memory and you’ll be making these selections without even thinking of it.
This becomes very important in the creation of masks. An example would be trying to select a highlight reflection off a building. You want to make an adjustment to only that highlight and nothing else. You could go into your channels panel and with luminosity masks created select one of the channels that shows this highlight in a fairly selected area. Remember, the lighter it is – the more selected. Make the selection of this channel by pressing CMD/CTRL & Clicking. You're brights selection is made. You could then grab the lasso tool and, while holding OPT+SHIFT draw, carefully, around this one spot you want to make adjustments. When you complete the loop that selection will now ONLY be that bright spot but with all the fine luminosity information in that selection. Now go to the bottom of the CHANNELS panel and click the little rectangular icon with black dot in center (SAVE SELECTION AS CHANNEL) and you're done creating the selection and it is saved for use when you need it.
The combining of highly accurate, tone/color based selections with varying grades of selected pixels with Photoshop's basic and simple tools allows for extremely precise CHANNELS.
CALCULATIONS
A very powerful and advanced way to create razor sharp selections of certain objects is by using the calculations command. Trying to explain this via text is a little on the difficult side so I have in cluded a quick video HERE!!
Well that does it for this article. Be sure to comment below with any questions or comments. I am linking to THIS VIDEO that explains to new SELECT AND MASK feature that has replaced refine edge in Photoshop incase anyone is interested. Have a great day and keep SHOOTING 🙂
I use (and teach) Photoshop Elements, and some of what you explain applies to that software. I had to try out the separate channels example for myself. Thanks for sharing!