

Some Tips & Tricks To Improve Your Post Production Workflow
Post processing digital images in Lightroom & Photoshop to many photographers is a great way to make our digital images as best as they can be. From a simple crop to complex luminosity masking techniques, there are always tips and tricks to be learned along the way that make it a much more enjoyable and powerful process. Listed below are 10 different tips, tricks or techniques that you will most likely find of great help when processing your digital images.
1 Customize Your Photoshop MENU
Photoshop was created in 1988 by Thomas and John Knoll. Since then, there have been hundreds of features and options that have been added to the many menus and submenus within Photoshop. You have menus for MENUS!! Panels have menus and so many different options it is no wonder it is a very intimidating application to use.
There is a way to have Photoshop display a much simpler and easy to use interface by altering all the menu commands and options using color codes. It is fairly easy to do and will REALLY unclutter your PS menus. After a while, you will be able to whiz through Photoshop using keyboard shortcuts for almost everything. But while you are getting more familiar with PS, here is what you need to do in order to customize your menus:
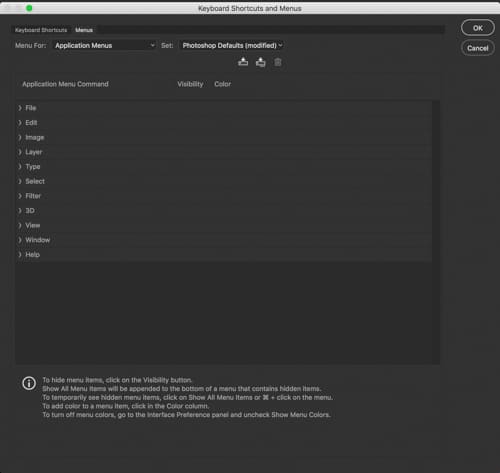
- Go to Edit>Menus and click. This box will appear:

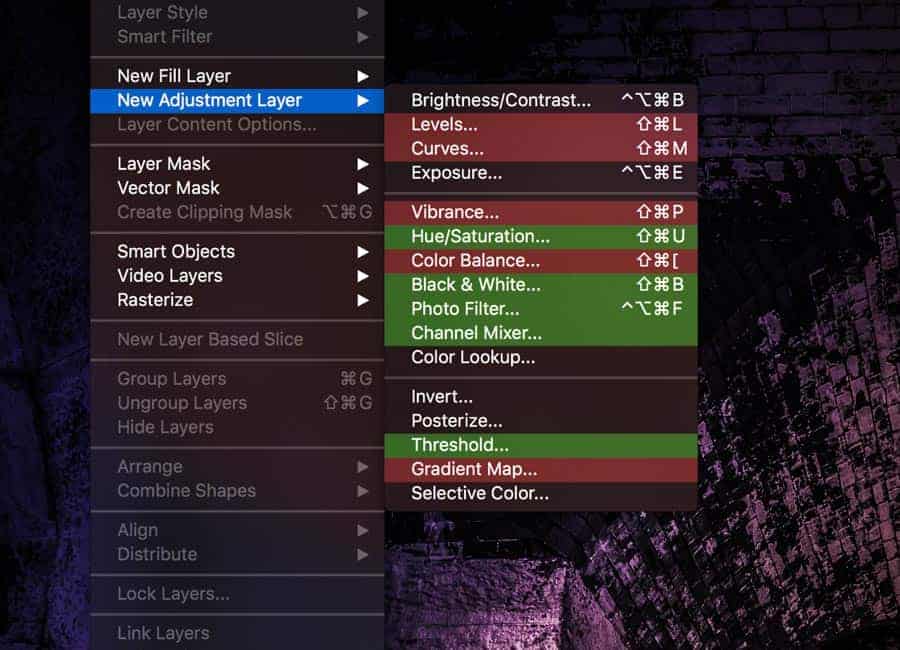
Adobe Photoshop Menus Customizing - Under Each Menu Option, there are sub menus. You can hide and get rid of the menus and options you never use or would rarely use. (Don’t worry – they are still there for you to use.)
- You are able to color code EVERY single option in any menu and also anything in the PANELS (Layers, Channels, etc) which can really make Photoshop much easier and less complicated to navigate.
Greg Benz is an excellent photographer and expert image maker along with being an OUTSTANDING teacher when it comes to everything from the very simple in PS to the more complex tasks such as advanced luminosity masking and much more. He has put together a great little video HERE explaining exactly how to set up your custom menus and has even made a custom menu that has options most photographers would have interest in. I reached out to Greg for this article and he’s a great guy that gets back to you as soon as possible and is willing to always help. He’s got a real passion for all of this and it shows. Check him out!
2 Custom Vignette
You might be like alot of people that have used Lightrooms Post-Crop Vignette feature under the “Effects” panel. It doesn’t matter if you are using any one of the three different modes (Highlight, Color Priority or Paint Overlay), you are limited on how you can make your vignette look. This is a limitation here in this section of LR but it isn’t the only way. There are two vignette methods I will discuss here; one is in PS and the other is right in LR.
While in LR, instead of using the Post-Crop Vignette option, go to the radial filter (Shift + M is the shortcut) and you can move your cursor out on the image and click and drag to create the shape you want. Holding down the SHIFT key while dragging will create a perfect circle. Holding down the Alt/Option key while dragging will result in the shape to follow the cursor direction. Shift and Opt/Alt together will create a circle that follows direction of cursor. Trying this in LR will make this much easier to understand. But here is where the real trick is with this tool:
Once you have your desired shape made (Make sure Invert Mask is NOT checked) you can make adjustments as you please such as darkening the outer border to bring attention to your subject. One thing that is very nice about this tool is that the subject does not need to be in center, You can click and drag the Radial filter to wherever you would like. A great little tip here is you can choose any point and by holding down ALT/OPT you can move that point in or out and it will be the only point that moves.

The advantage doesn’t end there. Using the Brush tool within the Radial Filter tool allows you to draw in or take away from the effects applied. Choosing the BRUSH from the menu (See Image) and drawing on your image will add the adjustments made in the sliders panel and holding down Opt/Alt will take away adjustments in that area.
In Photoshop, using the elipitcal marquee tool and set a soft feather value (Pixels setting depends on how large the image is). All you need to do is create a selection with the tool and then make a curves adjustment layer. The mask on the curves layer will be the eliptical selection you just made. Go to this mask and INVERT it by pressing CMD+I or CTRL+I. Then go to the curves adjustment and in the center midtone area drag and pull down and this will darken the outer edge of your image. You can also drag this up for a lighter vignette. Once you have this made, simply paiting black or white on the mask will allow you to create a custom vignette.
3 Auto Select Layers
When working with a Photoshop file with many layers, it is very easy to get lost in your work. You may want to jump quickly to a specific layer without having to jump over to layers panel and search around for that specific layer you want to work on. There is a great and quick shortcut that will make you very happy to know. Here it is:
- Hit “V” to activate move tool.
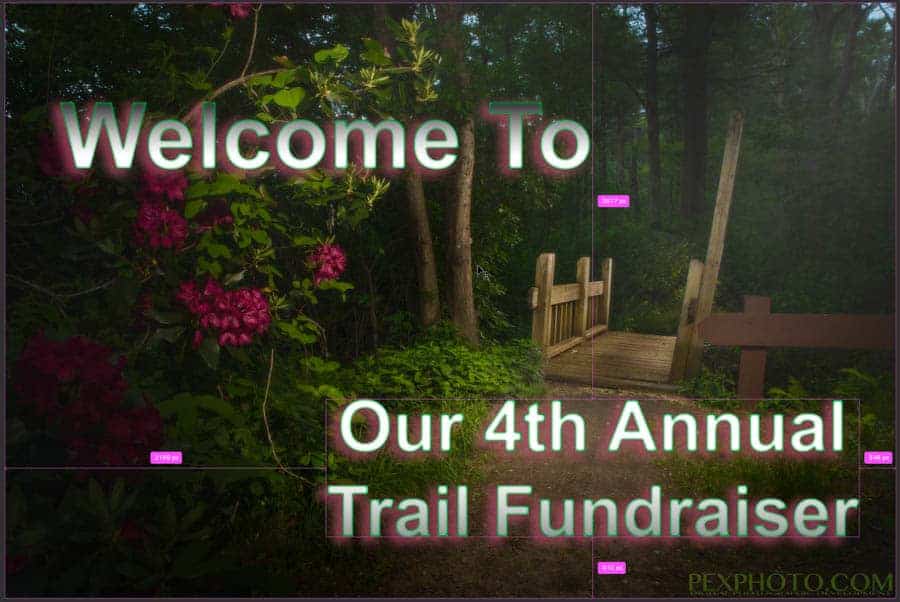
- Press down CMD or CTRL. This will activate the AUTO SELECT feature. A pink overlay will show up with measurements that correspond the the various layers and their proximity to the edge of the document. For your information, auto select is in the top left corner near the move tool options but leaving it on all the time is a major pain because every time you click on the image, you may be jumping layers by mistake. It is best left unchecked and instead use this method.
- You can move your mouse over the area you wish to jump to in the layers panel and when you click on those pixels under the cursor, you wil automatically jump to that layer in the layers panel!

When using the Move tool (Hit V to activate it), hover over your workspace in PS and press CMD/CTRL and the layers with their distance from edge of document will appear. Whatever pixels you are over when you click, you will jump to that layer in layers panel.
This is an invaluable tool when you have a document with many layers and the layers have scrolled outside of the layers panel. You’ll be glad you knew this little tip! When using text layers and other objects in your workflow, this becomes almost needed!
4 Modify Brush For Supreme Control
When dodging and burning in Photoshop, for instance, a round brush sometimes just is not the best shape for a brush. Luckily for us, changing the shape of the brush in Photoshop is super simple. This comes in super handy when dodging and burning flat landscapes. A round tip on the brush doesn’t go with the land. A flat brush does.

You simply need to right click when using the brush and a little box will show up. The brush tip is shown in the window in the image shown here. Simply click on those little control points to modify your brush. Once you are done, simply hit enter or return and your new brush shape is ready to be used.
5 Change Brush Tip Instantly
When using the Brush tool in Photoshop, you may want to change the brush tip for various reasons. This is a very simple to do. All you need to do is hit the < or > keys to flip easily between all the brushes in the current set of brushes! Makes it a whole lot more simple to work with the Brush tool!
6 HSL Adjustment Brush
Have you ever wished that you could use the HSL sliders but only for specific areas of your image? You can. This is done using Photoshop and the Adobe Camera Raw Filter. It is actually very simple. This is what you need to do:
- Make sure the top layer is the pixel containing composite image you want to adjust. If you have made several adjustments in Photoshop, simply Press CMD/CTRL+OPT/ALT+SHIFT & E. This will make a top layer image of all your work merged into a single image. You could simply flatten all the layers also if you wanted or you may be coming straight from lightroom. As long as you are on the image pixel containing layer, you're all set!
- Choose Filter>Camera Raw filter. This will open the Camera Raw Filter. You can then choose the HSL/Greyscale slider option and make your adjustments. These will be global edits but that is ok for now.
- When done, click on “OK” in lower right corner.
- In the layers panel, go down to the ADD layer mask icon and click while holding Opt/Alt. This will apply a black mask and your adjustments will not be seen.
- Now all you need is a white brush to let the camera raw adjustments show through. This method can be used for any and all adjustments in Photoshop. It is very hand for the HSL adjustments along with many more.
7 Pen Tool Quick Selection
The “P” Pen tool in photoshop is one tool many Photoshop users have a love/hate relationship with. However, once you get used to this quirky tool, you realize just how powerful and awesome it is. The pen tool creates Paths and for most Photographers, we create these paths simply to make selections. You can right click once your path is completed for a list of options but to make a selection immediately after your Pen tool path has been created, simply press CMD/CTRL+ENTER or RETURN. The path lines will turn to the marching ants and you now have your selection.
8 Change Layer Position Quickly
Have you ever created a layer or have been working on a layer and you had to change to position of this layer in the layers panel? You go over, click and drag on the layer and then have to scroll down the layers panel – it just seems like AND IS a pain. There is a shortcut and easier way to work. Simply click on the layer you wish to move up or down. CDM/CTRL + [ or ] will move the layer down in the layers panel or up, respectively. It is a little thing but one that is very good to know and utilize in your workflow.
9 Brush In Sharpness
There are several ways to sharpen your images in photoshop. In fact, one of the greatest things about Photoshop is that there are always a handful of ways to do similar things but they are always just a little different. This technique is one of those type things. This technique uses a HIGH PASS filter layer, a black layer mask and a white Paint Brush to “brush in” the sharpness. Here is how it works:
- With image layer selected, go to FILTER>OTHER>HIGH PASS
- Adjust the Radius until you are satisfied with the level of “Sharpness” – image size and look are factors. Practice with this method to know what you like to use.
- Click OK
- Now change this layer blend mode to LINEAR light.
- Go to the Add Layer mask ICON and click while holding down ATL/OPT. This will create a black layer mask. Your image will look as though nothing was done.
Now is the sharpening of very specific areas. Using the BRUSH tool with white as color, paint on the black layer mask to reveal the SHARP underneath layer. Be cautious here; you should use low opacity with the brush tool and brush in the effect with a few passes. This works very good on hair and other fine details and textures.
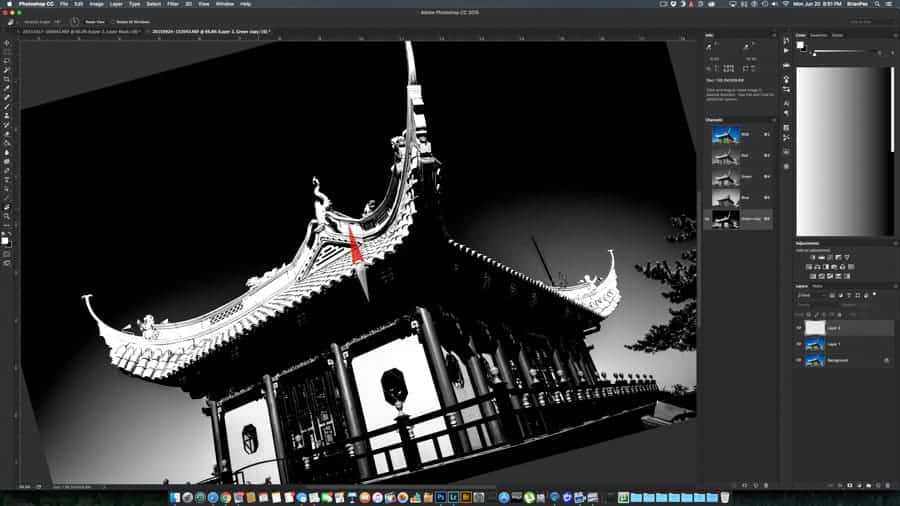
10 Transparent Layer Dodge and Burn for AMAZING control
You may be aware of the 50% grey layer for DODGE and BURN technique on your images. This is the same thing, almost. Instead of using a 50% grey layer set to the Overlay or Softlight blend mode, using a transparent layer allows you to select the paint that you have laid down on the transparent layer and then make further adjustments such a HUE and Saturation, Curves, Levels, etc. It is very good when painting in “light” because you are able to adjust contrast further than what the OVERLAY blend mode allows.

Simply make a blank layer and change the blend mode to Overlay. You can now, with a white brush (Dodge) paint over areas of the image you wish to lighten. Once you have these areas painted, CMD or CTRL click that layer. You will see the selection outlines on the paint areas you just created. With these selections made, you are now able to apply any adjustment layer you wish. It is a very handy technique and one I have found myself using a lot since I came across this method!
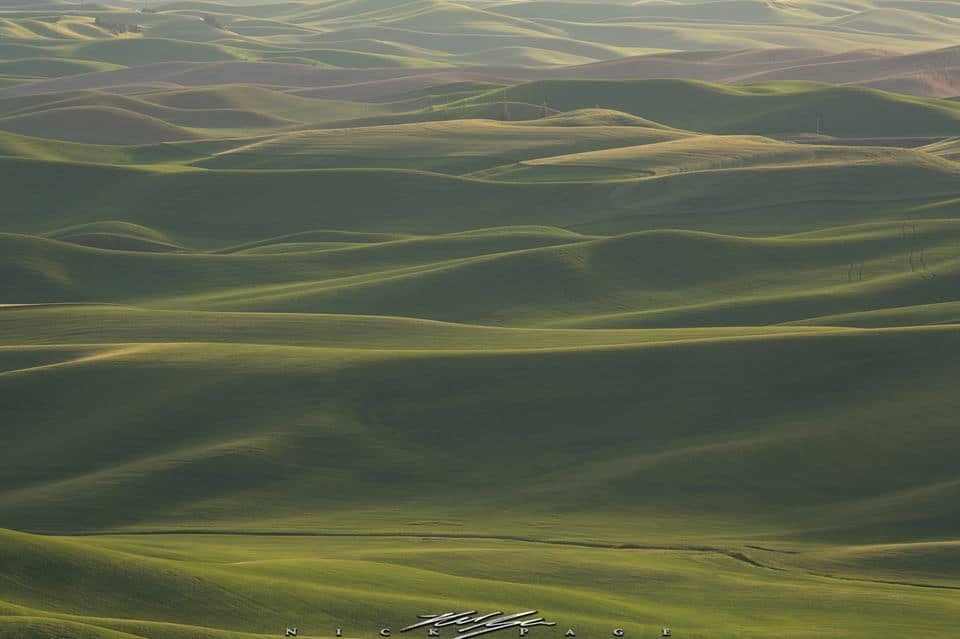
As a side note, I often touch base with other photographers while writing these articles. Dodging and burning is so important in post processing – so much so I had to share this example Nick Page sent my way. Nick sent me these files/before and after. He did only 3 adjustments to this image: LEVELS, DODGING AND BURNING and an ORTON EFFECT.
Dodging and burning is a technique that will take your image making to new heights!
BONUS TIP – Wacom Tablet Users MUST USE!
Rotate Your Image For Natural Brush Strokes
If you have been around Photoshop for even just a little while, you have probably come across the issue of having to make strokes from right to left with a mouse or stylus over portions of your image in areas where up and down or 45 degree strokes may be more natural. Just like drawing on paper, it would be nice to be able to twist and turn the page you are working on so that your strokes will go the way you want – not the way Photoshop makes you.
With the “R” Rotate command in Photoshop, this is very easy. If you are using a Wacom Tablet, I would highly suggest making one of the soft keys on the tablet the “R” key in the customized settings.
When done with the rotation, simply hit the ESC key and you image will snap back into proper position.
It is a super useful technique to retouching work on faces and also works super great when manipulating layer masks/Alpha Channels to get them just the way we want them.
I hope these tips help you in your workflow. Once again, if you have any questions, comments or concerns, please comment below or reach out to me on Facebook or Instagram. I am more than willing to help! Happy Shooting 🙂
Thank you Brian. Your tips and tricks are really very useful. Hope this also helps us after processing.