

Adobe Lightroom has become the most popular photography management and editing application over the last few years for many reasons. Not only is it a very powerful application that allows you to import your digial images, keyword them, rate them, sort them into collections, export them, etc – It is a also a VERY powerful editing software package as well. One of the very best things about Lightroom is that it is a highly intuitive in terms of operation. Not only are the tools very much visible and fairly easy to use, there is an order to the workflow that has been well thought out by Adobe engineers and, for most users, makes a whole lot of sense. There are some powerful features that are a little more complex and hidden (such as using modifier key (opt/alt) while sliding the masking slider in the details panel to show what is being sharpened) but for the most part, you could sit down with very basic knowledge and start editing your images and come up with some fairly good results with a few tutorials and some reading on various tools. After some more serious instruction such as Improve Photography’s “Lightroom 101” course (available at ImprovePhotographyPlus) you will be fully versed and able to use Lightroom and create stunning, professional images.
There is a point, however, where you will want to add more to your images. Maybe you’d like to add some fancy text to your images. This is something that simply cannot be done in Lightroom. Perhaps you have seen all the cool things that can be done by blending multiple images into one master image with effects and outcomes that are impossible using only LR (Lightroom for short). Maybe you would like some more control and more powerful retouching tools for your portraits or images in general.
Whatever the case may be, eventually you will want to move to the more powerful application in the Adobe Lineup and that would obviously be Photoshop. Photoshop (PS for short) is the premier software application that has been THE image application for digital photographers and designers for over two decades now. Many non professionals now have access to the power of PS since Adobe started their Creative Cloud subscription plan that negates the need to shell out $500-$600 for a single piece of software that they have very little idea on how it is used. Since the Adobe Photographers plan includes Adobe Lightroom and Photoshop for only $9.99/mo, it is an Application that many have access to but don’t use that much or have just toyed with because, unlike LR, Photoshop it is very complicated at first glance. It is sort of like going from driving your car and then being put in a cockpit of an airplane. Most people have the “Where do I start?” or “What are all these buttons for?” type reaction.
Unlike LR, PS is not at all intuitive. It is a professional software application that was designed for professionals – many whom have been trained to use this wonderful, awesome and just flat out amazing Image Creation Masterpiece of Software Masrery!! This presents a problem for many because it keeps people from taking advantage of many of the tools PS offers that can make your images anything you want them to be, literally! Improve Photography Plus has not only a Lightroom 101 course but also a Photoshop seriers – 101 and 102. If you’re not at all familiar with Photoshop, it would be a good idea to jump into those videos and Jim Harmer will walk you step by step through the software and get you very capable in a much shorter time period than you may think. Again, look to ImprovePhotographyPlus for this video series and much, much more.
All of that being said, here are 10 REASONS why you need to be using Photoshop.
1 Photoshop TOOLS, TOOLS & TOOLS!
Photoshop has an assortment of tools for just about any idea you can come up with. The tools themselves look very basic at first. It is when you combine the various tools with other options and features inside of PS that makes them very powerful. The idea that your imagination is the only thing that limits one using PS seems, at first, hard to grasp and like a line or BS. But after using PS for just a short time, you will find yourself coming up with all sorts of creative ideas over and over! It really gets your creative juices flowing and will actually change the way you shoot it many instances.
Here are a few key tools used in Photoshop for photographic images:
The paintbrush can be utilizes for an almost endless amount uses inside of PS. Unlike the adjustment brush in LR (Which is an amazing tool), you can create your own brushes specific for various images. You can even have your brush respond to pressure when used with a pressure pen & tablet such as a Wacom Tablet. With 2048 levels of pressure, it's like using a real life brush or writing instrument. As a side note, if you've gotten pretty serious about your digital editing, you may want to look into getting a Wacom Tablet. I personally have the Wacom Intuos Pro (Small Version) and it is fantastic. The fact that you are using your own natural writing motion to make edits and navigate the work area is amazing. Add to that the hot keys provided on the Pro tablets and you can zip around LR and PS very nicely. The real benefit is with Photoshop vs Lightroom when it comes to the tablet & stylus – another reason to up your Photoshop skills and begin taking advantage all PS has to offer.
Unlike a real life paintbrush which is used to lay down paint in a painting, the brush in photoshop has endless uses far beyond doing just that digitally. It is especially useful when used in conjunction with layer masks and adjustment layers so that you may “brush in or out” your adjustments. You can also make selections with the various selection tools and then refine them using the brush. For instance, using the quick selection tool works great many times where there is a nice edge or enough contrast. Sometimes, however, it just won't select what we want it to in some areas and thats when you enter “Q”uick mask mode. I stress the “Q” there because hitting the “Q” will bring you into quick mask mode. See my included VIDEO HERE for some examples in photoshop using various tools. While in Quick Mask mode you can use a black or white brush to add to the selection (WHITE) or take away (BLACK). Black, White and various shades of gray are the only colors available in quick mask mode which is the exact same thing as on a layer mask. This is because we are not interested in color here; we are only adding or taking away from a selection.

The brush has endless uses and I would suggest looking at various videos on YouTube for some cool things you can do with brushes! HERE IS ONE from Aaron Nace over at Phlearn on YouTube..
Quick Selection Tool is a tool that makes very quick selections by simply clicking and dragging your cursor around and it will create a selection based on contrasting edges. It works amazingly well for many uses.
Color Range is a selection option that picks out a certain color range and makes a selection out of it. Have you ever seen a catalog with a model in the same exact spot but with just another color top on? Well they didn't happen to get every hair and every finger back in perfect position for the next photo. They used the color range tool and adjusted the HUE, SATURATION and LUMINANCE to get the color looking just the way they intended! MANY uses for this powerful tool!
The Clone Stamp Tool is a powerful tool that lets you sample pixels from one area and then copy those pixels over all with a stroke of a brush. It has a myriad of uses that your creativity controls.
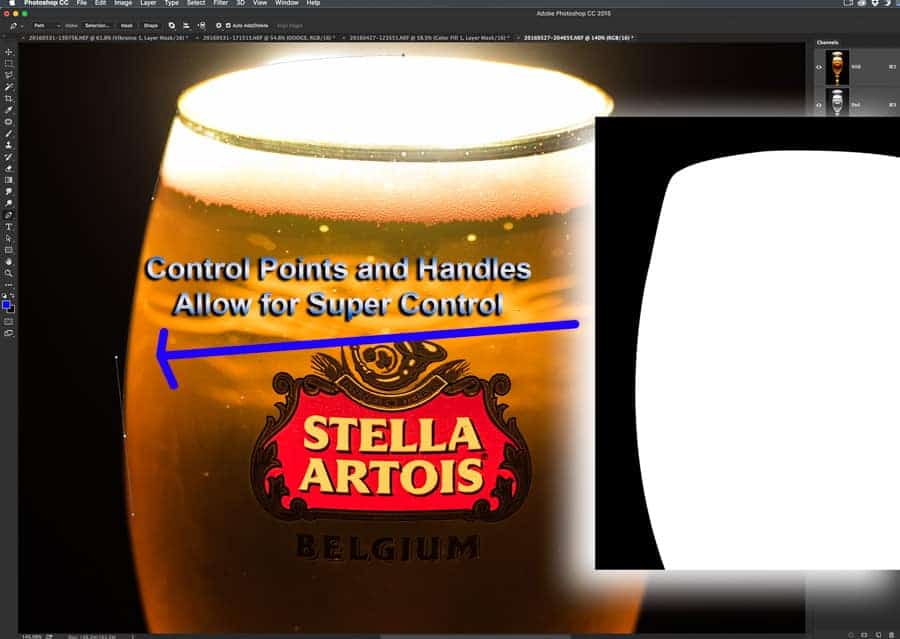
The PEN TOOL is also a very powerful tool that allows for extremely precise selections where other tools just can't do the job. It is a tool that takes time getting used to but a tool that makes making selections in difficult images very possible. I know that many shy away from this tool because it is not at all easy to use at first. I mention this only because like many things in Photoshop, practice is needed. A little time with each tool will super speed your learning process – don't be afraid to practice. CLICK HERE for a great tutorial on using the PEN tool.
This is far from a comprehensive list of the tools but rather just a random sample from the many tools available. You need to explore and learn more!
Selection tools are of most importance in photoshop because selections are the heart of what photoshop is all about. Instead of global edits in LR, PS lets you select very specific areas of an image (or color/tones) and work on just that part of the image.
Filters are another subset of tools inside of PS that add a whole new dimension to your digital image editing. . Where else can you drop 20lbs in a few clicks of the mouse? With photoshop liquify tool, it is very quick and painless – no diets needed! 🙂 CHECK THIS VIDEO OUT ON YOU TUBE!
2 TEXT
Adding Text to your images is VERY important for many uses. Being able to create special images with top notch professional text and styling is not only possible in PS, it isn’t all that complex once you get the hang of it.

Once you add text, you can then access layer styles to give your text what seems like an unlimited combination of effects. Again, your imagination is the limit. Photoshop is only a tool to help make your visions into reality.
No matter how good you are with LR, you simply cannot add text – not at this time anyway (June 2016). So jump into PS and learn a few tricks to add a whole new element to your tool box. And it doesn't end with just the text that can be typed out. You can create selections FROM text and then have more powerful choices at your finger tips. HERE IS ONE of MANY cool videos showing a great way to utilize text as a selection in Photoshop for a REALLY COOL effect!
3 LAYERS
Layers are what makes Photoshop, well, PHOTOSHOP! The ability to layer adjustments and edits on top of each other in a logical and very clear order is probably the greatest strength within PS itself. You can make NON Destructive Layer adjustments to your images – feel free to edit them at will. By layering your adjustments, you see a very distinct and organized “map” of your edits that you can tweak to exactly how you want. Blend modes are available on layers to change the looks and provide advanced functionality for many alterations.
Blending modes in the layers panel allow you to manipulate your images and theses modes give you an almost unlimited array of looks and uses to help improve your images and make them just the way you want them.
4 LAYER MASKS
Layer Masks are the true reason why Layers are what they are and so powerful in PS. The mask is a simple black and white representation of what is visible on the layer or what is hidden – and all else in between. White reveals and black conceals – as the lingo goes for layer masks. Grey areas from very dark to very light show partially visible sections of that layer – light being very visible and dark being more hidden.
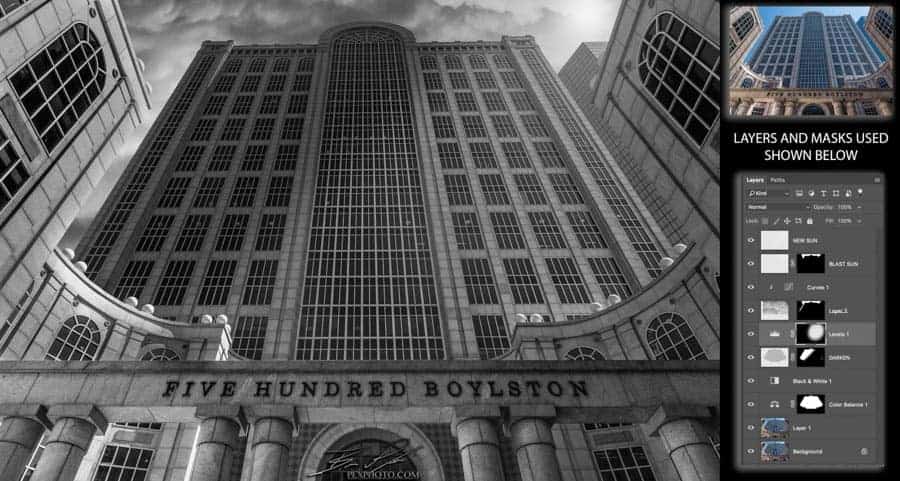
Layer Masks allow you to manipulate certain areas of your image while not affecting others. This is possible somewhat in LR. The adjustment brush in LR is very powerful and has an “Auto Mask” feature built in. But in PS, you can make masks not only based on an area of the image but also for color (Using color range tool), what is in focus and what isnt (Focus Range) and also based on tone using channel based selections which dictate luminosity values. The uses are pretty much endless here and one of the biggest reasons learning photoshop can be a great addition to your digital processing.
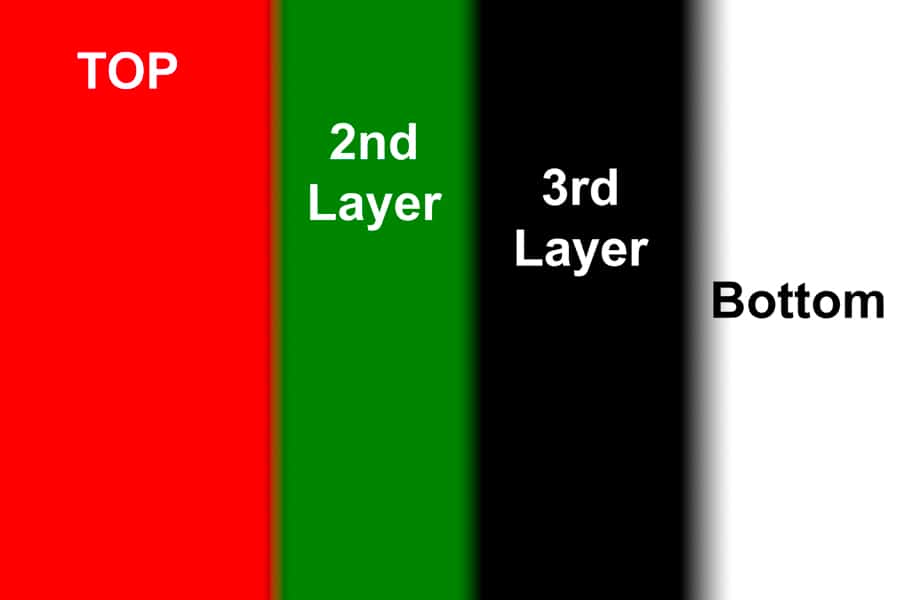
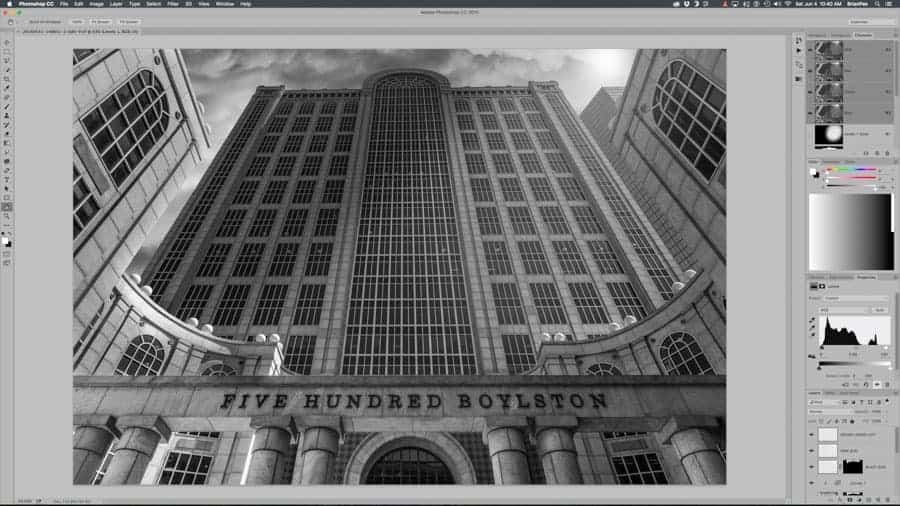
Here is a very crude image but it shows you EXACTLY how layers work in Photoshop. The Red Layer is on top and since its mask only has the WHITE on the left side, only the red shows on the left side and this lets the next GREEN layer show through. The green layer has a mask that is masking out or in about half that layer. Then why does only a small portion show you may ask? Simple – the RED layer is on top of that layer. This brings us to the BLACK layer which is taking up only a small portion of the entire image but its mask takes most of the image up in the mask area and once again the RED and GREEN layers are on top so only a small portion of that shows through. We then have our base layer that is white showing on the bottom over to the right side. Why no mask here? You will never have a mask on the bottom layer because it is, well, the bottom layer. Get it?? If not, don't worry. Just jump in. You will and you will laugh at how simple it is once you get into it!

5 SPEED AND SMOOTHNESS
Many LR uses (this writer included) sometimes wish that the tools and features in LR worked more smoothly and without any lag. Personally I am using a 2015 iMac 5k with an i7 processor, 24GB of RAM and a 4GB GPU. When the image is loaded into memory, it still has a little lag Vs the extreme smoothness you get in Photoshop. I like to think of PS as writing on a piece of paper. It is so smooth and fluid that you forget you're even on the computer at times. This is important because it keeps you in the creative zone.
A great example here when working in Photoshop using dodge and burn techniques is to use the “R” key which lets you rotate the image on screen – like a piece of paper you are drawing on. If using a stylus such and the Wacom tablet, it literally feels like you're drawing on paper because it's the same motion we use when doodling or sketching something. If you use a Wacom Intuous Pro, I would highly suggest making one of your keys on the pad while using Photoshop the “R” key (you are able to set up different functions for different applications). While holding this key down, simply swipe the paper gently to move it around the way you want it. You see that? I said “swipe the paper” because it feels so much like you're working with a piece of paper! Super smooth and intuitive!!
This is not at all suggesting that LR is a sub par editing software application. NOT AT ALL! LR is a super great application that is extremely powerful but the speed and smoothness of PS vs LR is like night and day.
6 FLEXIBLE INTERFACE
In PS, you are able to set up a custom workspace that allows you to organize the tools YOU use where YOU want them and accessing them is very simple. This also allows you to have what you need visible at all times. One of the best benefits of the larger and larger displays manufactures are coming out with all the time is how much real estate you have on screen to work with. Not only does it allow viewing the image being edited to be seen much better but also you can pack all the tools you use on the various “docks” in the PS interface. You may want to have a more loose environment and have the tools float all over the place. The choice is yours in PS. You can look at two different displays from two different users and think it is a totally different application. That is what you call customized!
Once you set your work area the way you want, you can then add it as a new work environment and save it. You may want to set up several various work areas depending on what you are working on. For instance, you're not going to want tons of text tools and options visible on screen when you're strictly working on an image where you may be doing only simple adjustments.
Whatever the task type, you can have a custom set up for just that type work.
7 COMPATIBILITY WITH LIGHTROOM
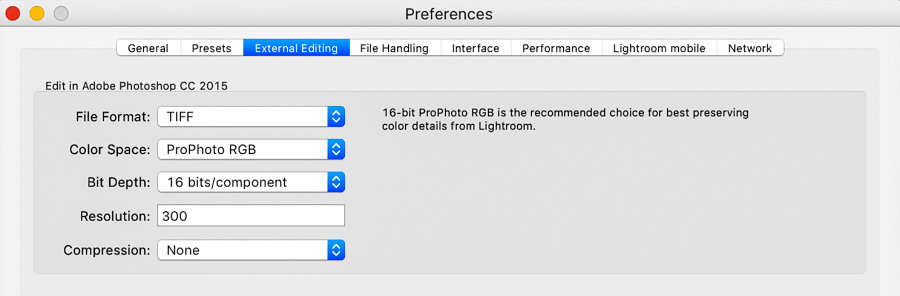
One of the great things about using LR and PS is that they work together – perfectly. They are obviosuly both Adobe imaging products so they were made to work in tandem. Lightroom and Adobe Camera RAW use the same RAW converter engine but lightroom has such an immense advantage in the organizational department. Actually, PS doesn’t organize anything. It is merely an editing tool for your digital images – BUT a powerful one it is! When working on an image in LR and you want to make further changes (Such as adding text, compositing two or more images, more advanced retouching, etc) it is a matter of a simple keystroke: CMD or CTRL-E and it exports the file to be worked on in Photoshop. You can set your export preferences in LR shown below for recommended settings.
Once you are in PS and have made all your tweaks and fine adjustments, you can now head on back to LR. This is a process in the business known as “Round Tripping” since you are going to and back from PS. Your new .TIF (or whatever format you choose) will reside right along side the RAW file in the filmstrip and you will be able to access it just like the RAW files that are there.
Make sure to close the file in Photoshop after you save them.
8 CREATIVE COMPOSITING
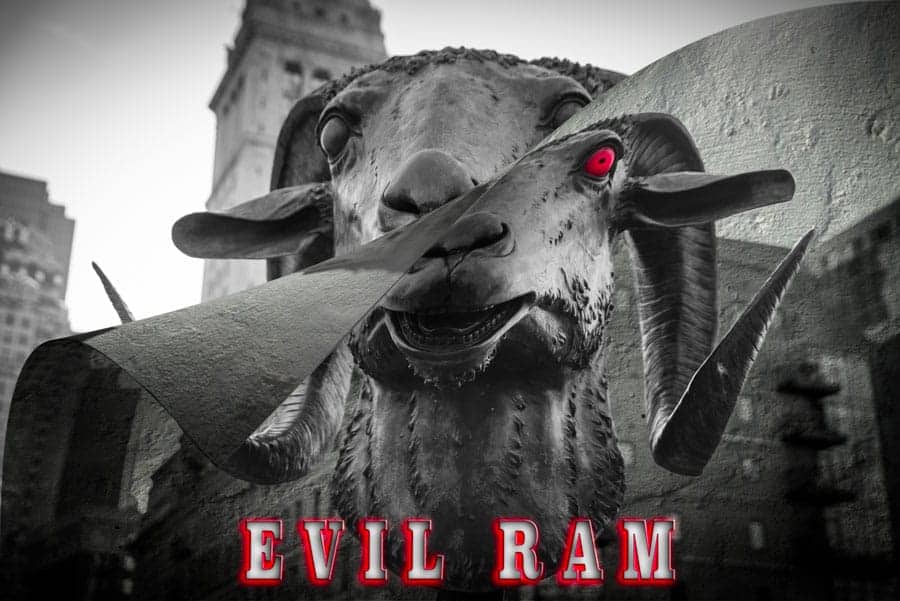
The ability to take two or more images or components from one image to another is simply something that CANNOT be done in LR. The verb “Photoshopped” is basically a word in today’s pop culture because of tricks like that. Taking yourself or someone else and putting them into a scene is something many do in photoshop.


Again the posibilites are endless and are limited only by your mind and your skill in PS. As you gain more skill and practice with these techniques, you will gain the confidence needed to try more difficult task and in time will create incredible and life life composites that will generate many “Oh wow” reactions.
9 Create Professional Documents
With composite skills and learning to use powerful text and graphics together, you are now able to create top notch professional marketing materials and much more! There are many printing companies that will allow you to send them a finished file from Photoshop and using their simple templates, you're able to create customized items such as business cards.
If you're a wedding photographer, having good Photoshop skills is a must. Think of all the endless creations that are possible with Photoshop. You could feature an image with the bride and groom with other smaller images on that same image set in whatever arrangement you would like such as the RING shots, cake cutting, and whatever else you can come up with
Once again, it is your imagination that can either limit your output or bring your work to soaring new levels and all possible by knowing how to use a few simple tools in Photoahop!
10 PERSONAL SATISFACTION AND ARTISTIC OUTLET
If you're anything like me, artistic expression never was an easy skill in which I had great control over. Most people don't have skills beyond the last grade in which they were involved with art at school – many times elementary or Junior High. If you don't practice and work on something, you lose your skills or never develop them. There are some people who obviously have a great ability as we have seen small children able to do remarkable things in art (music, drawing, painting, acting) but for the large majority of us, we are just not the next Leonardo da Vinci in the works. Have no fear!
With digital art, which is outside the realm of pure journalistic image capture, we have unlimited creative power with software like Photoshop. With sites like 500px and many more that have top notch fine art and composite images displayed in an endless array of collections, the inspiration to create these works are all around us. It is really just a matter of learning the tools and really opening up your mind. Where else can you take a mountain from New Hampshire and stick it in the background of a Massachusettes scene? (These are two states here in the USA for international readers). How about take someone's head from someone else and try it on for size?
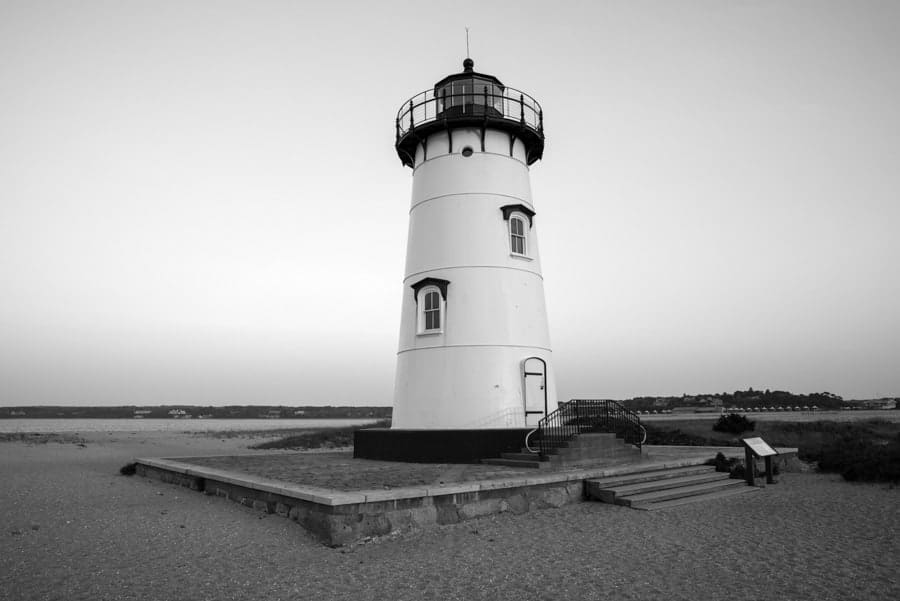
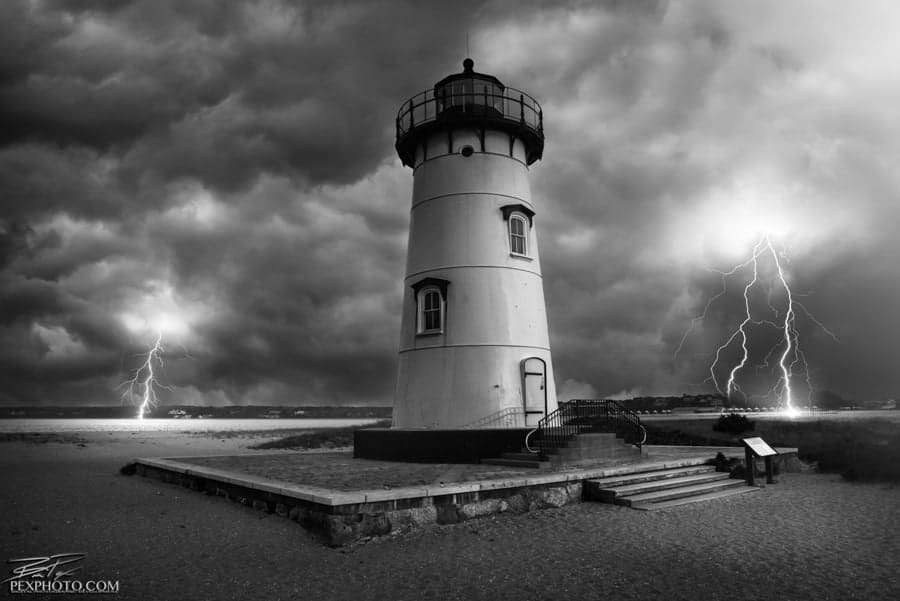
How about creating dramatic sky replacement scenes using skies with epic lighting at locations you may have been at but in less than optimal lighting? It's all possible – and not that difficult with some practice in PS
There is something very powerful about artistic creation and outlet that truly puts people in a different zone. In such a hustle and bustle world where we have little time to think to ourselves, sitting down and working on your ART can provide endless hours of pleasure and, at the same time, fill the walls of your home or office with your ideas – something not everyone can say they have done or will ever do.
The tools are there to be used. The places, faces and things are out there ready to be captured. What are you going to do with them all? Leave your ideas and visions in a place other than your mind. Learn Photoshop and make your visions a reality 🙂
Great article!
Great article Brian! You may have gotten me to possibly decide on getting the Adobe CC for LR/PS. I just have LR and I have been a bit afraid of PS, but between you and our son who said to me the other day, “Photoshop is easy” (and he’s not a photographer), I might just go ahead and pull the plug. But then, I would have to transfer all of my files I have on my current LR to the new one right? I am not computer savvy in any way. So, off to YouTube for tutorials on how to do that one first. Thanks again Brian for the article, it did open my eyes!
Photoshop is easy – after painfully learning it. Like anything else. It’s a relative word – easy.
On the other thing, you should be just fine opening your current Lightroom cat file with a newly installed version of Adobe CC. They are the same files the non CC version of LR use – everything is the same. I’m 99.999999% sure you would just open that catalog with the new CC LR and you would be as good as before – but now with CC. 🙂
Nice write up. My post processing is my biggest issue right now, well that & finding good light. I purchased the TK Action Panel & Sean Bagshaw’s tutorials to help with luminosity masking & now I really need to take the time to learn how to use those tools. And finish up the PS tutorials on IP Plus, too!
Kris – those are great videos by Sean and the TK action panel is nice also. But the more I learn about Ps and utilize shortcuts, other than making luminosity masks which take a while, I never use the other things on the panels. I love to know why something is doing something and not just hit a button. Maybe it’s me. I just really find it very key to learn the tools and how they work to the point you’re overly saturated with knowledge and then move on. Currently working on just curves and curves adjustments to correct color casts and prep work for printers by using luminance values that are 5% outside of the high and low end ranges so when you print, you get the details in the file. It’s a key step. There is so much to learn and I love learning a little bit more each day and try to master a tool every two weeks. So far it’s a pace I’m happy with but we could all learn faster. 🙂 Any questions at all contact me at [email protected] 🙂
Thanks Brian! I may well be in touch. I need to edit out red light on some trees by a lighthouse I shot last week. I know that I’ll need to somehow select the areas I want to change, get rid of the red & match the colors of the other parts of the tree. I’m also fighting PS with regard to selections -I’m having an incredibly difficult time making good, detailed selections & feathering them properly. Currently trying to blend 3 stacks of a Milky Way shot I did the other night. The sky is fine but I have 2 different layers for the foreground (water & rocks/mountains) & I don’t know the best way to select, feather l & blend them other than with the paint brush.
seals my decision
This article might be the kick in the pants I needed to step out of Lightroom and do some work in Photoshop. Thanks!