
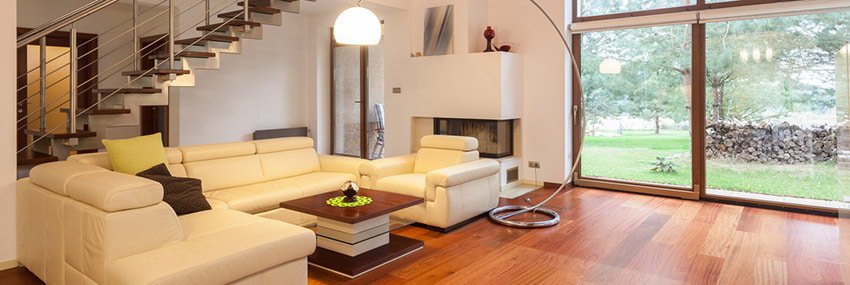
Photographing rooms with windows is probably the most challenging aspect of real estate photography. The extreme dynamic range created by a dim interior of a home contrasted with the bright daylight of the outdoors makes for a difficult exposure.
There are many different ways to handle this high dynamic range (bright brights and dark darks) situation. These are a few that have worked for me as I get into real estate photography.
Flash
So far, I’ve found that flash is the easiest way to balance out the lighting. How does flash help? You set the exposure on your camera for the window lighting. Once the image of the window looks properly exposed, you’ll see the room is too dark.
Now you’ll just add flash in the room with some speedlights until the room is bright enough to match the exposure.
The simplest way to do this is to simply put one flash on the camera and point it straight up at the ceiling. The flash will likely be at full power. Then take the picture. This significantly brightens the room and will get it close to the brightness of the outdoors area through the window.
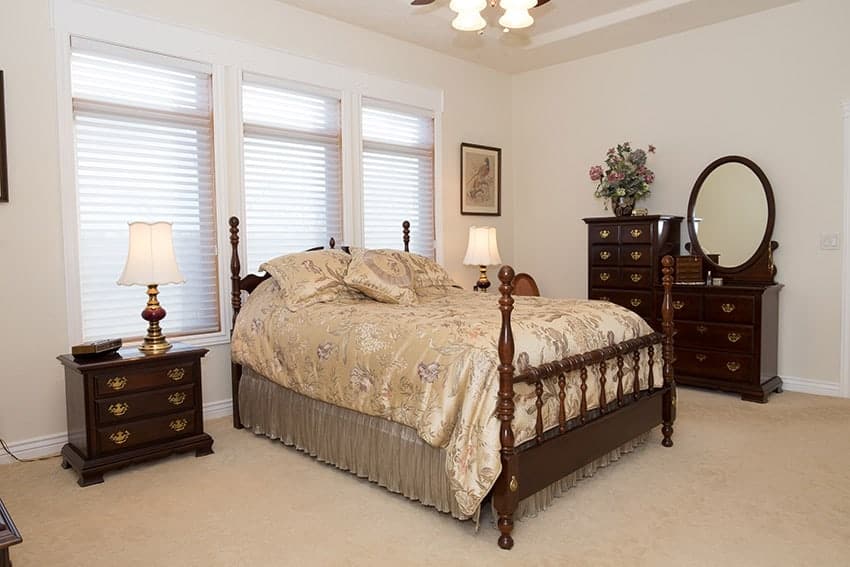
Close the Blinds
Okay, this one is probably a little too simple, but it’s something I didn’t think about in one of my shoots until afterward. Sometimes you want the blinds to be open so the potential home buyer can see the view outside the window.
But often, there really isn’t any view outside the window. For example, the view out the window may be the fence, the neighbor’s house that is very close to the home you’re photographing, train tracks, or other undesirable views. If that’s the case, it may be better to just close the blinds.
When you close the blinds, it’ll de-emphasize the nonexistent view and dramatically reduce the dynamic range.
HDR Tonemapping
HDR tonemapping is probably the most obvious way to approach a high dynamic range situation like this. Tonemapping means taking about 3 photos (one dark, one properly exposed, and one bright) and using software to take the pixels with detail to create a photo that can handle the brights and darks in the scene.
Tonemapping is much more popular among non-photographers (the real estate agents and potential buyers) than it is among photographers. Photographers have given HDR a pretty bad rap, but I generally find that non-photographers like the look of an HDR with a medium-strength affect applied.
Organic HDR
Organic HDR is what I call it when you take a photo that is at a medium exposure (window a little overexposed and the room a little underexposed) and just use Lightroom to bring back the highlights and bring up the shadows.
Sometimes I call this “doing the splits” in Lightroom because your highlights slider goes all the way to the left and the shadows slider stretches all the way to the right.
This usually produces a very natural looking result, and I rarely find that bracketing gives much of a better result. A raw file is so infinitely adjustable that I usually find that stretching a raw file does quite well.
Wait for the Equalization Point
One way to fix the dynamic range problem is simply to wait for the equalization point. The equalization point is when the light outside matches the brightness of the interior lighting (dusk and dawn).
This is actually a very realistic solution for many real estate photographers, because we like to photograph the exterior in nice blue hour lighting anyway, so doing the interiors around the same time of day is a winning solution.
In a practical matter, there is no way a real estate photographer will get the good light for every shoot. Real estate agents often book shoots at horrible times of day for the lighting, but when it does work out to be shooting in good light, just pay attention to the equalization point and you’re gold.
I found that the equalization point would happen for the interior shots before the exterior shot. So if you plan your shoot at dusk and you shoot the interiors first, when you’re done with the interiors, it’ll be perfect timing to shoot the epic blue hour shot with the dark blue sky contrasted agains the warm house lights.
Let the Window Blow Out
Another option is to simply let the window light blow out. In portrait photography, this is common practice. Blowing out the background gives the photo a light and airy feel, which is well suited to real estate photography.
I certainly wouldn’t plan on doing this every time, and I’d never do it if the view is a selling feature of the house, but when you’re struggling to make a house look bright and clean, this is a viable option.
Whether you are clicking pictures of your windows for real estate or just for fun, it cannot be refuted that windows have a very important role to play in enhancing the overall look of the house. Therefore, in case your windows require repairs or replacments, so not shy away from getting the best home window replacement from Your Window Expert.
A great summary of the tools available to us for what can be a difficult photograph. You did leave out using Photoshop to mask in a properly exposed window.
I look forward to your article photographing rooms (bathrooms) with mirrors.
Very good advice, thank you.
What about a tripod and light painting? I have not tried it myself, yet.
Regards,
Michael
(Bermuda)
Anything is worth a try for a creative effect, but it’s pretty tough to get light painting to look even. Also, it’d have to be dark outside.
Light painting with flash can add super cool effect and textures that HDR simply cannot do. However, it is a multi step and time consuming process. I would recommend that technique with higher end listings only where you can get more than the standard real estate penny pinching rate. It works exceptionally well with stone textures, some wood and tiles. The key is to angle the flash in order to bring out the textures that holding the flash at a slight angle will bring. This is something you will have to practice because looking at the LCD will just show a flash in one area and it is very hard to “see” the whole picture as a finished, multilayer image in PS.
Using speed lights, how do you take care of the shadows created by ceiling fans, chandeliers or hanging lights/objects?
Another way to get the outside and inside to balance and overcome the dynamic range problem, is Luminosity Masks. it works for landscapes and can easily work for interiors.
I would recommend the Enfuse plugin for lightroom or the ‘merge to 32 bit’ plugin from the photomatix people. It creates one file from a bracketed series, but doesn’t do any tonemapping, allowing you to edit as a regular file, but with a heck of alot more information to work with.
Tonemapping is something I’ve never heard about before. My mom wanted me to come try real estate photography for the homes she is selling. I hope that taking these three types of photos will leave me with at least one that is perfect for her website. Do you have to have software installed to try these different photos?
I just shot a home that is beach front. I used the HDR tonemapping technique in Lightroom and I think it came out well. It was important to emphasize the view as the ocean is just outside the house. As far as editing goes is it better to have a brighter look to the rooms? I personally like the contrast but I am not sure how an average person would look at it.
I imagine that having quality photos of your house would help you sell it better. I want to have good pictures of my house that is for sale so those who can’t come see it in person still are impressed by it online. I like your tip of closing the blinds to balance out the light when taking pictures. I will take your advice and hope it improves the chance of me selling my house!
I shoot RE for 8 years now and have tried just about everything including software and techniques. I’ve settled on: one or two flash shots using only an on camera bounced flash, multiple exposures using Magic Lantern (runs from the memory card) on a Canon 5DMII, Photomatix for exteriors only and LR/Enfuse for interiors.
I’m in and out in a home less than 3000sf in 45 minutes or less and processing averages 1 hour. Botta bing, botta boom. Yes, I know that using multiple speedlights, umbrellas, etc. will produce great results, but neither the Realtor or seller really want you in the home for more than an hour.
Jim,
Thank you so much for this article!!
Most other articles state: you need to do this or do that, yet your article completely put my mind at ease.
Thinking outside of the box and also not always going with the flow can be just as valuable.