
 Although the official start of summer is months away, many of us are already dreaming up fun outdoor adventures. Camping is often synonymous with summer, and one of my favorite things to capture while camping is sitting around the campfire–roasting s'mores, singing songs, reading stories, talking and laughing. Taking pictures of a campfire scene, though, can be tricky. Keep these 11 tips in mind, however, and you'll be able to successfully capture many special campfire moments. Surely you love camping, for some recommendatons on great camping equipment visit this site Instash.
Tip #1: Use a tripod
As with all night photography, a tripod is a must. You'll be taking some long exposures (possibly up to ten seconds), so make sure you place your camera on a sturdy tripod. (Of course, if you don't have a tripod, setting your camera on a table, chair, rock or tree stump will work, too.)
 Tip #2: Use a self-timer or remote trigger
If you want to be in any of the shots, use the self-timer option on your camera or consider using a wireless remote. You can easily slip the wireless remote in your pocket and fire the camera from anywhere in the shot.
Tip #3: Bring along a light source
I don't mean a flash for your camera. (Although the flash will light up your subjects' face, it will also wash out the fire.) Use a penlight, small flashlight, your cell phone or a headlamp to see the buttons on your camera and view your camera settings.
Tip #4: Slow down your shutter speed
As I mentioned earlier, in order to get good campfire photos, you'll need to take some long exposures. In other words, you'll want to slow down the shutter speed significantly to bring in more light. If you're a beginner photographer, consult your camera manual to learn how to manually set your shutter speed. Or many digital cameras have a “night” setting, which you can try instead.
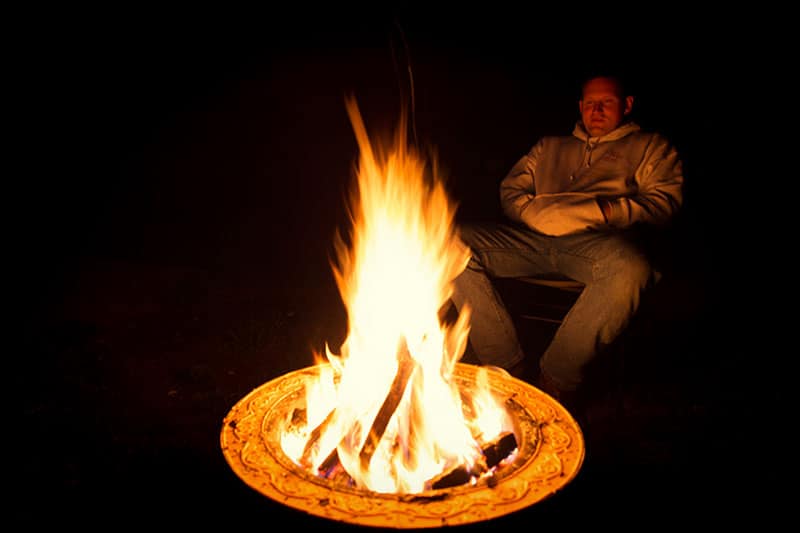
Tip #5: Ask your subjects not to move while the shutter is open
Because you'll be taking several long-exposure shots, let your subjects know when the shutter is open, so they can minimize their movement, thus avoiding blur in the image. Conversely, though, if you want to show action, ask one of your subjects to move.
Tip #6: Consider using back-button focusing
At night, your camera will likely have a difficult time focusing, which is why I'd recommend you try back-button focusing (if you are not already using it). In the alternative, you can use auto focus and then lock your focus or use manual focus. (To help your camera focus, ask a friend or family member to light up the subject with a flashlight.)
Tip #7: Experiment with the time of day
Start your campfire shooting session early; begin taking photos before the sun goes down. Shoot again as the sun goes down, and then again once it is pitch black outside. Bear in mind that because the light will be changing rapidly and the sky will be getting darker and darker, you'll need to adjust your exposure every few minutes. Pay attention to your in-camera light meter, and either lower your shutter speed, or if you must, bump up your ISO.
Tip #8: Don't raise your ISO too much
You may be thinking that because it's dark outside, you should raise your ISO. Sometimes, this is the case. But when shooting pictures of a campfire on a tripod, it's best to use the lowest ISO possible. Why? Because you want to minimize the noise (or grain) in your image. If you raise your ISO, take a long exposure, and have lots of dark areas in your picture, it's likely you will have considerable noise in your image. Keeping your ISO at 100 or 200 will ensure that you don’t have noise in your photo.
Tip #9: Shoot in auto white balance
If you don't want to pay attention to the color, shoot in AWB (auto white balance), and then warm up your photos in Lightroom or Photoshop. Another option is to learn how to shoot in Kelvin.
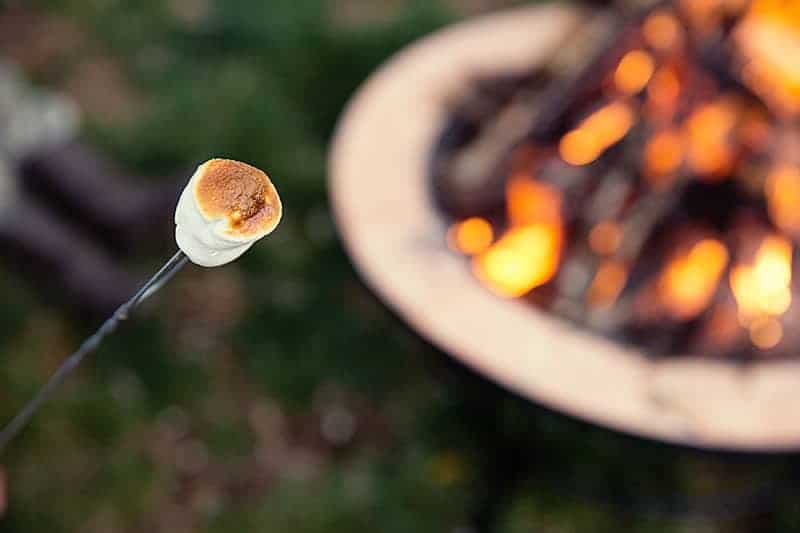
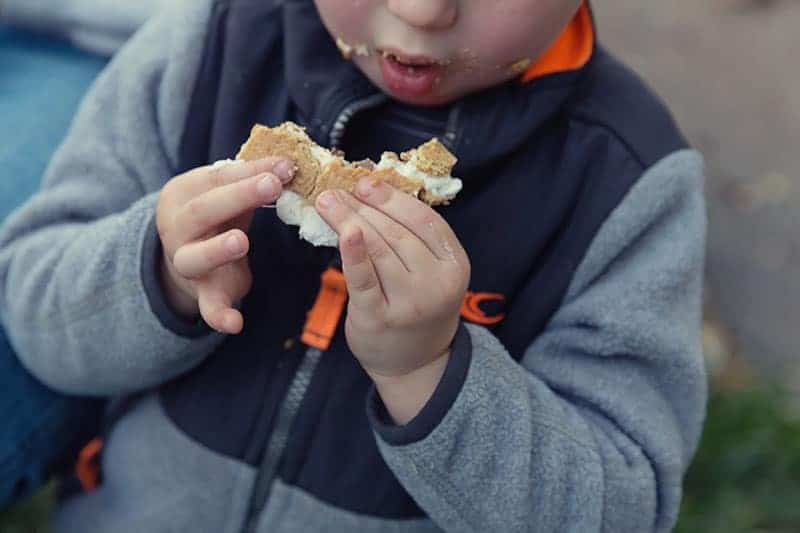
Tip #10: Play with props
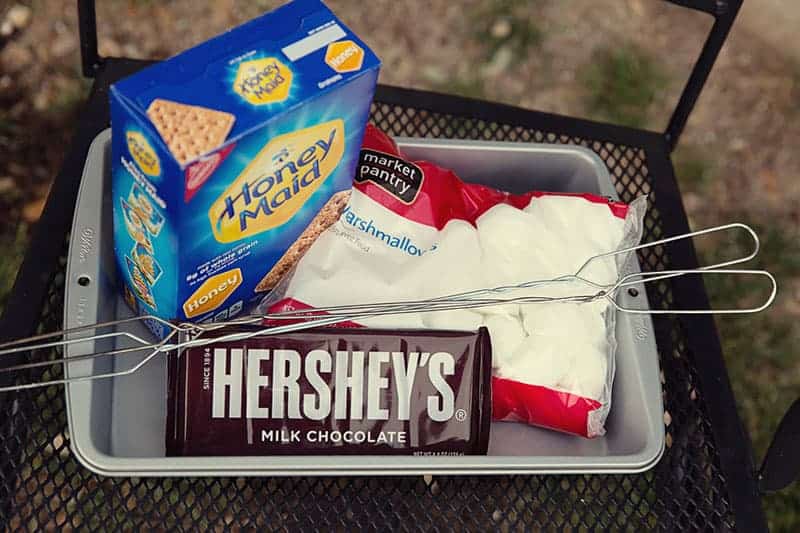
Photograph your campfire supplies—the chocolate bars, the graham crackers, the marshmallows, and the mugs of hot cocoa. Take photos of the kids’ reactions when they learn they’ll be roasting marshmallows as well as the finished s'mores and the gooey hands devouring them. If your tent is nearby, consider including it in your photos. You can easily light it up by placing a flashlight inside.
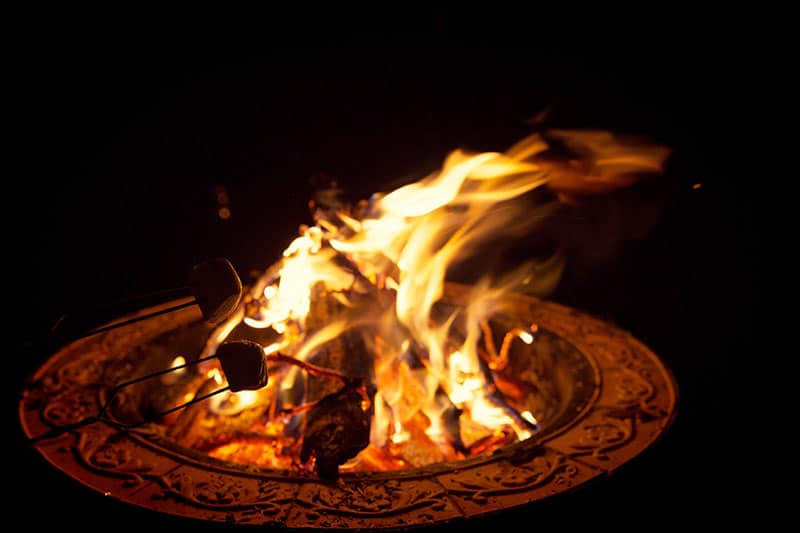
Tip #11: Take the obvious shots and then experiment with more creative captures
Here are some straightforward ideas: Take photos of the kids and adults roasting s’mores around the campfire. Take photos of the campfire itself–when it is first built, then lit and then again when it is a roaring fire. Take photos of people sitting or standing around the campfire. Snap photos of a child sitting on her mom or dad’s lap. Capture an image of someone reading a book, telling a story, or playing the guitar. Another great idea is to snap a photo of people warming their hands over the fire.
From there, experiment with more creative angles and shots. For instance, get down low and shoot up at your subjects' faces. Around a campfire, most people will be looking down at the fire, so if you get down near the fire, you'll be able to capture their eyes and facial expressions. (It's likely that there will be an orange cast from the fire on your subjects' faces, and that's perfectly okay.) Experiment with shooting through the smoke, or move around and shoot straight through the flames. Take a shot of a person sitting perpendicular to the fire, so that one half of their face is lit by the fire and the other half is dark.
Above all, don’t be afraid to try a variety of different angles and shots with varying shutter speeds. If you find that the exposure is not long enough to create the look you’re going for, delete the shot and try again. With some practice and patience, you’ll be creating cozy campfire photos in no time.
Which of these shots are a combination of tip #1 and #5?
The second image incorporates tips #1 and #5. Thanks for reading!
Awesome, I look forward to using these tips next time we are camping or RVing.