
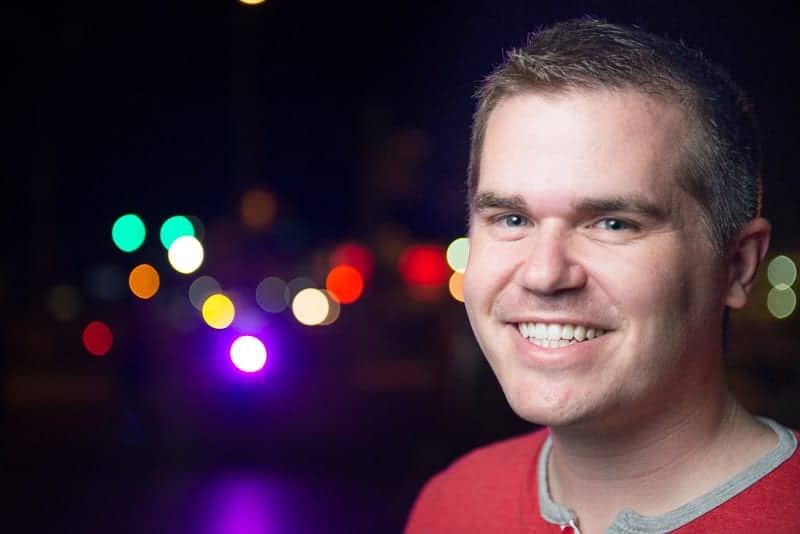
If you feel like your portrait photography has become stale, then a night portrait is an excellent way to spice things up.
This last week I was in Southwest Florida holding a completely free photography workshop for readers of the site. I always share step-by-step tutorials like this in my free “Behind the Photos” newsletter but I decided to put this one on the site as well.
How to Make Bokeh Bursts of Light at Night
Creating the beautiful circles of light in the background of a night portrait isn’t complicated, but it will require a bit of understanding of depth-of-field.
The light bursts are simply city and street lights in the distance, which are put so far out of focus that they become these beautiful light bursts.
Simply using a low f-stop will help, but you’ll need to do more to make the lights larger in the frame. There are three more ways to create shallow depth of field: (1) Use a long focal length, (2) place the subject physically close to the lens, and (3) leave a long distance between the model and the lights in the background.
My Camera Settings
Camera: Nikon D800
Lens: Nikon 24-70mm f/2.8 lens
Focal length: 70mm
Shutter speed: 1/100 (Needs to be under 1/200 for the flash sync speed)
ISO: 1,000
Aperture: f/2.8
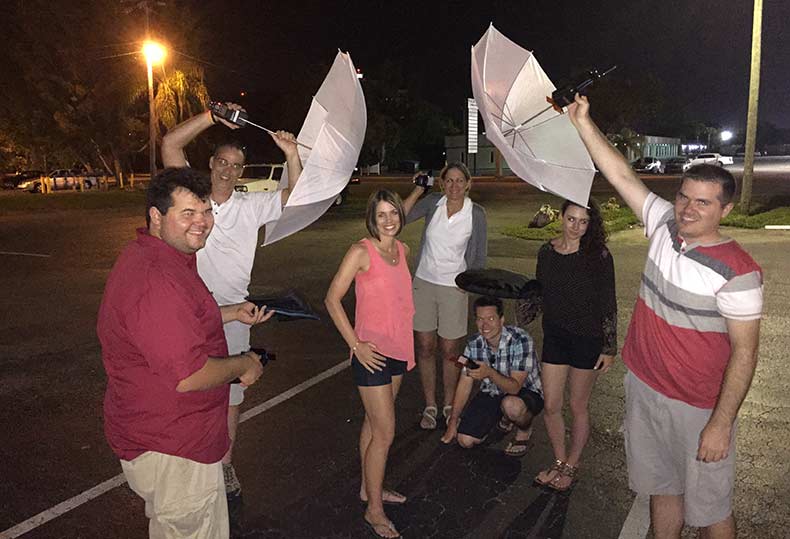
Adding Flash
Flash photography always looks stunning at night, when the flash is not competing with any ambient light.
The way I set up the flash for the self-portrait above is to simply use one simple $70 manual speedlight flash shooting through a cheap $10 white shoot through umbrella.
The flash was placed to camera left and slightly higher than my eyeline. Because it was so dark outside and our camera settings were gathering so much light, the flash was on very low power (1/16 if my memory serves me correctly).
Enhancing the Bokeh
If you’re shooting in a downtown area with lots of tail lights and lights from signs and stores, you’ll get plenty of light bursts to make a nice background.
When we took the picture above, we were in a darker area of the city in the parking lot of our hotel. So we didn’t get as many lights as we wanted.
To enhance the background, 5 or 6 of us grabbed our cell phones and turned on the flashlight apps. We then walked about 15 yards behind the model and placed a colored gel over our cell phone flashes to color the light. This provided enough extra bursts of light to add interest.
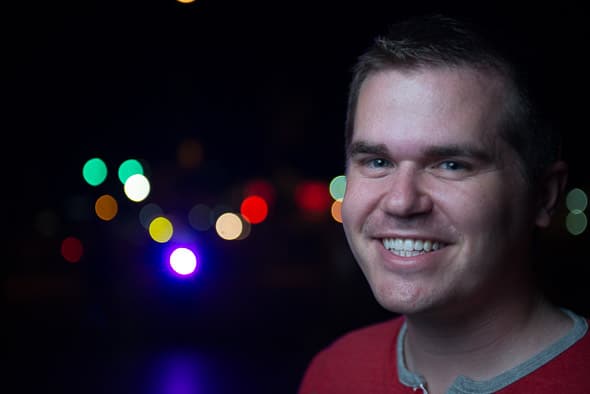
The Original, Unretouched Photo
I always share the original, unretouched photo in my free Tuesday “Behind the Photos” newsletter, and the readers of the site always tell me they appreciate seeing the photo straight out of the camera so they can know how to do the post-processing as well.
The post-processing of this photo was quite simple. All I did was:
- Bring up the shadows slider in Lightroom so that my hair stood out from the background and wasn’t so dark.
- I copied and pasted some of the bokeh bursts so that there would be more light spots. There weren’t quite enough of them for my taste.
The Step-by-Step
Step 1: Wait for night time. This works best when it’s completely dark.
Step 2: Place your subject far away from the lights from the street. If there aren’t enough city lights in the background, you could place a few flashlights in the distance shining toward the camera.
Step 3: Minimize your depth of field by using a wide aperture, and stand close to the model and use a reasonably long focal length.
Step 4: The last step is to add a flash. For this portrait, we simply used a $70 manual flash and fired it through a $10 white umbrella that someone held above me and to the side of the camera. That’s it!